Hello, friends! The other week I started to pull out our Christmas decor and decorate our apartment. Nothing major, just a faux poinsettia here, some LED lights there and so on. The lights I have in my home have actually inspired me to try and create a “lights only” Christmas card. So today I have a video tutorial to share showing how to create a beautiful modern looking Christmas card with lots of gorgeous sparkling lights featuring Party Lights stamp set by My Favorite Things.
Like this project? Pin it and save for later | Curious about my project photography? Click for details.
VIDEO TUTORIAL
Watch the video below or on my Youtube channel.
Like this video? Please give it a big thumbs up (you can do this on Youtube video page right under the video) and share it with a crafty friend! Leave me a comment too, I love hearing from you!
CARD DETAILS
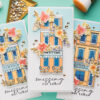
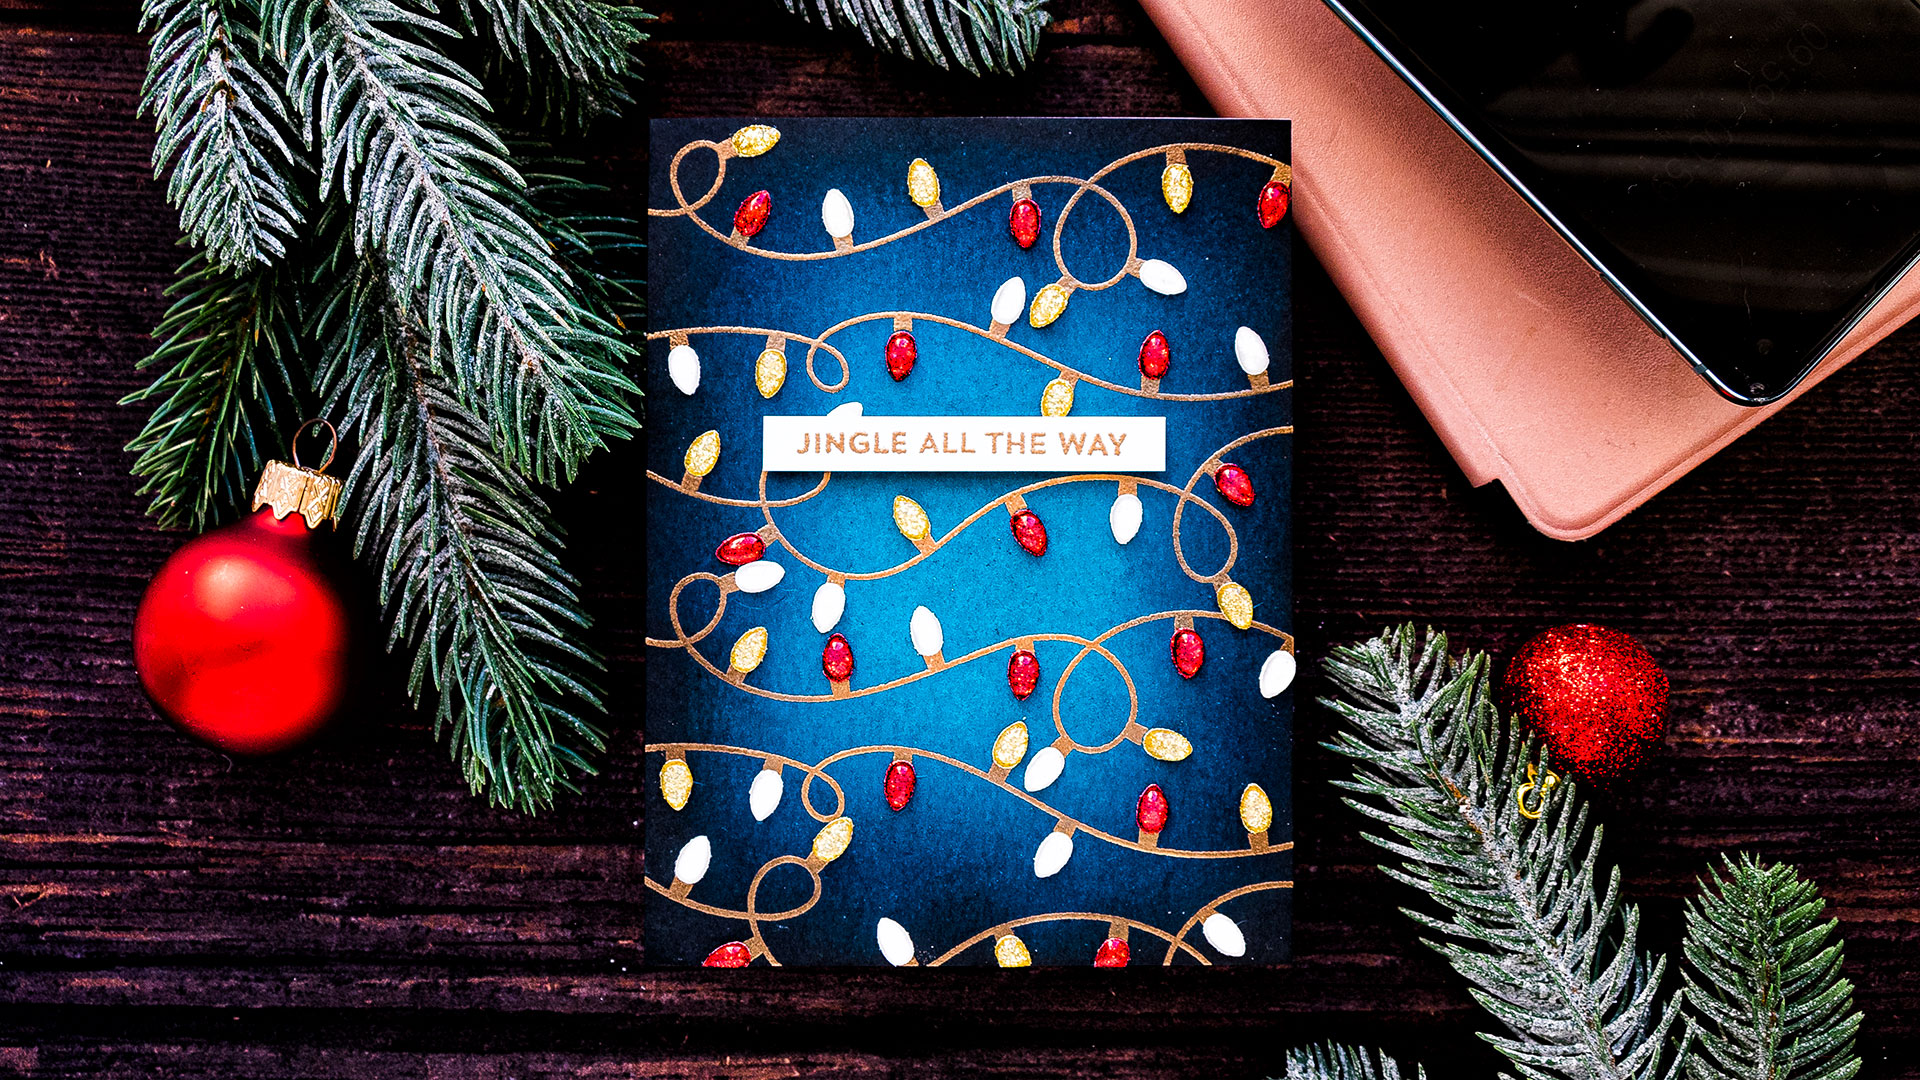
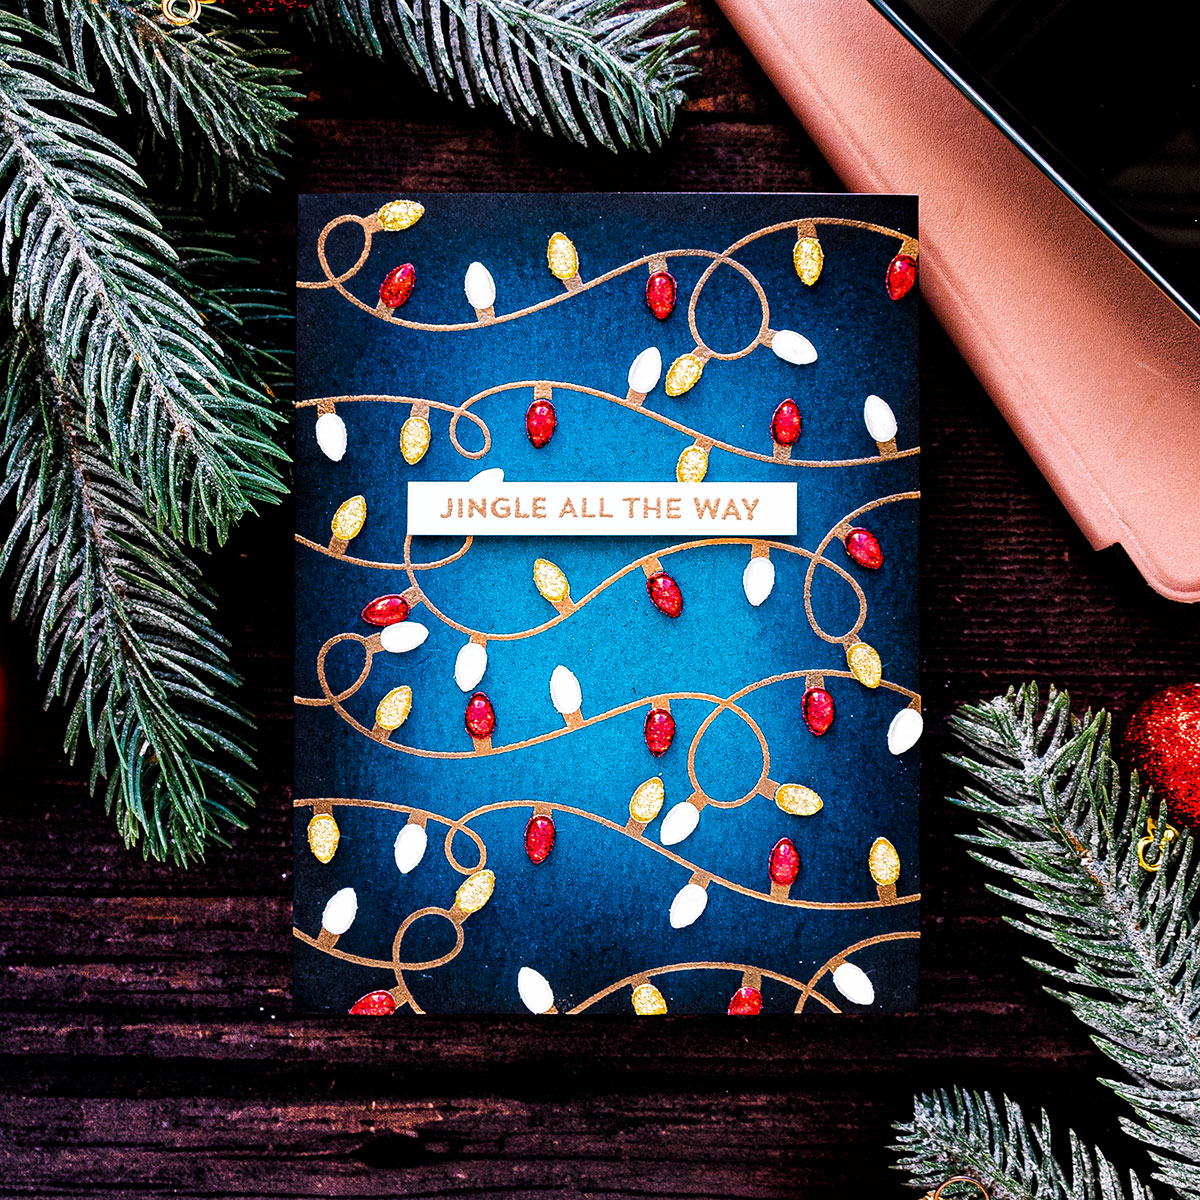
I started to work on my card by placing the 3 strings of lights stamps onto a panel of teal cardstock. I wanted to heat emboss those in Brass embossing powder so I treated the panel with anti-static powder, spreading the powder evenly on the paper and next inked the stamps up with clear embossing ink. I planned to stamp these images twice to cover the entire card front, you can also overlap them to give them a tangled look. The light strings are long enough to be stamped on a landscape card and because these are 3 separate images you can easily customize your backgrounds and make them your own.
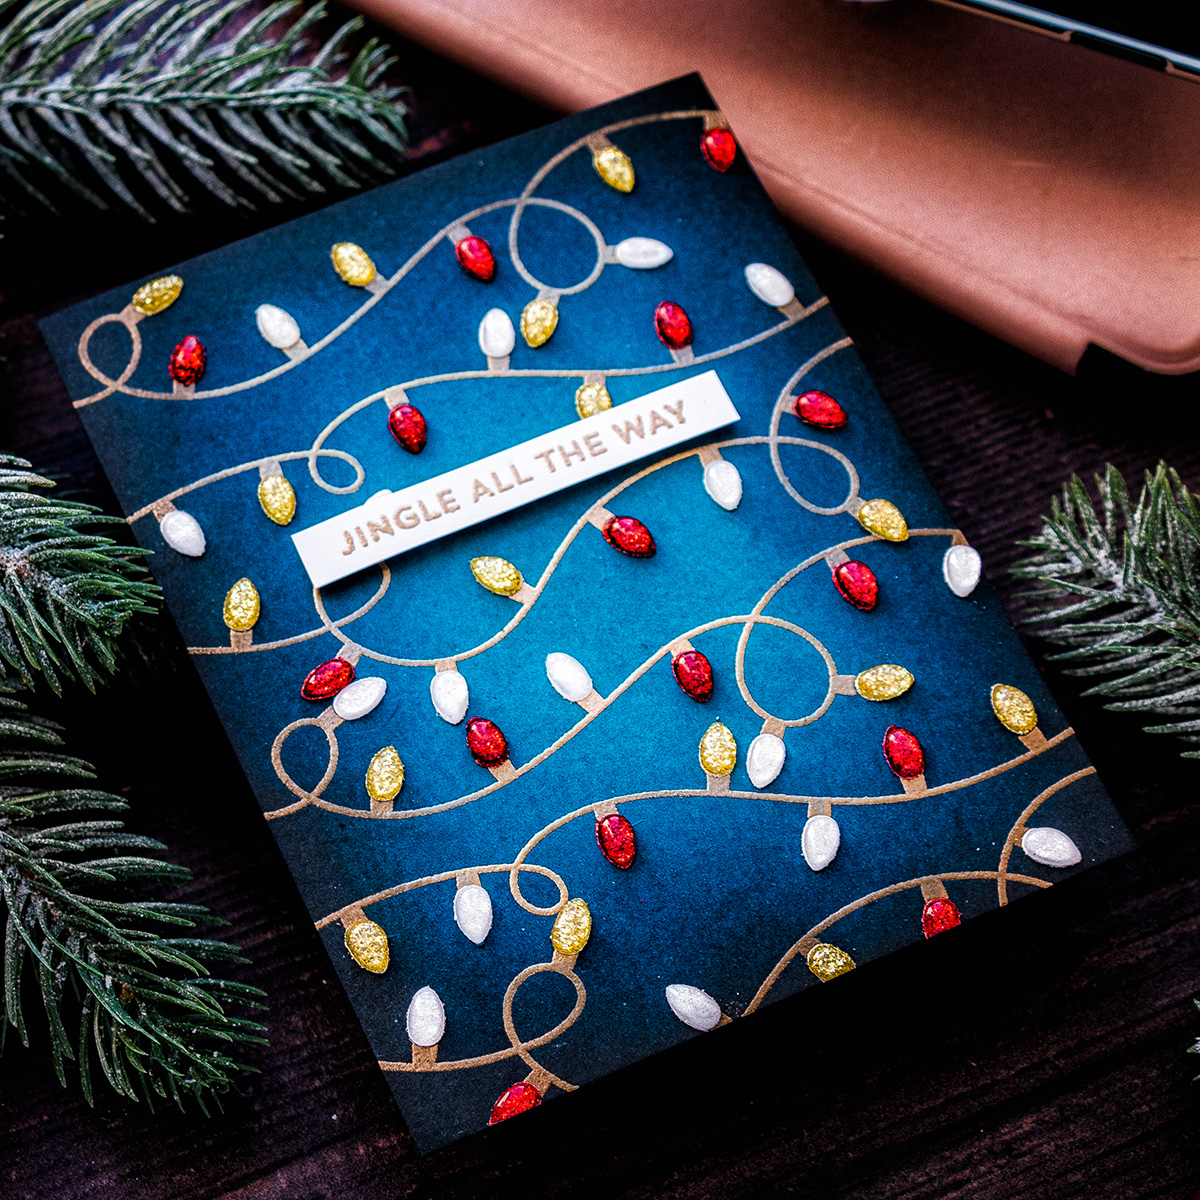
I’ve covered the panel with Brass embossing powder and heat set it to melt it. Next, I repeated the process and completed my background with these fun strings of lights. The light bulb images are separate in this stamp set allowing you to stamp them in different ink colors. You also have a die to cut the light bulbs out from various colors of cardstock which gives you a lot more options and flexibility when using this stamp set. I personally love sets that well designed and well thought out such as this one – it’s always a pleasure to use them for my card making.
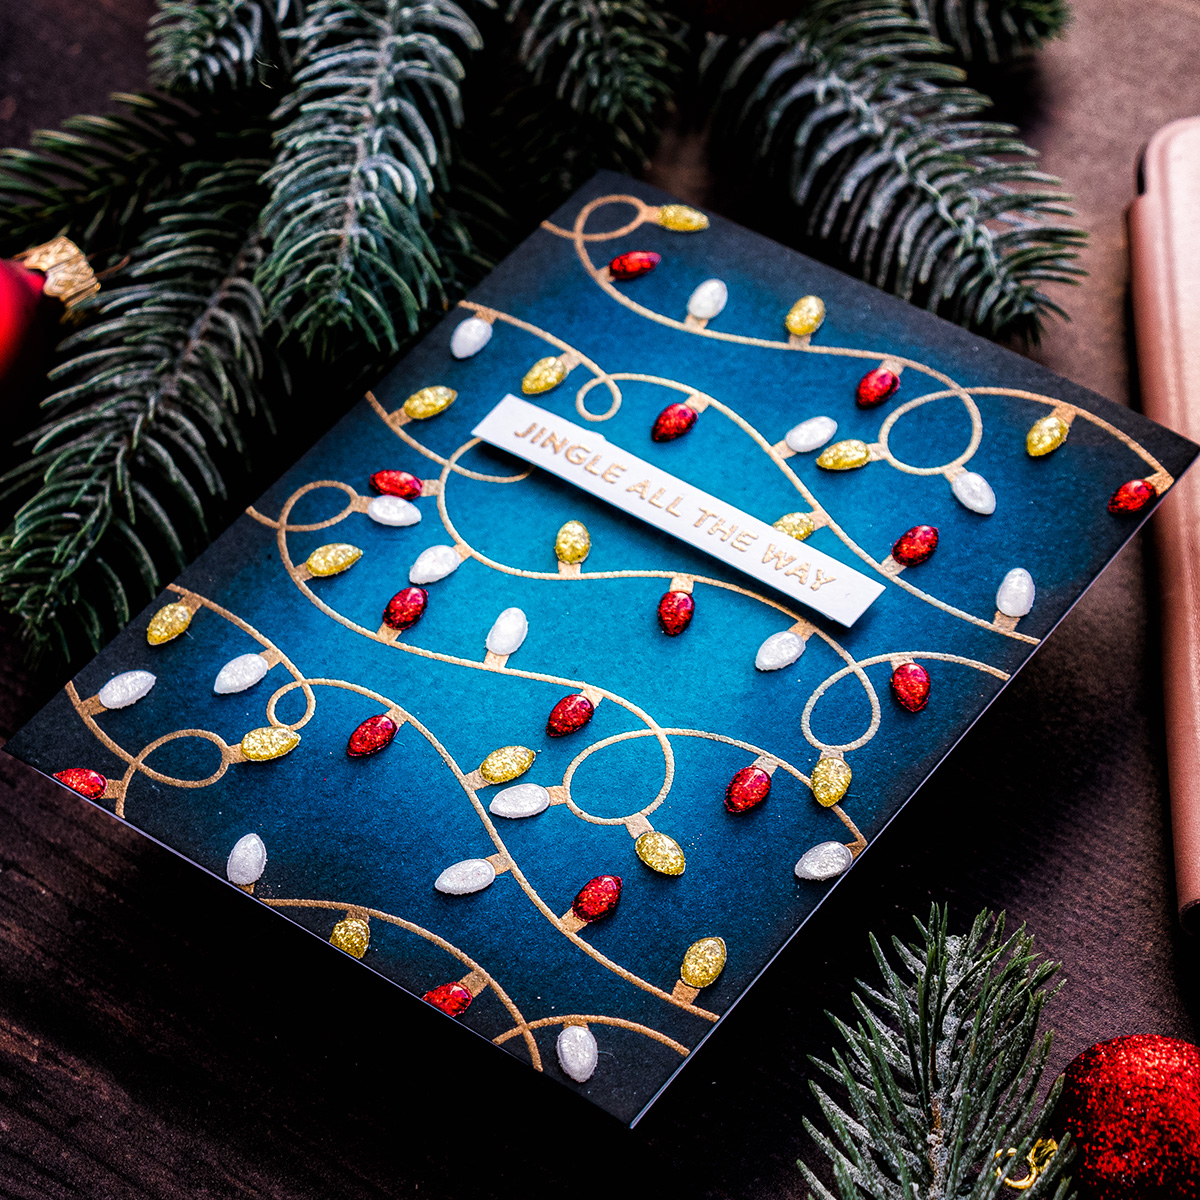
With my background ready I added some ink blending. This darkened the edges of the cardstock but kept the center light creating a glowing illusion. It is a particularly fabulous trick for Christmas cards as it somehow adds a lot of warms to them.

I used dark blue ink for the ink blending and also some black just barely around the edges. If you don’t have colored cardstock like the one I am using here you can also heat emboss the light strings on white and simply ink blend the background using various colors of ink. I find it much easier to start with colored cardstock of the color that I like as this way I have to do significantly less ink blending.
I used the light bulb dies included in this set and die cut a bunch of colorful bulbs from glitter paper in various colors. I picked white, gold and red for my card, but I also tried using teal glitter paper and magenta just for fun to see how that would look.
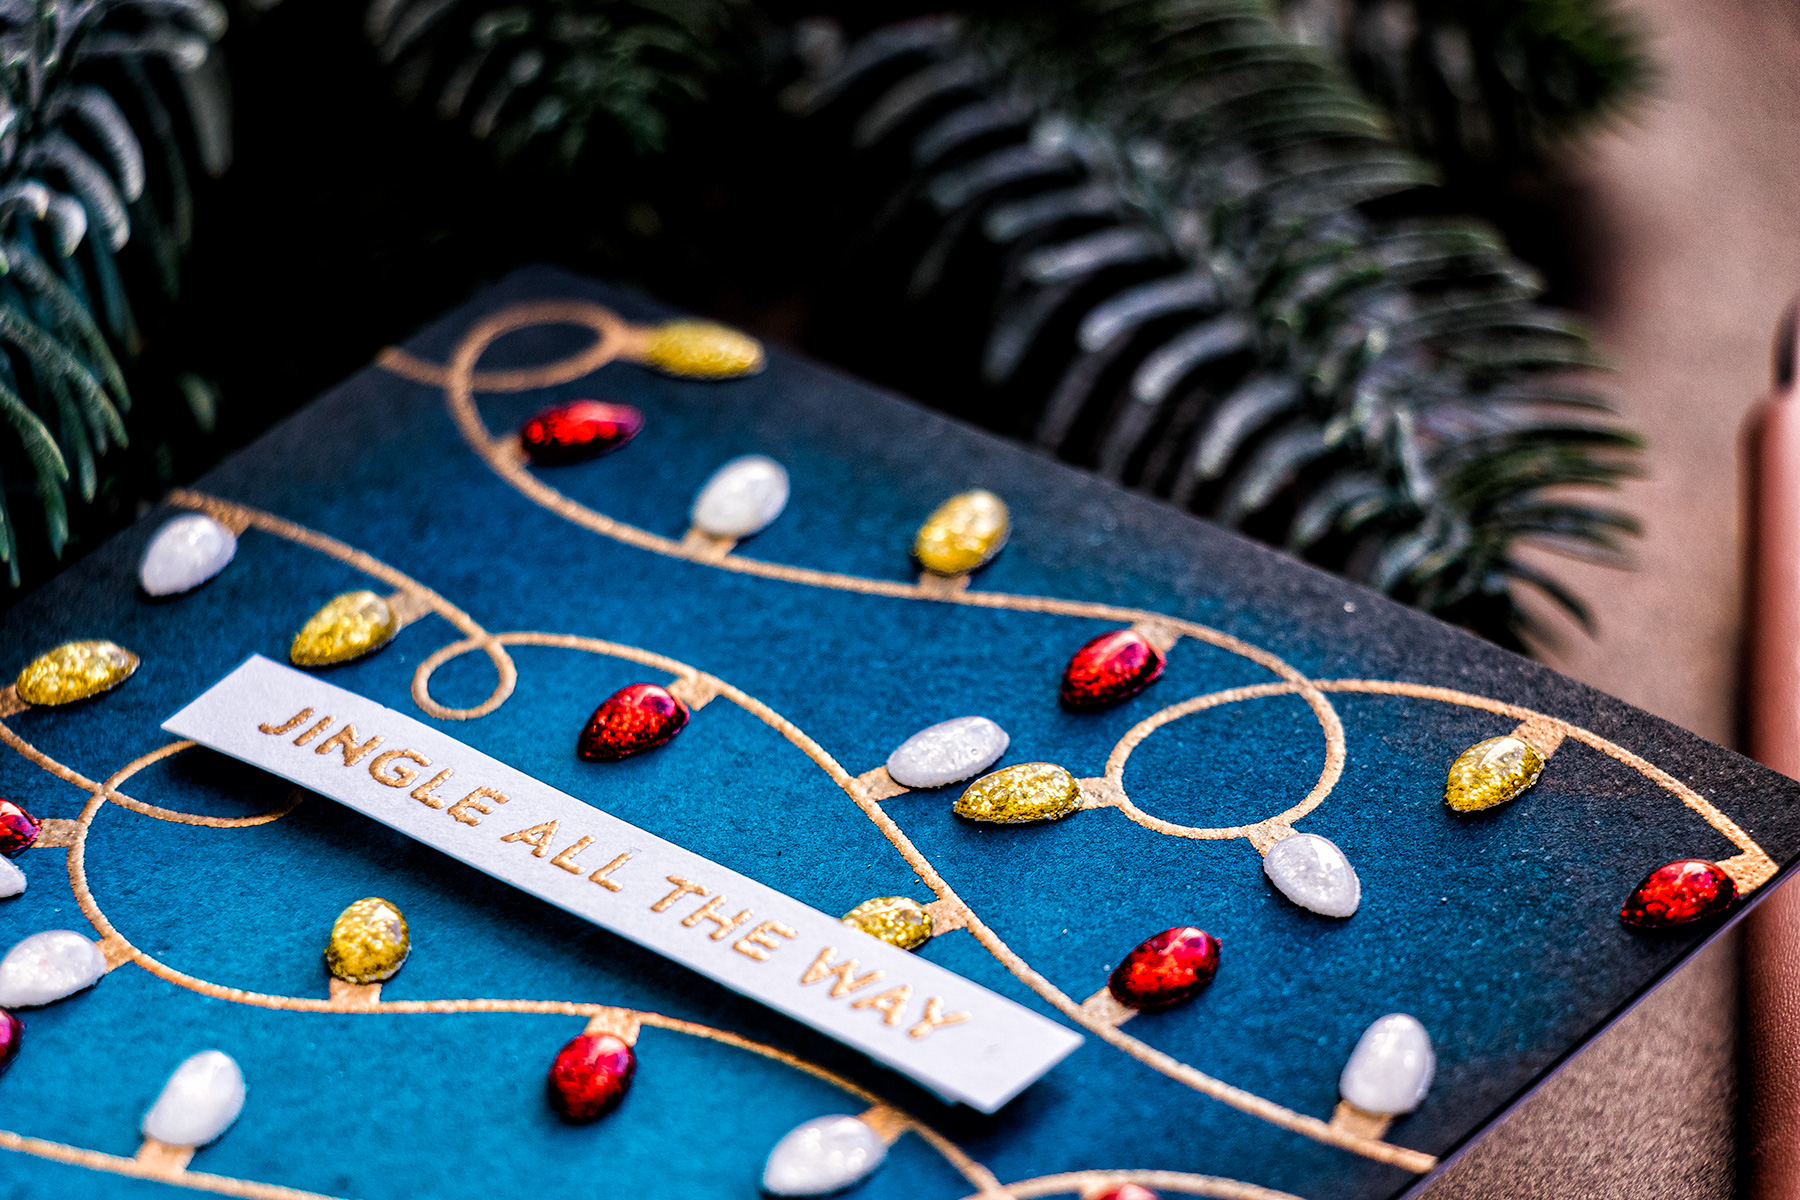
I used my handy Crystal Katana tool to position all of the lights on the background. I tried to alternate colors to avoid having too many red or too many white lights. That seemed to have worked really well. Next, I used a bit of glue and adhered each onto the background.
While the glue was drying I heat embossed sentiment for this card using a message from the Bitty Holiday Wishes stamp set. I heat embossed it in the same Brass embossing powder on white cardstock.
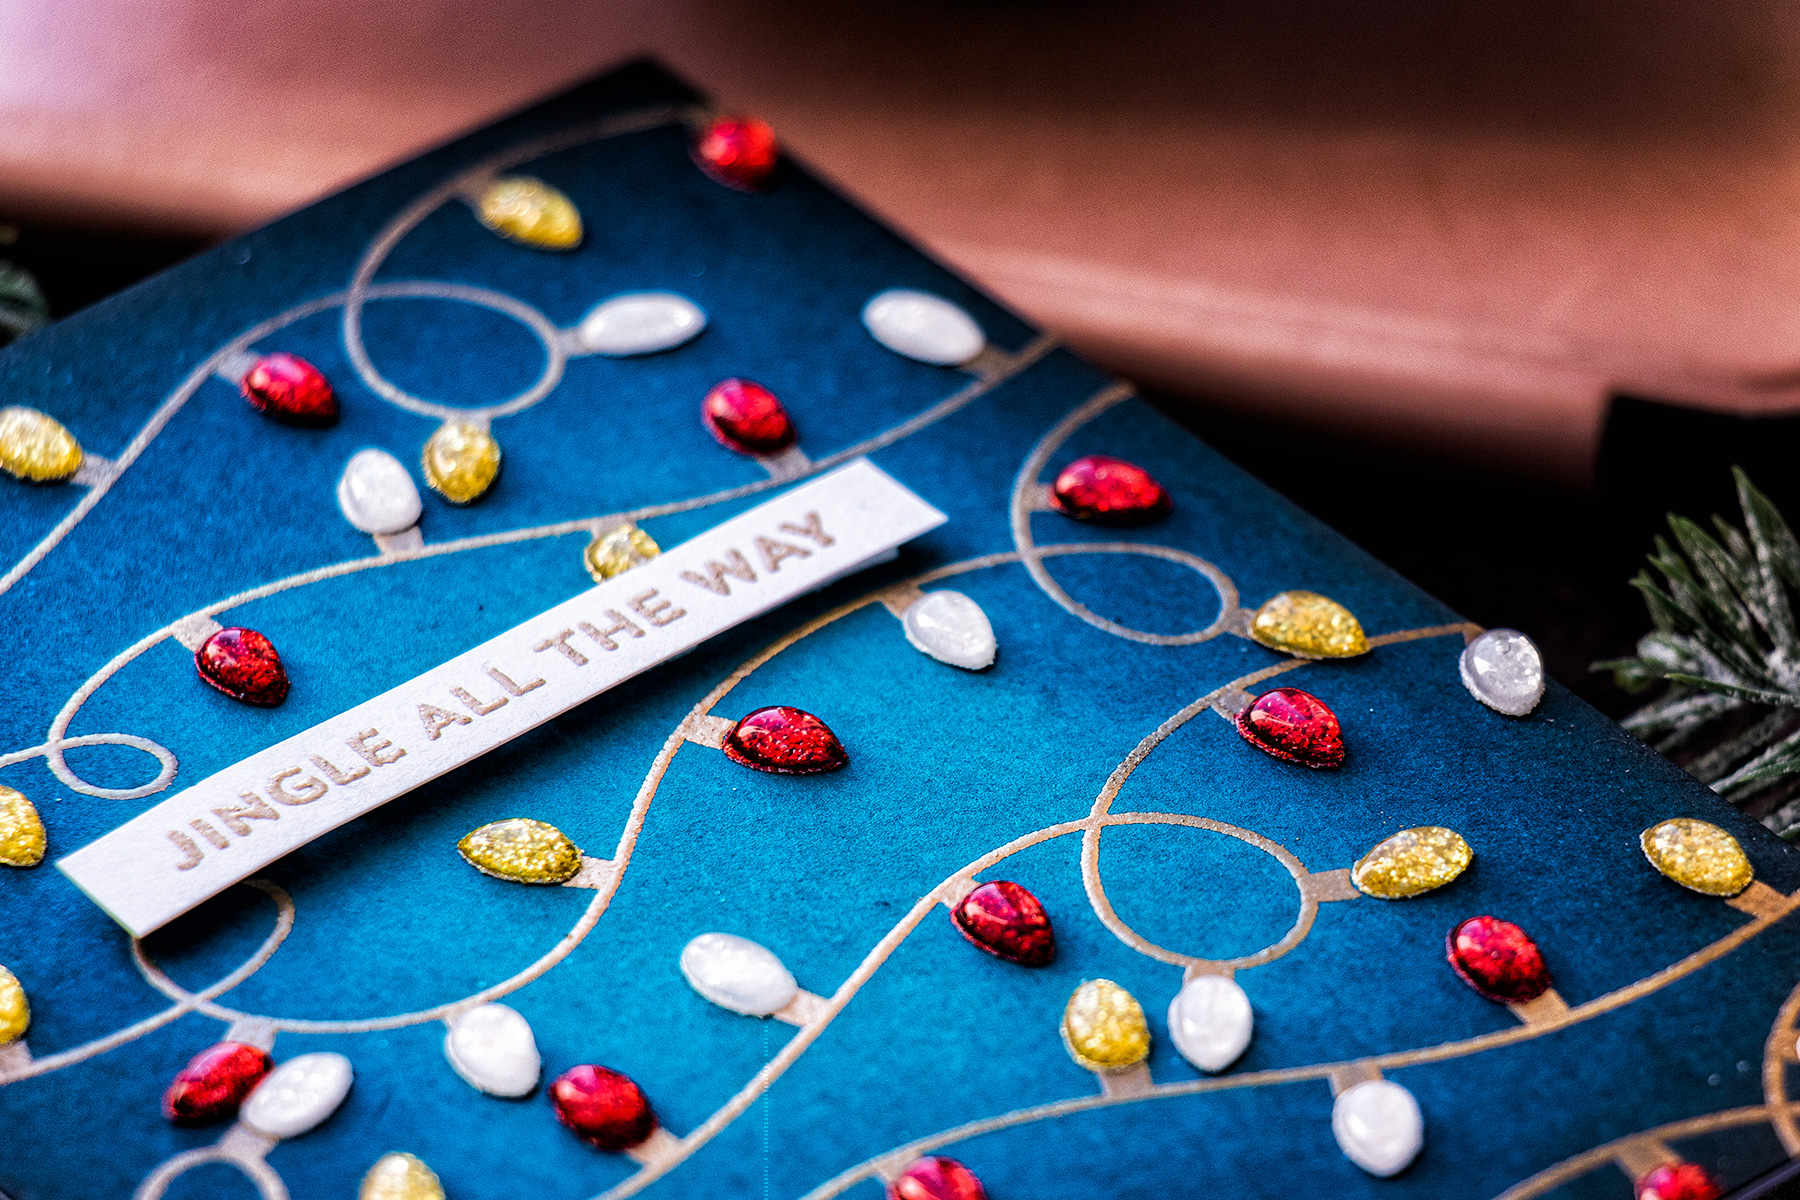
Next, to add some glossy shine to each of the lights I added a generous coat of Nuvo Drops in Morning Dew. You can use any other similar product for this, such as Glossy Accents for example. I set the background aside to dry overnight and that finished my card! I had a blast making this custom Christmas lights background and I am looking forward to creating additional backgrounds like this in the future.
Have fun stamping!
SUPPLIES
I’m listing the products I used below. Click on the link to go directly to the product. Where available I use compensated affiliate links which means if you make a purchase I receive a small commission at no extra cost to you. Thank you so much for your support!
 My Favorite Things Party Lights Clear Stamps and Dies Shop at: SSS |
 My Favorite Things Bitty Holiday Wishes Clear Stamps Shop at: SSS |
 Hero Arts Hero Hues Premium Cardstock Adriatic Shop at: SSS |
 Neenah 110 Lb Solar White Cardstock Shop at: SSS |
 Simon Says Stamp Cardstock Gold Glitter Shop at: SSS |
 Simon Says Stamp Cardstock White Glitter Shop at: SSS |
 Simon Says Stamp Cardstock Crimson Glitter Shop at: SSS |
 Hero Arts Navy Ink Pad Shop at: SSS |
 Mini Misti Stamping Tool Shop at: SSS |
 Nuvo – Clear Mark Embossing Pad Shop at: SSS |
 Hero Arts Black Ink Pad Shop at: SSS |
 Hero Arts Heat Embossing Gun Shop at: SSS |
 EK Success Powder Tool Applicator Shop at: SSS |
 Hero Arts Brass Embossing Powder Shop at: SSS |
") FSJ Bloom Palette Paint Palette (2 Pack) Shop at: |
 Ranger Mini Round Ink Blending Tools Shop at: SSS |
 Spellbinders Circle Replacement Foam Shop at: SSS |
 Spellbinders Deep Sea Die Cutting Machine Shop at: SSS |
 Tonic Morning Dew Nuvo Crystal Drops Shop at: SSS |
 Crystal Ninja Crystal Katana Pick Up Tool Shop at: SSS |
 Simon Says Stamp Craft Tacky Glue Shop at: SSS |
 White Foam Squares Shop at: SSS |
 Scor-Tape 1/8 Inch Crafting Tape Shop at: SSS |
 Journey Craft Glue Shop at: |
WOW !! This is stunning, love the colour combination you went with after trying various options. Don’t know if I would have the patience for all those bulbs if we tried to do a bunch of this card though x
Amazing card!!!!!