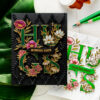


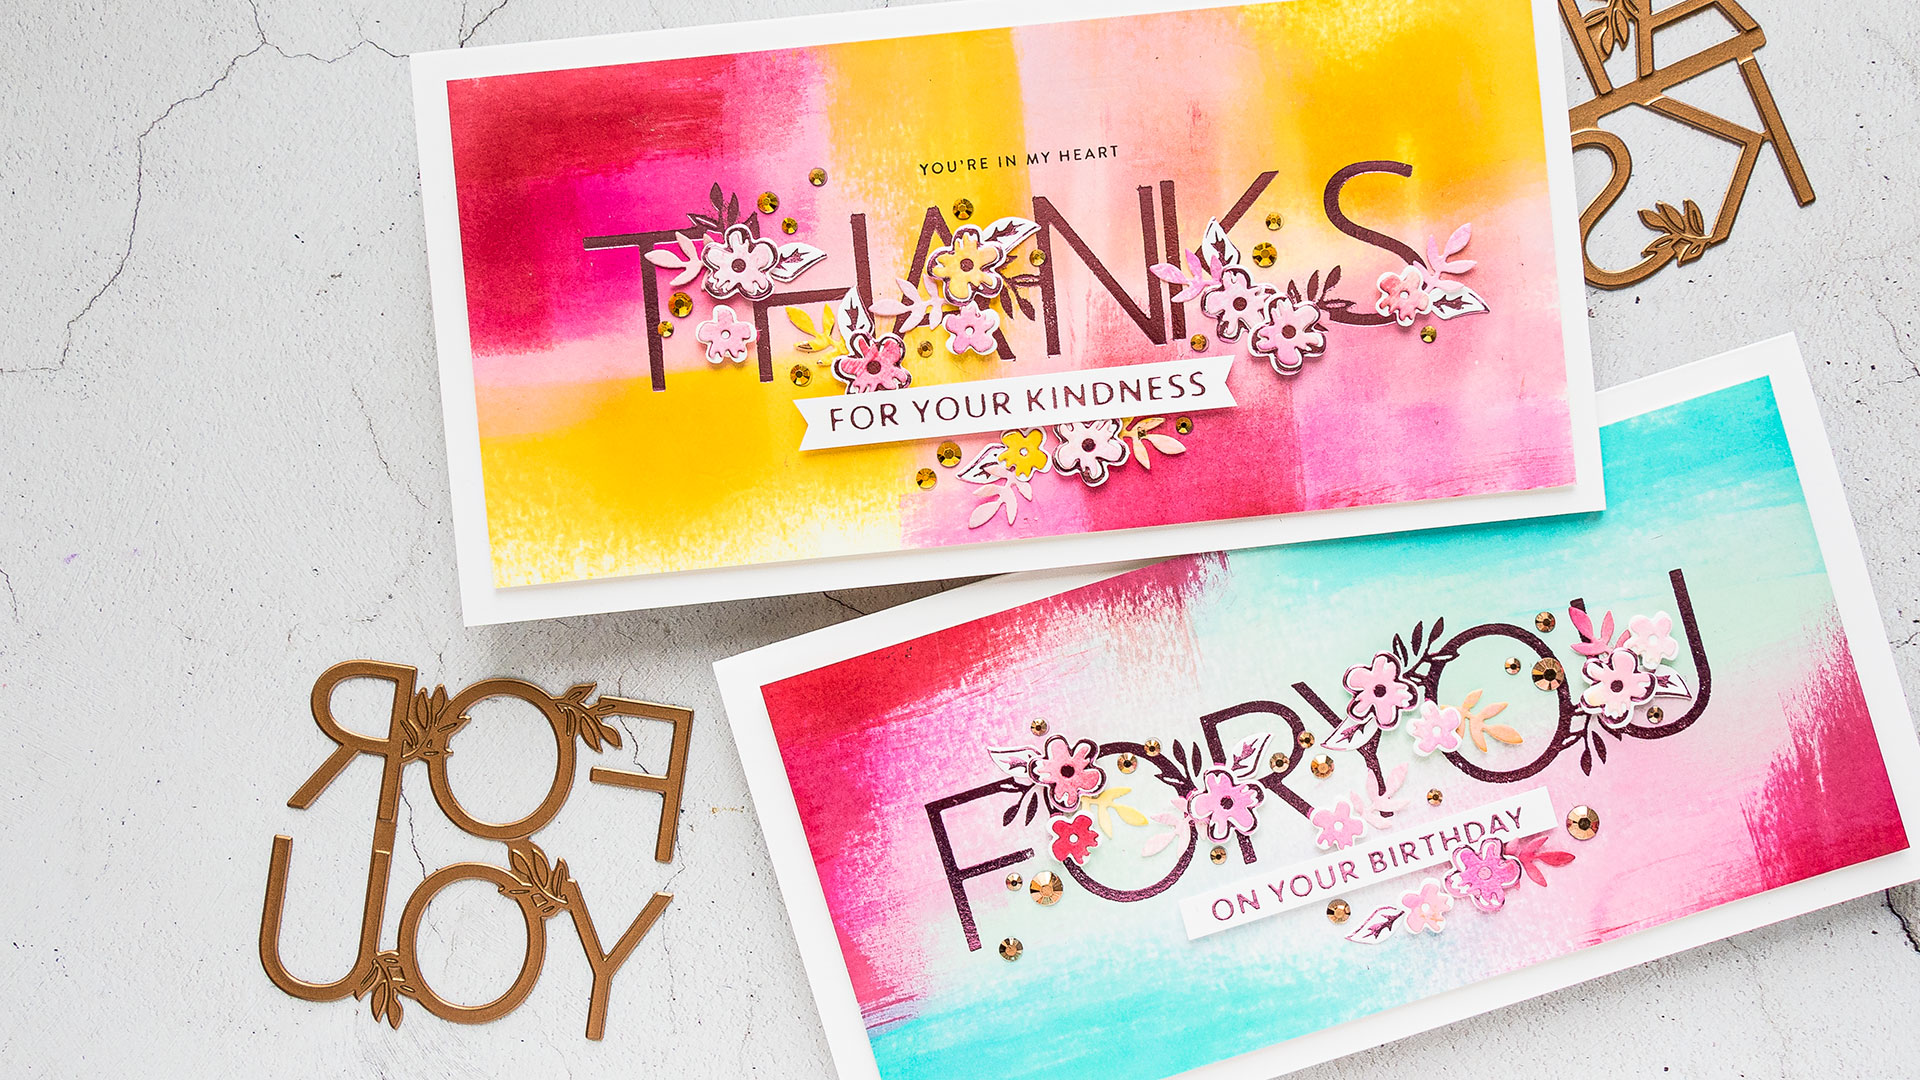
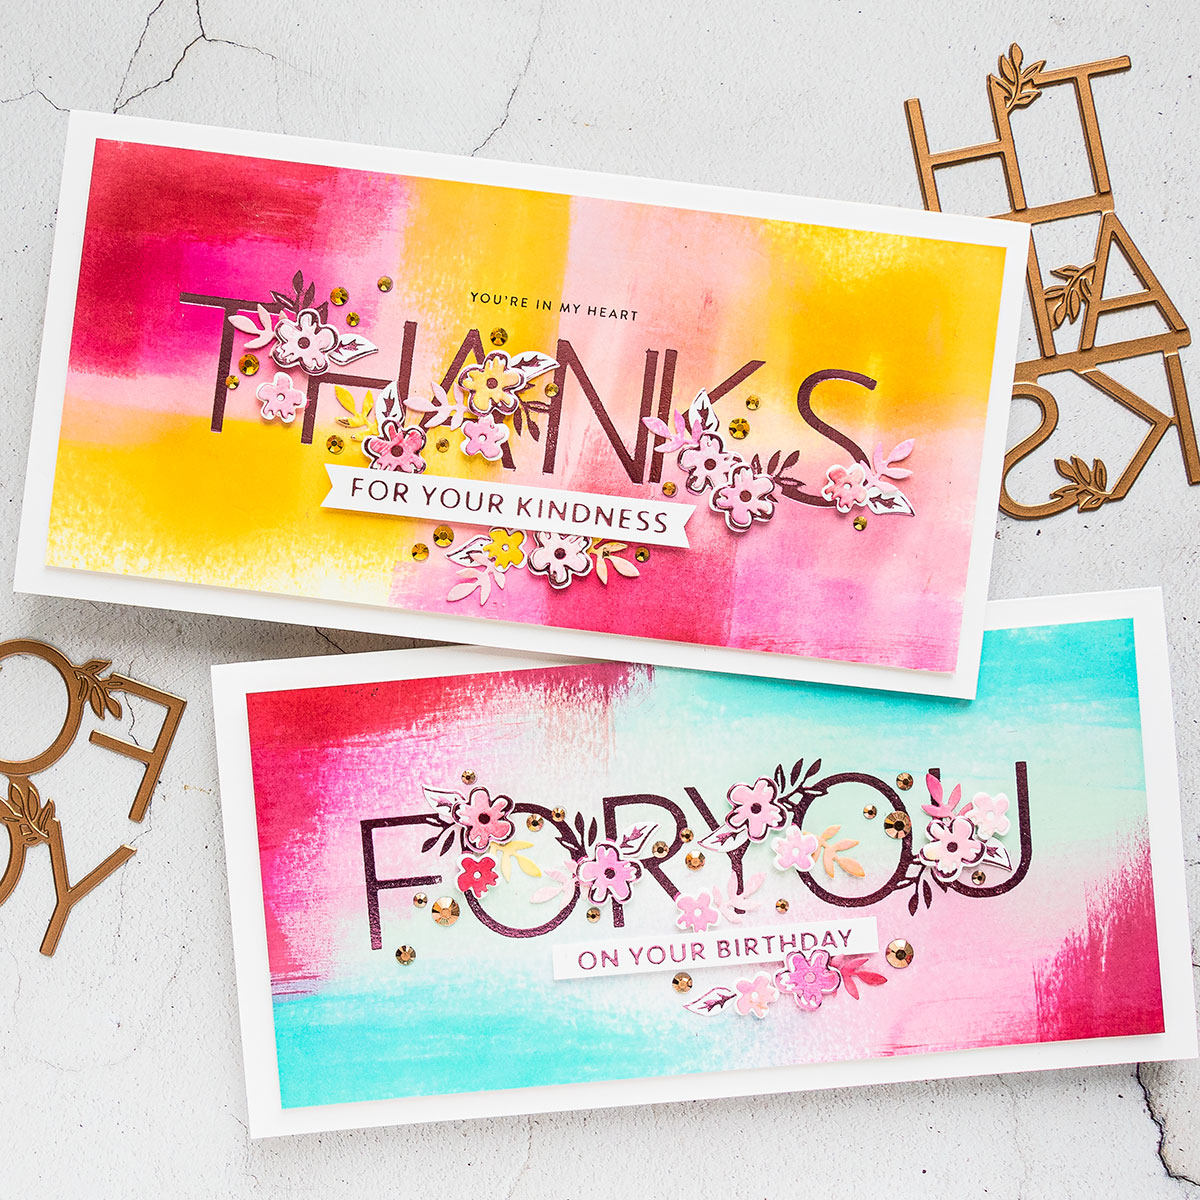
Hello, crafters. In this video, I’ll show you how to stretch your Glimmer plates using the partial foiling technique. I am using 2 similar but slightly different products from Spellbinders – the Especially For You glimmer plate and Thanks a Million glimmer plate (May 2020 Glimmer Hot Foil Kit of the Month).
Like this project? Pin it and save for later | Curious about my project photography? Click for details.
VIDEO TUTORIAL
As always, I filmed a video tutorial showing how to create this project from start to finish. I’m hoping you’ll enjoy it. Watch it below or on my Youtube channel.
Like this video? Please give it a big thumbs up (you can do this on Youtube video page right under the video) and share it with a crafty friend! Leave me a comment too, I love hearing from you!
CARD DETAILS
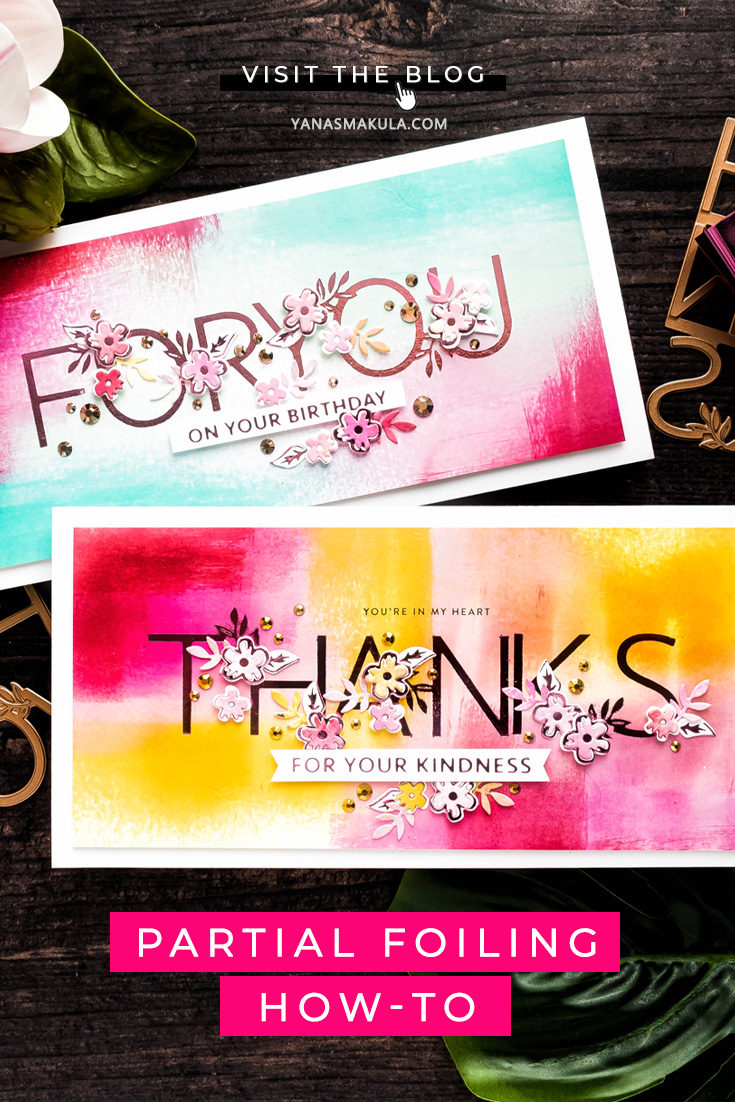
Horizontal foiling featuring these two products, Especially For You glimmer plate and Thanks a Million glimmer plate (May 2020 Glimmer Hot Foil Kit of the Month) isn’t hard, but it is a bit tricky. There are 2 ways to do this – first is an easier one, but you’ll need to trim your panel down significantly; the second method, which is a bit more difficult, but still doable and gives a better result.
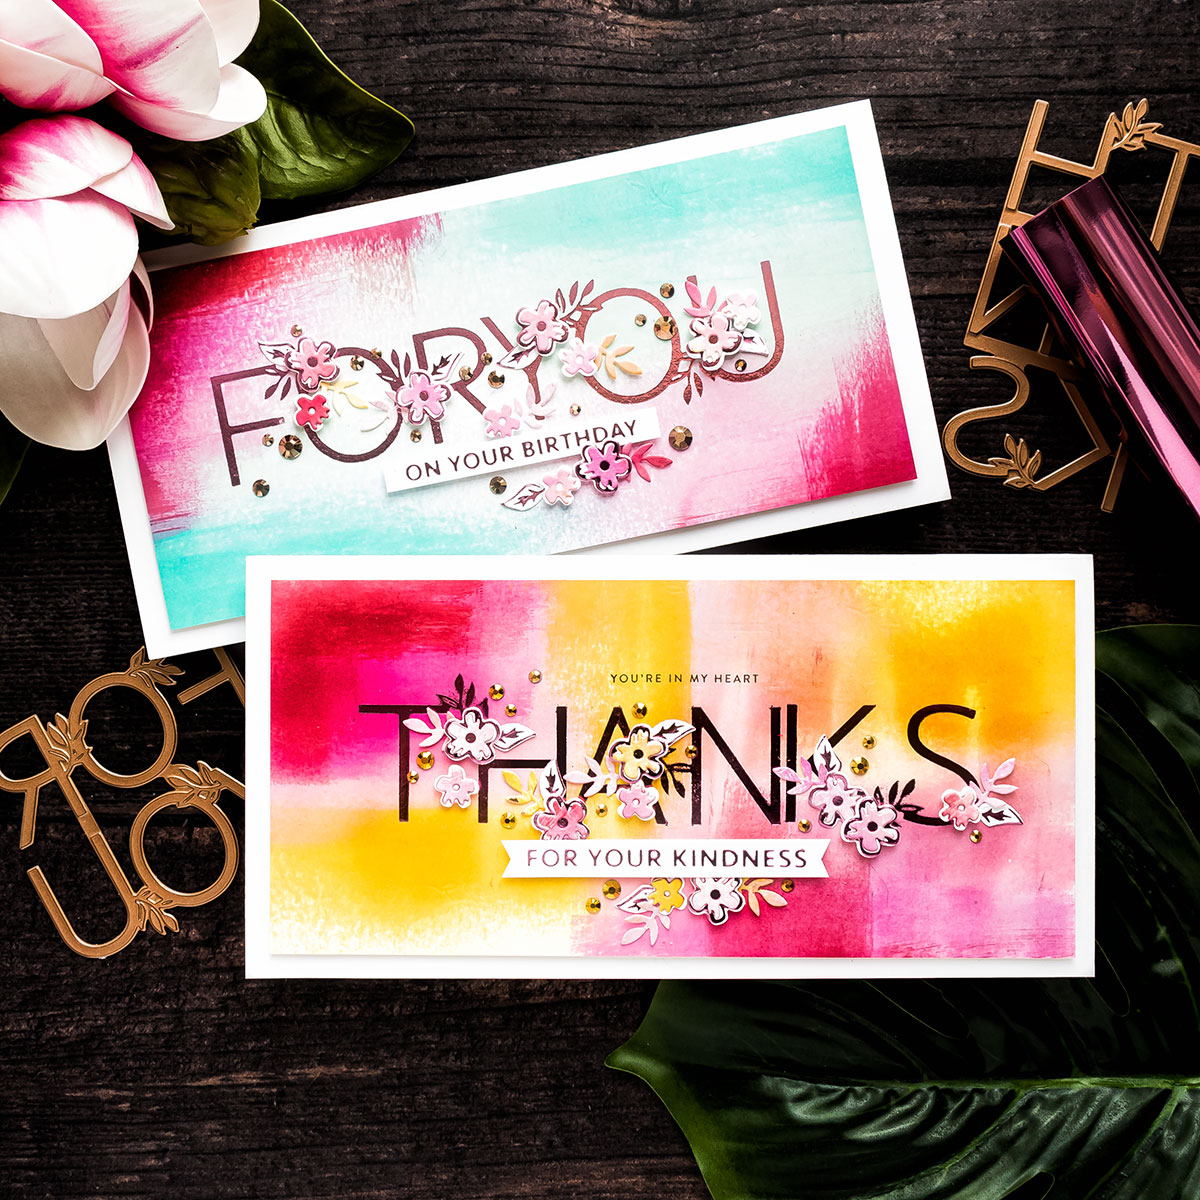
The idea is to foil Thanks plate 3 times, so you foil each row once. The For You plate needs to be foiled 2 times – each row once.
INSTRUCTIONS:
- Place glimmer plate on the background, centered. Use a ruler and a pencil and add guidelines for where you need to place the letters to create a horizontally foiled word.
2. Use my hinge method to tape the glimmer plate in place. I’ve shared this method many times in my previous glimmer videos, here’s a good one to learn the hinge method. The key here is to cut your foil exactly to size so that it only covers the part of the glimmer plate you want to foil. It only matters that you cut it to size for the middle row. You can have your foil slightly larger for the top and bottom rows as you’ll be able to adjust its placement. Add your foil to the middle row making sure it is not overlapping the top or bottom row, flip glimmer plate back into place. Use another piece of low tack tape to tape everything in place.
The hinge method is basically creating a hinge using low tack tape to be able to tape the die in place, flip it away from the paper, add foil, and flip back into place.
3. Next, follow Glimmer machine instructions and foil. We’ve foiled the middle part – letters AN.
4. Next, use the pencil lines on the paper and position the letters TH, so the 1st row on the panel, tape it down using hinge method, slide your foil making sure it does not overlap the letters from the middle row. This is the trickiest part – foil is hard to cut to a specific size, so this is something that might take you the longest. Again, take it to your glimmer and foil.
5. Repeat the same steps to foil the last two letters. Position the plate on the panel using pencil lines as a guide. And tape in place using low tack tape. Add your foil, make sure it does not overlap the letters in the middle row. Use another piece of low tack tape to tape everything down and again, foil.
This takes a bit longer, but it is well worth the effort. I also love that colorful background, I think it helps the foiling pop.
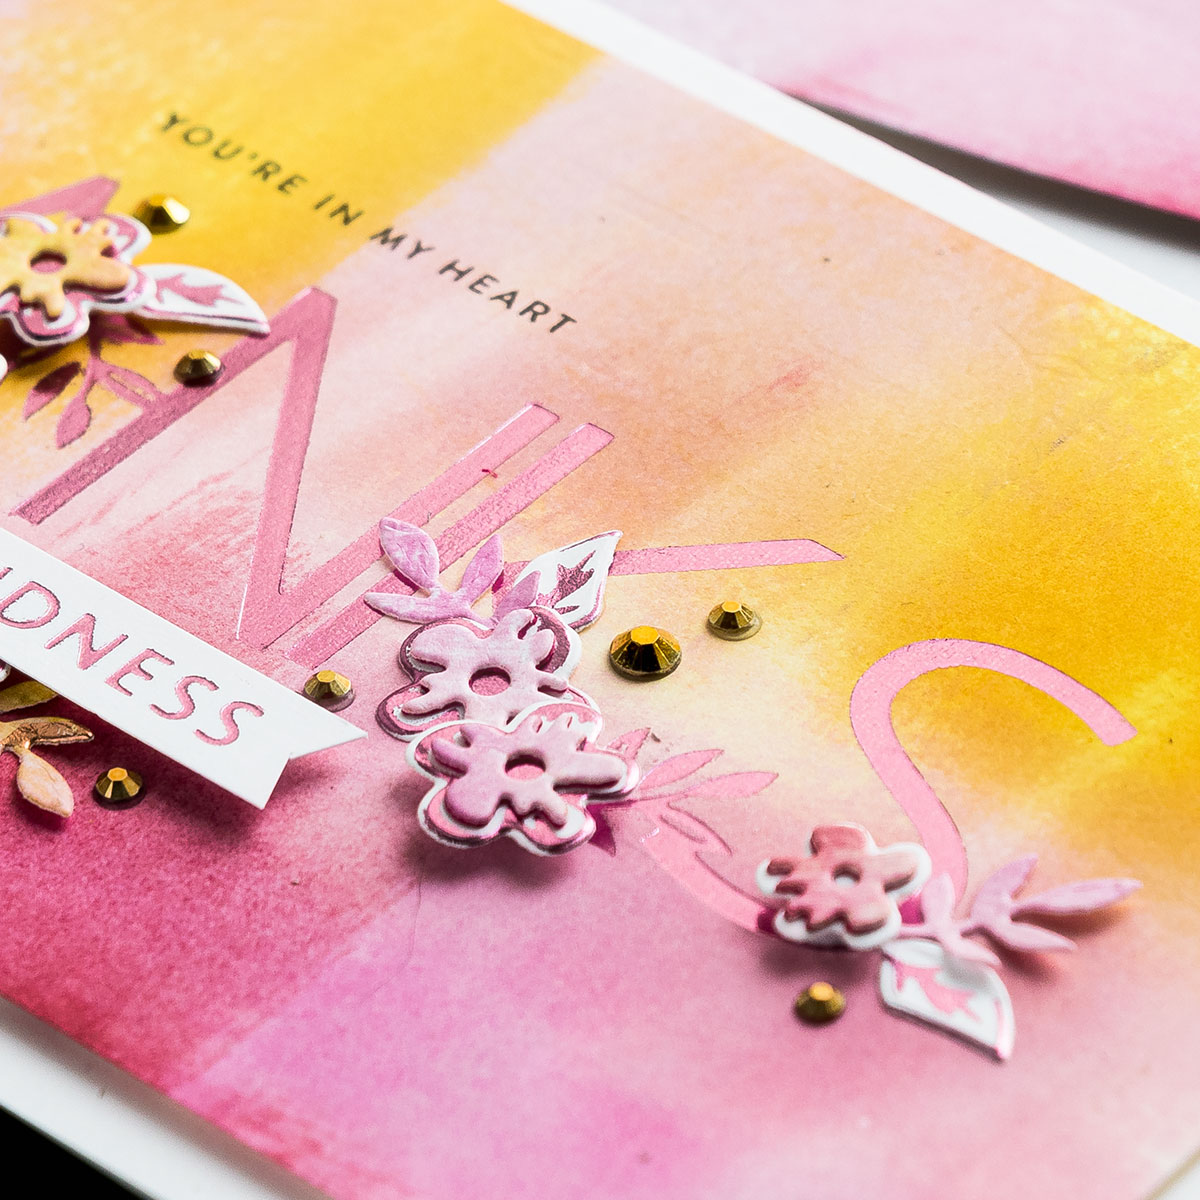
This glimmer plate comes with additional skinny strip sentiments to add to the word Thanks. You have several options – A Million, For All You Do, You are the best, for your kindness. I picked one that reads For Your Kindness for this card. There are also glimmer plates to foil a flower and a leaf and also coordinating dies.
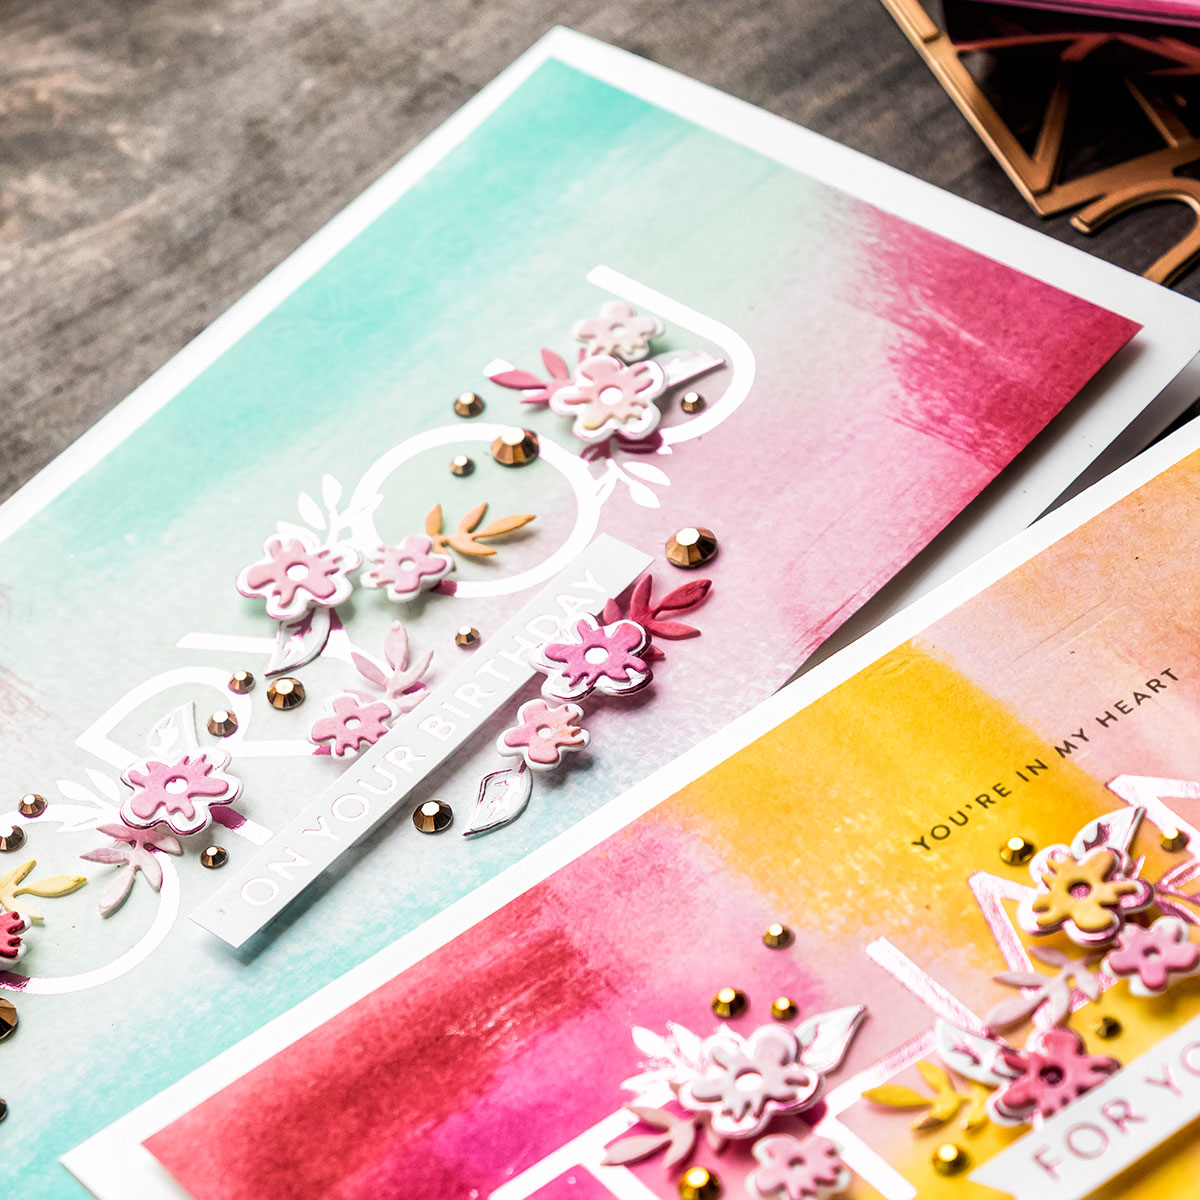
With the foiling complete, I foam mounted my background to the card base. The card base measures 8 1/2 x 4 1/4 “ and the panel is 8 x 3 3/4”. Next, I assembled the flowers and leaves. I die-cut additional flower layers from pink cardstock, to go along with the pink ink on the background. I used glue and foam adhesive squares and adhered my die cuts onto the card. I stamped a sub sentiment above the foiling as it felt like that part of the card was a bit empty. I stamped one that reads “You’re in My Heart” and I used black ink for stamping.
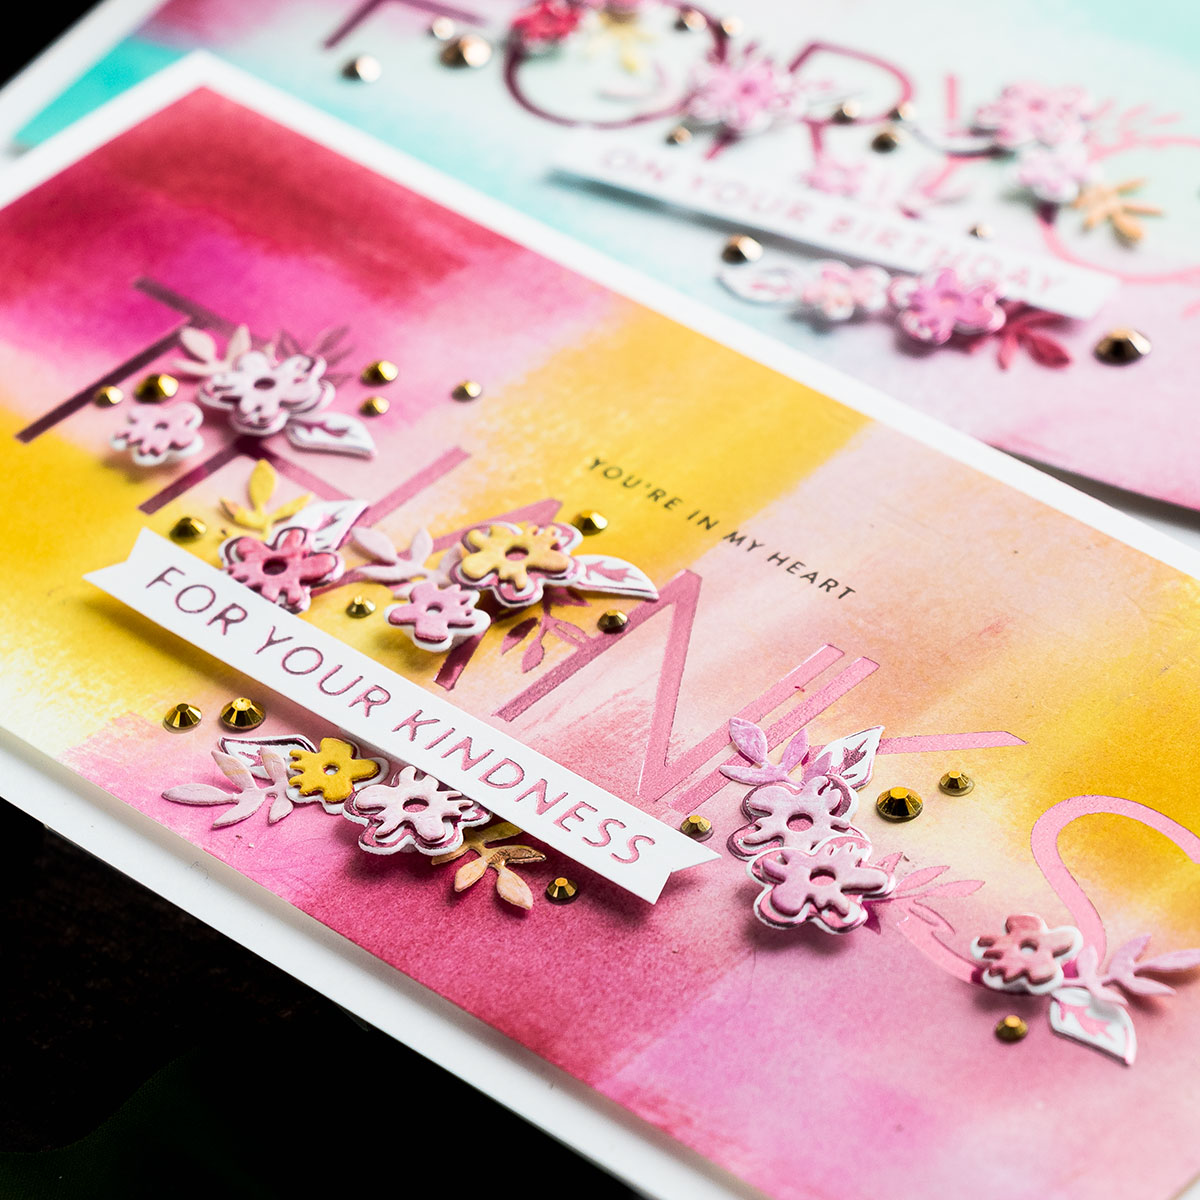
I used metallic gold jewels from Pretty Pink Posh to dress up this card and add a bit more bling to the background, I scattered the jewels in between the florals and the foiled letters and that finished my project.
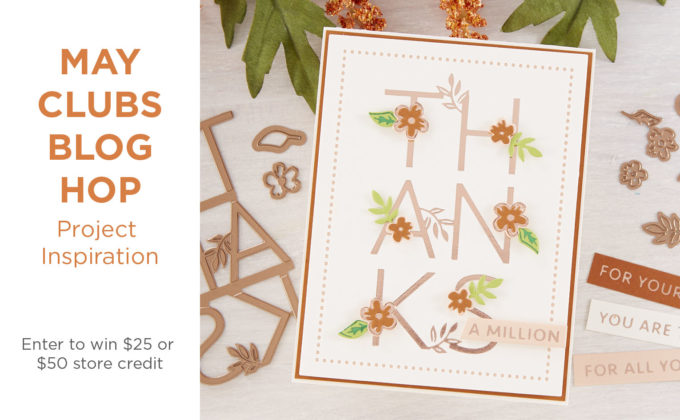
GLIMMER HOT FOIL KIT OF THE MONTH
In case you are new to Spellbinders and their Clubs, the Glimmer Hot Foil Kit of the Month, this is that Thanks glimmer plate, is a subscription Club, it is membership, available from the Spellbinders website only. This subscription is $22.5 per month, US shipping is included in this cost. Every month there’s a new glimmer plate set delivered to your door along with lots of inspiration from Spellbinders. If you enjoy foiling – you’ll enjoy these kits as the designs are always fresh and trendy. I don’t share the projects with the kits every month here on my youtube channel, but I do try and create fun cards using these products whenever I can find the time.
BLOG HOP
Spellbinders Blog
Yana Smakula – you are here!
Nichol Spohr
Tina Smith
Desiree Kuemmerle
Kathy Clement
Bibi Cameron
Jackie Pasko
Marie Heiderscheit
Jill Hilliard
Carrie Rhoades
Hussena Calcuttawala
Jennifer Snyder
Jean Manis
Virginia Lu
Jeanne Jachna
Ilina Crouse
GIVEAWAY (CLOSED)
To celebrate this release, we are giving away a $50 gift certificate to 3 lucky blog readers – selected from the comments on our blog. Hop along for additional chances to win. Giveaway closes on Sunday, May 31st, 11:59 pm EDT. The winner will be announced in the blog hop post the following Tuesday. The winner is responsible for shipping costs, duties, and taxes.
I also have one $25 gift certificate to giveaway to a lucky blog reader. To enter the giveaway, subscribe to my blog newsletter, you can do so HERE and comment below if you are a member of any of the Spellbinders Clubs. I’ll pick the winner and announce the winner in this blog post by Sunday, May 31st, 11:59 pm EDT.
The winner is Cherry Robinson. Congratulations! I’m off to email you, Cherry.
SUPPLIES
I’m listing the products I used below. Click on the link to go directly to the product. Where available I use compensated affiliate links which means if you make a purchase I receive a small commission at no extra cost to you. Thank you so much for your support!
 Especially for You Glimmer Hot Foil Plate & Die Set Shop at: SSS | SC | SB |
 Spellbinders Glimmer Hot Foil Kit of the Month Club Shop at: SB |
 Spellbinders Glimmer Hot Foil System Shop at: SSS | SC | SB | AZ |
 Spellbinders Glimmer Hot Foil Roll – Blush Shop at: SC | SB |
 Spellbinders Glimmer Hot Foil – Pink Shop at: SSS | SC | SB |
 Spellbinders Deep Sea Die Cutting Machine Shop at: SSS | SC | SB | AZ |
 Simon Says Stamp White Cardstock 120 LB Shop at: SSS |
 Neenah 110 Lb Solar White Cardstock Shop at: SSS | AZ |
 Tsukineko VersaFine Onyx Black Ink Shop at: SSS | SC | AZ |
 Hero Arts Butter Bar Ink Pad Shop at: SSS | SC | HA | AZ |
 Hero Arts Soft Yellow Ink Pad Shop at: SSS | SC | HA | AZ |
 Hero Arts Soft Pink Ink Pad Shop at: SSS | SC | HA | AZ |
 Hero Arts Ombre Pink To Red Ink Shop at: SSS | SC | HA | AZ |
 Hero Arts Soft Vanilla Ink Pad Shop at: SSS | SC | HA | AZ |
 Hero Arts Soft Pool Ink Pad Shop at: SSS | SC | HA | AZ |
 Hero Arts Tide Pool Ink Pad Shop at: SSS | SC | HA | AZ |
 Hero Arts Mint Julep Ink Pad Shop at: SSS | HA | AZ |
 Crystal Ninja Crystal Katana Pick Up Tool Shop at: SSS | AZ | PPP |
 Simon Says Clear Stamps Tiny Words Shop at: SSS |
 Pretty Pink Posh Metallic Gold Jewels Shop at: SSS | AZ | PPP |
 Pretty Pink Posh Espresso Jewels Shop at: SSS | PPP |
 Journey Craft Glue Shop at: SC | SB |
Awesome cards. I usually prefer cool colors & my favorite is purple. Your color choices are very impactful and beautiful. You have a great color sense & I always enjoying what you do with the Spellbinders club kits. Thanks for the inspiration!
Beautiful beautiful cards, Yana. I love the colors and the shimmer. And those tiny flowers are oh so cute!
Your talent always inspires me to stretch myself, thank you! Gorgeous cards, I have both plates, never thought to use them this way, thank you! Time to play!
OMG YANA THESE ARE ABSOLUTELY SPECTACULAR! LOVE LOVE LOVE! OBSESSED WITH THESE CARDS AND COLORS TOO!
Absolutely love this and need to get my hands on some! Thank you for this chance!
I love your cards and videos, Yana. No I am not subscribed to any of these kits of the month but I love looking at what you make.
These cards are beautiful! I do not have the foiling glimmer machine and products, but hope to invest soon. Love the elegance of hot foiling.
Thank you for blogging about glimmer plate designs. Need the ideas
beautiful ! Thank you so much for all the tips! Love your backgrounds!
I really need a glimmer system. That turned out great
OMG, I never thought to use this hot foil stamp this way. Thank you for all your creative happiness you share.
I enjoy your designs. always excited to see what you have created.
Such a pretty card. This months glimmer foil kit is a favorite.
I love how you made the colors in blocks. Very pretty and different
I made some backgrounds in the Spring Card Camp and I have the wonderful Thanks glimmer plate, so I will definitely be trying this in the next day or two. Thanks.
These are so beautiful and the extra foil tips are a great way to get more use from a plate. Thank you for sharing. These make me want a glimmer plate machine.
Just gorgeous! Love
the foiling and colors.
I am not a member.
Carla from Utah
Beautiful cards…love them…
I would have never thought to use this plate this way, it’s beautiful!
(And I’m a subscribed to the Glimmer Plate of the Month club!)
This is a new technique for me. Do you need to use the machine only that you use in the video to do foiling? I will have to learn about it as it looks so much fun and the cards you created are gorgeous. I also like the technique you used for the ink backgrounds.
So beautiful- artsy and classy! I have a Spellbinder’s glimmer plate on my birthday wish list! I actually have some foil and plates (purchased from Spellbinder’s store) , but no machine yet! Thanks for the wonderful inspiration. Looking forward to watching more of your videos.
Great video showing the technique. I like how the foiling can be used partially.
I am excited to see you blog post on the layour of the Thanks for this card with it going straight across I say the earlier post and wanted to see how it was done. Had an idea but good to actually see it done. Love the colors you used with ink pads also. Very vibrant and spring /summer feel to card.
Awww man! Now I have to get this foiling system! You also taught me something with that direct to Paper inking technique for the background. Absolutely gorgeous cards!
Absolutely gorgeous cards! Thanks for sharing your technique…
Thank you so much for all the great foiling information. I’m sure that your tips will help me to create many beautiful items with my new foiling machine. Also, thanks for the information on the monthly clubs. Helpful to know.
Love the color blocking. Beautiful cards.
thanks for sharing txmlhl;(at)yahoo(dot)com
I am just amazed at your cards every time. The6 are so beautiful, I hope when my dies arrive I can do just as good .
WOW!!!!!! These are Stunning!!!!! I love your inked backgrounds and this awesome foiling technique!!!
Gorgeous cards. The backgrounds are stunning. I love the tiny flowers. They are so cute!
Thank you so much for sharing your beautiful cards…and such great instructions! I am new with the foiling, so your foiling tips are very much appreciated!
Thank you for your wonderful tutorial Yana. I’m new to crafting. Looking forward to receiving my Hot Foil Kit to try this technique along with the original one. Thank you for sharing how to do those wonderful backgrounds. I’m looking forward to playing with your background technique till my foil kit arrives. Love how you incorporated using scrap cardstock to build up your backgrounds. So many wonderful ideas and tips. I would have never thought of these ideas on my own. I appreciate your sharing, inspiration and talent. Take care and stay well.
Beautiful background for the foiling!
Beautiful!! Thank you for sharing your techniques.
Love! Thank you for sharing this unique use of these two hot foil plates, I would have never thought of them, and I’m excited about the versatility this brings.
Such eyecatching cards! I’m so happy foiling is in again. Thank you for sharing your inspiration and techniques!
Very pretty coloring on the cards and very clever way to extend the die. TFS
Those cards are absolutely gorgeous!
Gorgeous cards love the design
So pretty! Thanks for sharing and video tutorial!
I just purchased the Glimmer Hot Foil System and can”t wait for my dies to come from Spellbinders so I can make cards for my 89 year old second cousin. She sends out about 35 cards a month to all her friends. She loves my cards so I thought that if I had a glimmer hot foiler they would just make the cards so much nicer. I try to make her 30 to 40 cards every 2 to 3 months. I love all the cards that everyone makes. I just wish that I had more time to just do cards and crafts every day. Everyone’s cards are just beautiful and awesome. Thanks for the chance to win. Love the Thanks card, I joined the foil club so that I could do that lovely card. Thanks for all inspiration , your cards are awesome.
I am not a member of any of the Spellbinders clubs but I always love and buy Spellbinder products. Your cards are full of glorious color and I love the foil glimmer!
Beautiful! Your mastery of Glimmer Foil looks so effortless! I so appreciate the easy to follow instructions. Of course I also love your artistry in color and design. Thanks for keeping it fresh! Deb
So pretty! I have to say I think I really like this Glimmer die in the horizontal orientation–a little more work, but worth it! Thanks Yana!
Simple enough and a quick card, but so elegant and pretty. Nice work.
Beautiful colors, technique and foiling.
You do beautiful work. Thank you and God bless.