


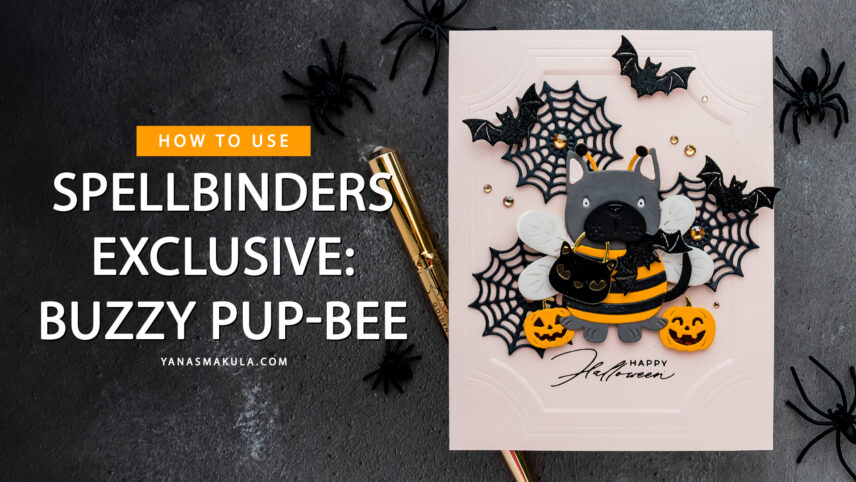

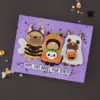
Hello, friends! Today I’m sharing one of the cutest Halloween character die sets I’ve worked with in quite some time – the new Spellbinders Exclusive Buzzy Pup Bee Dies. This little puppy is dressed as a bumblebee, complete with tiny wings, antennae, and even a cat-shaped trick-or-treat bag. Although the die set is small, it is packed with personality and thoughtful details that make assembling the finished character incredibly rewarding.
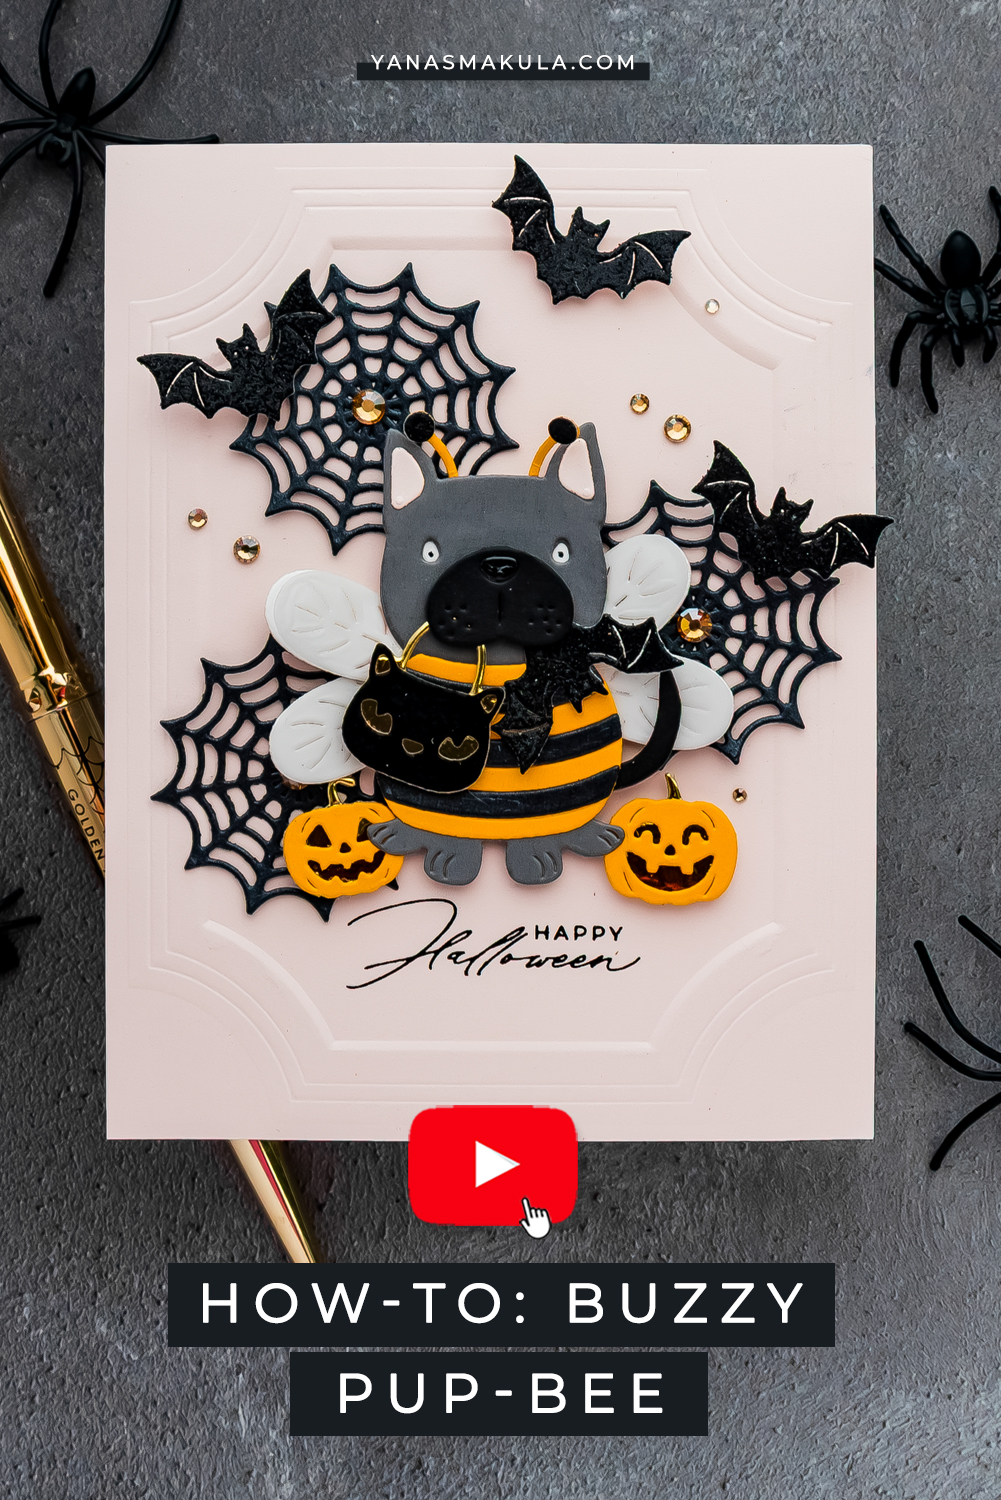
Like this project? Pin it and save it for later
For today’s card, I’m also combining products from several Spellbinders collections. The Pup Bee takes center stage, while dies from my Halloween City Holiday collection and the Ornate Molded Frame Embossing Folder from my Christmas Cats collection help create an elegant Halloween scene.
I love mixing collections like this because it gives your supplies even more versatility. Instead of thinking of products as belonging to one specific release, try combining them with dies, embossing folders, sentiments, and embellishments from other collections already in your craft room. You’ll be surprised how naturally they work together.
VIDEO TUTORIAL
Watch the complete video tutorial below or on my YouTube channel, where I walk through the assembly process, share several tricks I discovered while building this character, and show how I created the finished Halloween card.
START WITH A PRACTICE ASSEMBLY
Before choosing the final colors for this project, I recommend assembling one practice version of Pup Bee. Whenever I work with a brand-new character die, I almost always build one sample before creating the final project. That first assembly helps me understand how the individual pieces interact and nearly always reveals little tricks that make the second version easier.
In this case, that practice puppy taught me two valuable lessons that completely changed the final result.
Crafty Tip: Don’t worry if your first character isn’t perfect. Think of it as a dress rehearsal. You’ll often discover small placement adjustments that make the finished version look much more polished.
POSITION THE ANTENNAE BEHIND THE HEAD
The first discovery involved the bee antennae. At first glance, placing the headband on top of the puppy’s head seems logical. In fact, that’s how it appears in the original assembly guide. However, after assembling the first puppy, I found that positioning the headband behind the head creates a much cleaner look.
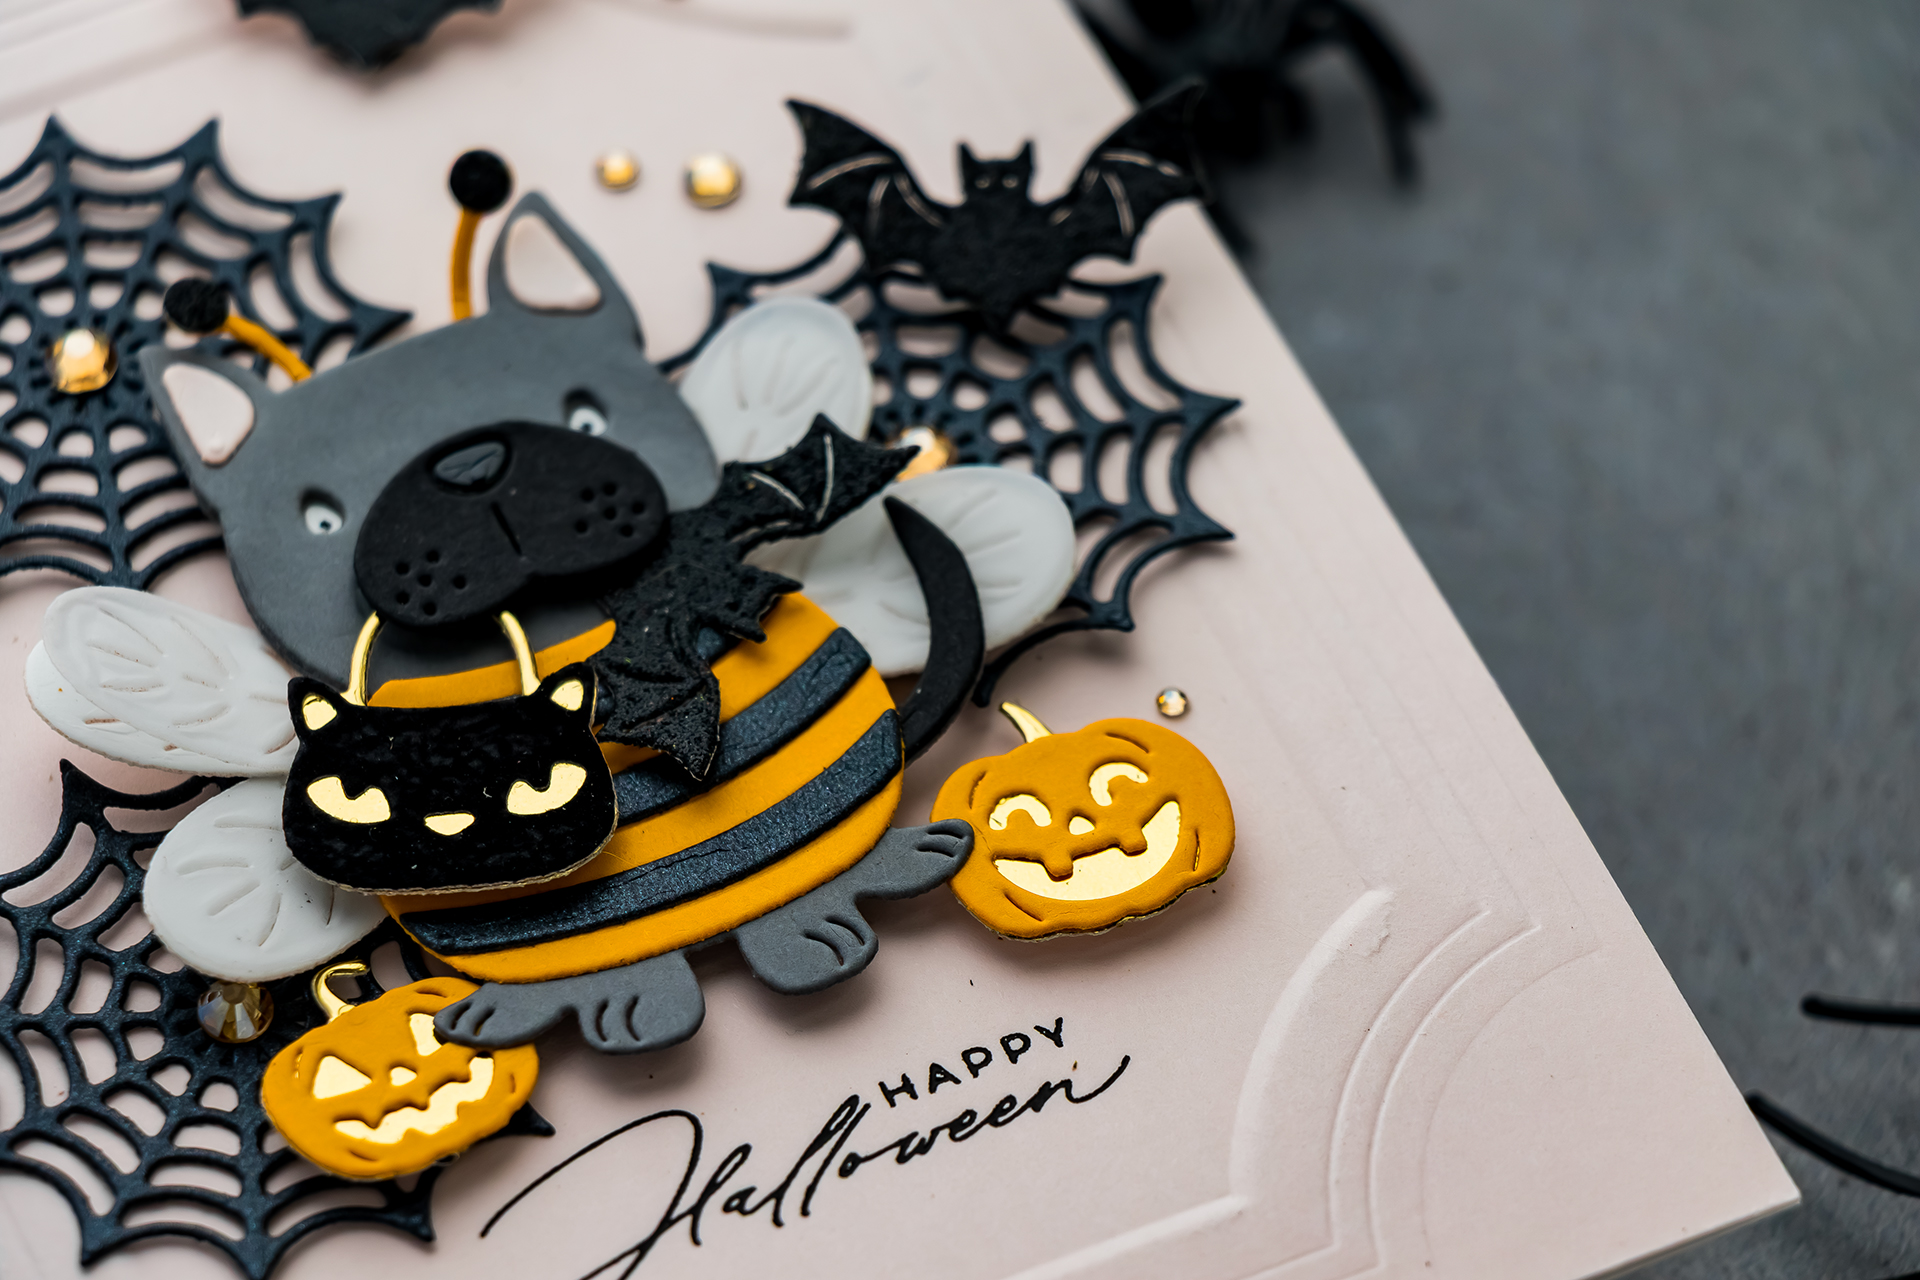
Only the antennae remain visible above the ears, making them appear as though they naturally grow from behind the head instead of sitting on top like a costume accessory. It is a tiny adjustment, but it completely changes the finished character. Little details like this are often what separate a cute project from one that feels polished and professionally finished.
LEAVE SPACE BEHIND THE MOUTH
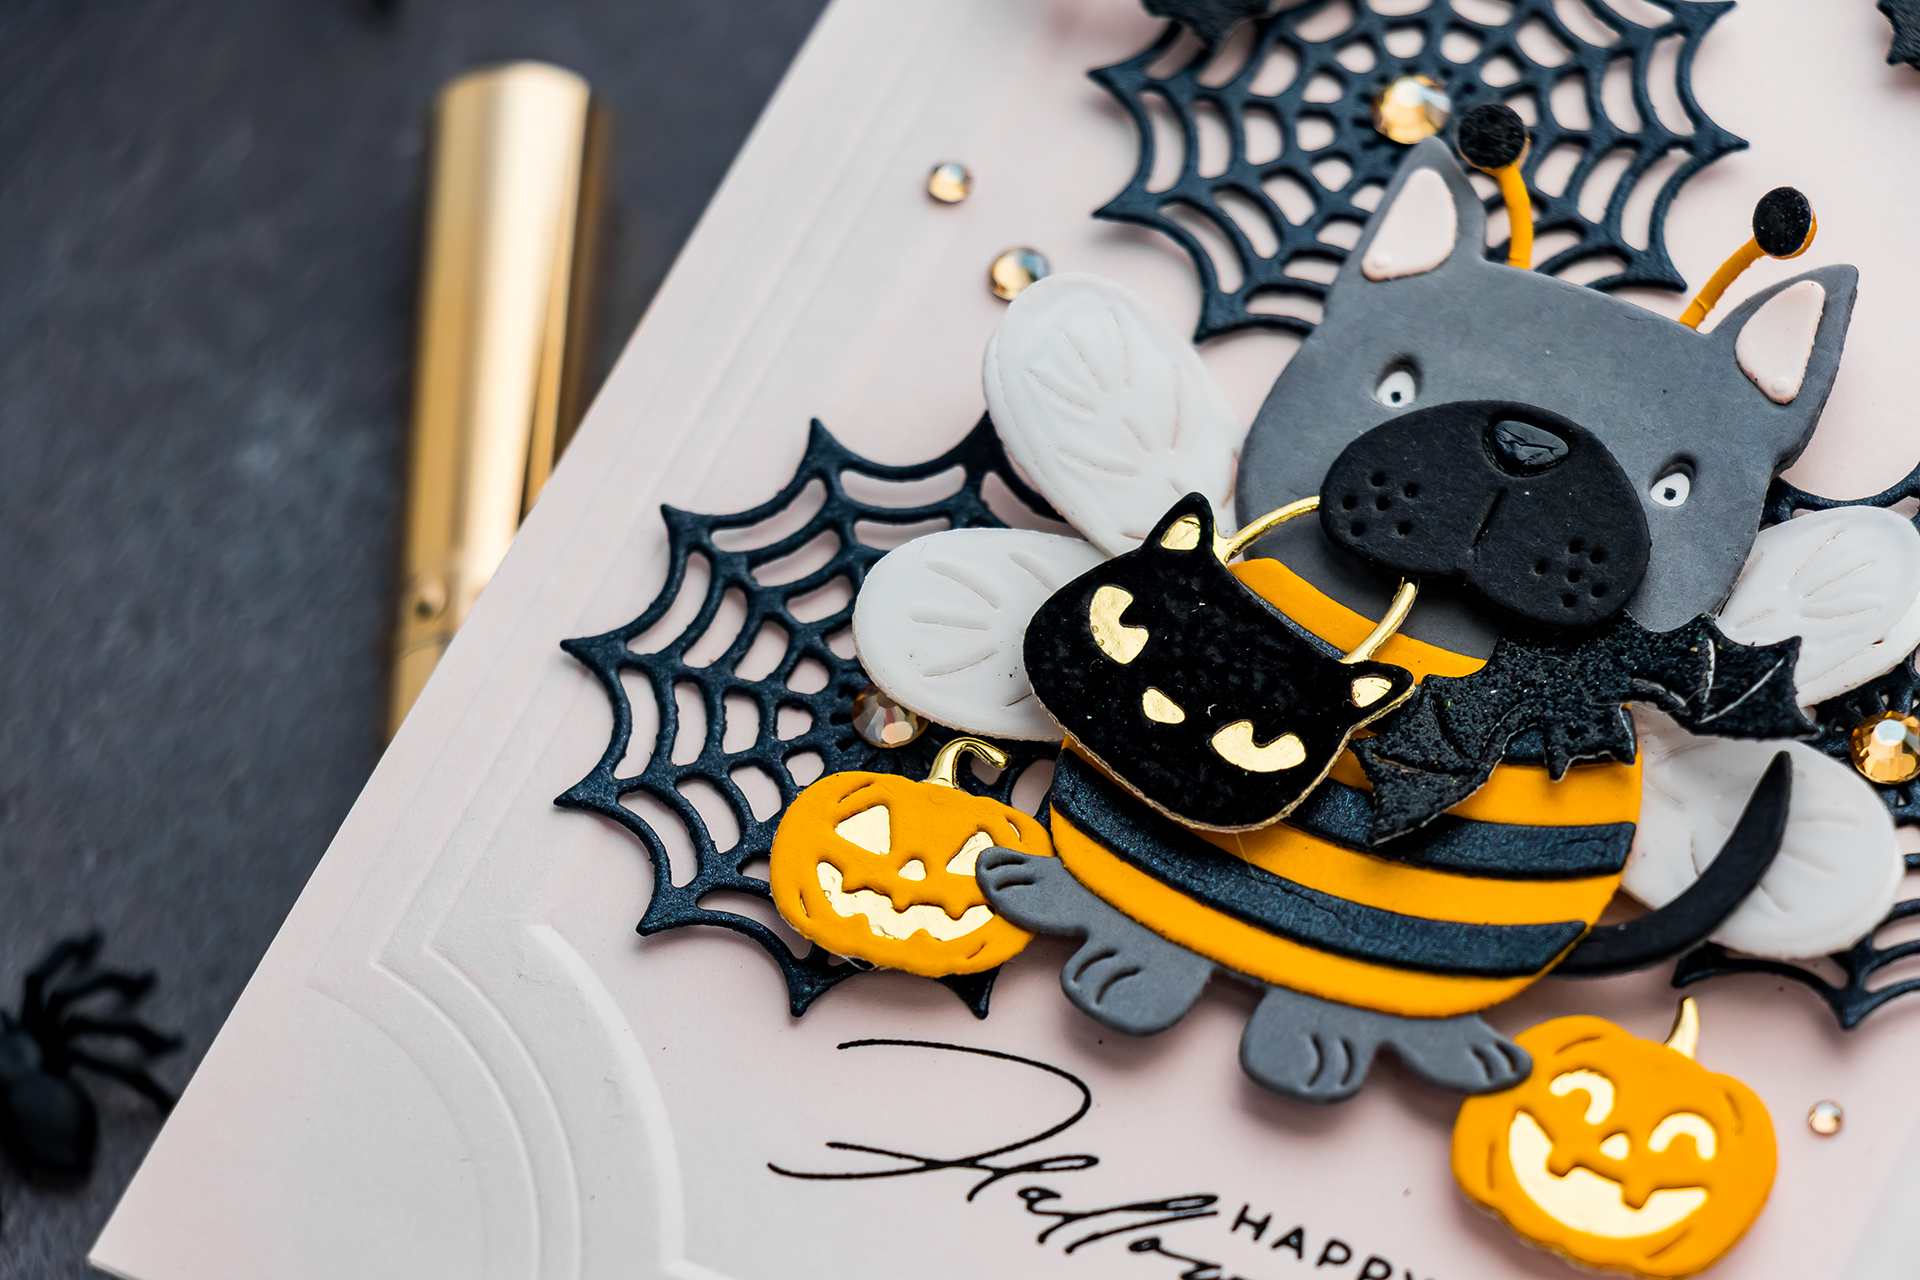
The second discovery is just as important. Instead of adhering the entire mouthpiece flat against the face, apply adhesive only toward the top edge. This leaves a small opening underneath where the tiny cat-shaped trick-or-treat bag can slide naturally into place. For this project, use Spellbinders Black Foam Adhesive Squares rather than liquid adhesive. The foam creates just enough clearance for the bag while also adding subtle dimension to the face.
This simple assembly trick helps the puppy interact with the accessory instead of simply holding it in front of the body.
CHOOSING CARDSTOCK THAT BRINGS THE CHARACTER TO LIFE
Once the assembly was refined, it was time to choose the final color palette. Use Spellbinders Anchor Cardstock for the head, legs, and tail. Die cut the bee body from Spellbinders Saffron Cardstock and the stripes from Spellbinders Brushed Black Cardstock.
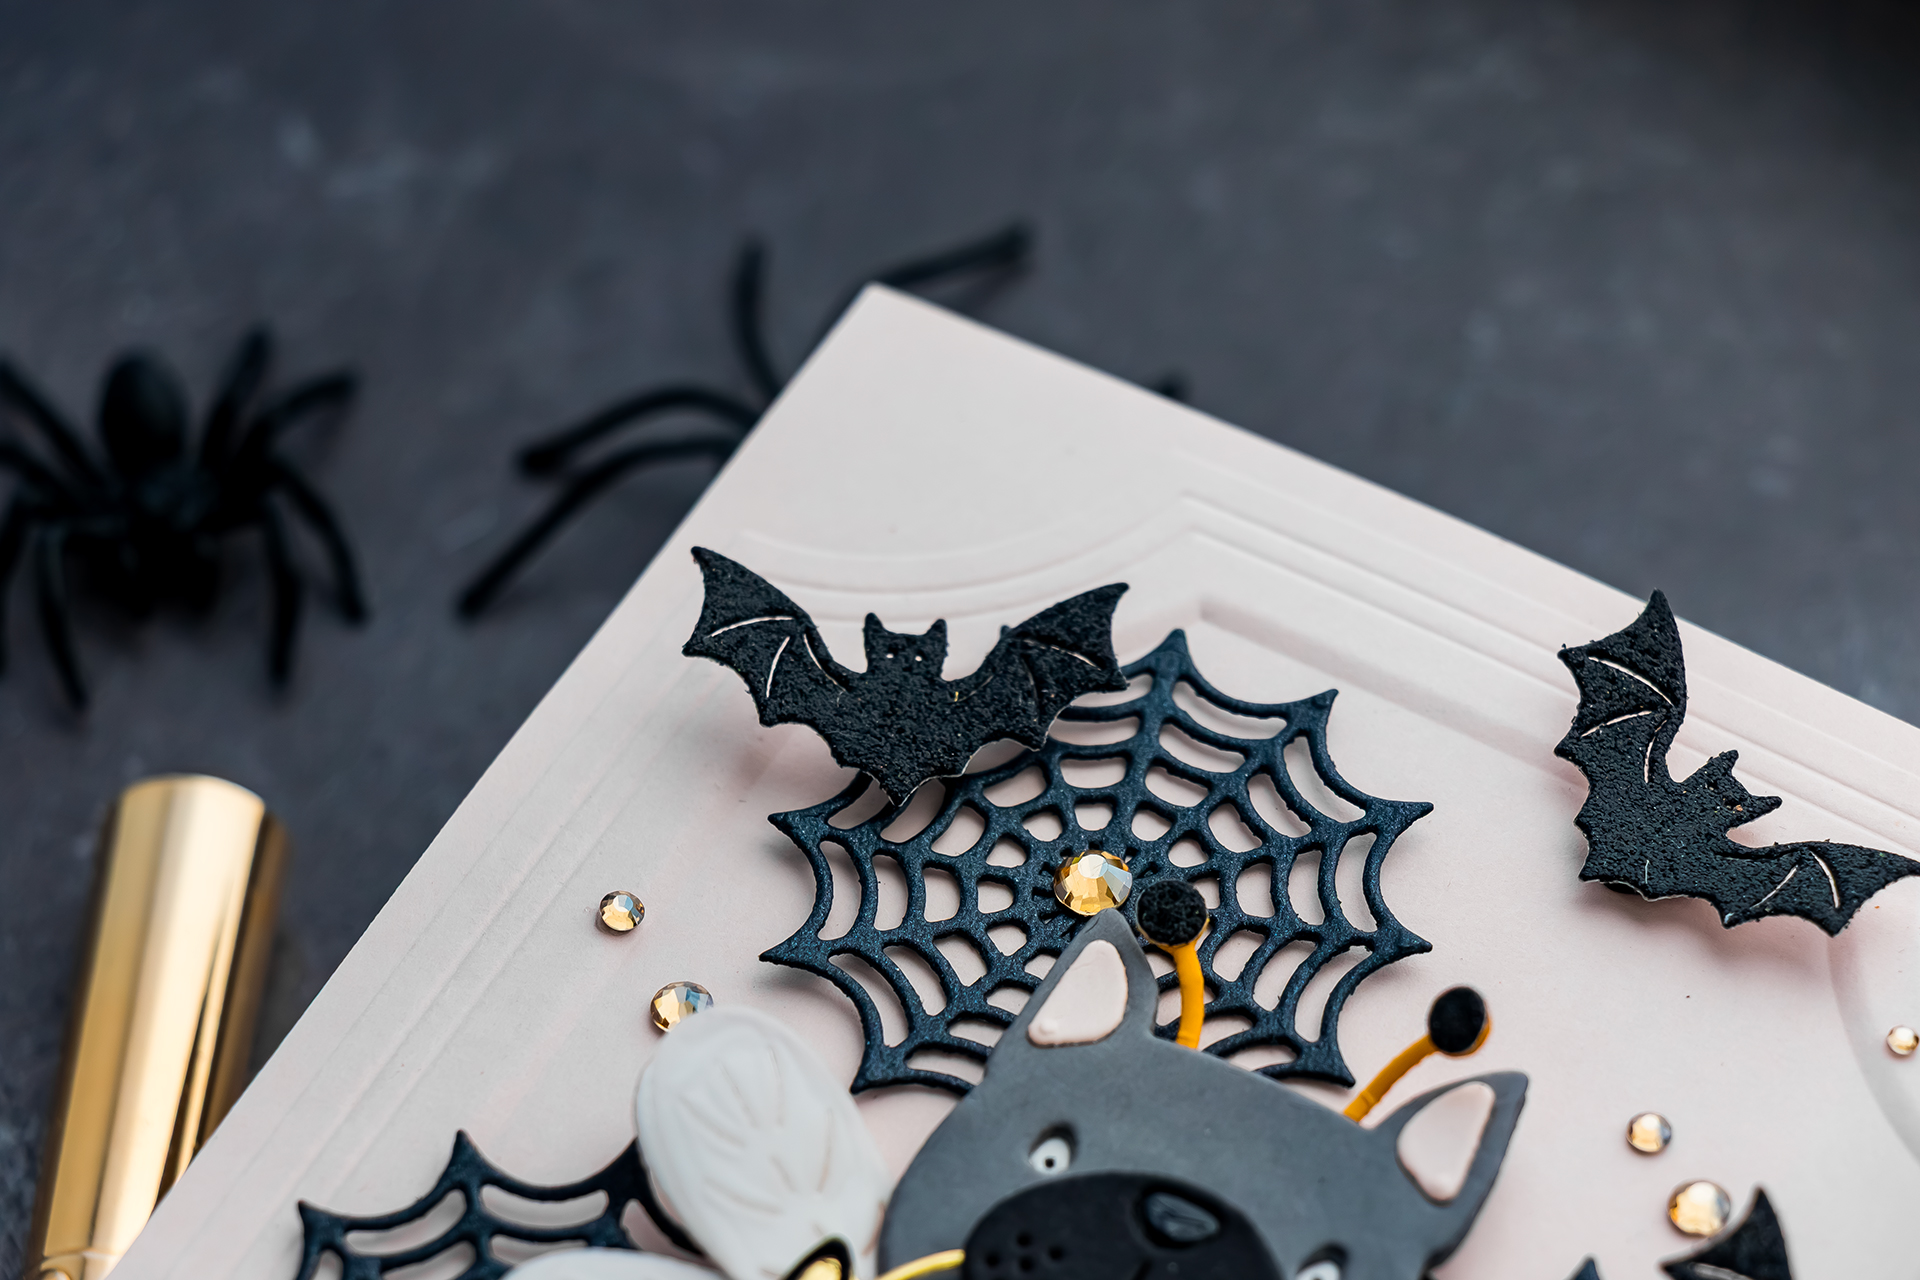
Brushed Black has become one of my favorite specialty cardstocks for Halloween projects. Instead of a flat black finish, it has a subtle shimmer that catches the light and gives die-cut pieces extra depth. The cardstock is included in the Onyx Treasured Cardstock Pack, which is one of those collections I reach for again and again throughout the year because it offers several beautiful specialty black finishes.
Design Tip: One of the easiest ways to add interest to a card is to vary the finish instead of adding more colors. Matte, brushed, mirror, glitter, vellum, and foil can all work together while keeping the overall palette clean and cohesive.
A TINY DETAIL THAT MAKES A BIG DIFFERENCE
Here’s one of my favorite tricks from this project. The puppy’s nose is created by a tiny die-cut opening in the mouthpiece. Instead of filling that opening with regular black cardstock, die-cut the nose from Mirror Black Cardstock. Because the surface is reflective, the nose instantly looks glossy and dimensional, just like a real puppy’s nose.
You could achieve a similar finish with Glossy Accents, but using Mirror Black Cardstock creates the same effect immediately, no drying time, no waiting, and no risk of accidentally smudging the finish. It’s a tiny detail, but it adds an amazing amount of personality to the finished character.
MIX COLLECTIONS TO CREATE A MORE INTERESTING CARD
One of my favorite parts of this project is that it isn’t built from a single collection. The Buzzy Pup Bee is the star of the card, but several other Spellbinders products help complete the scene. The little bat tucked into the puppy’s trick-or-treat bag comes from my Halloween City Holiday Decoration Dies. Although it was originally designed to decorate the City Holiday building, it works perfectly as a tiny accessory here.
This is something I encourage you to do often: look beyond the collection a product belongs to and think about how it might work with other supplies you already own. A small die intended for one project might become the perfect embellishment for another. That’s one of the best ways to stretch your crafting stash.
CREATE AN ELEGANT HALLOWEEN BACKGROUND
For the card itself, I wanted something that felt Halloween-inspired without relying on a busy background. To create the card base, start with a 4¼ × 5½ inch panel of Spellbinders Chiffon Cardstock. Rather than leaving the panel flat, emboss it using my Ornate Molded Frame Embossing Folder from the Christmas Cats Collection.
If the design looks familiar, that’s because it’s the second version of my molded frame embossing folder. The original design became a favorite among crafters and even received Spellbinders’ Best Embossing Folder Award in 2025.
One of my favorite features of this folder is the large open center. Instead of embossing across the entire panel, it naturally creates a framed focal area that’s perfect for sentiments, die-cut characters, floral arrangements, or small scenes like today’s project.
FOIL BEFORE YOU EMBOSS
Before embossing the cardstock, add the sentiment. This is a simple trick that makes placement much easier. Instead of guessing where the greeting belongs, place the cardstock inside the embossing folder without running it through the machine. The embossed design acts as a guide, showing exactly where the open center will be.
Once you’ve found the perfect location, remove the cardstock and hot foil the sentiment. For this project, I used one of the Happy Halloween BetterPress Sentiments from my Halloween City Holiday Collection together with Matte Black Hot Foil. Although these are BetterPress plates, they also work beautifully for hot foiling, giving you two completely different ways to use the same product.
Designer Insight: When I designed these sentiments, I intentionally made each greeting its own individual BetterPress plate rather than combining several sentiments onto one plate.
This gives you much more flexibility because you can foil or press a single greeting exactly where you want it. Whether your design calls for a centered sentiment, one tucked into a corner, or one placed beneath a focal image, you’re not limited by a larger multi-sentiment plate. After foiling, emboss the panel using the Ornate Molded Frame Embossing Folder.
Foiling first helps ensure the sentiment transfers cleanly onto a perfectly smooth surface. Embossing afterward adds all of the beautiful texture without affecting the crisp foiled image.
ADD SOFTNESS WITH LAYERED WINGS
To finish the puppy, create the wings using two different materials. Die cut one set from white cardstock and a second set from regular vellum. Layer the vellum over the white cardstock before adhering the wings behind the puppy. The white cardstock provides opacity and shape, while the vellum softens the appearance and creates the illusion of delicate, translucent wings. This small detail adds much more dimension than using a single cardstock layer alone.
Design Tip: Combining opaque and translucent materials is an easy way to add depth without introducing another color into your design.
BUILD THE SCENE ONE LAYER AT A TIME
Before permanently attaching anything, arrange the entire composition. Position the puppy first since it will be the focal point of the card. Next, add three spiderwebs die-cut from Spellbinders Brushed Black Cardstock. Instead of placing them in a straight line, spread them around the puppy to create a visual triangle. This is one of my favorite composition techniques because it naturally guides your eye around the design before returning to the focal image.
The same principle works beautifully with flowers, snowflakes, stars, embellishments, or nearly any repeated design element.
ADD MORE HALLOWEEN DETAILS
To finish the background, die cut several bats from Black Glitter Cardstock from the Onyx Treasured Cardstock Pack. The subtle sparkle catches the light beautifully while still allowing the puppy to remain the star of the card. Next, create two pumpkins using Spellbinders Saffron Cardstock. Back each pumpkin with Spellbinders Mirror Gold Cardstock.
This is one of my favorite Halloween tricks. As the card moves, the reflective gold catches the light through the carved jack-o’-lantern openings. Sometimes the pumpkins appear dark. Sometimes they look as though they’re glowing from within. It’s an incredibly simple technique, but it creates a fun interactive effect without adding lights or specialty products.
Crafty Tip: Whenever you’re using metallic cardstock, repeat that metallic finish in several places throughout the design. Repeating the same finish creates a much more cohesive project than using it only once.
FINISH WITH DIMENSION AND SHINE
Once you’re happy with the arrangement, adhere the spiderwebs using liquid adhesive. Attach the puppy, pumpkins, and bats with foam adhesive. Using different levels of dimension creates small shadows that separate each element from the embossed background and add even more depth to the finished card. Complete the design with a few gold gems.
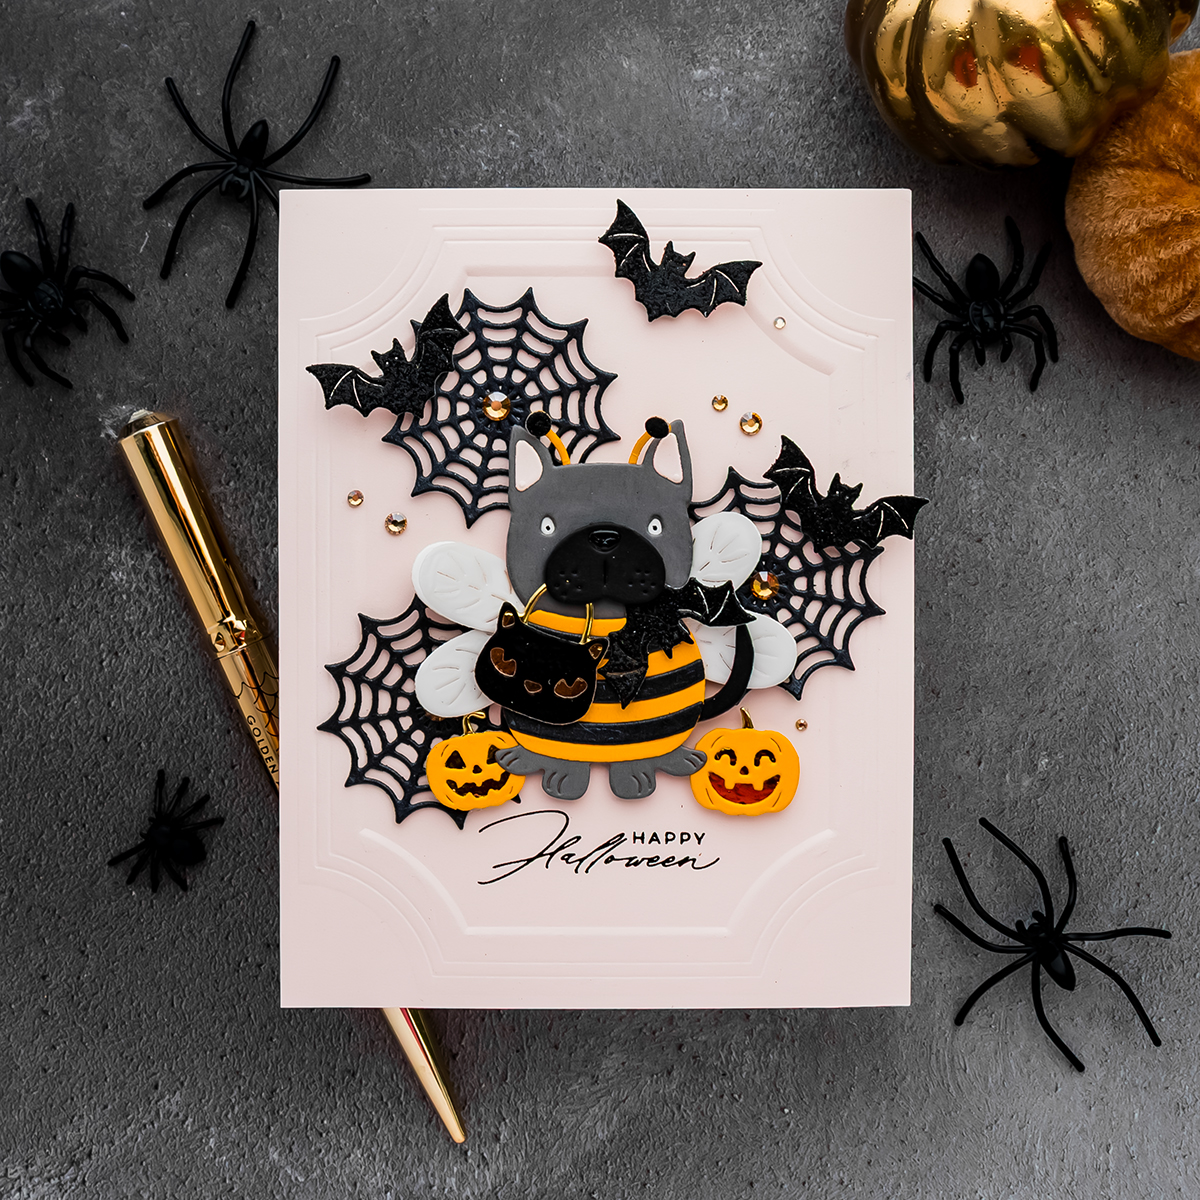
The embellishments echo both the Mirror Gold Cardstock and the Matte Black foiled sentiment, helping tie the entire color palette together. Even though this card uses a limited number of colors, repeating those finishes throughout the design creates a project that feels balanced, polished, and intentional.
A CHARACTER FULL OF PERSONALITY
I absolutely love how this little bee puppy turned out. What began as a simple character die quickly became the centerpiece of an elegant Halloween card by combining products from several different Spellbinders collections. More importantly, this project is a great reminder that your supplies don’t need to stay within the collection they were released with.
Try mixing character dies with florals, holiday products with everyday designs, or dies with embossing folders from completely different releases. You’ll discover fresh combinations, create more unique cards, and get even more value from the products already in your craft room. I hope this project inspires you to build your own Buzzy Pup Bee and experiment with mixing collections in new ways.
Have fun creating!
SUPPLIES
Affiliate links used at no additional cost to you

This is so cool