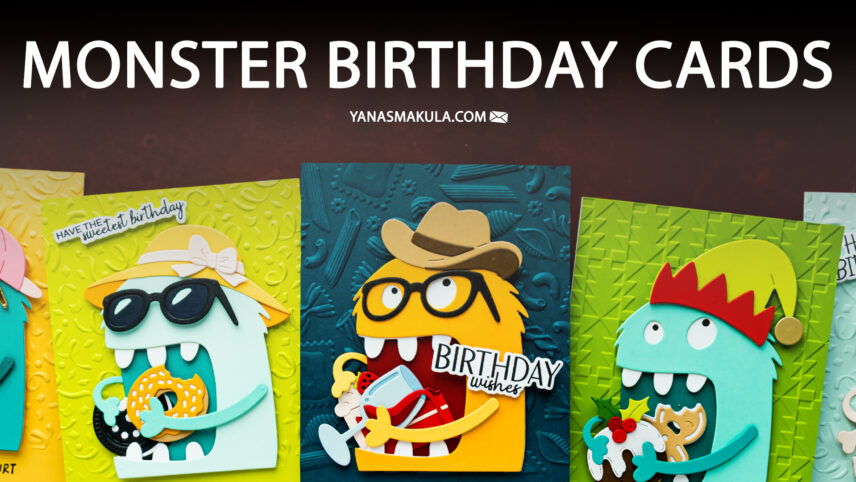

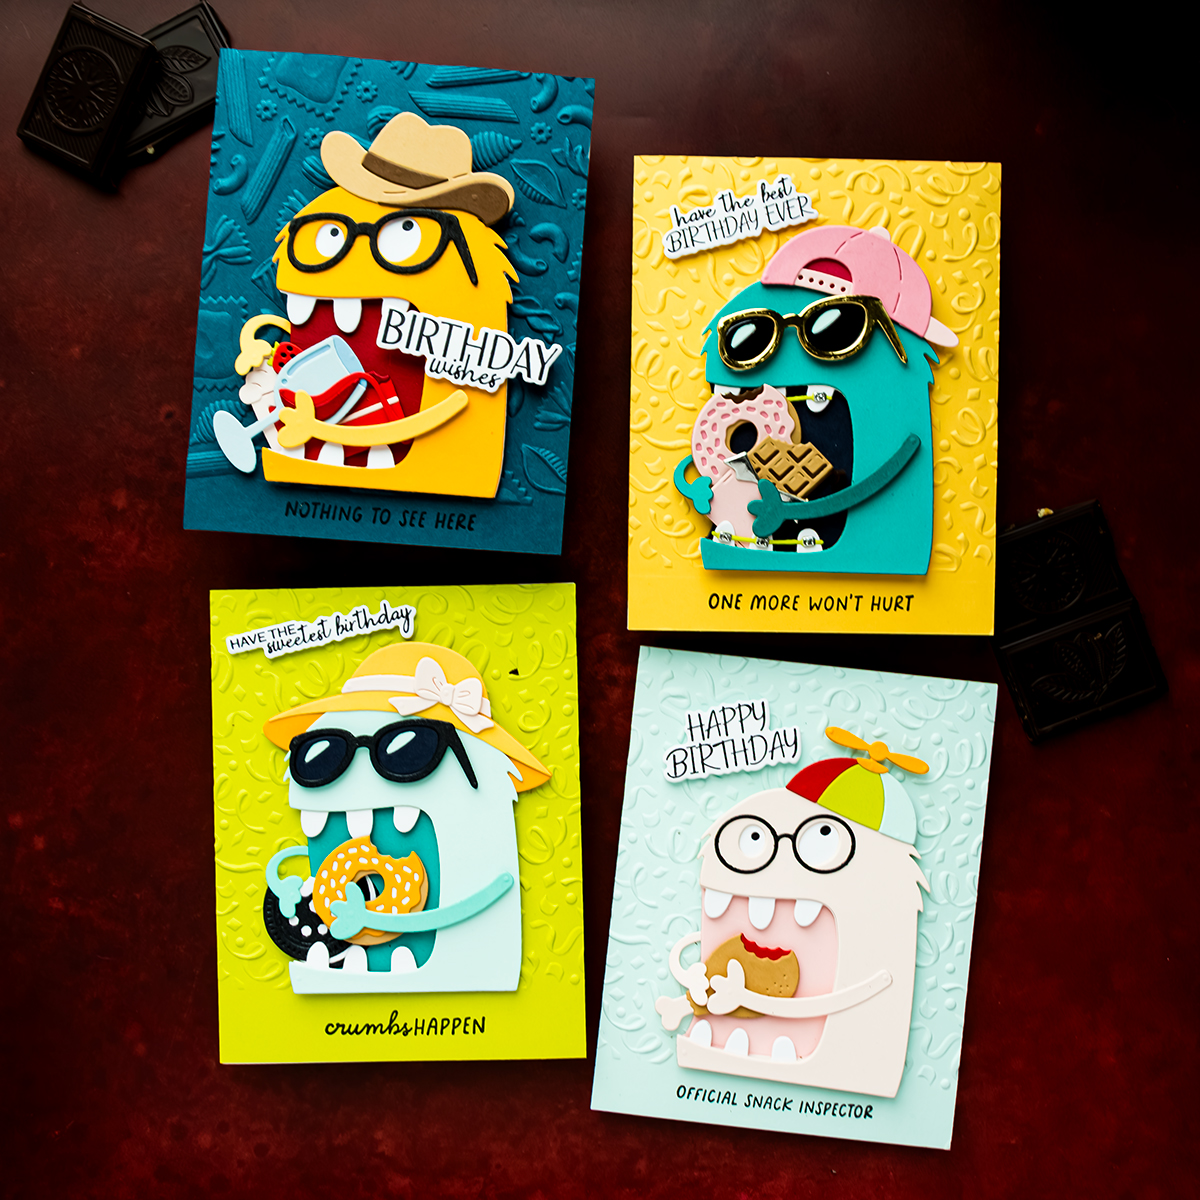
Monster birthday cards are a fun option for men, teenagers, children, and anyone who appreciates a playful handmade card. In this tutorial, I’m sharing five colorful designs created with the Spellbinders Snack Goals Collection and the Chompster dies from the Just Add Cake Birthday Cardmaking Kit. You’ll learn how to assemble the layered monster, create a dimensional recessed mouth, arrange snacks before attaching the movable arms, coordinate bright cardstock colors, and partially emboss a background to leave space for a stamped sentiment. Although four of these cards have birthday themes, the same monster can also be dressed for Christmas or Halloween using the coordinating add-ons. The result is a versatile character that can be customized for many recipients, occasions, and personalities.
Hello, friends!
Today, we are creating monster birthday cards for the guys in our lives, although these designs could easily be adapted for women, teenagers, or children. The colors, accessories, snacks, and sentiments can all be changed to suit the person receiving the card.
I’m working with the new Spellbinders Snack Goals Collection and combining the products with the Just Add Cake Birthday Cardmaking Kit.
The star of all five cards is the Chompster die set included in the Just Add Cake box. Chompster is not available separately, so you will need the original Birthday Cardmaking Kit to create these exact characters. The new Snack Goals products are add-ons that expand the ways you can dress, feed, and customize the monster.
Project Snapshot
| Project details | Five colorful monster cards featuring hats, glasses, braces, snacks, funny sentiments, and holiday accessories |
|---|---|
| Skill level | Varies by design; the small braces and layered accessories require careful assembly |
| Approximate time | 2+ Hours |
| Project type | Four birthday cards and one Christmas card |
| Techniques | Die cutting, layered paper piecing, partial 3D embossing, stamping, dimensional assembly, and color coordination |
| Occasion | Birthday and Christmas |
| Finished size | A2 – 4 1/4 x 5 1/2 inches |
| Featured products | Snack Goals Collection, Just Add Cake Birthday Cardmaking Kit, Top It Off Etched Dies, One More Bite Etched Dies, Merry Munchies Stamp & Die Set, and Snack Goals Clear Stamp Set |
| Machines and tools | Platinum 6 Die-Cutting and Embossing Machine, MISTI stamping tool, tweezers, and wax-tip pickup tool |
| Color palette | Teal, blue, yellow, pink, red, green, black, white, gold, and silver |
| Materials | ColorWheel Cardstock, metallic cardstock, liquid adhesive, thin foam strips, foam squares, and black ink |
| Dimension and finish | Double-layer die cuts, recessed mouthpieces, raised arms, dimensional accessories, metallic details, and embossed backgrounds |
Video Tutorial
Watch the video tutorial to see how I assemble the Chompster, create the dimensional mouth, arrange the snacks and movable arms, and partially emboss an A2 background.
What Is the Spellbinders Snack Goals Collection?
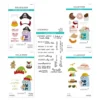
The Snack Goals Collection includes several sets designed to coordinate with the Chompster from the Just Add Cake Birthday Cardmaking Kit.
Top It Off Etched Dies
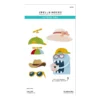
The Top It Off Etched Dies include several accessories for changing Chompster’s personality:
- Sun hat with a decorative band and bow
- Cowboy hat
- Propeller hat
- Baseball cap
- Sunglasses
- Braces
These accessories provide a simple way to personalize the same base character for different people. Many of the pieces may also fit larger characters from other die collections.
One More Bite Etched Dies
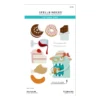
The One More Bite Etched Dies add a menu of snacks for Chompster to hold, bite, or attempt to eat all at once. The set includes food and drink elements such as:
- Donut
- Chocolate sandwich cookie
- Chocolate bar
- Slice of cake
- Turkey leg
- Additional savory snack
- Spilling wine glass
Many of the snacks include bite marks, which makes them especially fun with Chompster. The separate layers also allow you to create detailed food pieces using cardstock alone, without additional coloring.
Merry Munchies Stamp & Die Set
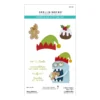
The Merry Munchies Stamp & Die Set transforms Chompster into a Christmas character. The set includes holiday treats and an elf hat, along with sentiments such as:
- Don’t Tell Santa, the Elf Did It
- Holiday Calories Don’t Count. I Checked.
- Snacking All the Way
The sentiment stamps do not have coordinating outline dies. This is important when planning the card because you will need a flat area where the greeting can be stamped.
Snackula Stamp & Die Set
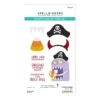
The Snackula Stamp & Die Set creates a Halloween version of Chompster with horns, a pirate hat, alternate teeth, and candy corn. The coordinating sentiments include:
- Candy Coma Incoming
- Haunting the Snack Aisle
- Snack Strikes Again and Again
I did not use the Halloween add-on for these five cards, but it gives the original monster another completely different occasion.
Snack Goals Clear Stamp Set
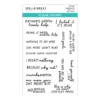
The Snack Goals Clear Stamp Set includes a larger selection of food and birthday sentiments designed to coordinate with the collection. Some of the greetings shown in the video include:
- Birthdays Happen. Treats Help.
- One More Year. One More Bite.
- You’re Worth Saving a Bite For.
- Snack Goals, Because Why Not?
These sentiments can also be paired with food dies already in your stash, even when Chompster is not part of the card.
How to Assemble the Chompster Die Cut
The same basic assembly method can be used for all five cards. Once you understand how the mouth and arms work, you can change the colors, expressions, accessories, and snacks without changing the process.
Step 1 – Double the Main Die Cuts
Start by die cutting the monster’s body from your chosen ColorWheel Cardstock. Cut the body a second time from another piece of cardstock and glue the two layers together. The color on the back does not need to match because it will not be visible on the finished card. The purpose of the additional layer is to make the large die cut thicker, sturdier, and easier to handle. I also doubled the white teeth whenever possible. The arms were cut only once because they need to remain flexible enough to be positioned around the snacks.
Designer tip: Doubling a large focal die cut helps it hold its shape when it is raised with foam adhesive. It also gives the finished character a more substantial, polished feel.
Step 2 – Add the Teeth
Turn the monster over and adhere the teeth from behind the mouth opening. Use a fine-tip liquid adhesive so you can control the amount of glue around the small pieces.
The dies create small indentations that act as assembly guides. Use these marks to determine where each layer should be positioned.
Step 3 – Create a Recessed Mouth
Instead of gluing the mouthpiece directly behind the opening, add thin foam adhesive strips around the mouth from the back of the monster. Apply the foam in the same way you would line the opening of a shaker card.
Place the colored mouthpiece behind the foam. This creates a recessed area and makes the teeth and mouth opening look more dimensional. Because the mouthpiece adds height to the back of the monster, place additional foam squares behind the body when attaching it to the card. This keeps the monster level.
Step 4 – Add the Eyes or Glasses
The original Chompster includes separate dies for the white and black portions of the eyes. Layer the pieces together and position them using the die-created guides. If the monster is wearing opaque sunglasses, you can skip the eyes because they will be completely covered. This saves both cardstock and assembly time.
For more substantial glasses, cut and stack two or three identical die cuts. One cardstock layer works, but additional layers make the delicate frame stronger and more dimensional.
Step 5 – Add the Snack Before the Arms
Position and adhere the snack before attaching the arms. This is one of the most important assembly tips for these cards. Once the food is in place, you can rotate and angle the separate arms so the monster appears to be holding it. If the arms are attached first, fitting the food underneath them becomes much more difficult.
Add liquid adhesive near the shoulder and a small foam square near the hand. This gives the arm a gentle lift and allows it to wrap visually around the snack.
Step 6 – Finish with Hats and Accessories
Add the chosen hat, glasses, braces, or other accessories after the main monster is assembled. Layered hats may need to be built directly on the character rather than glued together separately. For example, the lower portion of the sun hat overlaps the monster. Attach the upper portion first, place it on Chompster, and then add the brim over both layers.
Card 1 – Birthday Monster with Braces
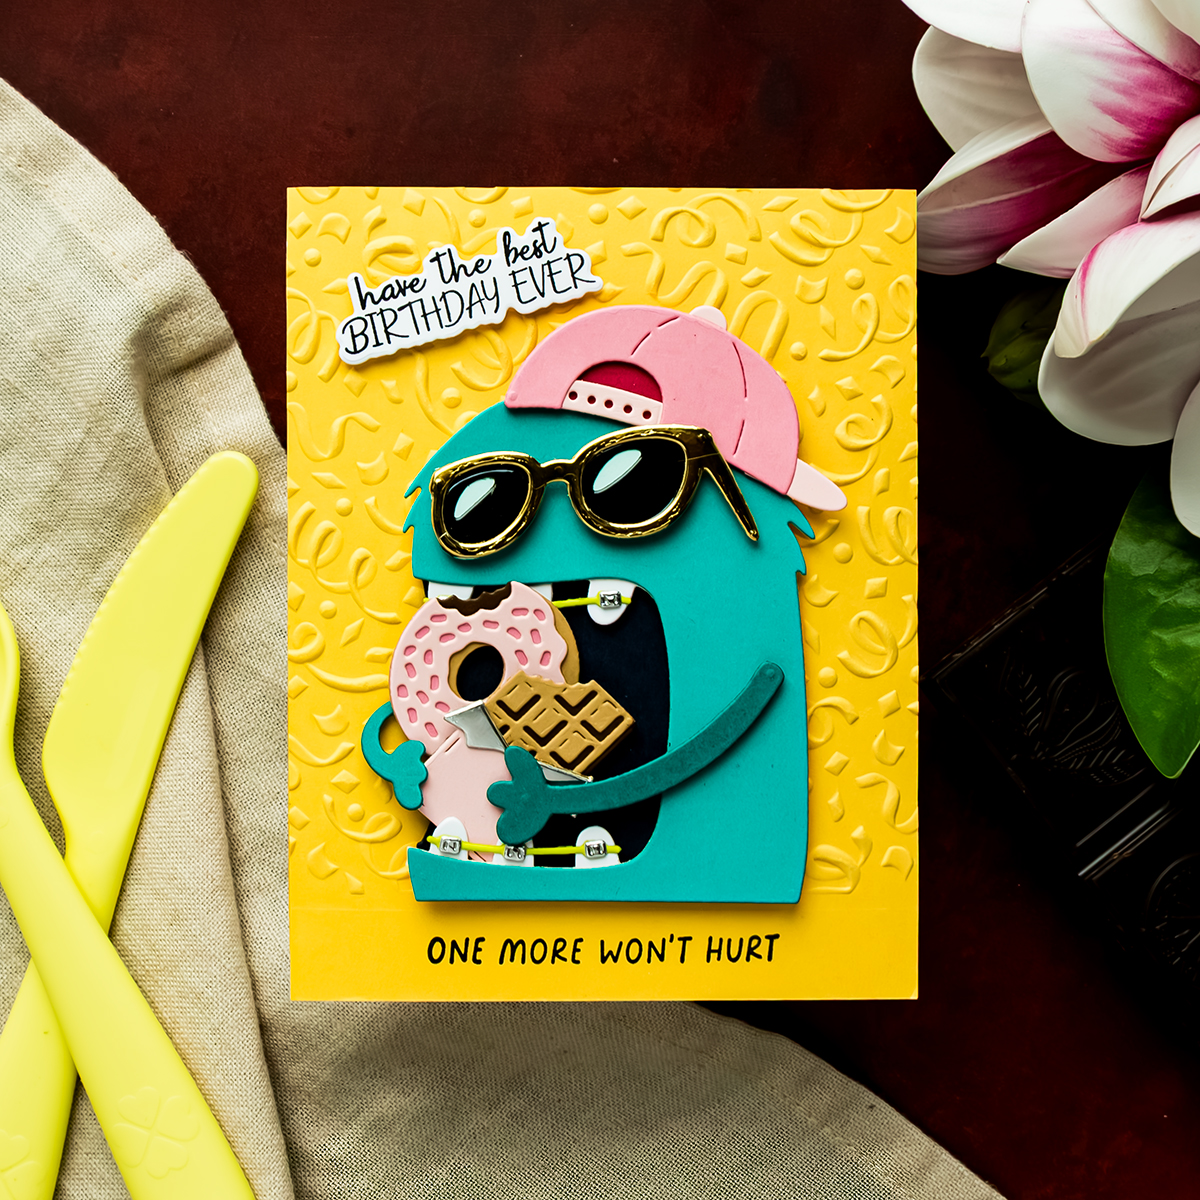
The first card features a teal monster with a dimensional indigo mouth, white teeth, colorful braces, a baseball cap, and gold-and-black sunglasses.
Choose the Cardstock Colors
I cut the body from Teal Topaz ColorWheel Cardstock and backed it with a second die cut for stability. The mouth is Indigo, and the arms are Blue Spruce.
The baseball cap combines Blush, Tutu, and Wild Berry. For the sunglasses, I used Mirror Gold, Mirror Black, and Seaside for the highlight.
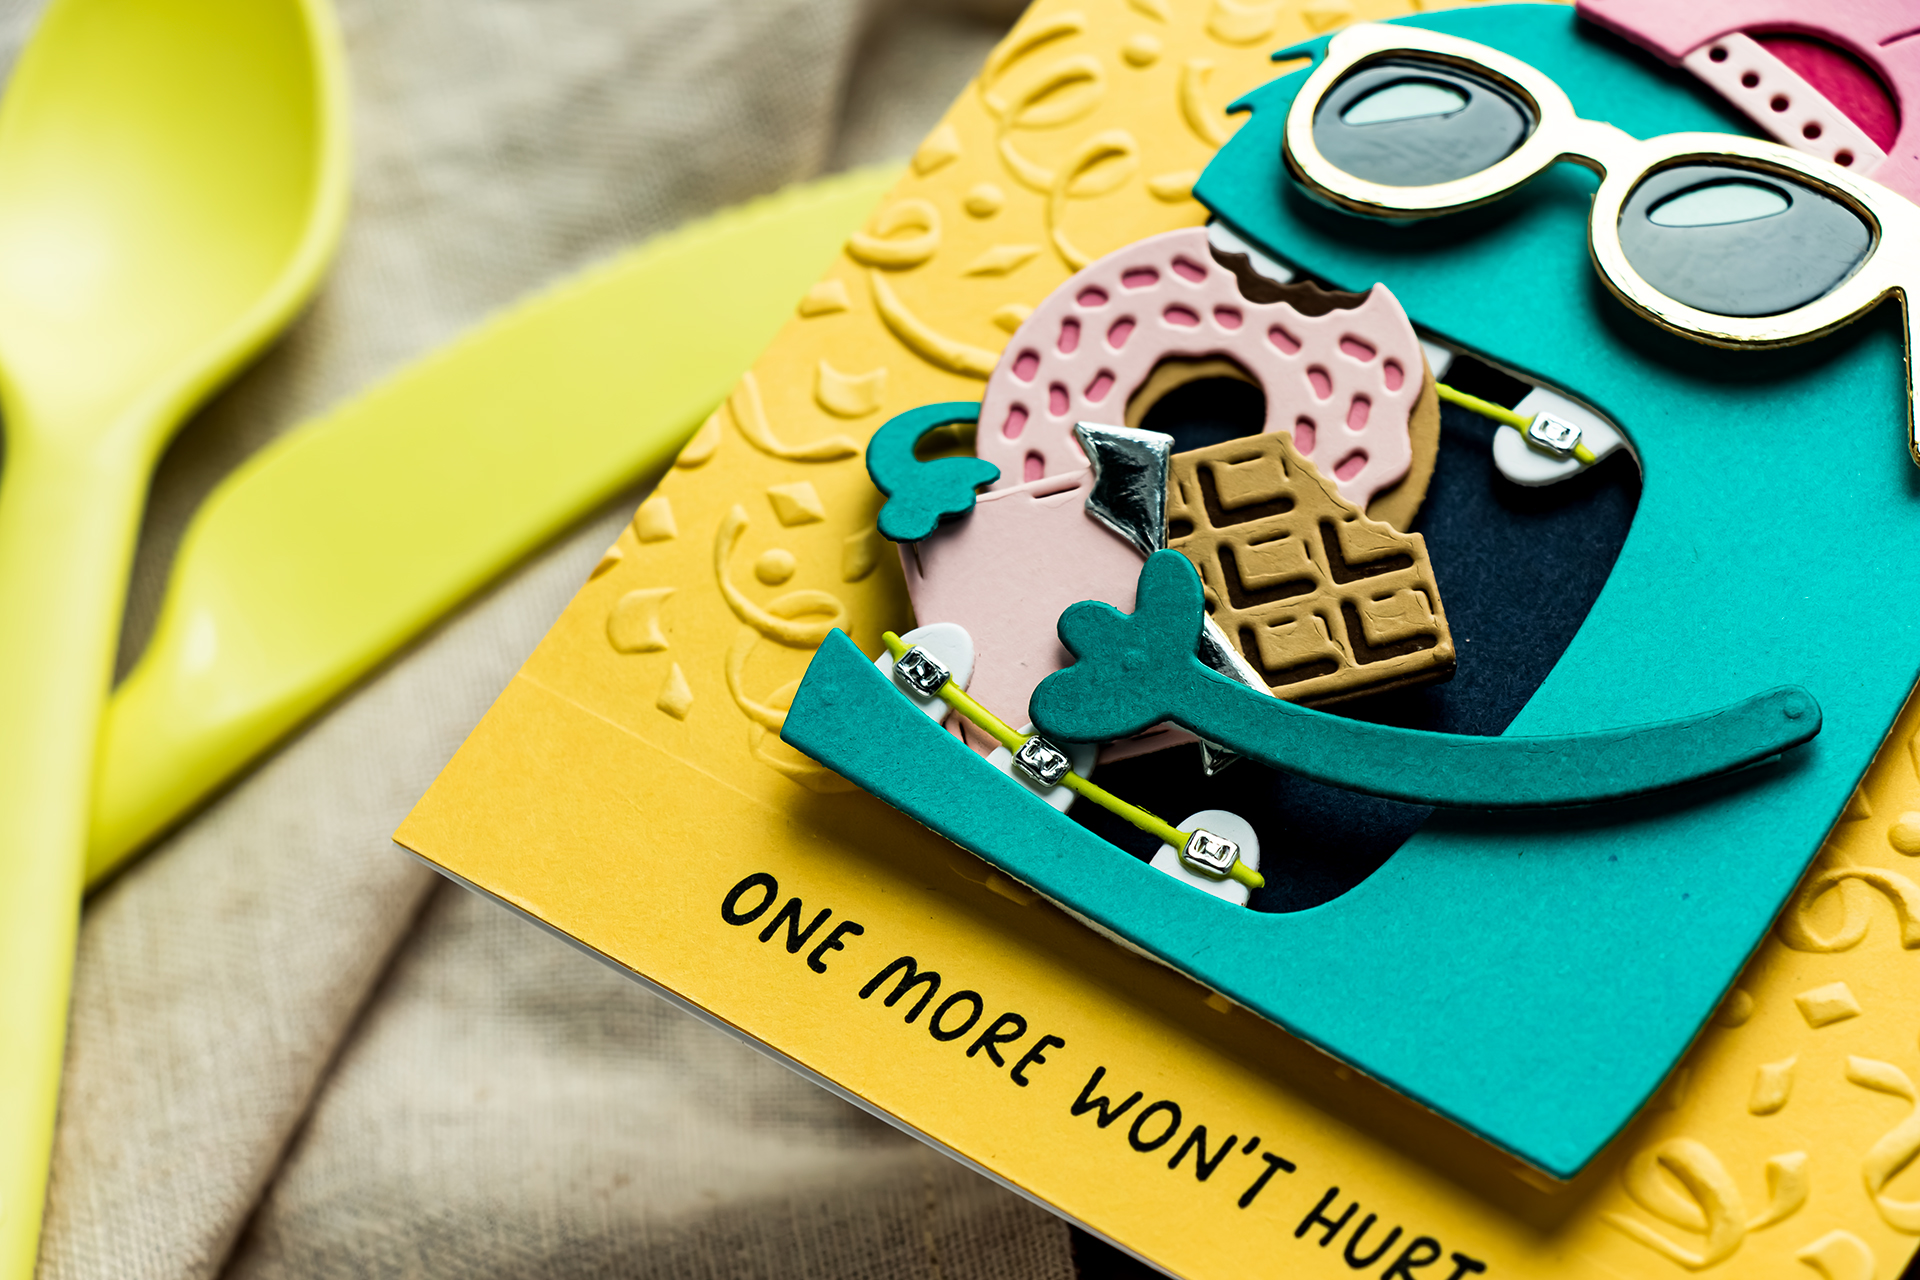
The braces were cut from Peridot cardstock with silver cardstock for the metal portion. Braces can include colorful rubber bands, so pink, teal, purple, or another favorite color would also work.
The braces contain very small pieces. Use fine-tip tweezers or a wax pickup tool to position them accurately.
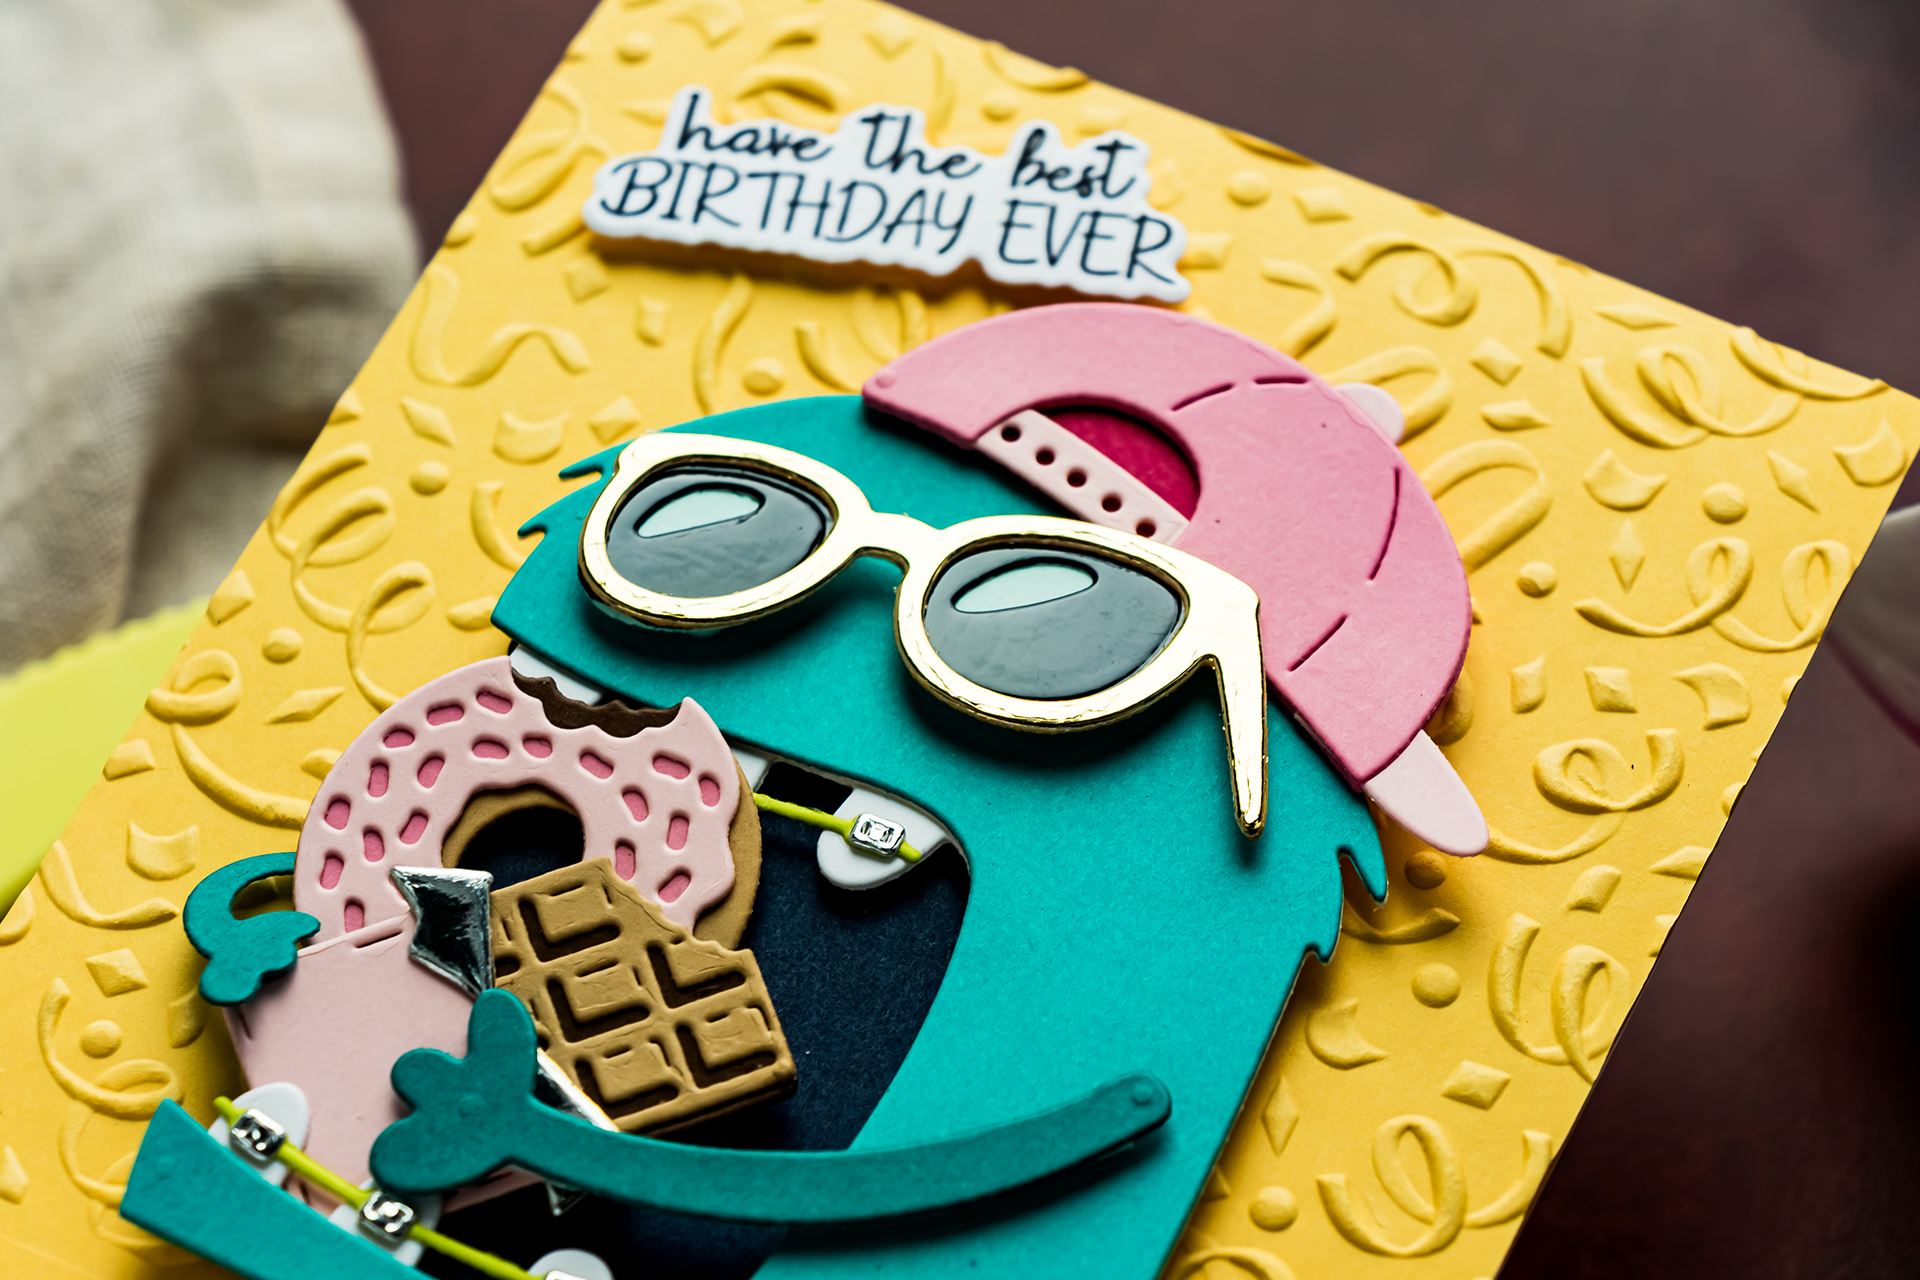
For an extra joke, you could add a tiny piece of cardstock “food” caught in the braces. If you have ever worn braces, you already understand.
Coordinate the Snacks and Background
The monster holds a donut and chocolate bar from the One More Bite set. The pink in the snacks repeats the pink in the baseball cap, while the yellow works with the teal and green accents.
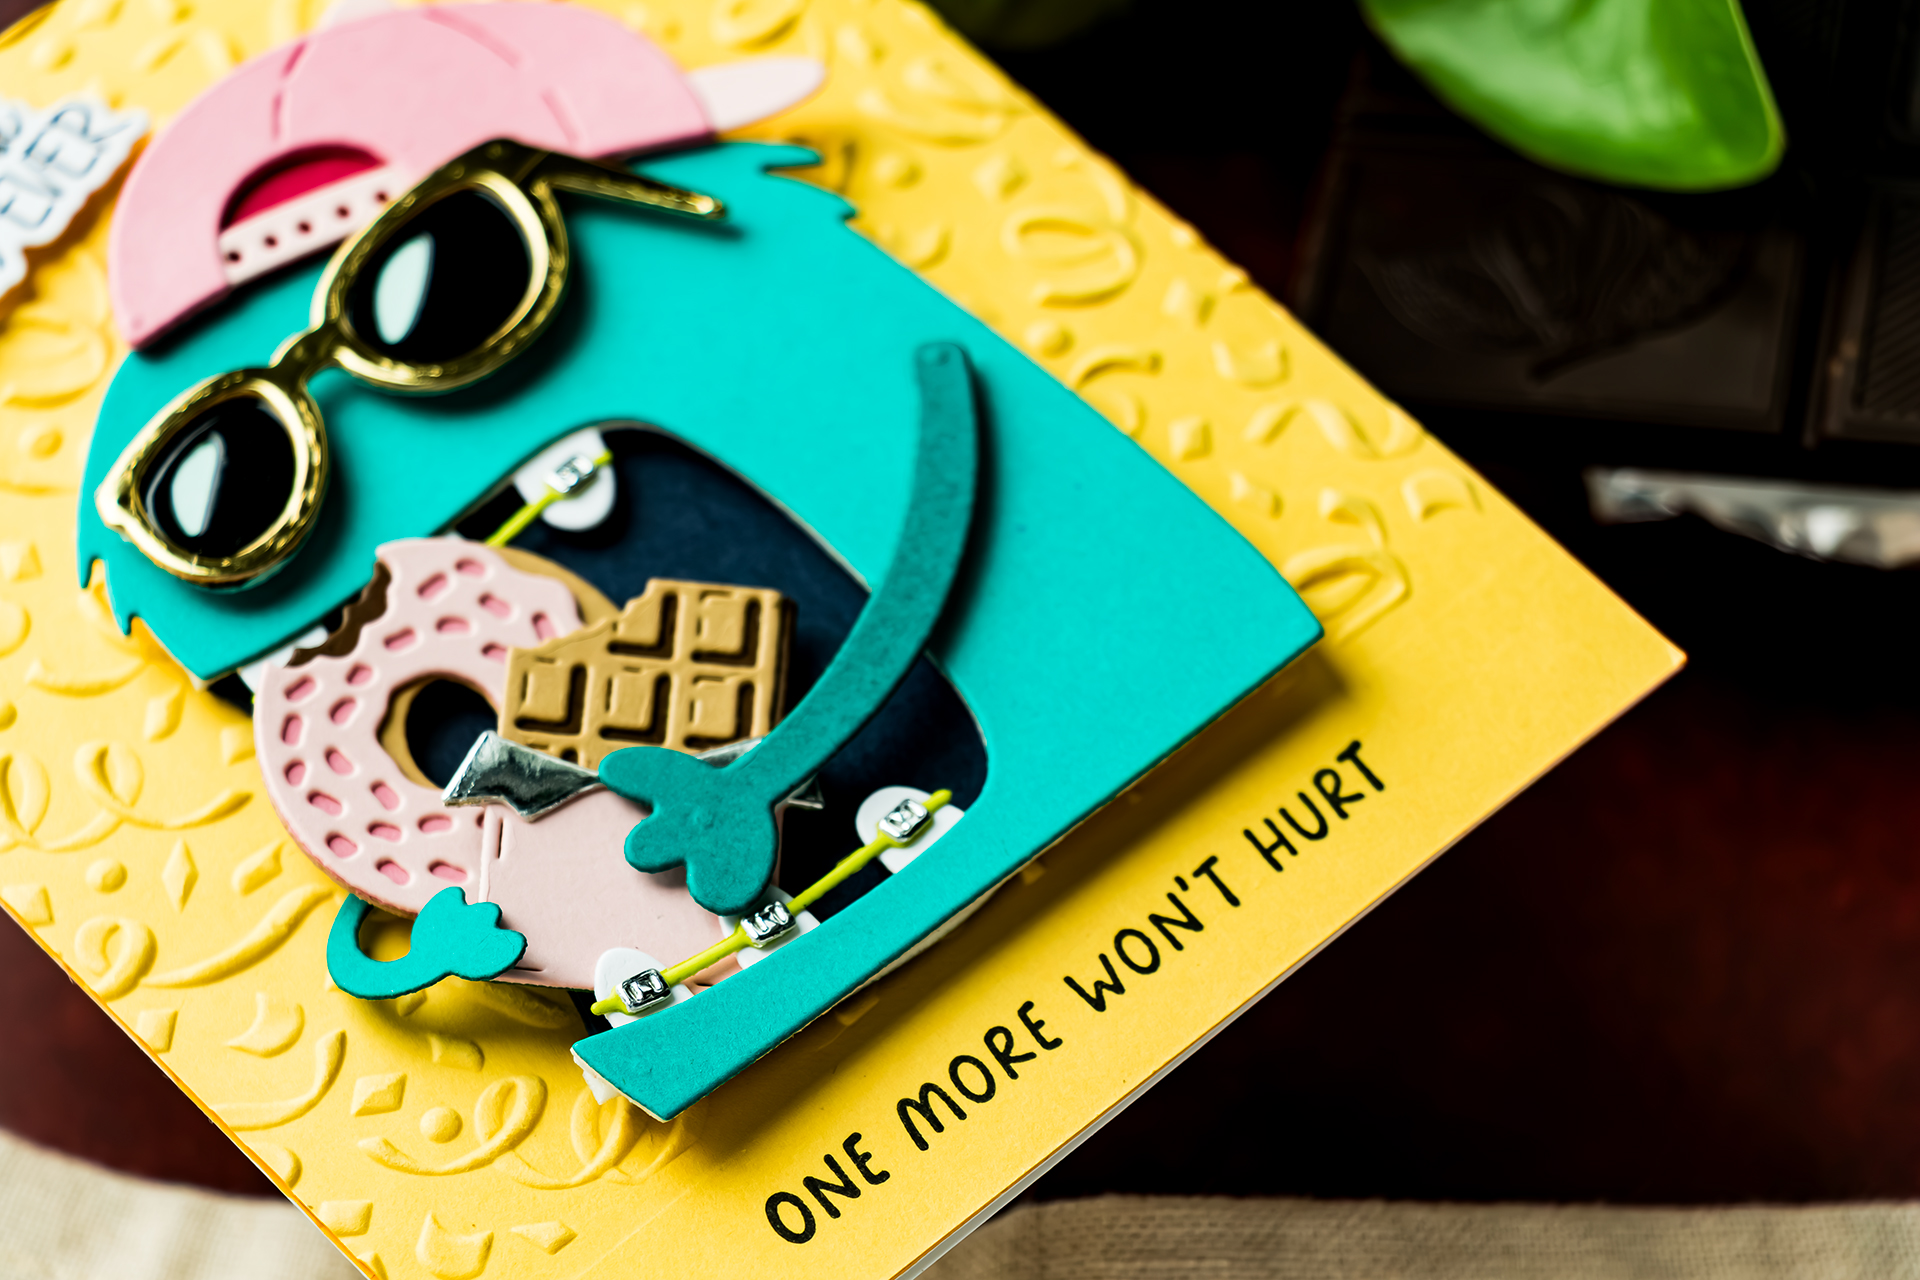
I initially used a partially embossed Saffron background, but it felt too strong and visually busy. I replaced it with a softer Beeswax panel and changed the lower greeting to a slimmer, one-line sentiment.
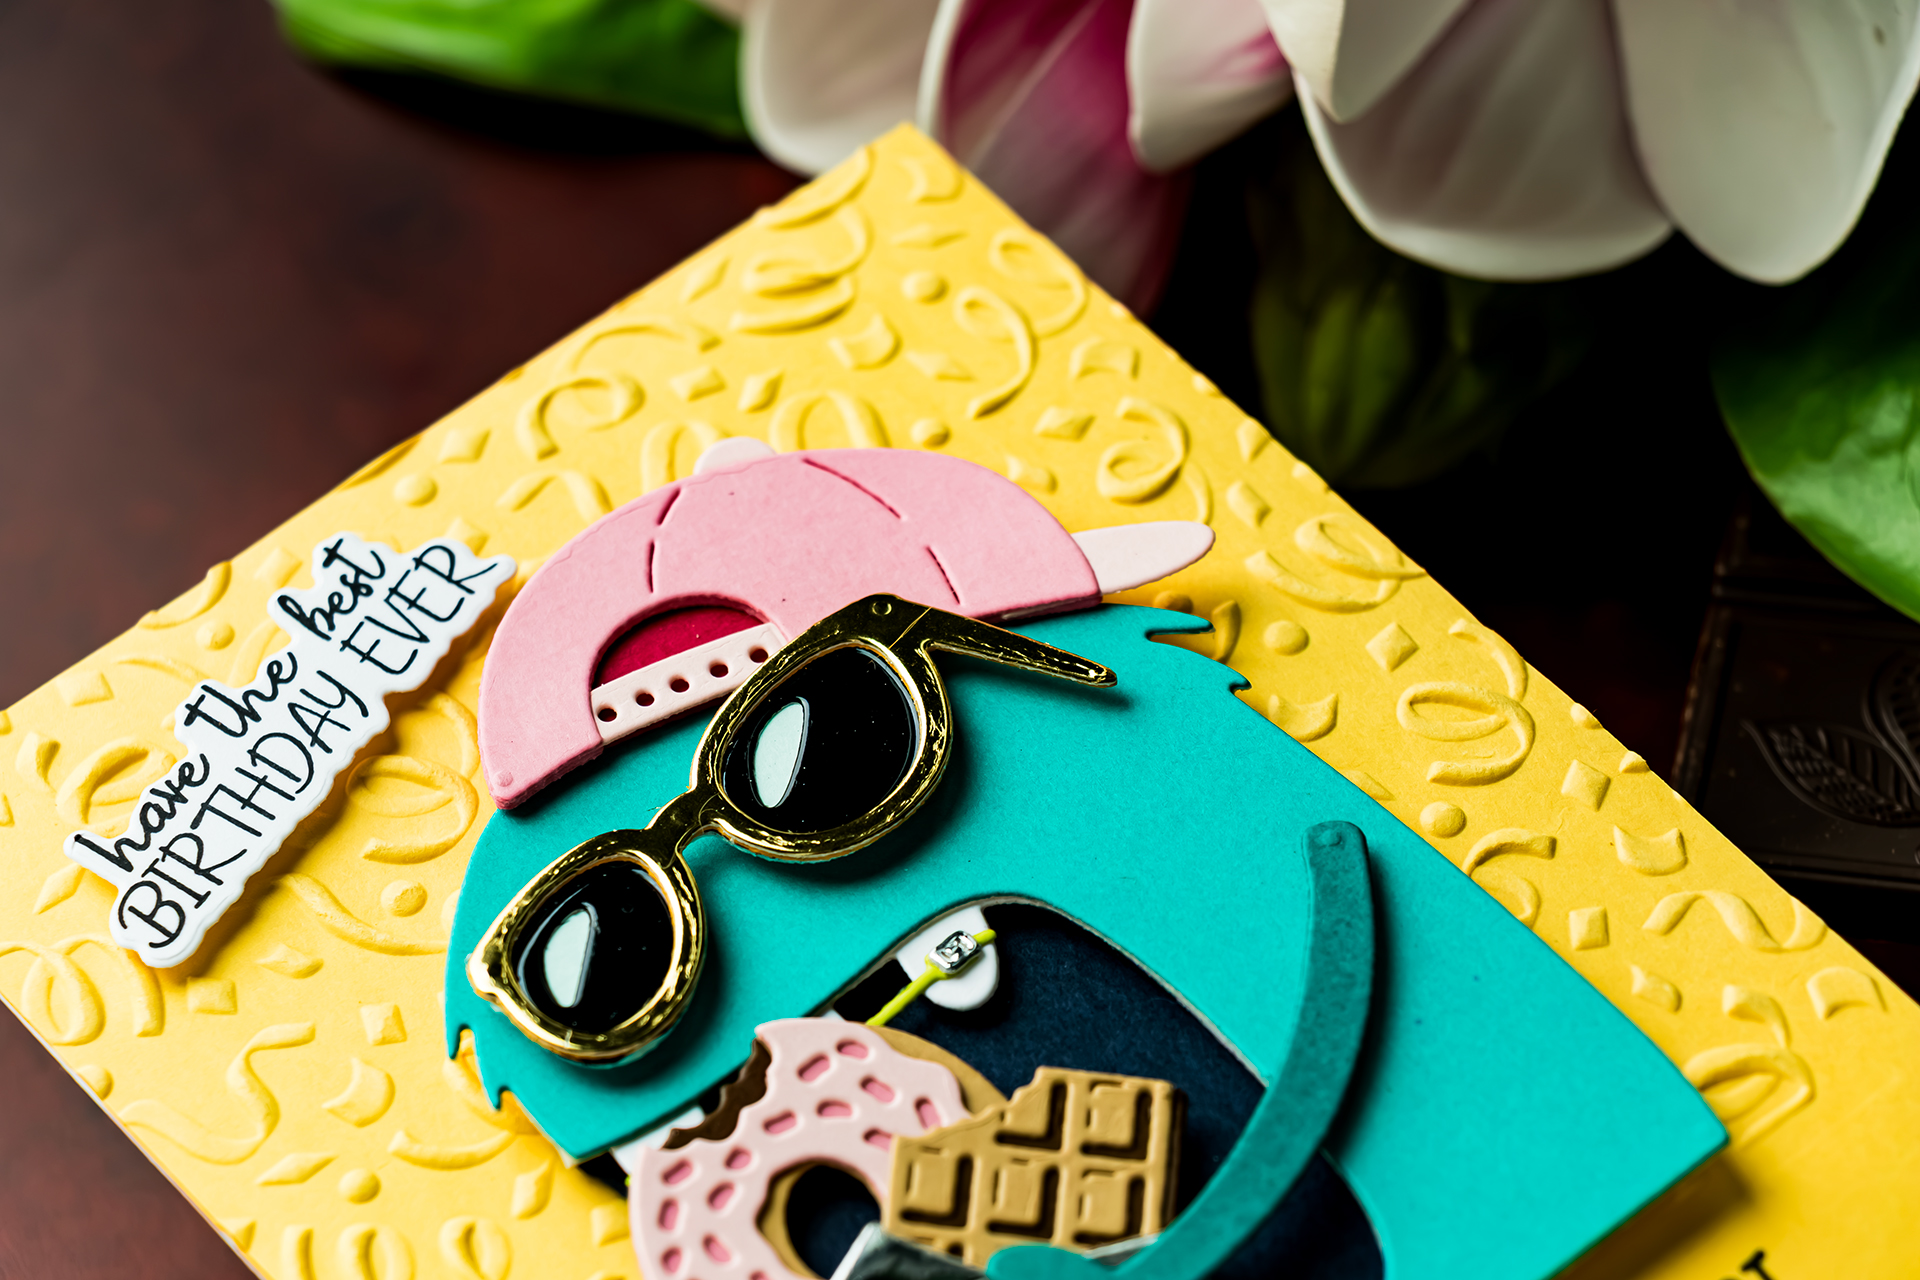
This allowed the colorful monster and accessories to remain the focus.
The finished sentiments read:
- Have the Best Birthday Ever
- One More Won’t Hurt
Card 2 – Official Snack Inspector
The second monster holds a layered turkey leg and wears the playful propeller hat. The monster is cut from Chiffon cardstock with a Blush mouth. The turkey leg has three separate parts: the bone, the meat, and the bitten section.
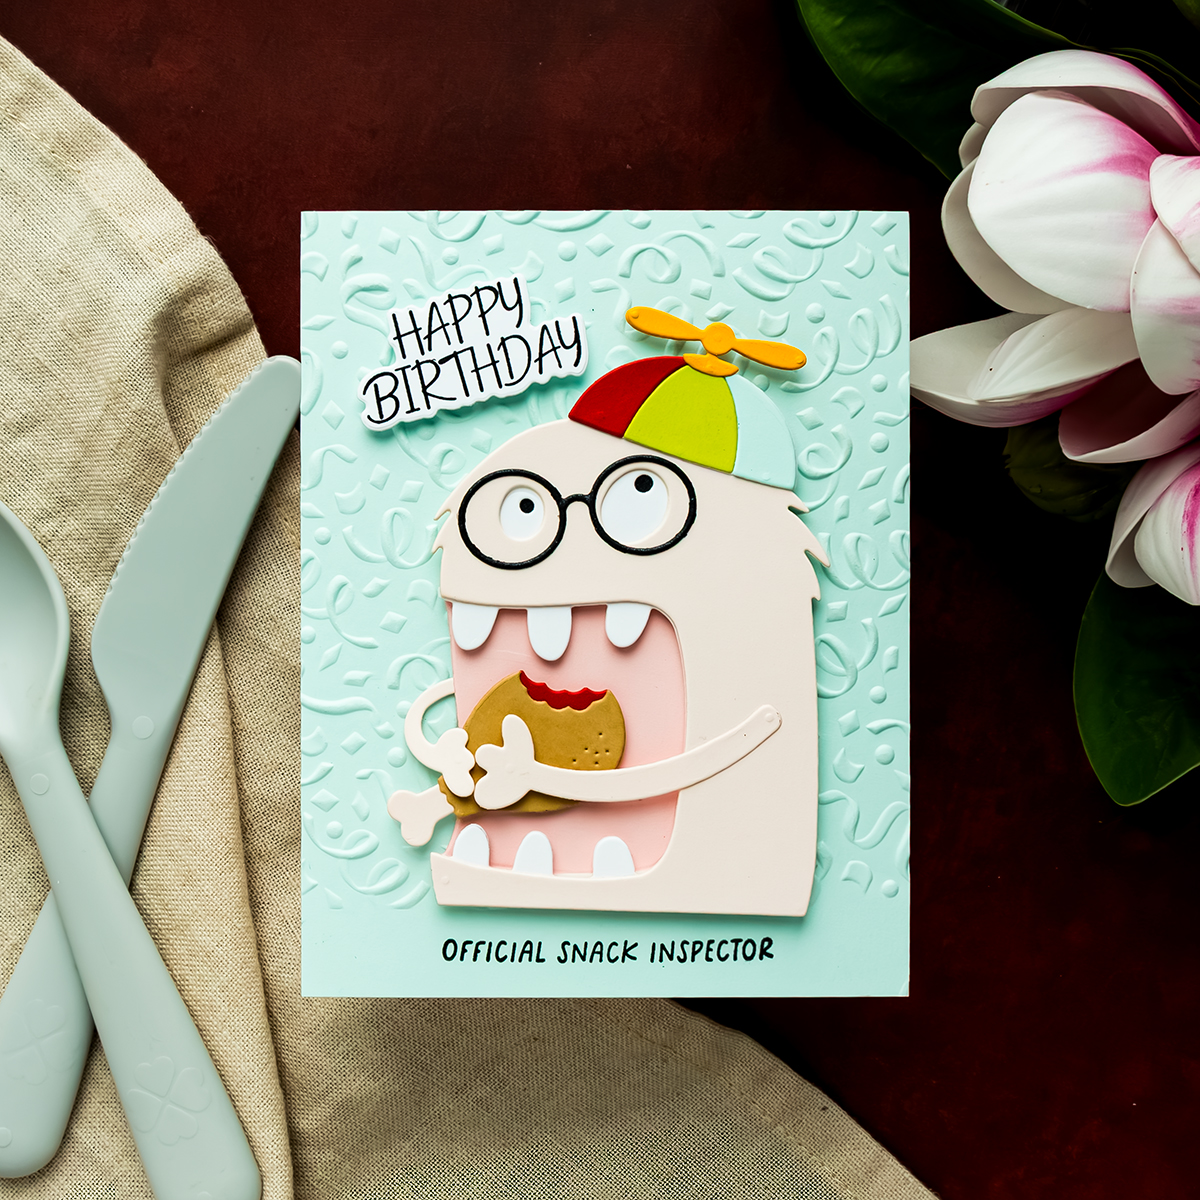
I used red for part of the turkey leg because the same red appears in the hat. Repeating that color in two areas helps the design feel intentional.
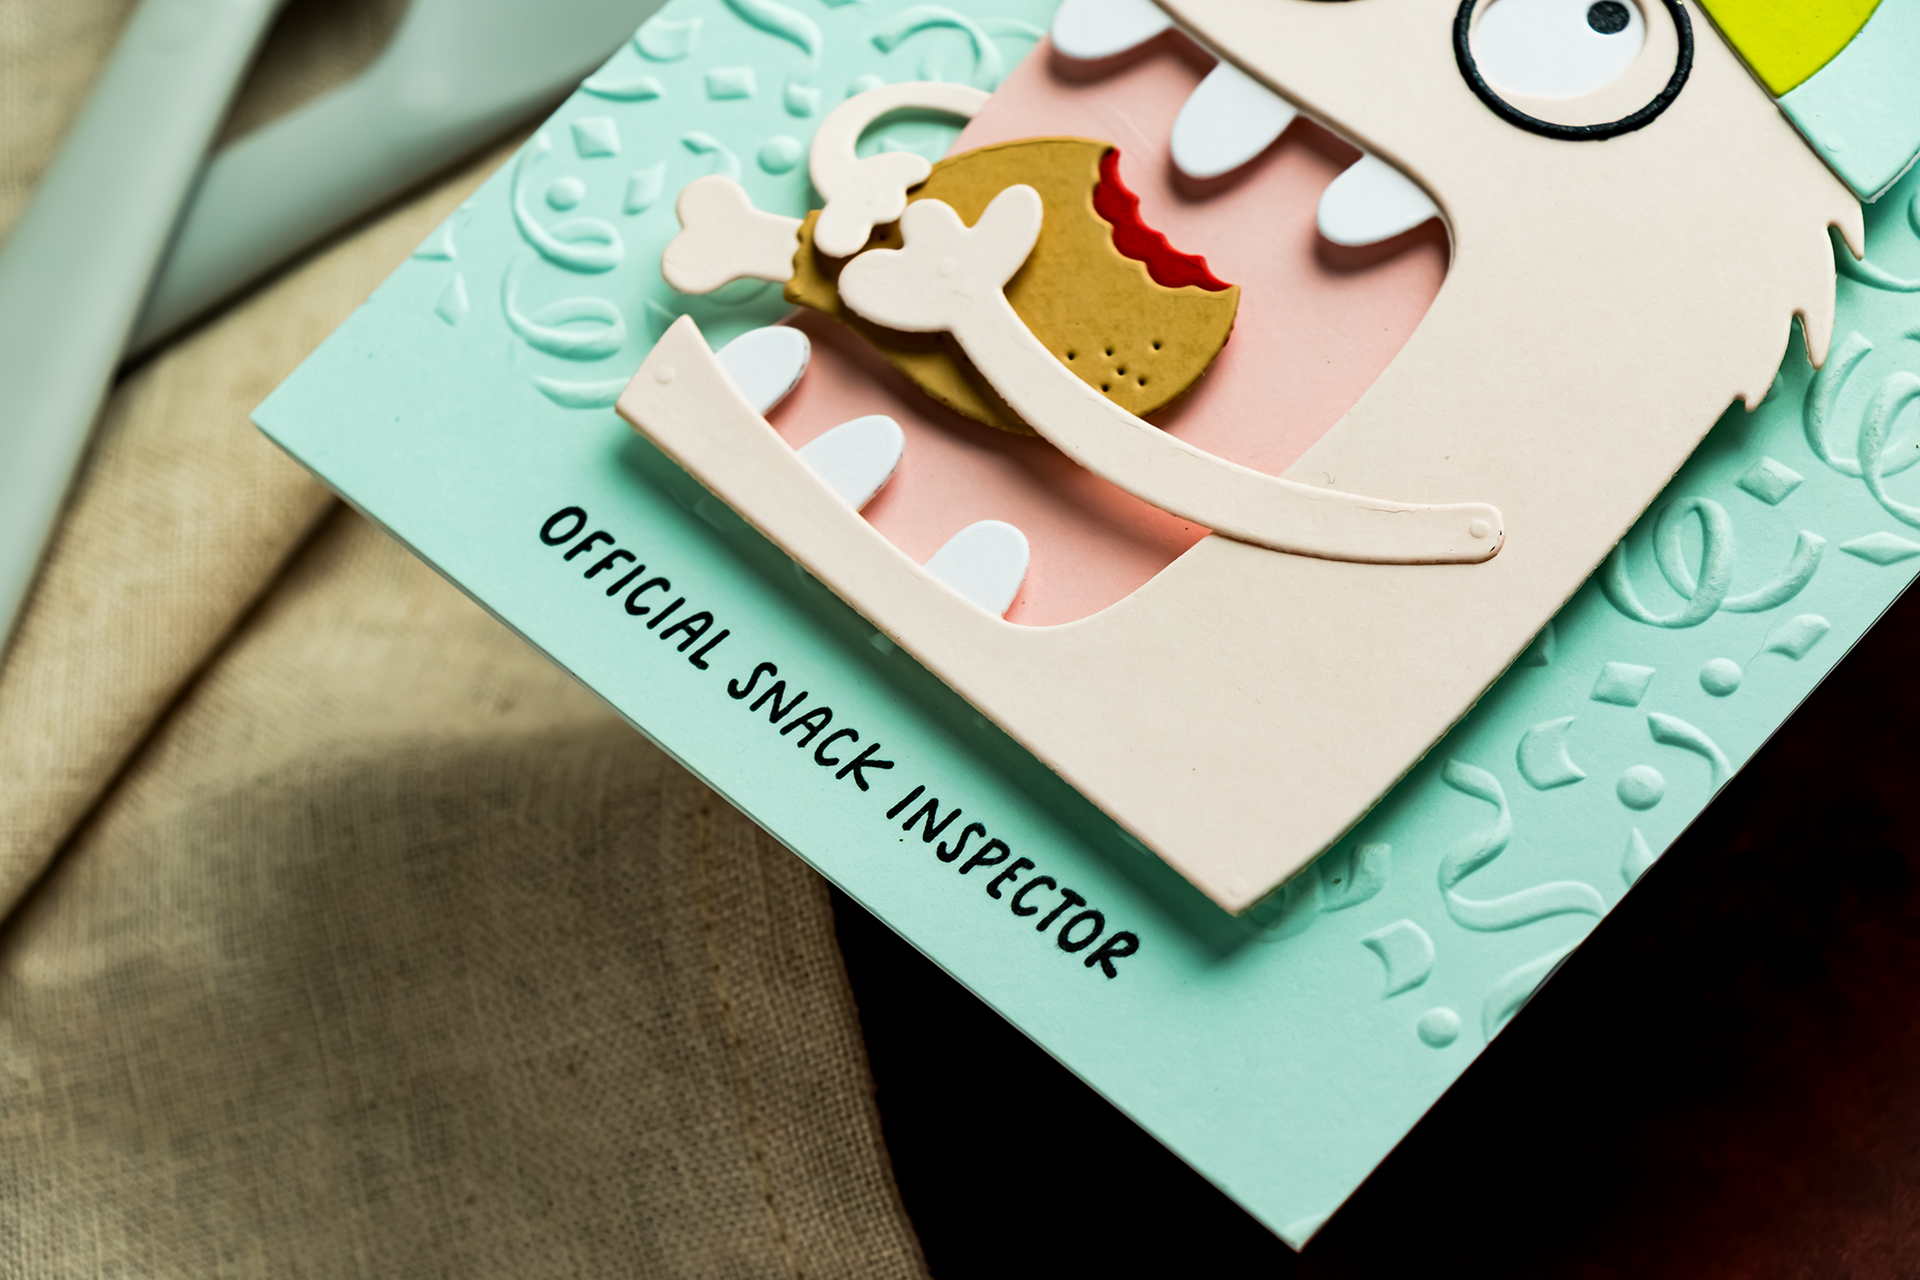
The light blue Seaside background coordinates with the teal accents in the character and accessories. Although the finished card contains several bright colors, those colors repeat throughout the design rather than appearing only once.
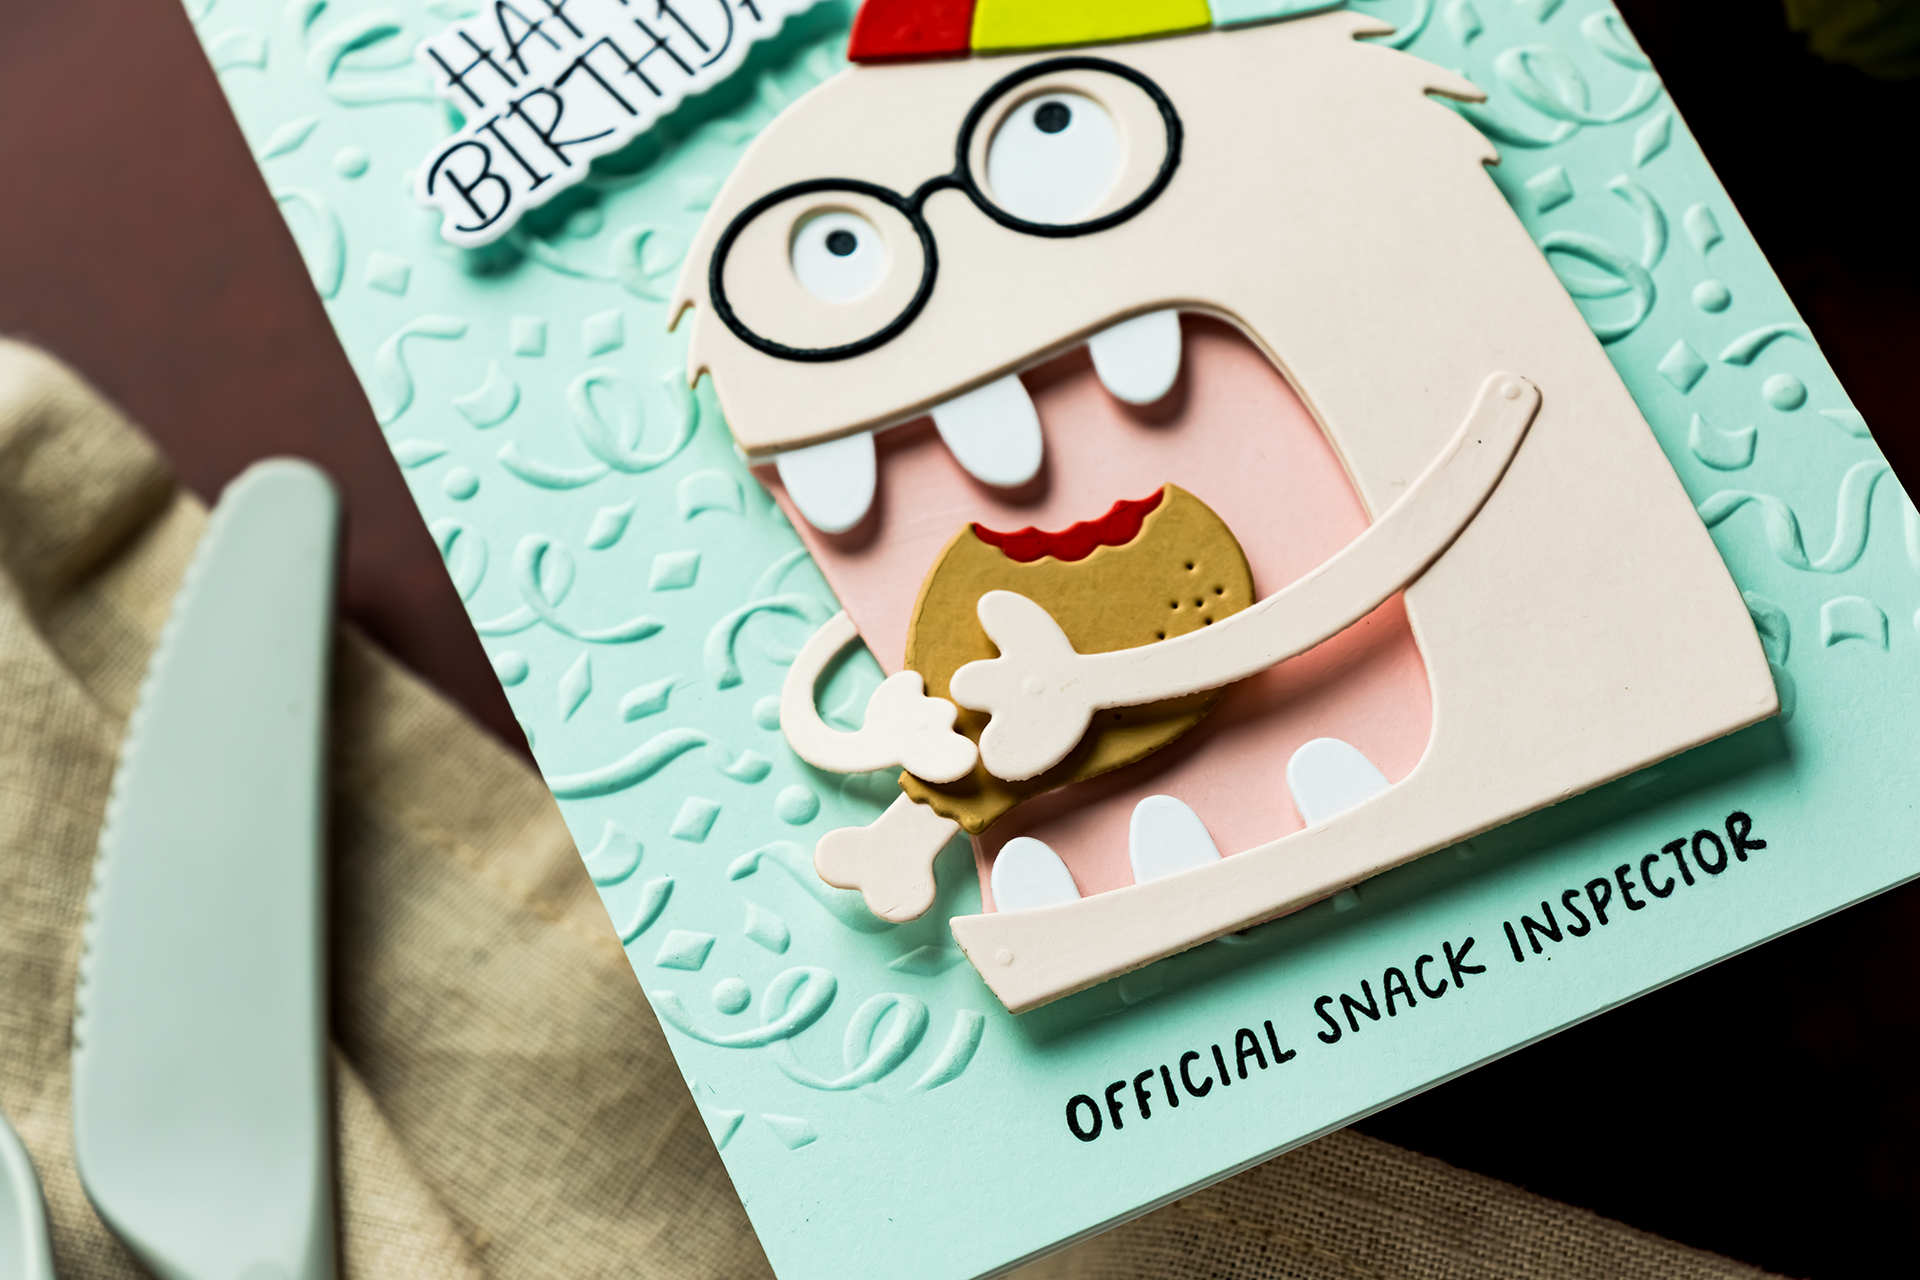
After placing the turkey leg inside the mouth, I attached the two arms with liquid adhesive near the shoulders and foam adhesive near the hands.
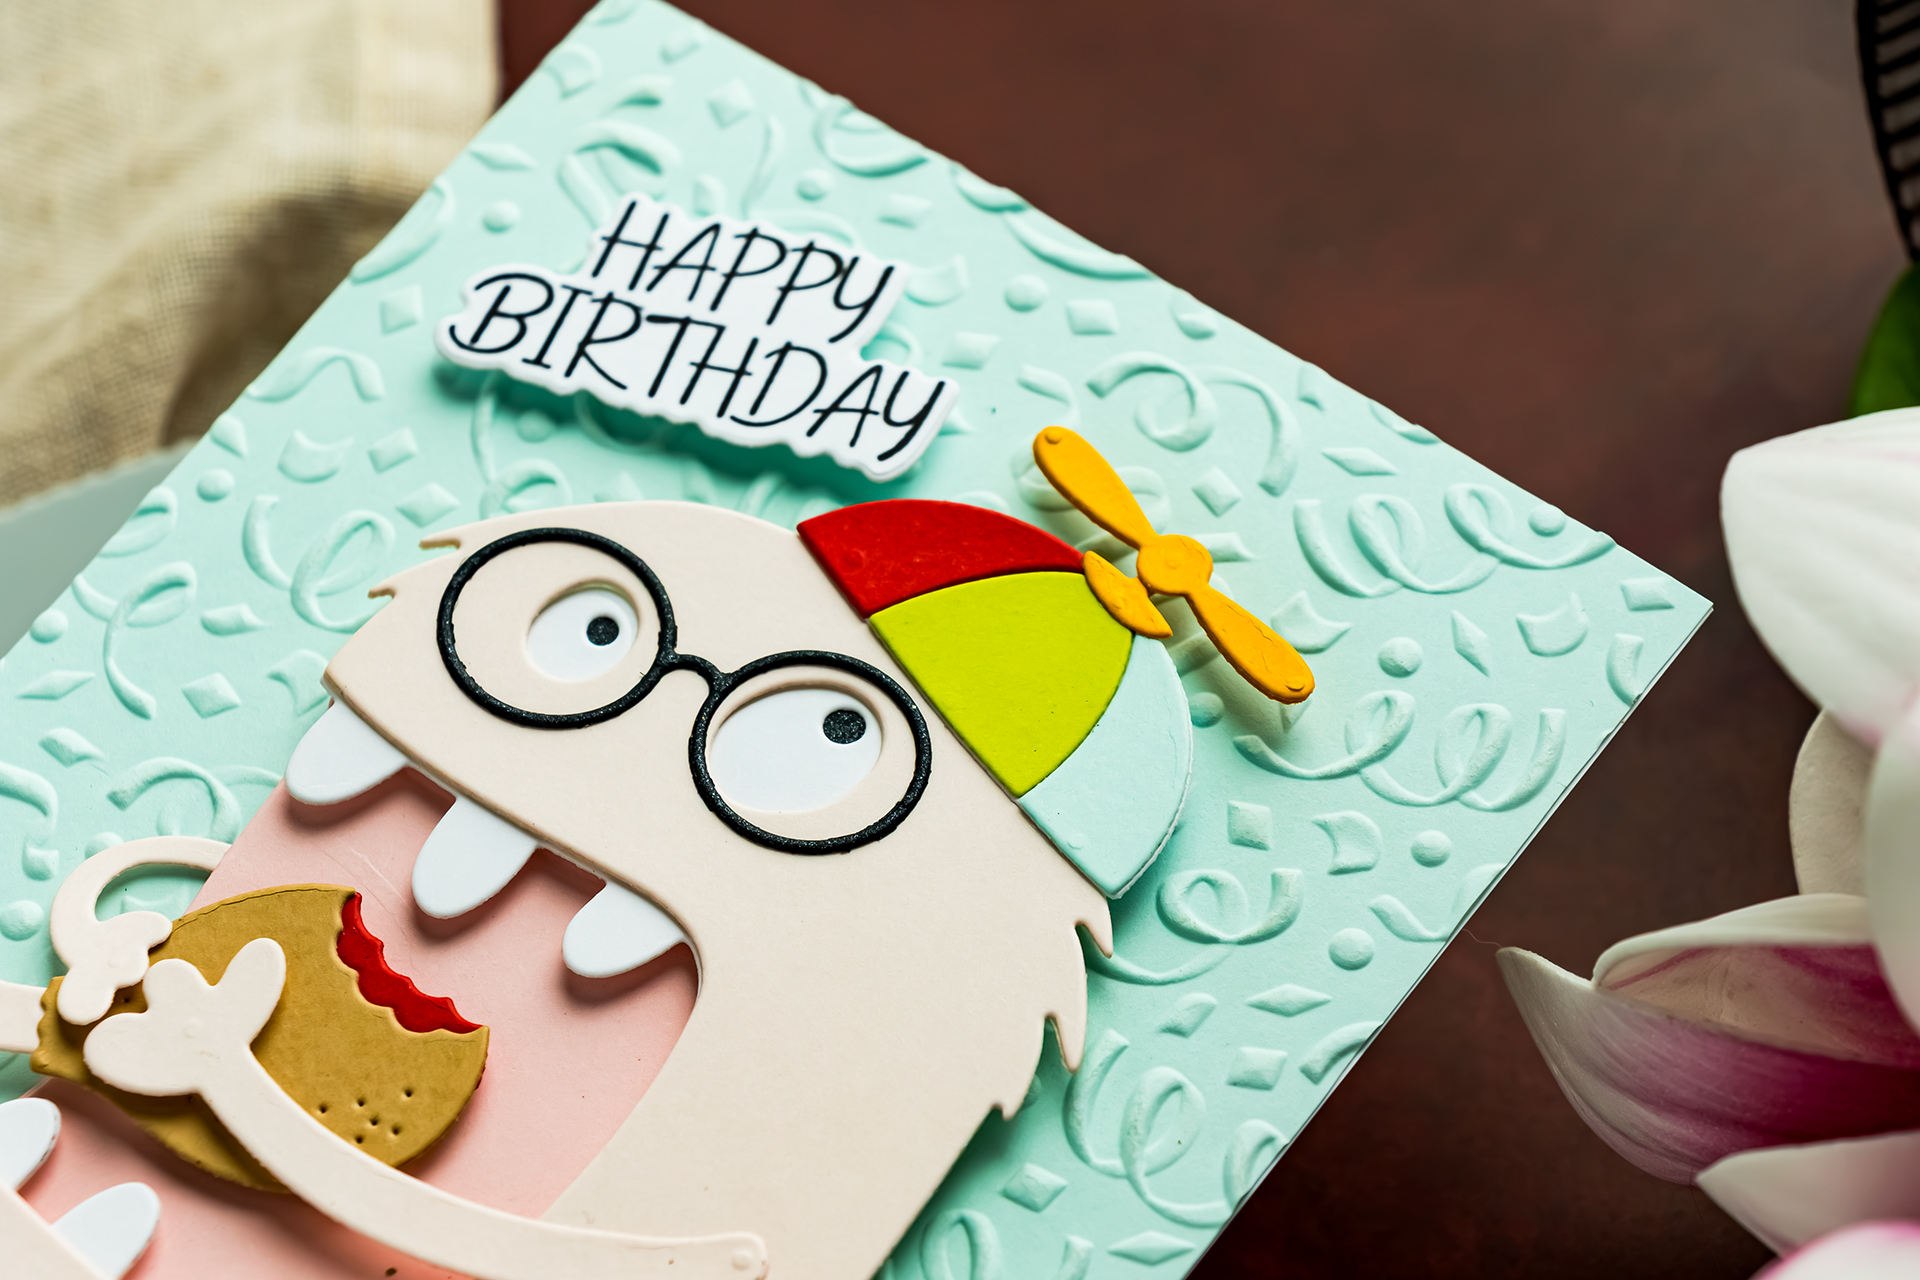
The sentiments read:
- HBD
- Official Snack Inspector
Designer tip: Colorful does not have to mean random. Repeat each important color in at least two areas of the card to create a visual connection between the accessories, food, character, and background.
Card 3 – Have the Sweetest Birthday
The third card features three shades of teal, a large sun hat, sunglasses, a donut, and a chocolate sandwich cookie.
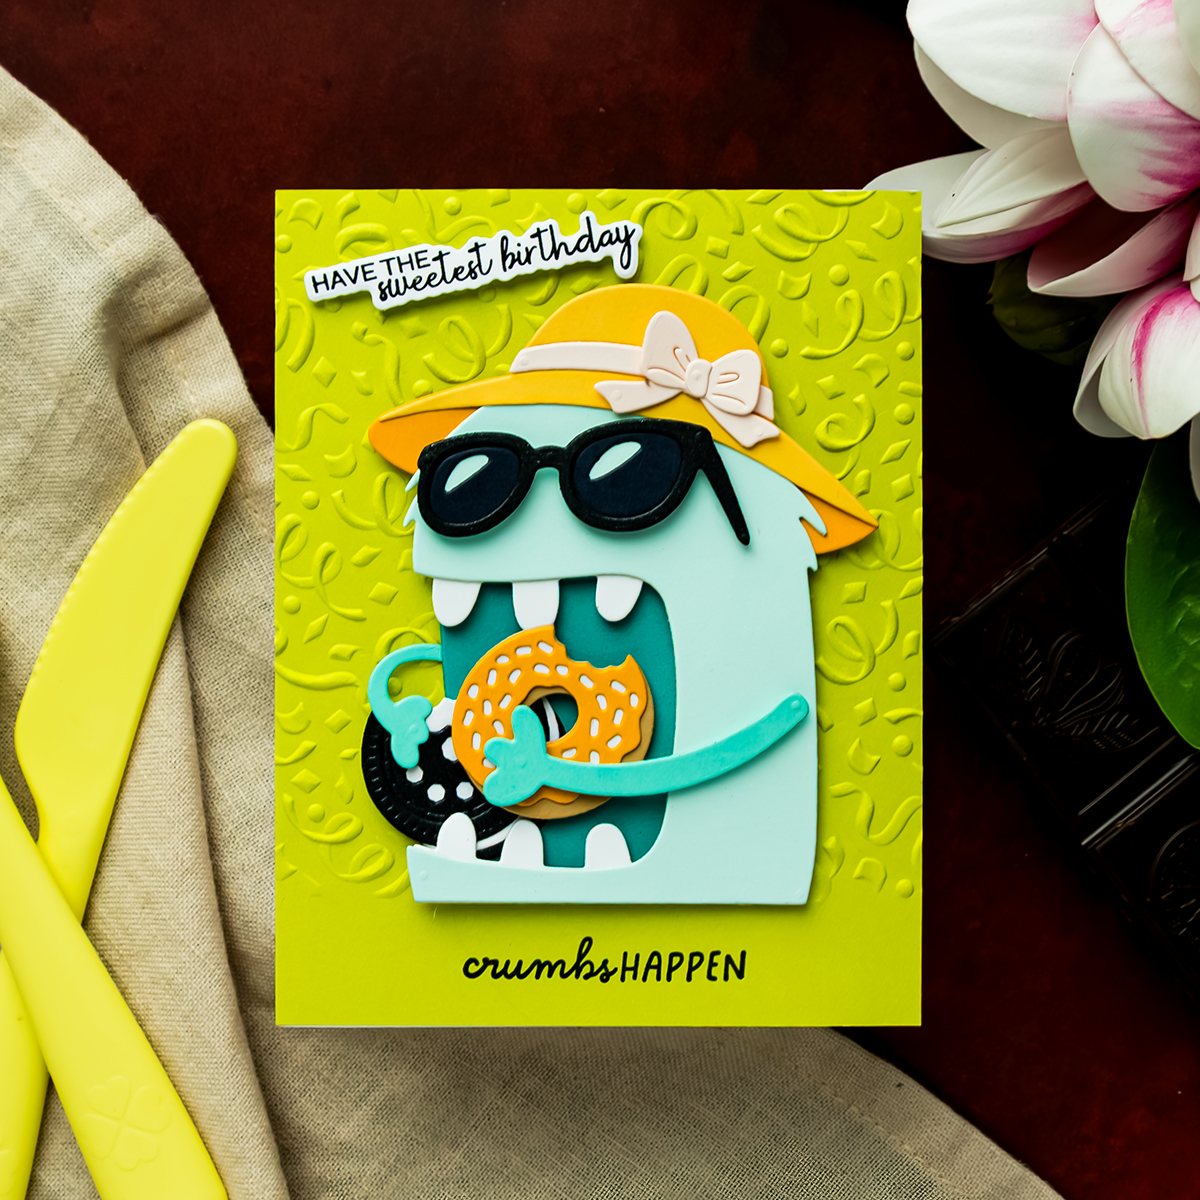
The monster is Seaside, the recessed mouth is Teal Topaz, and the arms are Waterfall. Using several shades from the same color family adds variety while keeping the palette cohesive.
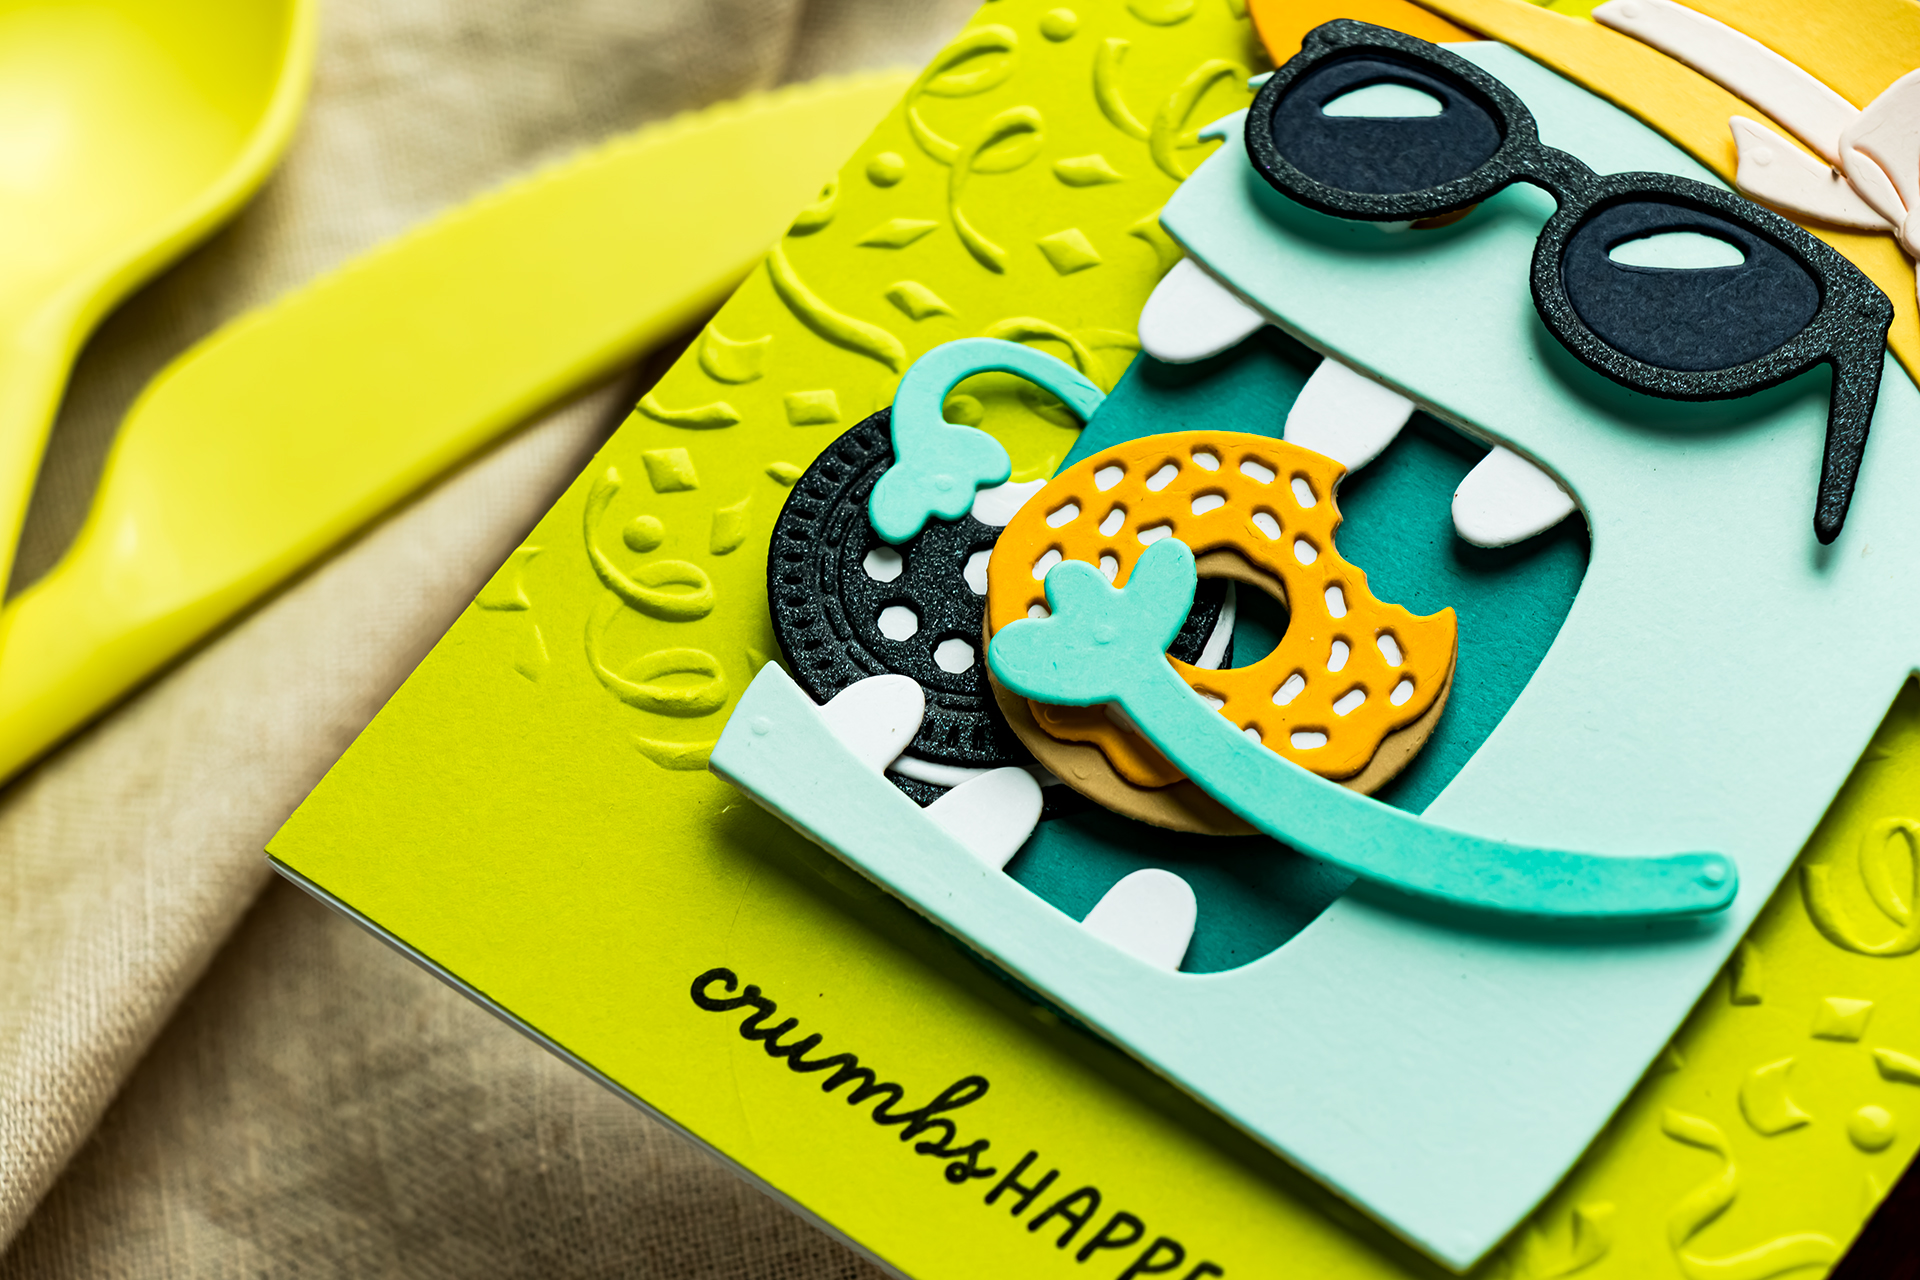
The sunglasses combine Indigo, Seaside, and Brushed Black. Because the sunglasses cover the eye area completely, I did not add the separate eyes.
Assemble the Layered Sun Hat
The sun hat includes an upper section, brim, decorative band, and bow. Start by attaching the band and bow to the upper portion.
Next, adhere the upper portion to Chompster. Add the brim last because it overlaps both the hat and the monster.
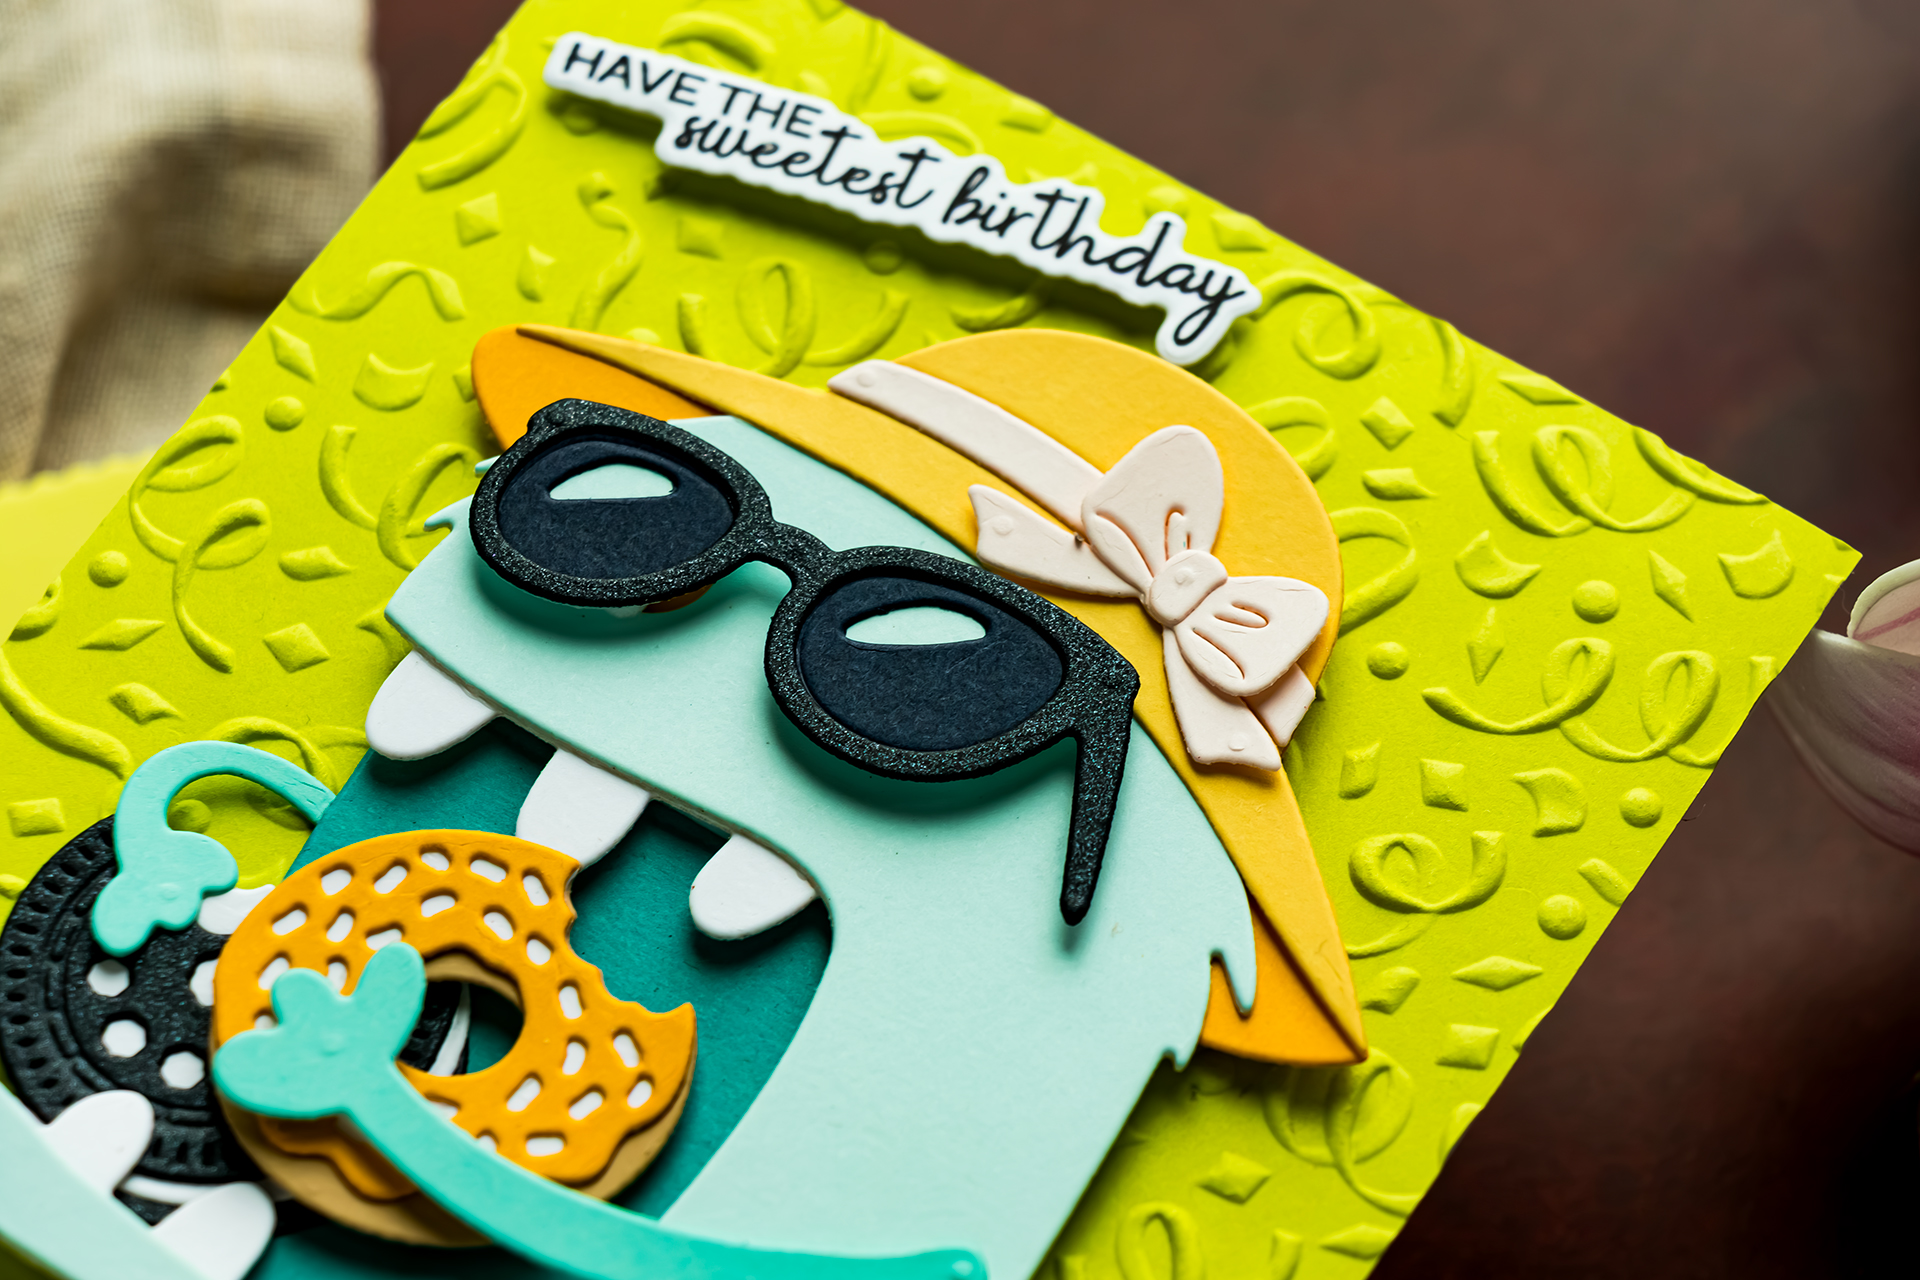
The yellow hat coordinates with the yellow frosting on the donut. The black-and-white cookie repeats the black-and-white combination in the sunglasses and teeth.
The separate arms make it possible to position the donut and cookie at different angles so Chompster appears to be trying to eat both at once.
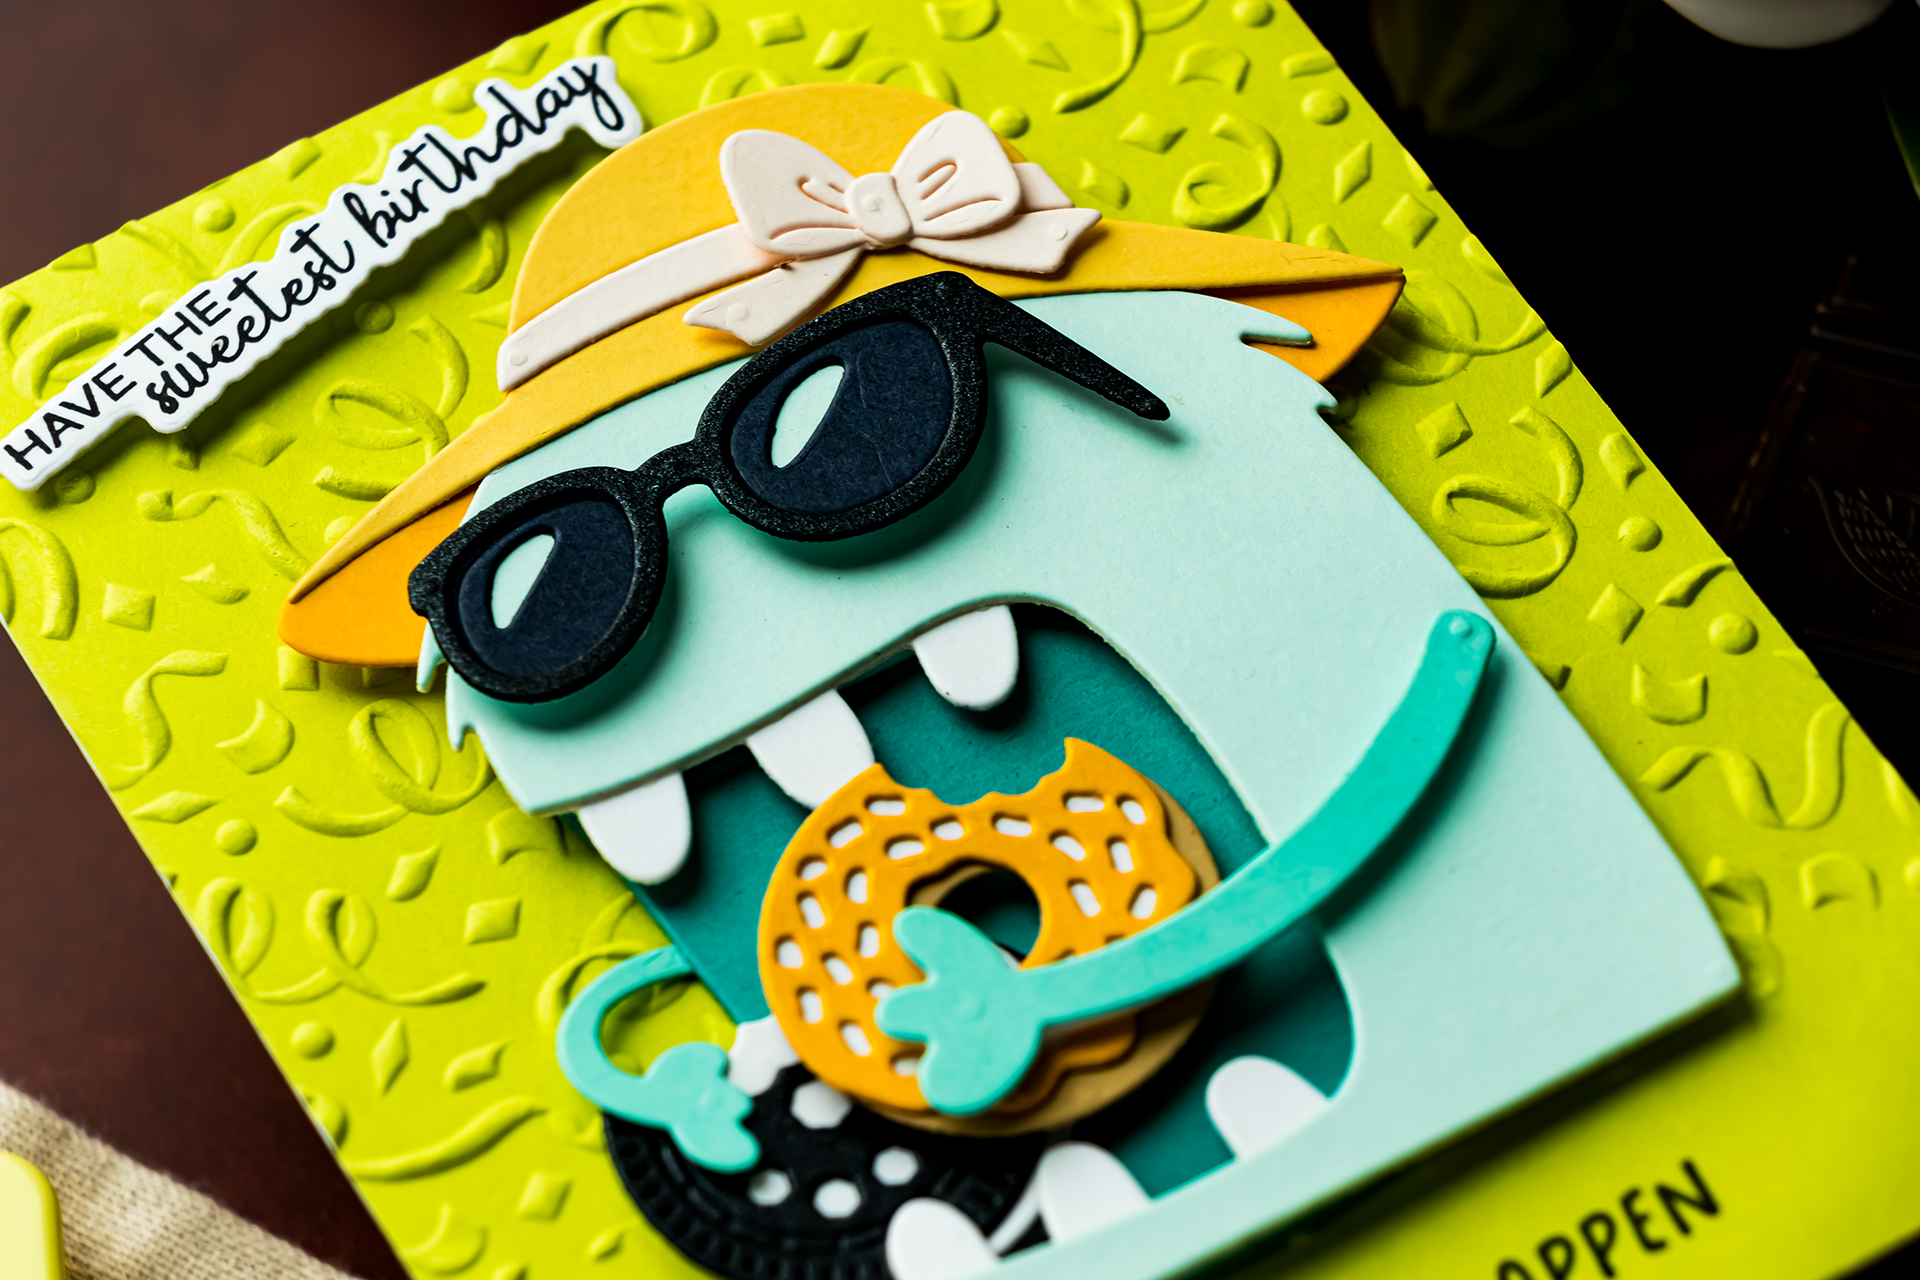
The sentiments read:
- Have the Sweetest Birthday
- Crumbs Happen
Card 4 – Cowboy Monster with Wine
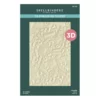
The fourth card combines a cowboy hat, glasses, a spilling wine glass, and a piece of cake over an embossed pasta background. I used Oceanside ColorWheel Cardstock for the background and embossed it with the Al Dente 3D Embossing Folder from the Buon Appetito Collection.
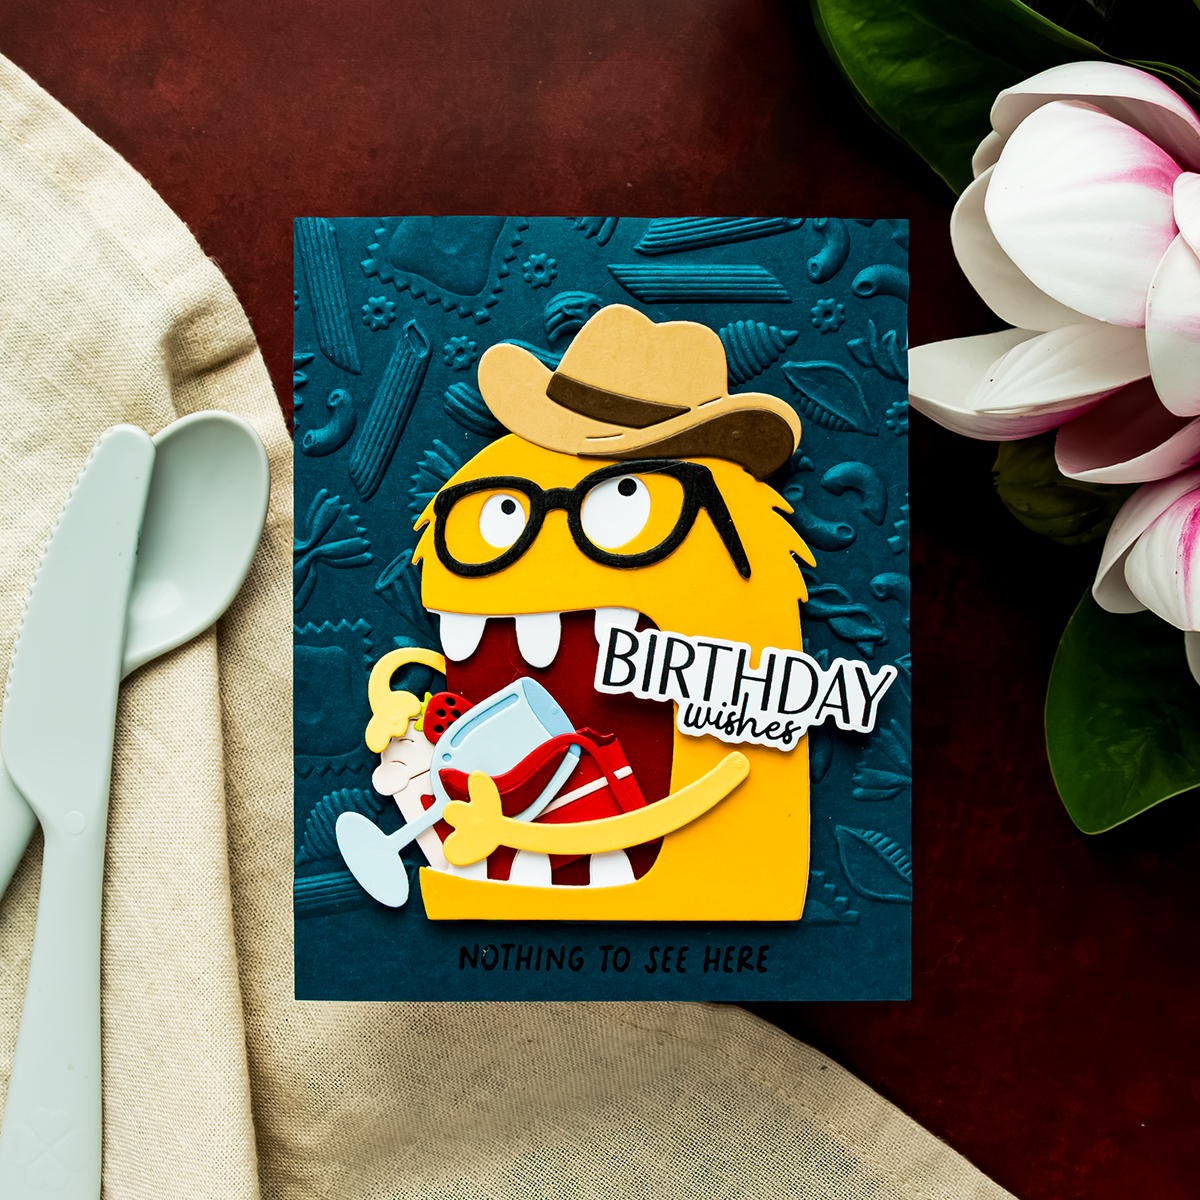
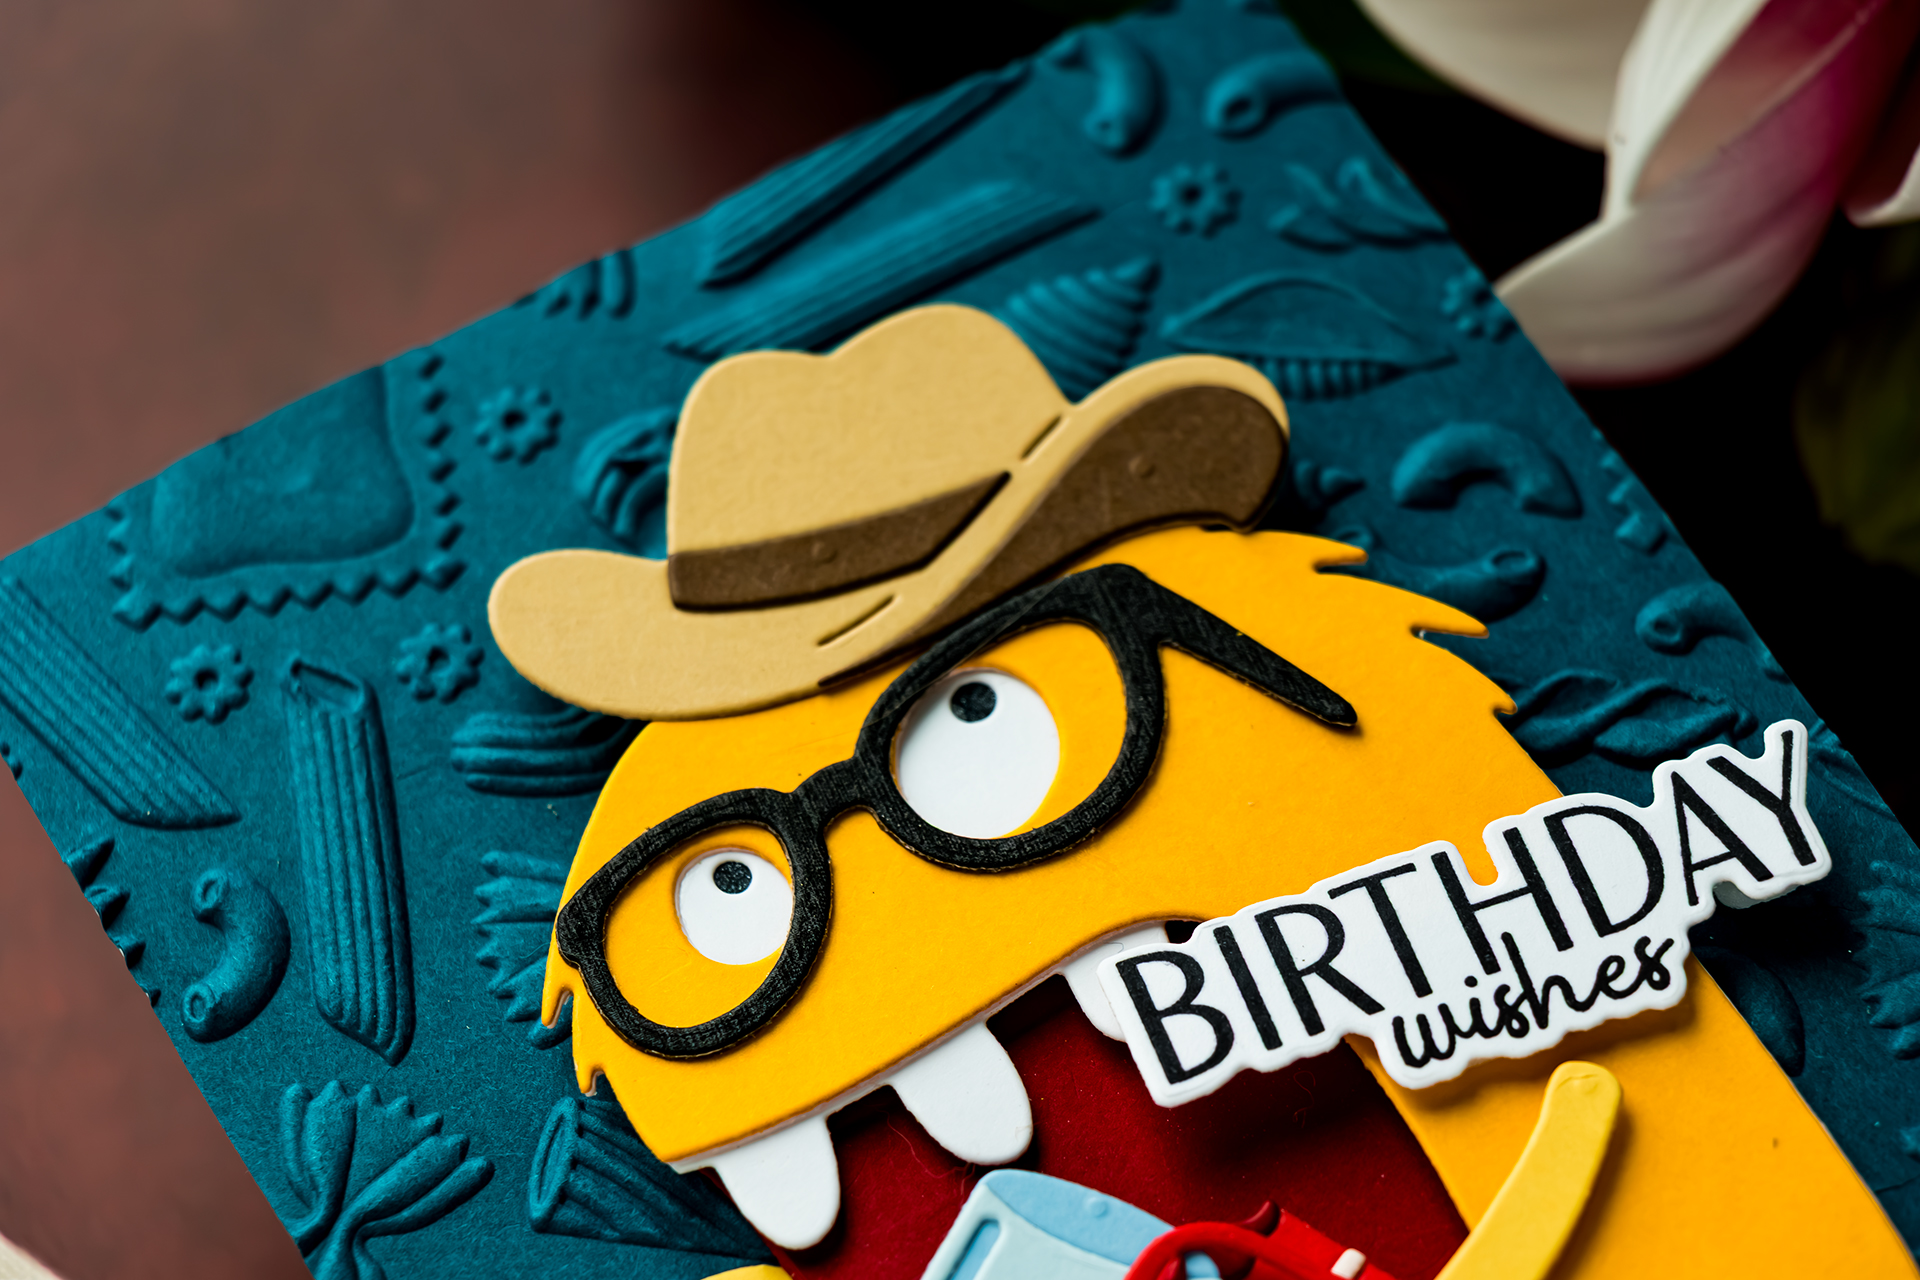
The monster is cut from Saffron cardstock. This bright yellow creates strong contrast against the dark teal background. The glasses are made from the sunglasses die without the insert. By omitting the inner lens pieces, the accessory becomes a different style of open glasses.
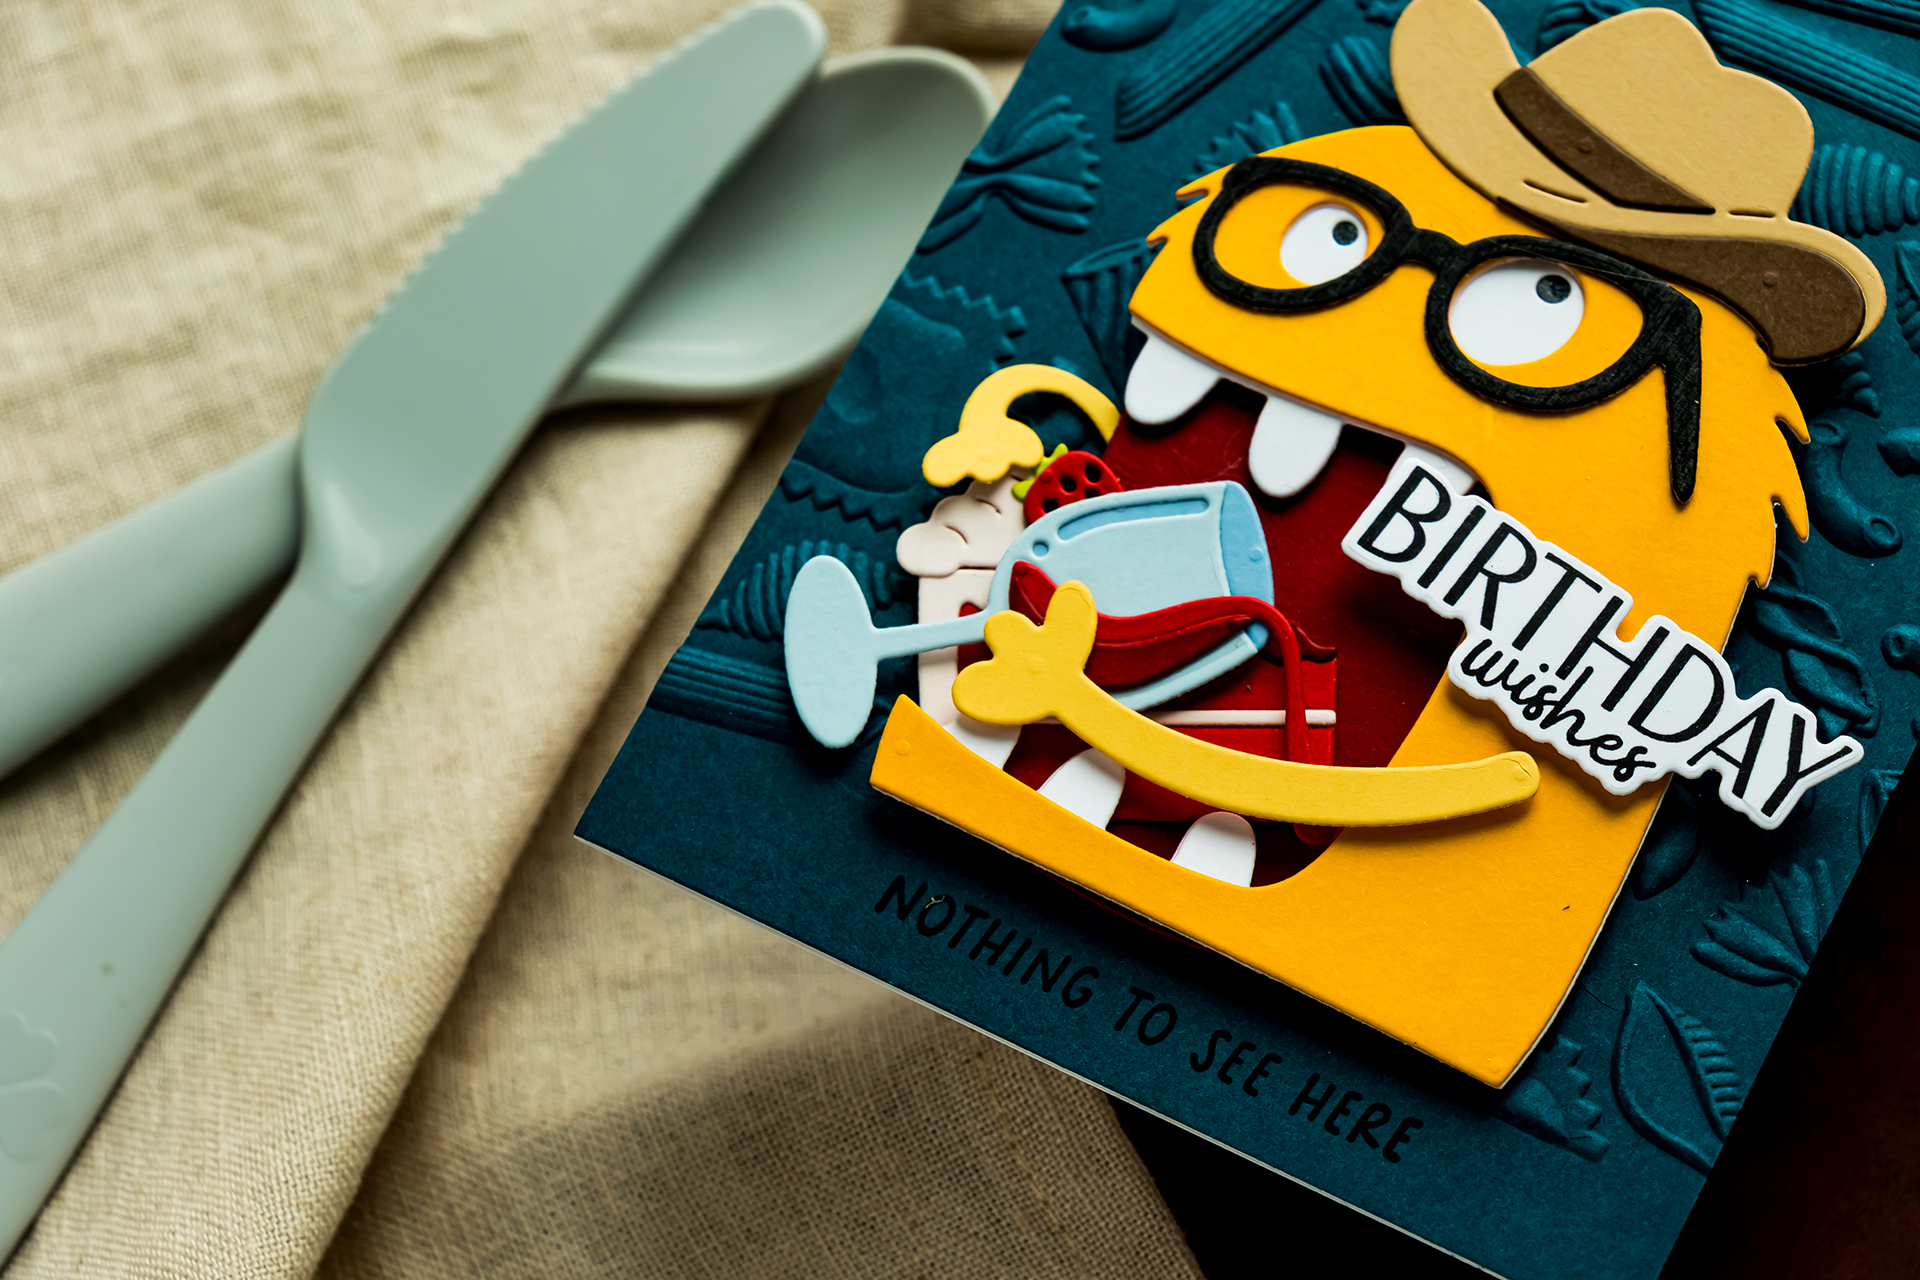
The wine glass is positioned so the wine appears to spill directly into Chompster’s mouth. I also added a piece of cake because apparently wine alone was not enough.
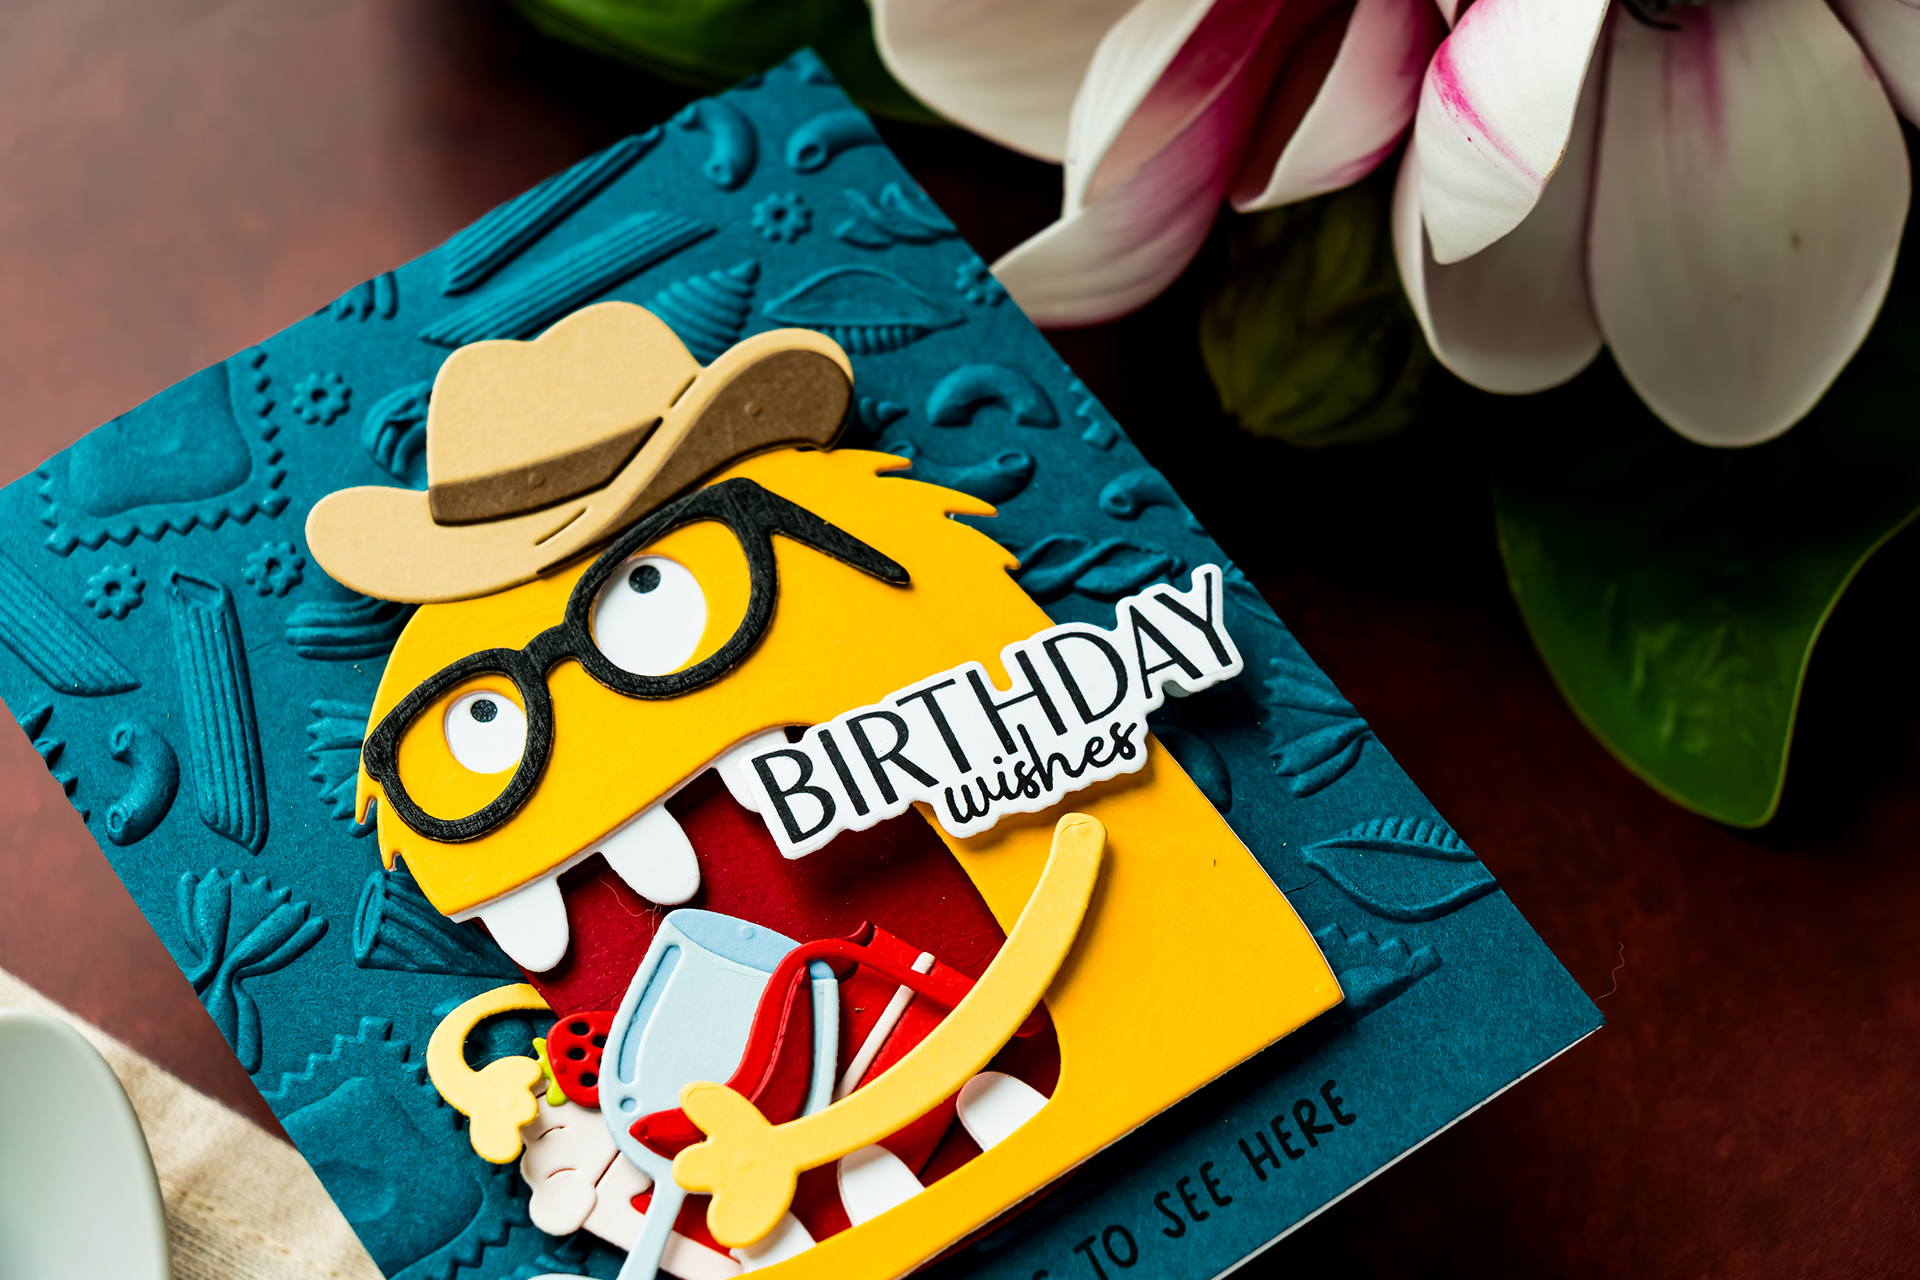
The cowboy hat is an unexpected choice for a wine-drinking monster. The Just Add Cake kit also includes a beer mug, which could be substituted for a more traditional cowboy version.
The lower sentiment reads:
Nothing to See Here
Test Colors Before Final Assembly
I originally selected a vibrant pink mouthpiece, but it competed with the yellow monster and dark teal background. Before completing the card, I tested several alternatives, including dark blue, light yellow, and dark red.
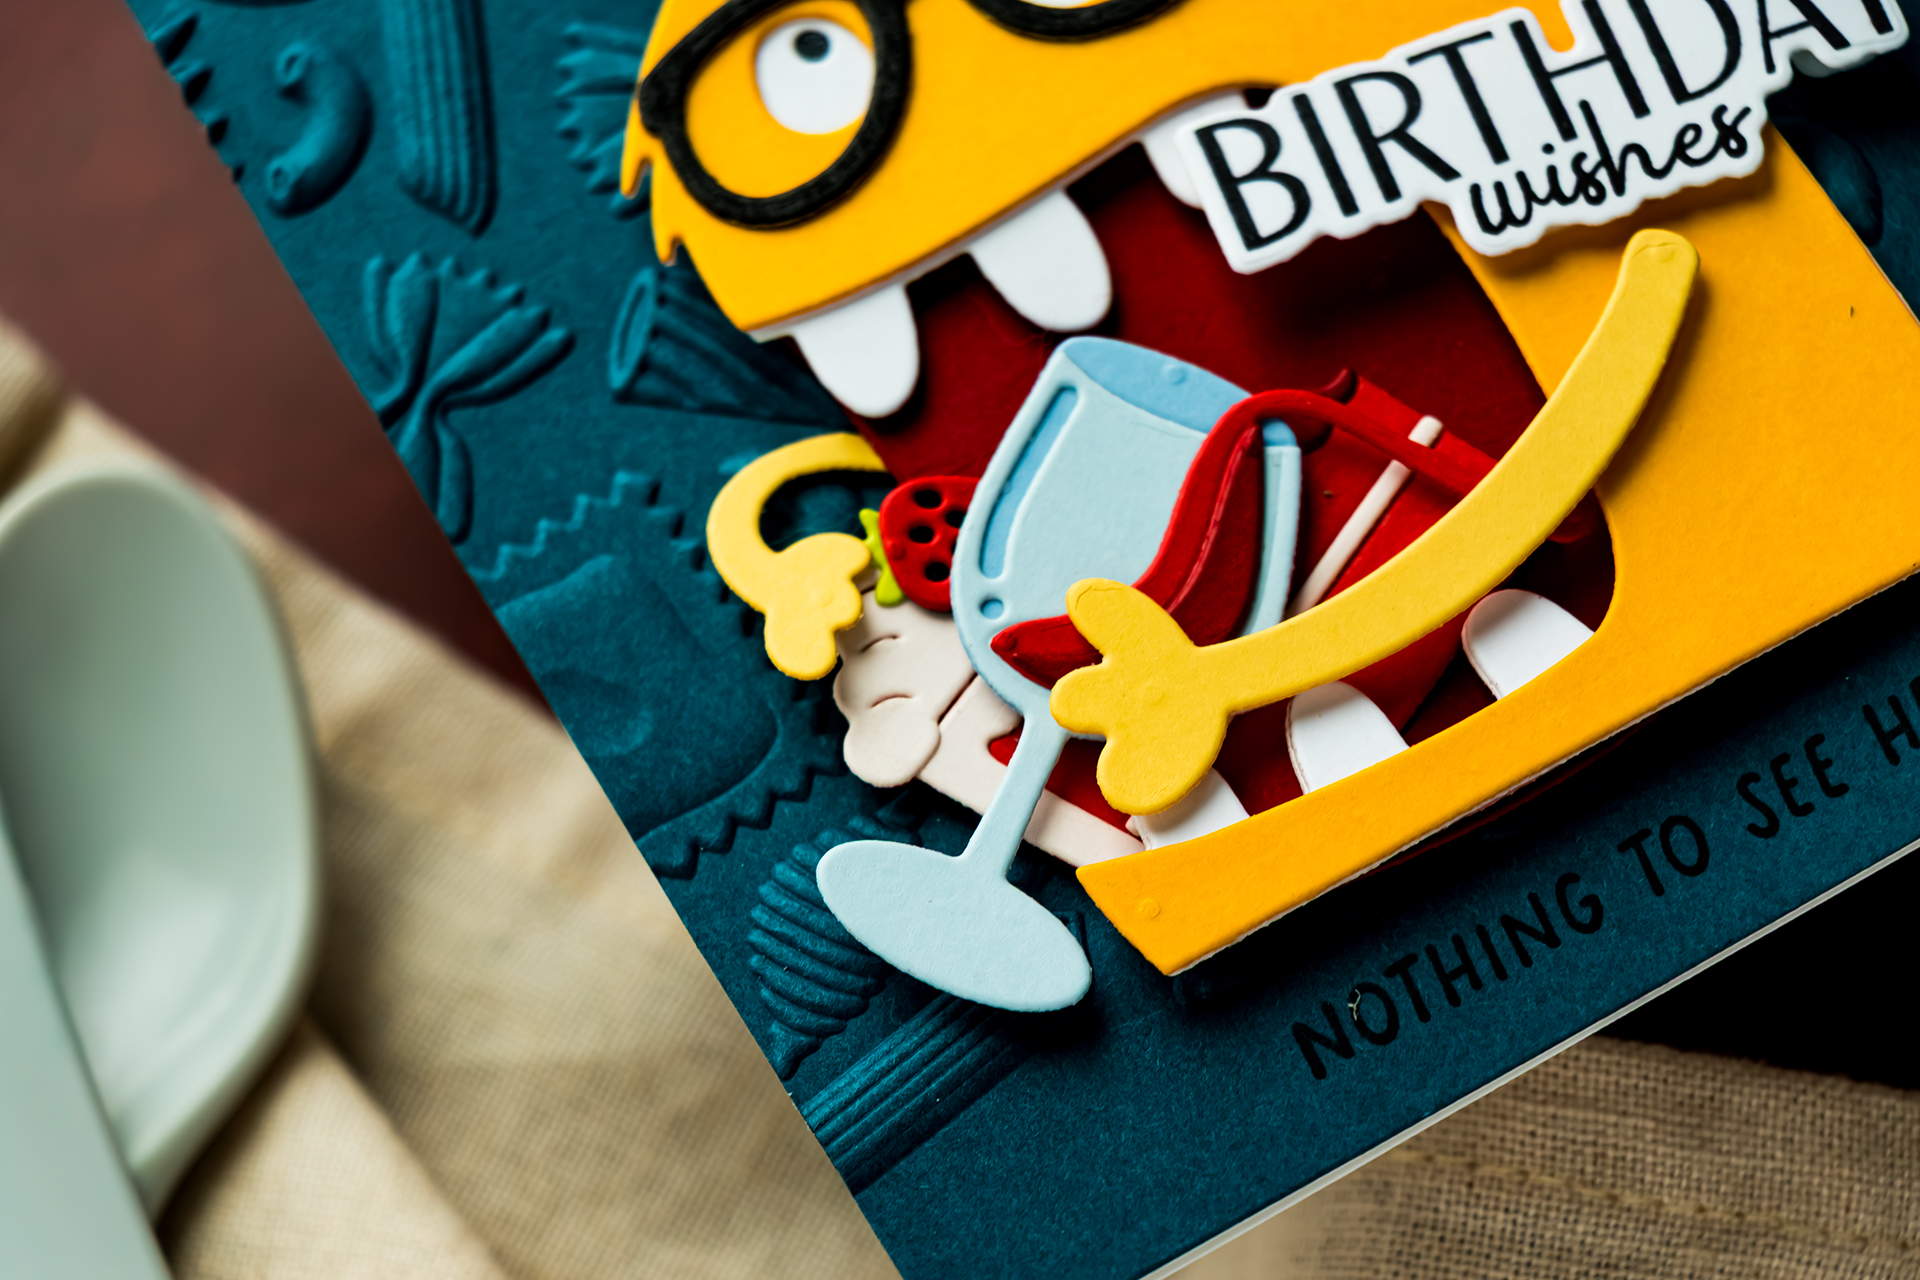
Placing the loose die cuts behind the mouth opening made it possible to compare the choices without committing to adhesive.
Designer tip: When one color feels disconnected from the rest of the card, repeat it elsewhere or replace it with a shade already present in the design. Testing loose cardstock pieces is much faster than rebuilding the entire focal point.
How to Create a Partially Embossed Background
Partial embossing creates texture across most of the card panel while preserving a flat area for stamping. This is especially useful when the sentiment does not have a coordinating die.
Step 1 – Position the Cardstock
Cut the cardstock to 4 1/4 x 5 1/2 inches. Insert only the upper portion into the embossing folder, leaving the bottom section outside the folder.
Step 2 – Position the Adapter Plate
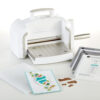
Place the embossing folder onto the Platinum 6 platform using the correct sandwich for a 3D embossing folder.
Add the adapter plate over the embossing folder, but stop the plate slightly before the area where you want the texture to end. The machine applies pressure only where the plate covers the folder.
Step 3 – Run the Folder Through the Machine
Pass the sandwich through the Platinum 6. The upper portion will be deeply embossed, while the uncovered lower area will remain flat for stamping.
The pattern may gradually fade near the edge of the plate, creating a softer transition between the embossed and unembossed sections.
Designer tip: Lightly mist the cardstock with water before using a detailed 3D embossing folder. This softens the fibers and may reduce small cracks or imperfections in the deeply embossed areas.
Card 5 – Holiday Calories Don’t Count
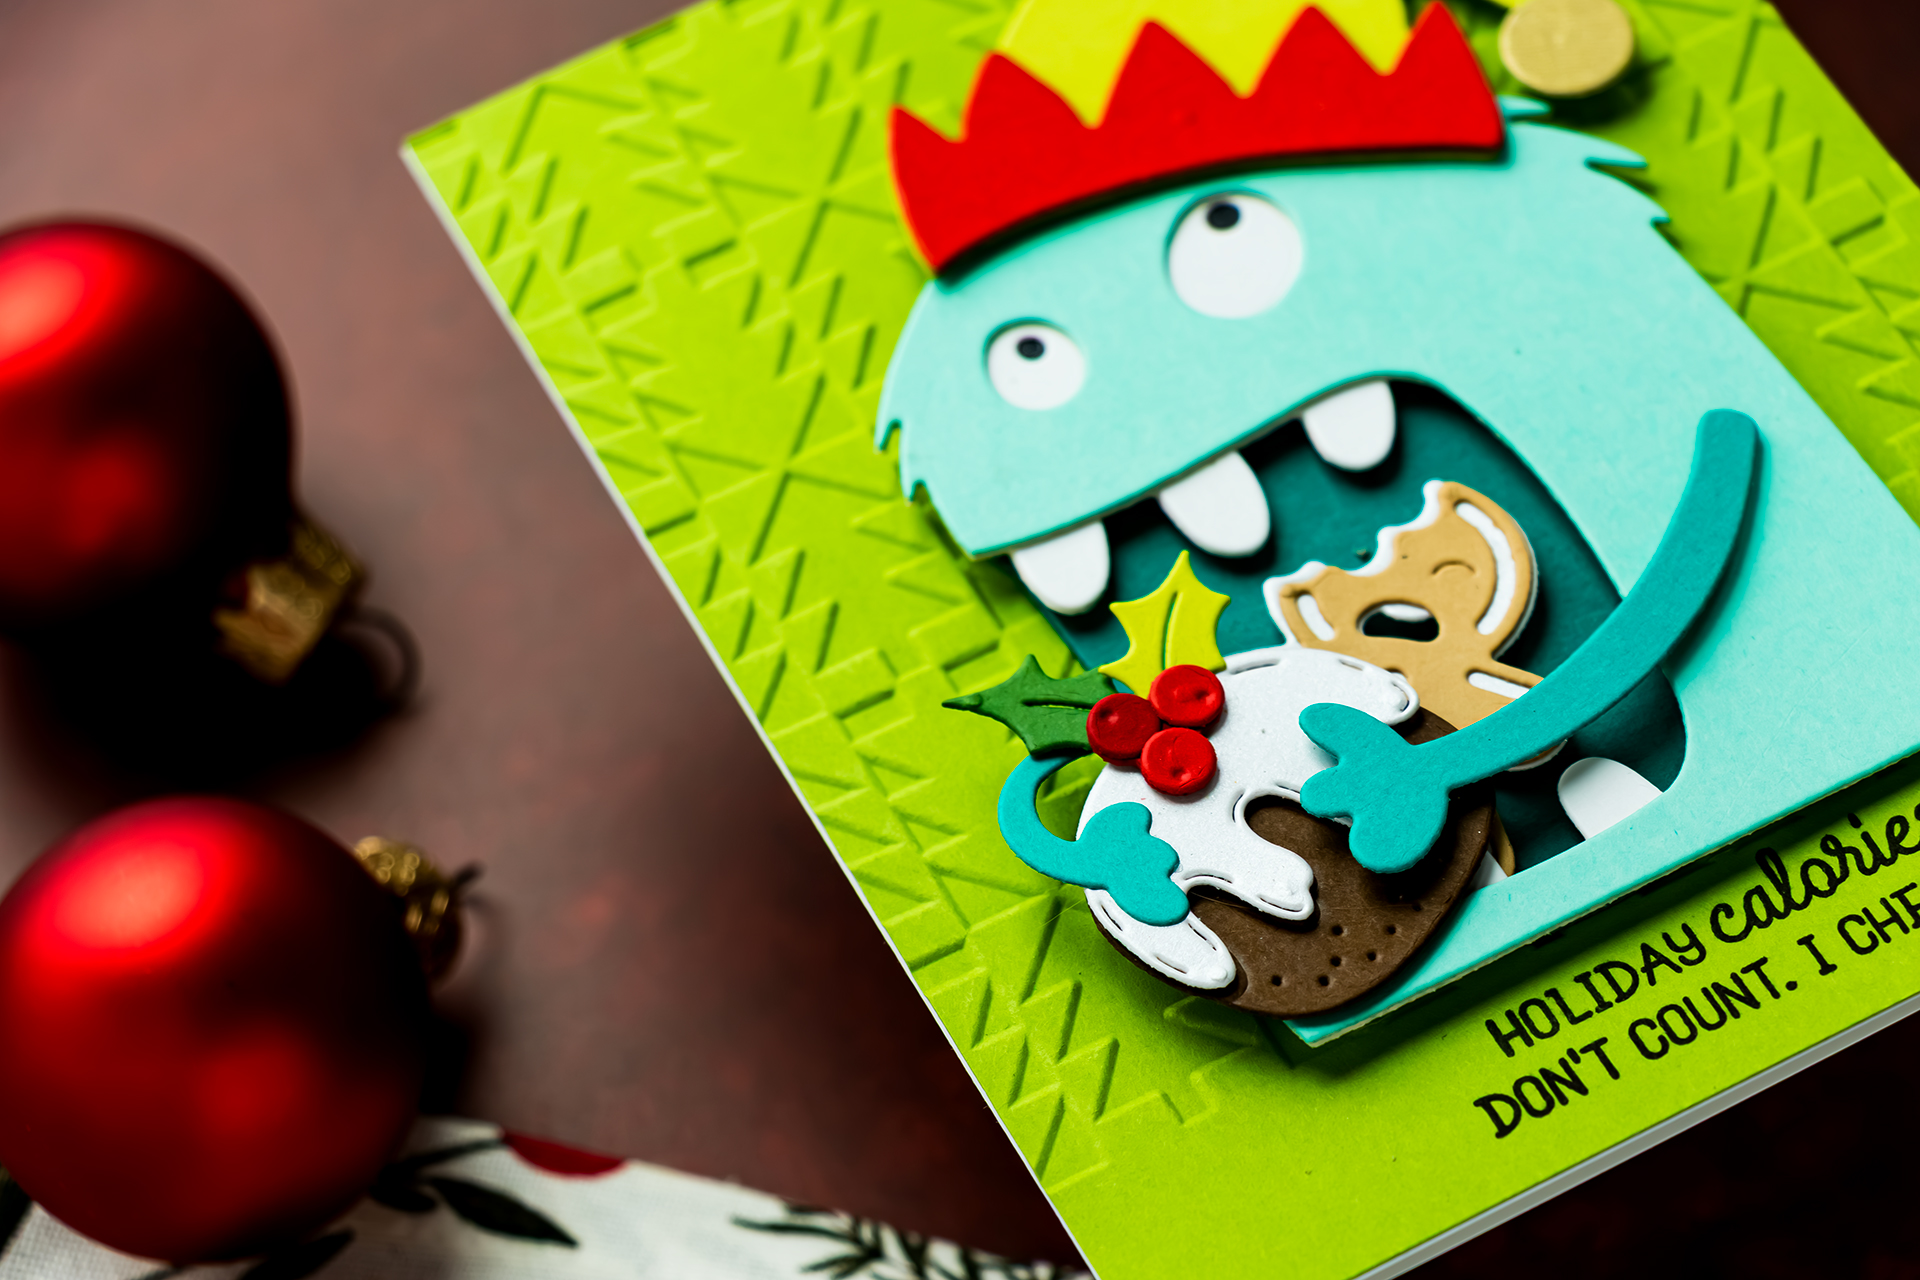
The final design transforms Chompster into a Christmas monster using the Merry Munchies add-on. I paired the Christmas character with the October 2026 Holiday Check 3D Embossing Folder background. The holiday pattern immediately distinguishes this design from the four birthday cards.
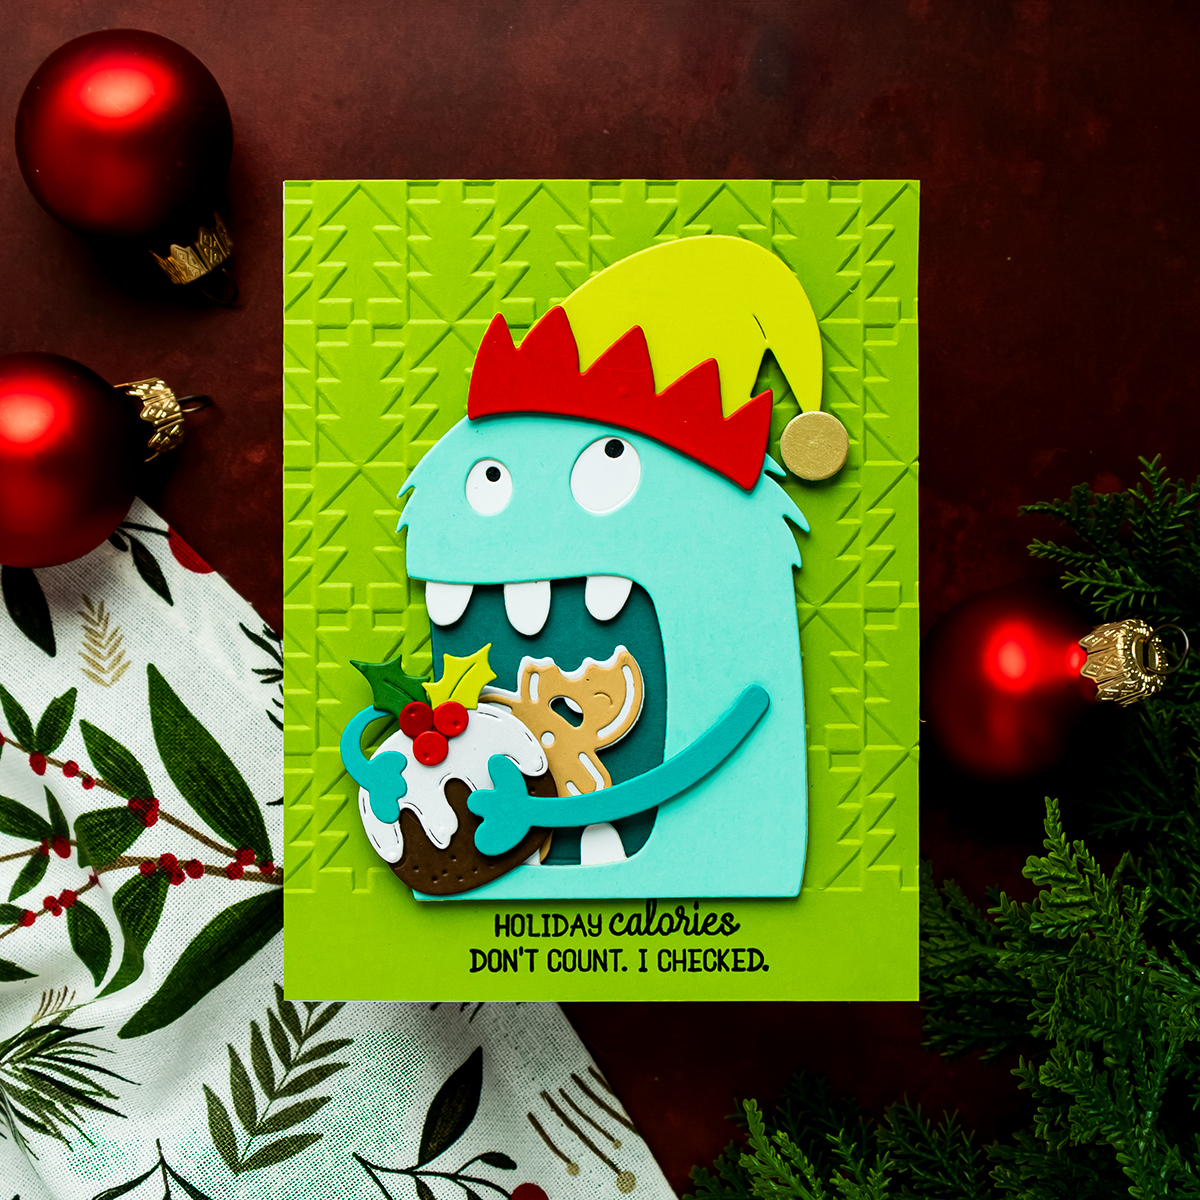
The monster wears an elf hat and holds several Christmas treats near its mouth. I tucked one arm around the smaller pieces so it appears to be holding everything while trying to take another bite.
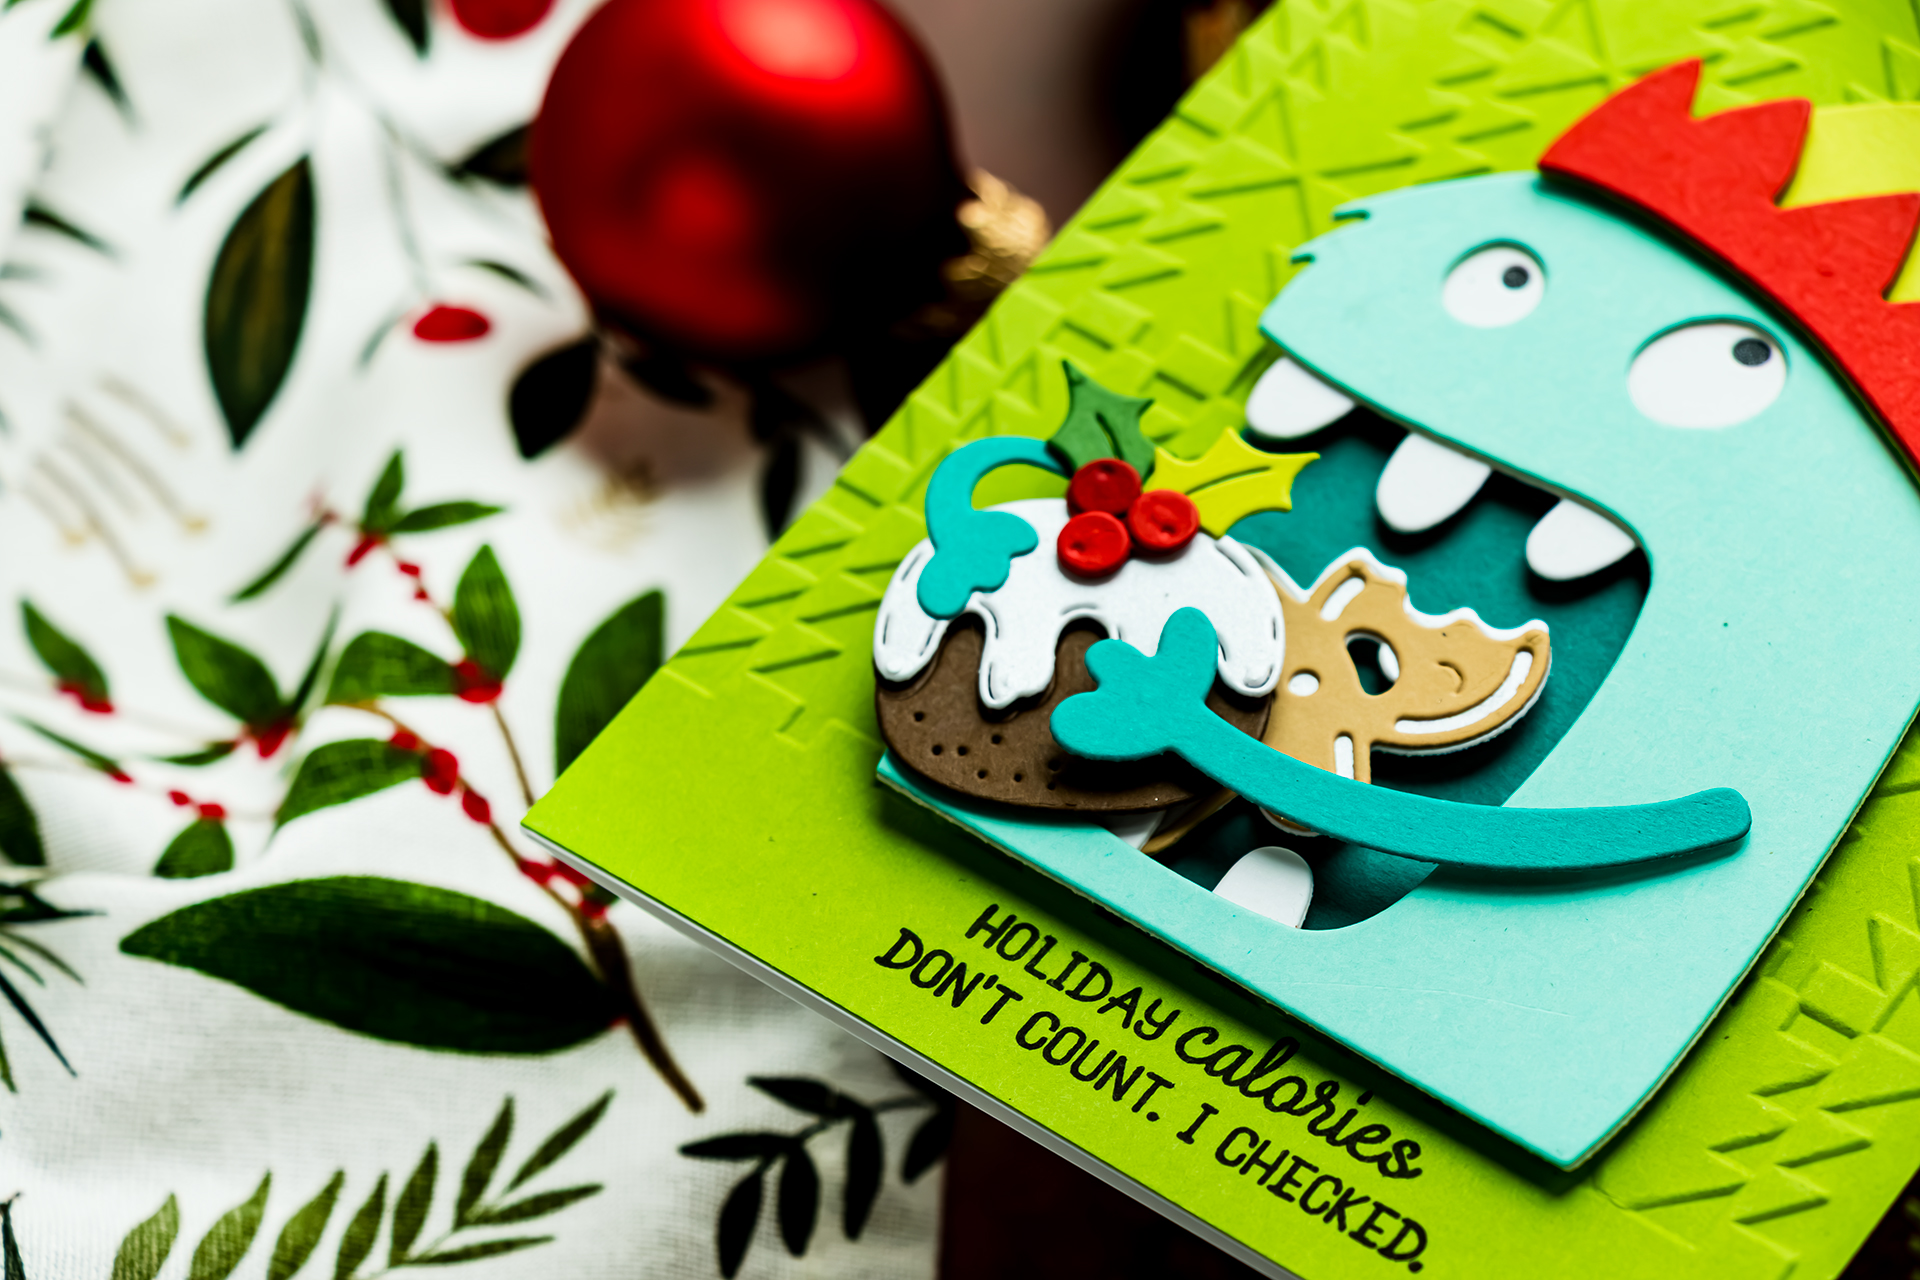
The sentiment reads: Holiday Calories Don’t Count. I Checked.
Although this design uses the Christmas add-on, the same card layout works with Snackula for Halloween. Change the hat and food, select a Halloween greeting, and replace the Christmas background with a spooky embossed or ink-blended panel.
Tips for Better Monster Birthday Cards
- Die cut the monsters, food, and accessories in batches before beginning assembly.
- Double the large body, teeth, glasses, and delicate accessories whenever time allows.
- Use the die-created indentations as guides for positioning layered pieces.
- Add the food before the arms so the hands can be adjusted around each snack.
- Use thin foam strips around the mouth to create a recessed, dimensional opening.
- Repeat important colors across the character, snacks, hat, and background.
- Skip the eyes when opaque sunglasses will cover them completely.
- Use tweezers or a wax-tip pickup tool for the tiny braces and decorative pieces.
- Keep the background simple when the monster has several colorful accessories.
- Partially emboss the background when you need a flat area for stamping.
Ways to Customize the Chompster Cards
Create Personalized Characters
Change the hat, glasses, braces, food, and colors to reflect the recipient. A baseball fan might receive the cap version, while a friend who loves the beach could receive the sun hat and sunglasses.
Use Different Colors for the Braces
Cut the braces from silver cardstock and change the tiny bands to match the recipient’s favorite color, school colors, or outfit.
Find More Snacks in Your Stash
Look for beer mugs, coffee cups, fruit, cheese, pizza, cupcakes, or other food dies that fit inside the monster’s mouth. Add the food first, then adjust the arms around it.
Use the Food Without Chompster
The One More Bite food pieces can be used independently. Arrange the donut, cookie, cake, and chocolate in a grid and pair them with one of the Snack Goals sentiments.
Try Patterned Paper
Cut the monster from patterned paper or add ink blending, splatter, stripes, dots, or texture to the body before assembly. This changes the appearance of the character without requiring additional dies.
Create Seasonal Monsters
Use Merry Munchies for Christmas and Snackula for Halloween. The same base character can also be adapted for graduation, retirement, sports, or another celebration by borrowing small accessories from your stash.
Organizing the Small Dies
I store many of my Spellbinders dies on Craft Stax Magnetic Panels. The magnetic panels keep the small dies visible and prevent pieces such as braces, bows, teeth, and snack layers from becoming separated from the rest of the set.
The panels fit inside coordinating Craft Stax trays, and I label each tray by collection. I also use the larger Craft Stax for storing complete collections, including the dies, embossing folders, stamps, and finished reference pieces.
Craft Stax can also be used for travel. I have packed the trays and magnetic panels in checked luggage when traveling to teach. The magnetic sheets add weight, but the trays keep the products organized and protected.
Frequently Asked Questions
Can I buy the Chompster die set separately?
The Chompster used for these cards is included in the Just Add Cake Birthday Cardmaking Kit. It is not listed as a separate product. The Snack Goals dies are add-ons, so you will need the original Chompster from the kit to recreate these exact cards.
Which Snack Goals set includes the hats and braces?
The Top It Off Etched Dies include the hats, sunglasses, and braces shown in this tutorial. The accessories can be combined in different ways, allowing the same Chompster body to represent several personalities and recipients.
Should the snack or the arms be attached first?
Attach the snack first. Once it is positioned near or inside the mouth, arrange the separate arms over it. This gives you more control over the hand placement and makes the character appear to be holding the food naturally.
How do you create the recessed mouth?
Place thin foam adhesive strips around the back of the mouth opening, then attach the colored mouthpiece behind the foam. This creates space between the body and mouth layer, making the mouth appear recessed.
How do you leave part of an embossed panel flat?
Insert only part of the cardstock into the embossing folder and cover only the section you want embossed with the adapter plate. The area outside the folder and plate remains flat, giving you space to stamp a sentiment.
More Monster and Birthday Card Ideas
- More cards created with the Just Add Cake Birthday Cardmaking Kit
- Birthday cards for men
- More ways to use food dies for handmade cards
Final Thoughts
The Snack Goals Collection gives the original Chompster even more personality through food, hats, glasses, braces, and seasonal accessories. The basic assembly remains the same, but changing the cardstock colors and small details creates a completely different character each time. Prepare several bodies and accessories at once, then enjoy mixing and matching everything during a monster assembly session.
Which Chompster is your favorite – the monster with braces, the snack inspector, the sun hat version, the wine-drinking cowboy, or the Christmas monster? Let me know in the comments!
Have fun crafting!
SUPPLIES
I’m listing the products I used below. Click on the link to go directly to the product. Where available, I use compensated affiliate links, which means if you make a purchase, I receive a small commission at no extra cost to you. Thank you so much for your support!