


I’m slowly getting back to my usual routine, I finally have my blog schedule done for the rest of the month and I’m setting time aside to make various projects. I’m telling you, traveling abroad really messes up my schedule, I love traveling, but I always have such a hard time getting back to real life.

Anyhow, today I have a new Clean & Simple Die cutting episode and I’m talking about using the negative space, or the negative die cuts. We usually neglect those when crafting, but sometimes they can be used to make the most amazing cards and, this also helps a great deal to stretch our dies.
This post is from the bi-weekly “Clean & Simple Die Cutting” series. You can view all posts from this series by clicking here.
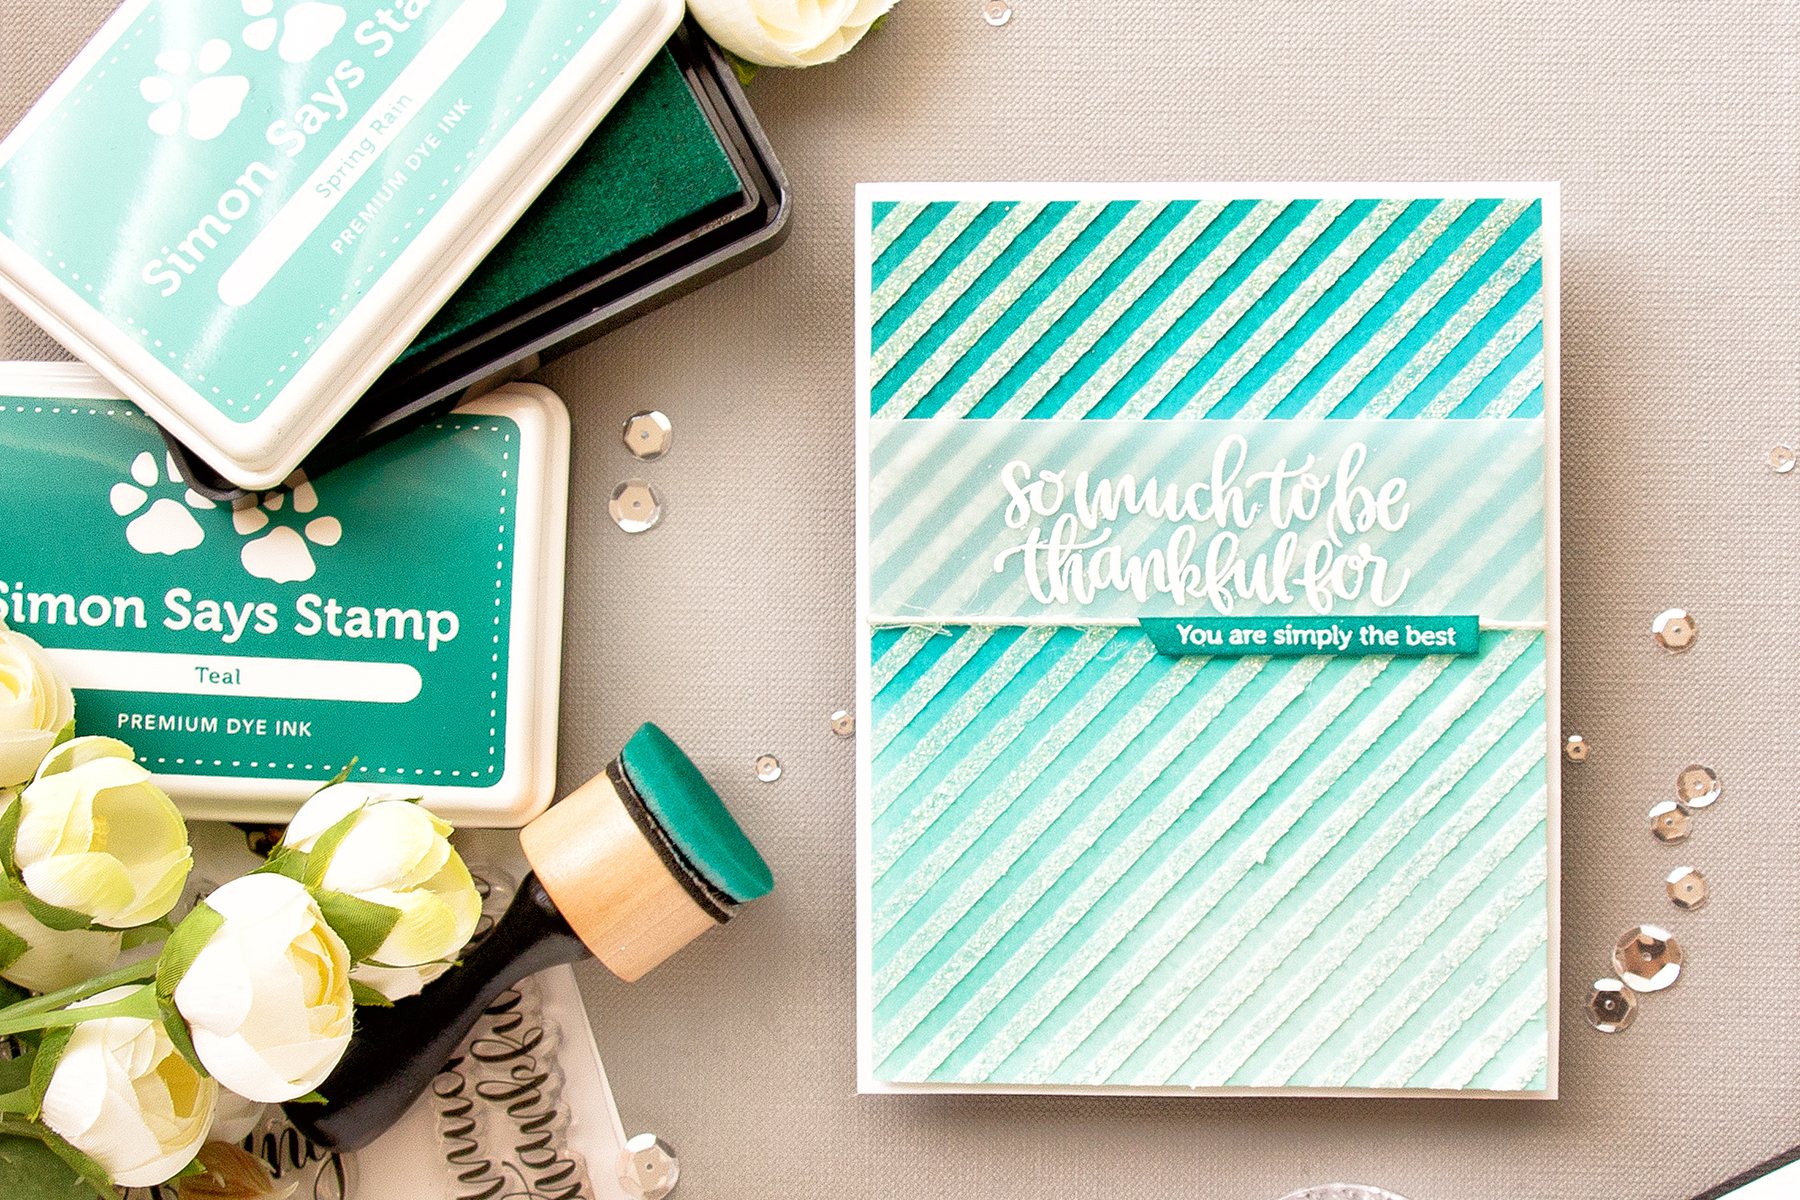
My today’s project is a very simple and very basic. I used a beautiful heart die from Spellbinders (all supplies are linked at the bottom of this post) and created a fun negative space in a piece of teal cardstock. To give it a bit more interest I punched a hole in the bottom of that piece and tied a bow using twine from Doodlebug.

This piece was inspired by a piece of packaging I used when testing my negative die cutting idea out. I hate using my good paper for testing purposes, so whenever I need to test something I’m using leftover pieces, different non card making cardstock and also packaging. This is just a way for me to save some money, so for this card I used a piece of cardstock that came with gems, it was a packaging piece. That particular one was white on one side so it was perfect for me to practice on.

To give this card a feminine look I used stamps from Waffle Flower and created a simple two color pattern inside the negative die cut window. I used Vera Fine Onyx Black ink and also Turquoise ColorBox Pigment ink to do my stamping.
As always, I’m sharing a quick video tutorial showing you how to make this card. You can watch it here or on my Youtube channel:
Like this video? Please give it a thumbs up! Thanks!
Supplies:


Love that stamped background behind the heart and the little grey border. Beautiful balanced design!
Beautiful!
I’ve seen this done with a die and moving from the practice die to a clean die for glueing was a lot of trouble. I like your system much better and will actually try it!
thank you, everyone!