


Before we jump into today’s post I wanted ask – are you guys ready for STAMPtember? It starts tomorrow and I feel it’s going to be the biggest and bestest one ever! Stay tuned!
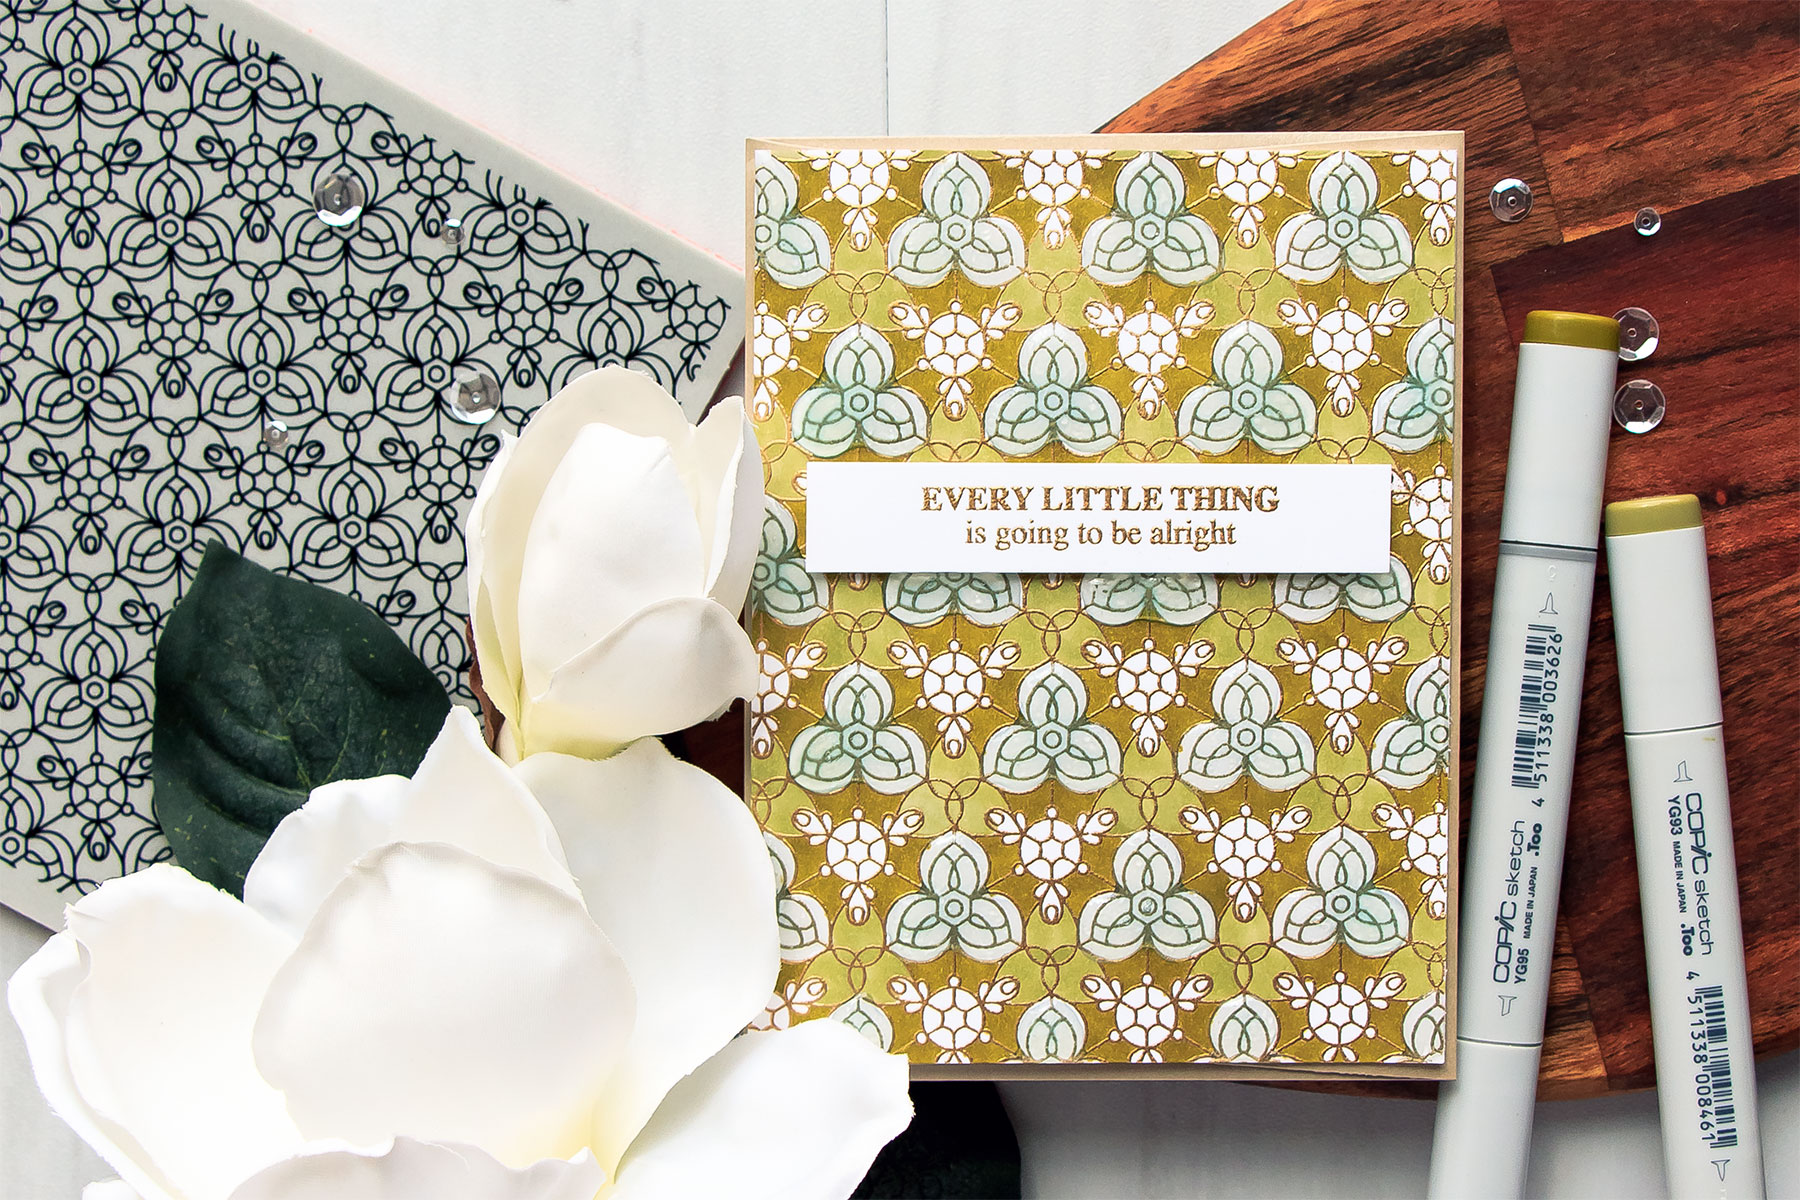
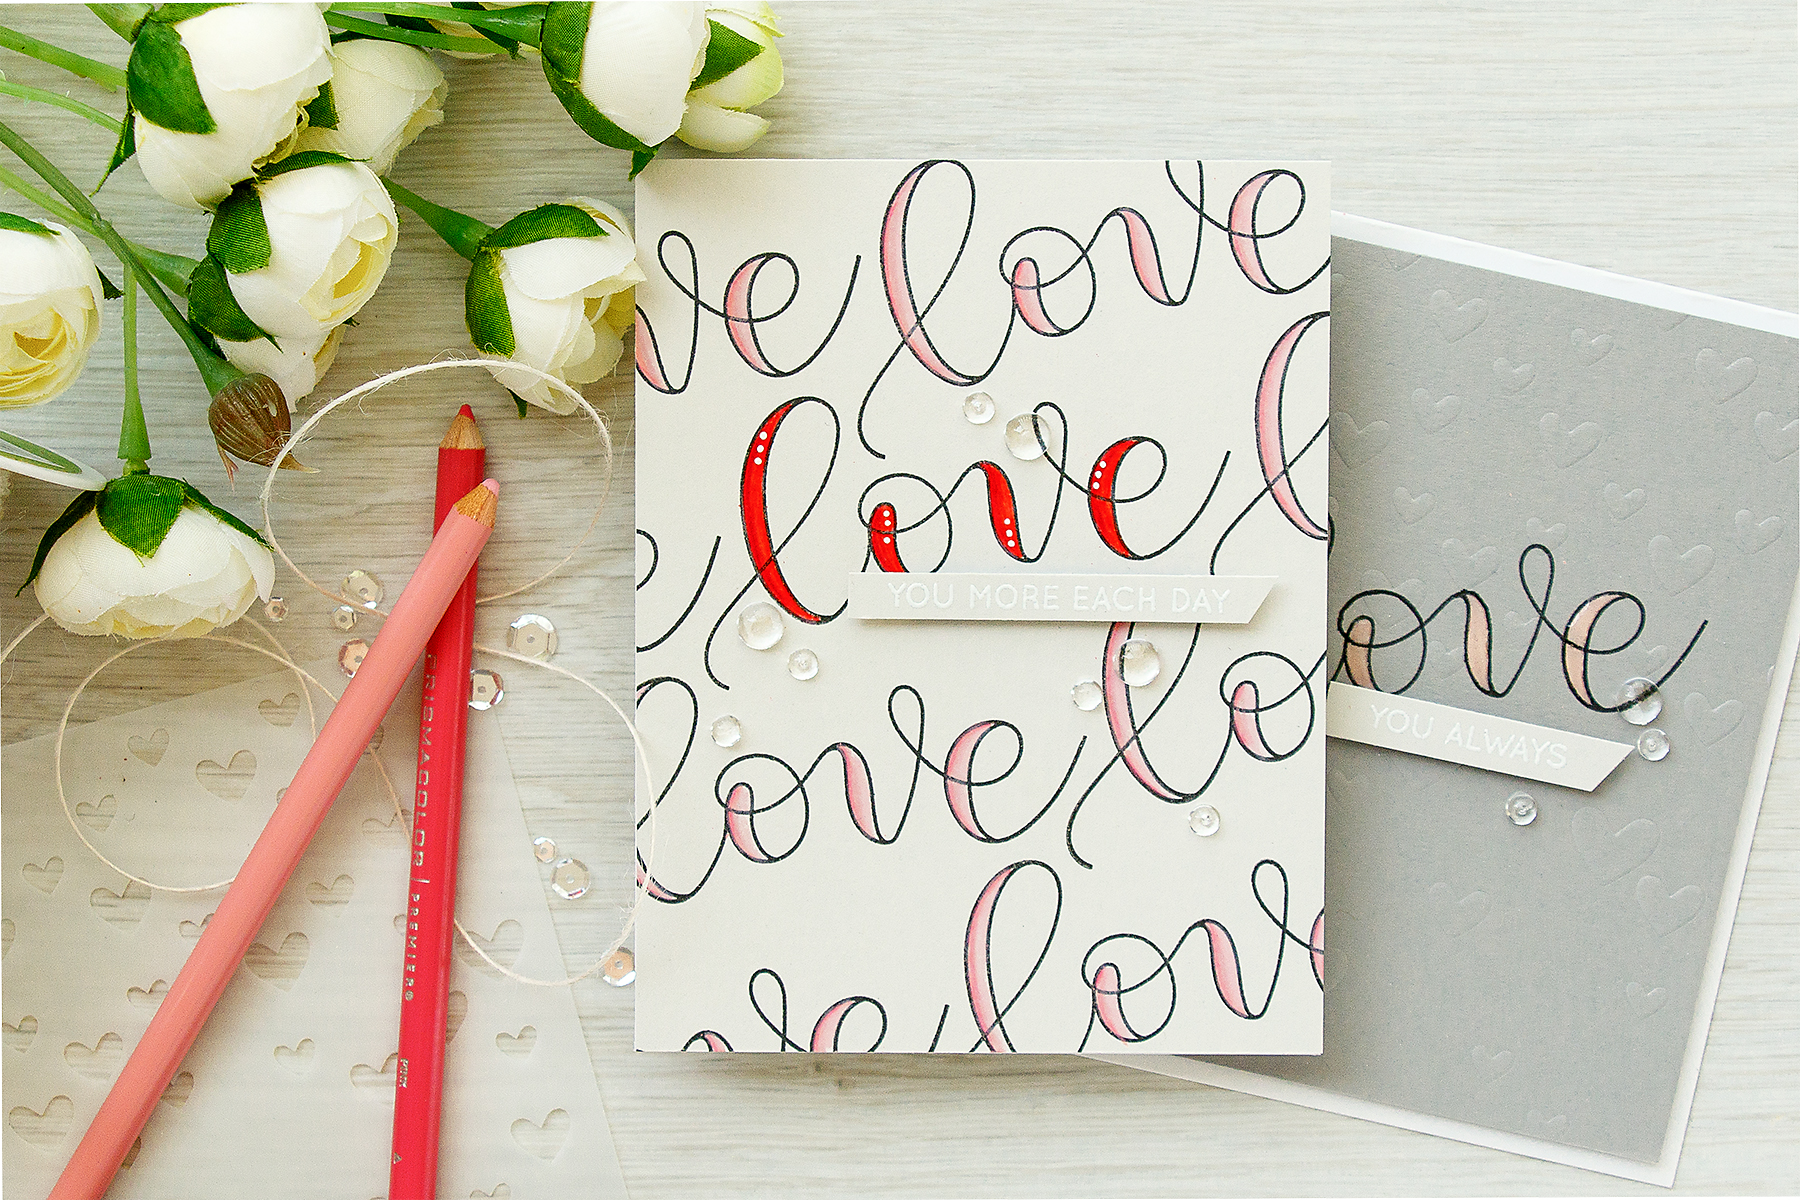
Hi everyone! Welcome back for another episode from my by-monthly Yippee For Yana video series for Simon Says Stamp Blog! In today’s video I’m using Copic markers and Simon’s Kaleidoscope background stamp to create gorgeous and rather effortless patterned paper look.
Like this project? Pin it and save for later | Curious about my project photography? Click for details.
VIDEO TUTORIAL
As always, I filmed a video tutorial showing how to create this project from start to finish. I’m hoping you’ll enjoy it. Watch it below or on my Youtube channel.
Like this video? Please give it a big thumbs up (you can do this on Youtube video page right under the video) and share with a crafty friend! Leave me a comment too, I love hearing from you!
CARD DETAILS
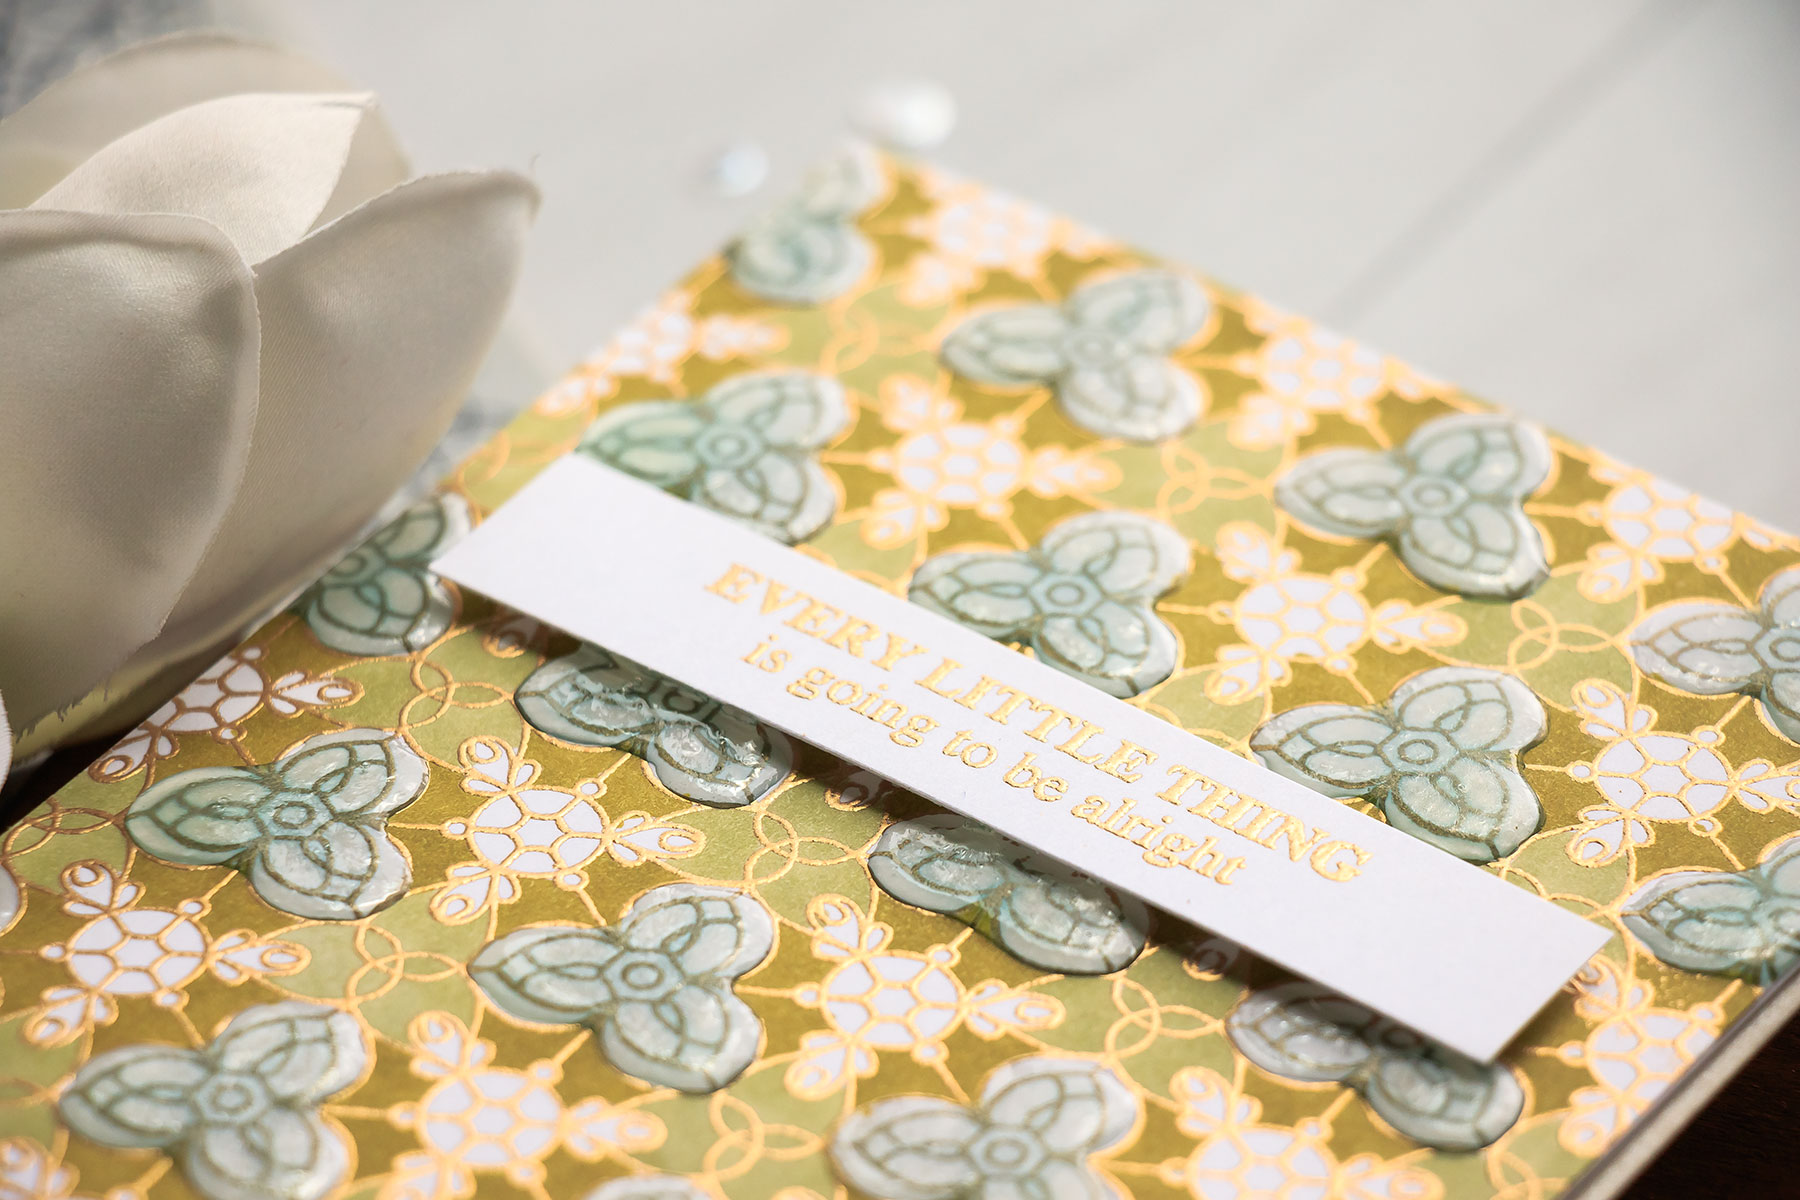
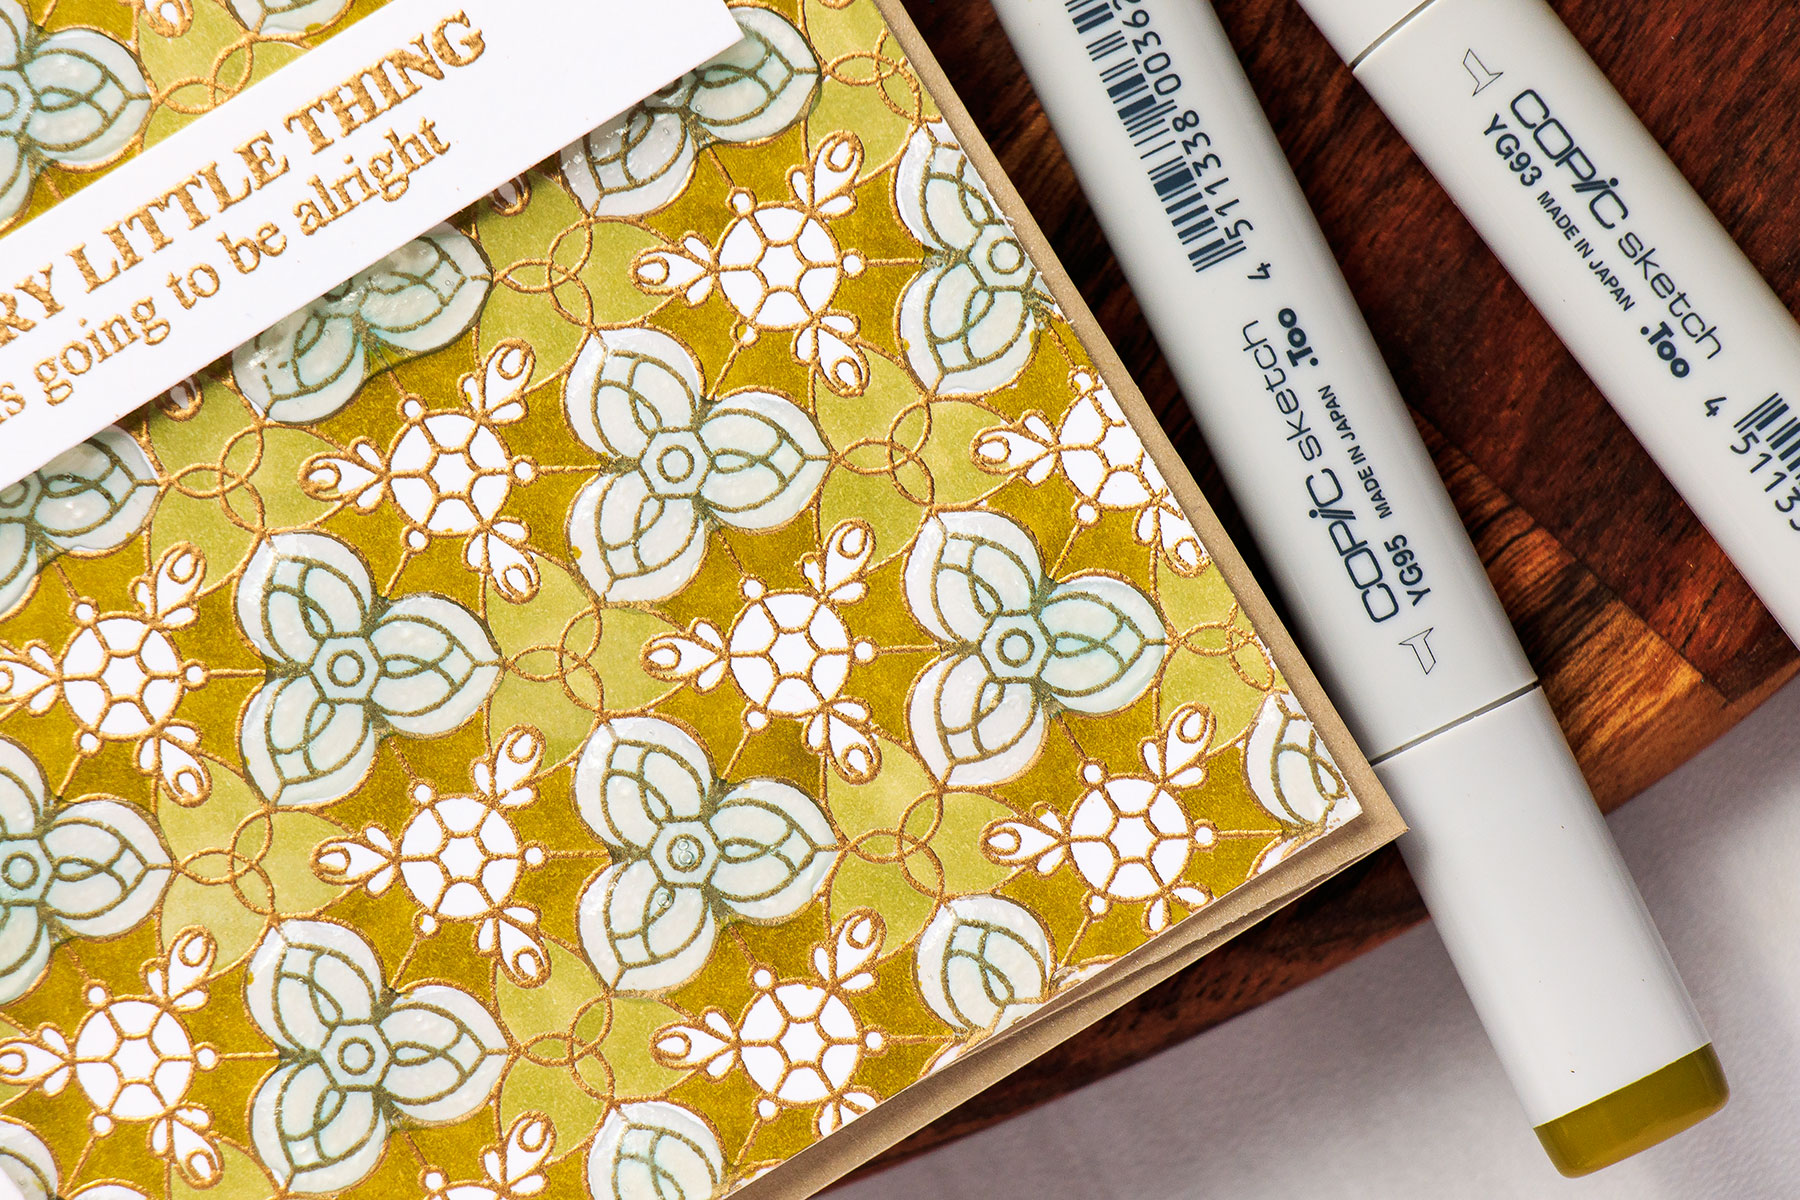
I started working on my card by heat embossing Kaleidoscope background in Antique Gold embossing powder onto a 4 ¼” x 5 ½“ white cardstock panel. I knew I wanted to color my panel using warm greens, so I picked a warm gold embossing powder. By planning what colors you want to use to color your panel and picking out appropriate color embossing powder you can achieve some fantastic results.
I used my anti static powder tool from ScrapPerfect to prep the surface of my paper before embossing. Usually I like to use a similar tool from EK Success, but the area that dispenses powder on that tool is much smaller, so for large backgrounds like this one I prefer to go with ScrapPerfect.
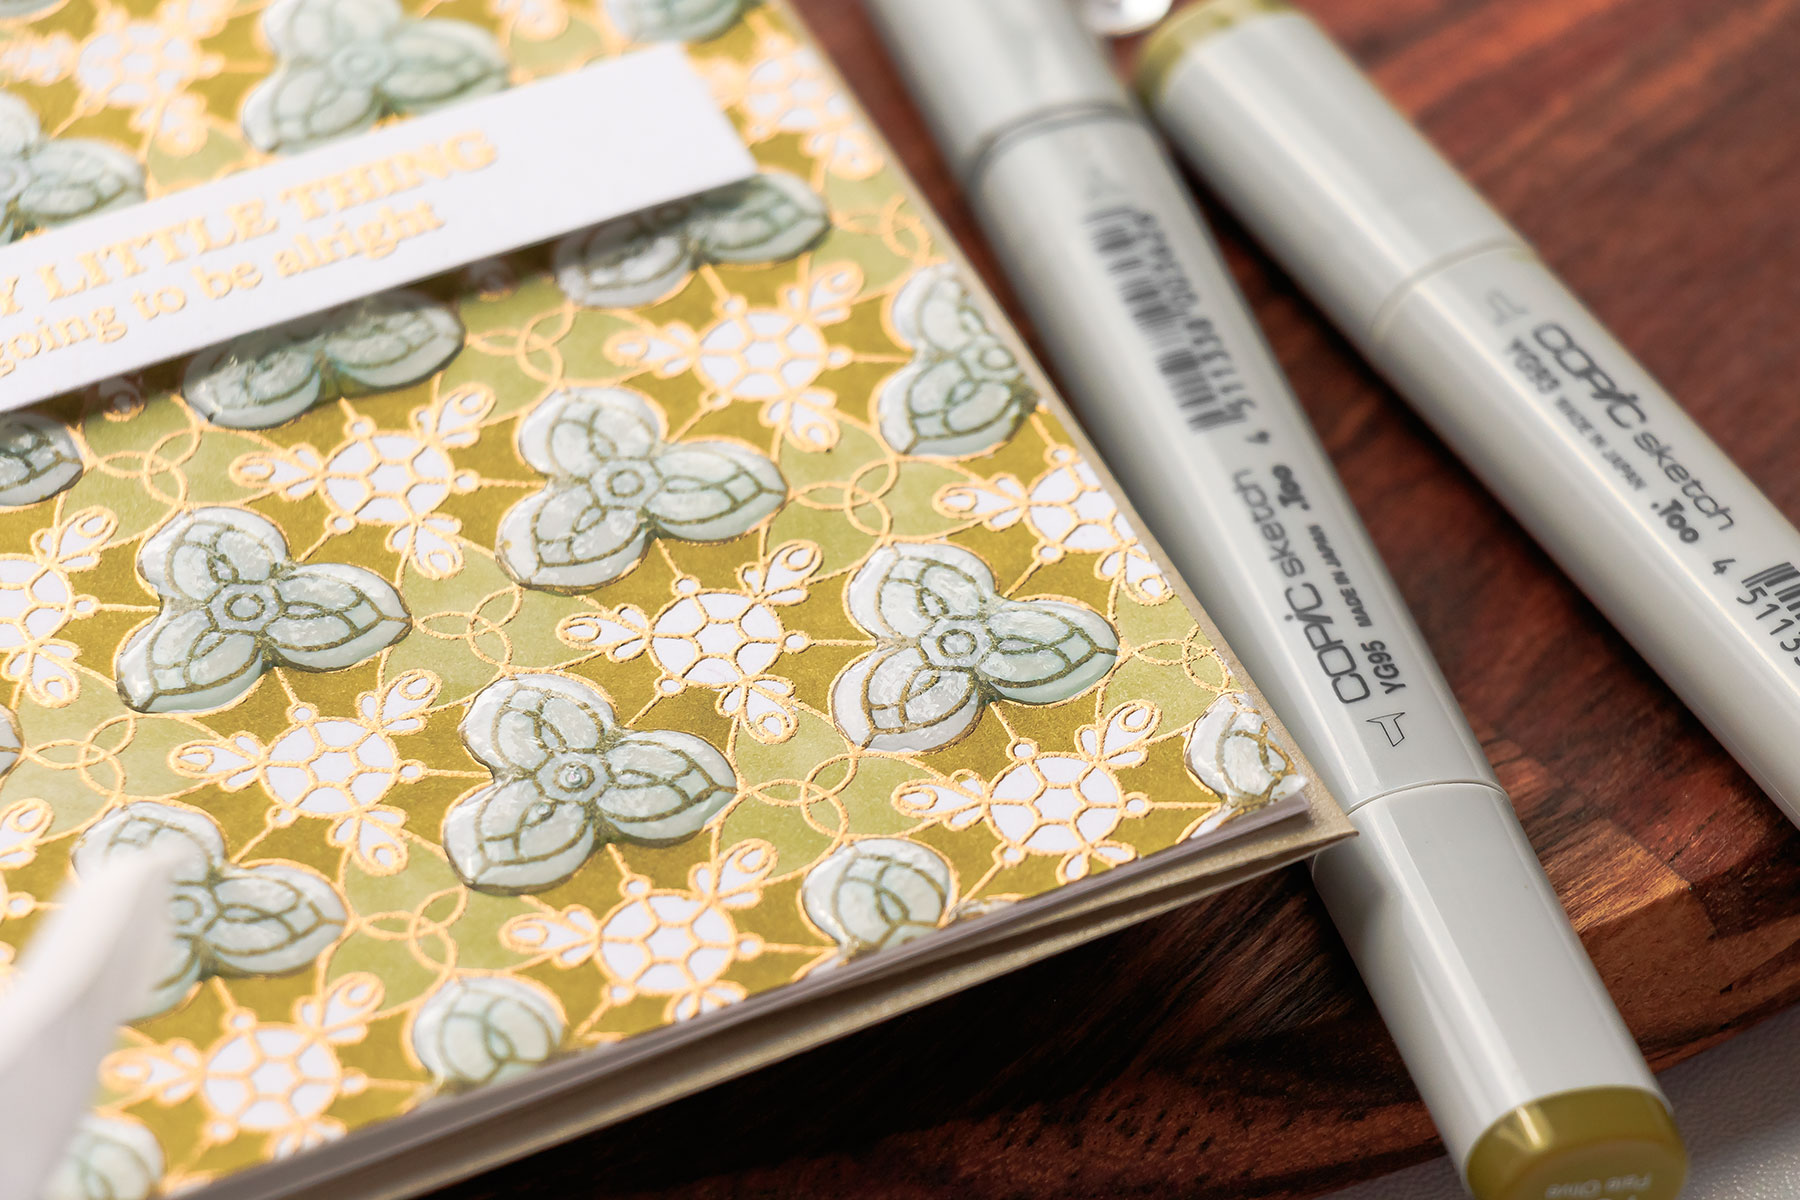
For my coloring I picked YG95 and YG93 Copic markers. With my darker marker I decided to color in the background or the sections that will make up the background. The idea is to color this so that it looks like there’s a dark background and some lighter as well as white shapes on top of it.
I looked for a shape that seemed to be largest and colored it using my darker marker. I liked the way it looked and proceeded to coloring the rest of the identical shapes using same color.
There are 2 reasons why I heat embossed my background and didn’t stamp it using alcohol marker friendly ink. I didn’t want to have a black outline, I wanted this background to have a very rich and luscious look so I picked Antique Gold embossing powder. Reason number 2 is I didn’t want to spend too much time being careful and staying within the lines. Heat embossing creates a raised edges and that, in a way, helps to keep the marker in place and prevents, again in a way, from going outside the line. You can still go outside the line of course, but it just isn’t as easy to do.
I wouldn’t recommend using white or clear embossing powder for this technique as if you do go over the embossed line the embossing will pick up the color of your marker and that won’t look as nice. This antique gold embossing powder probably picked up the color from my green markers, but because it’s a dark colored powder you can’t really see any marker smudges on it.
Once I colored the background using my darker, YG95 marker I also used a lighter YG93 and colored in some additional shapes. You can go with just one color – I think that YG95 coloring alone looked very pretty, or you can add in additional colors.
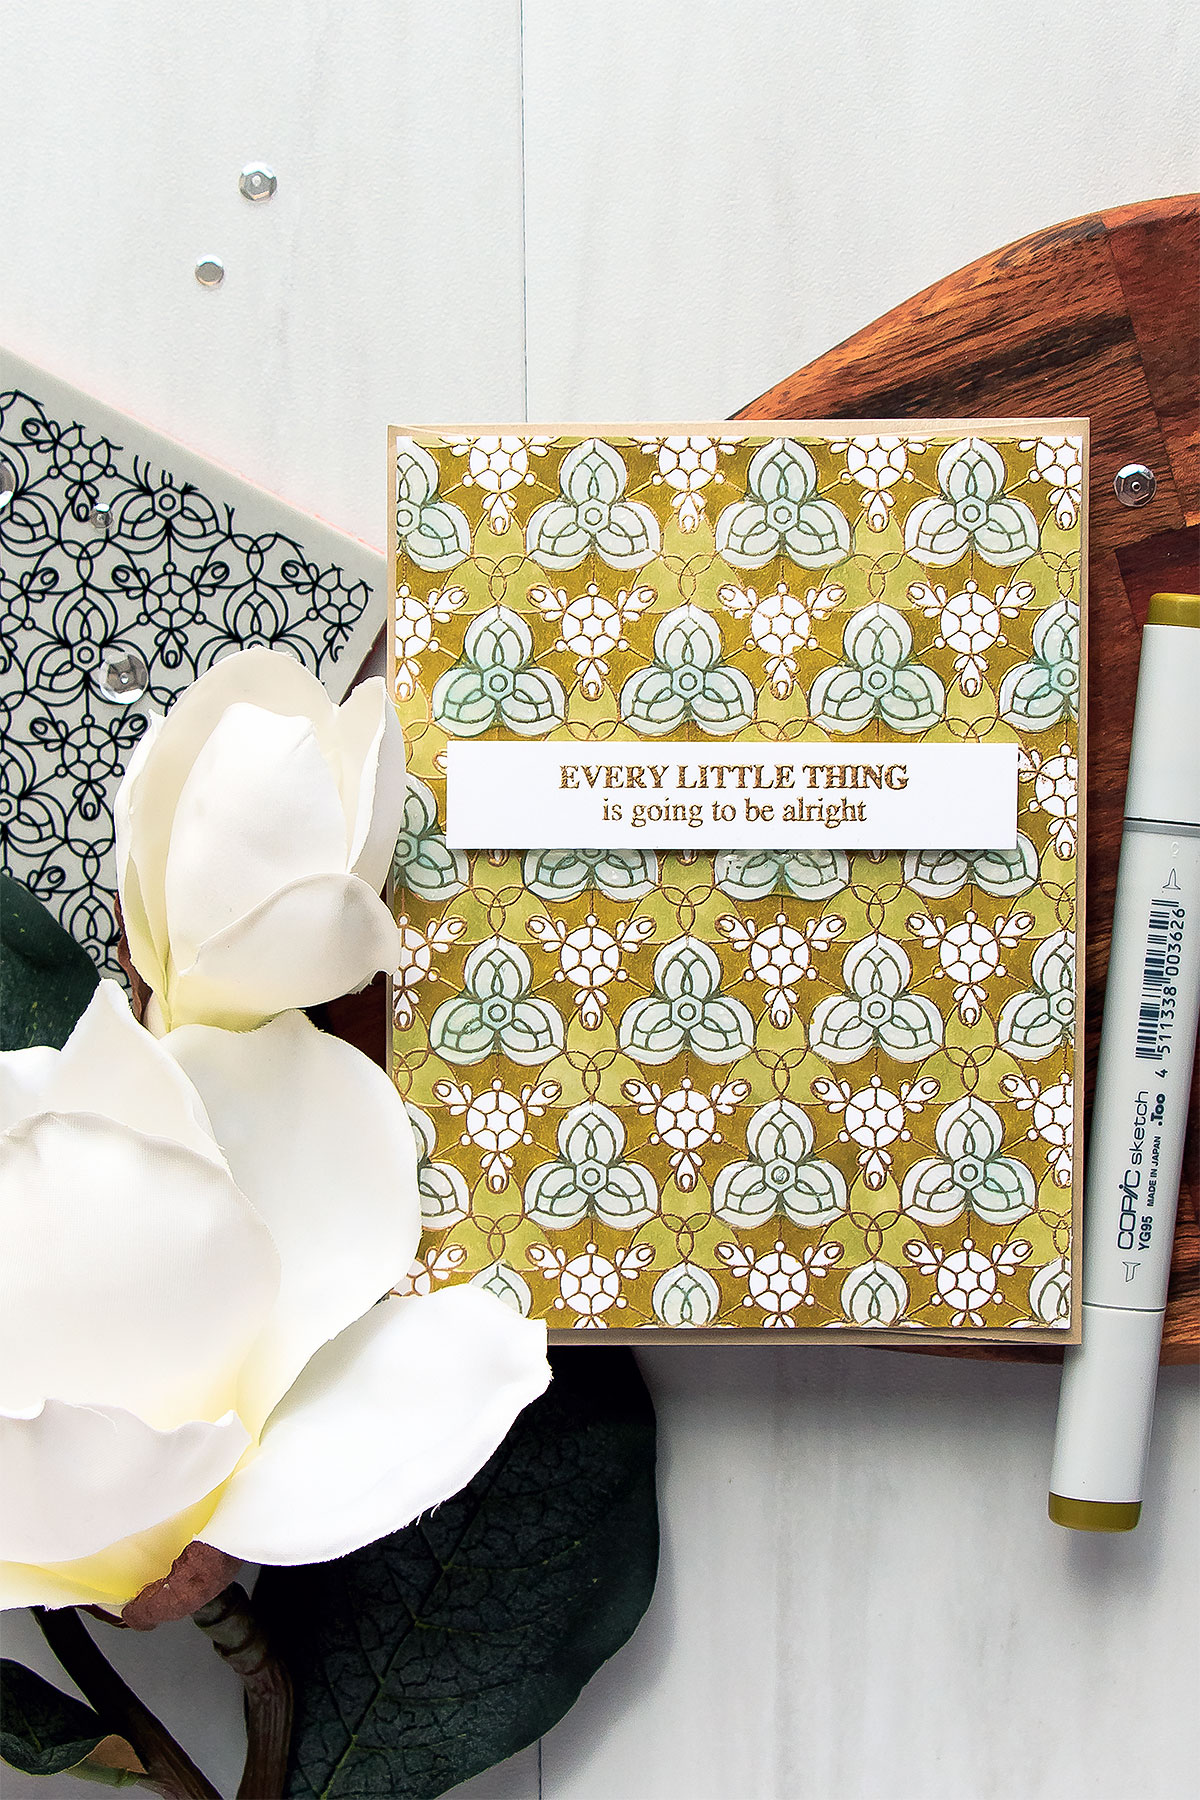
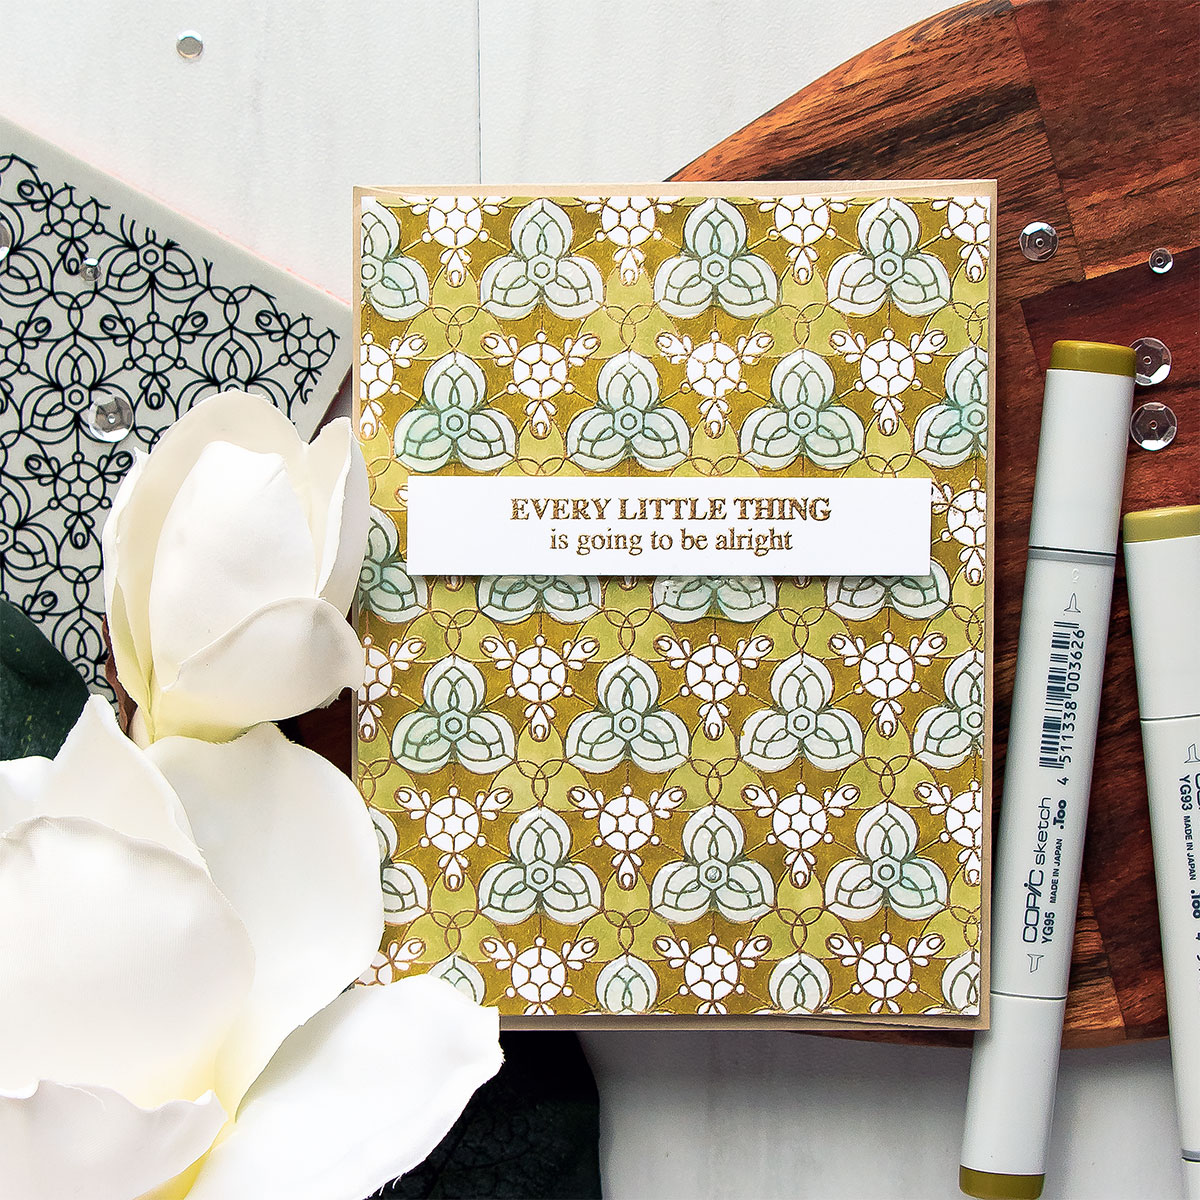
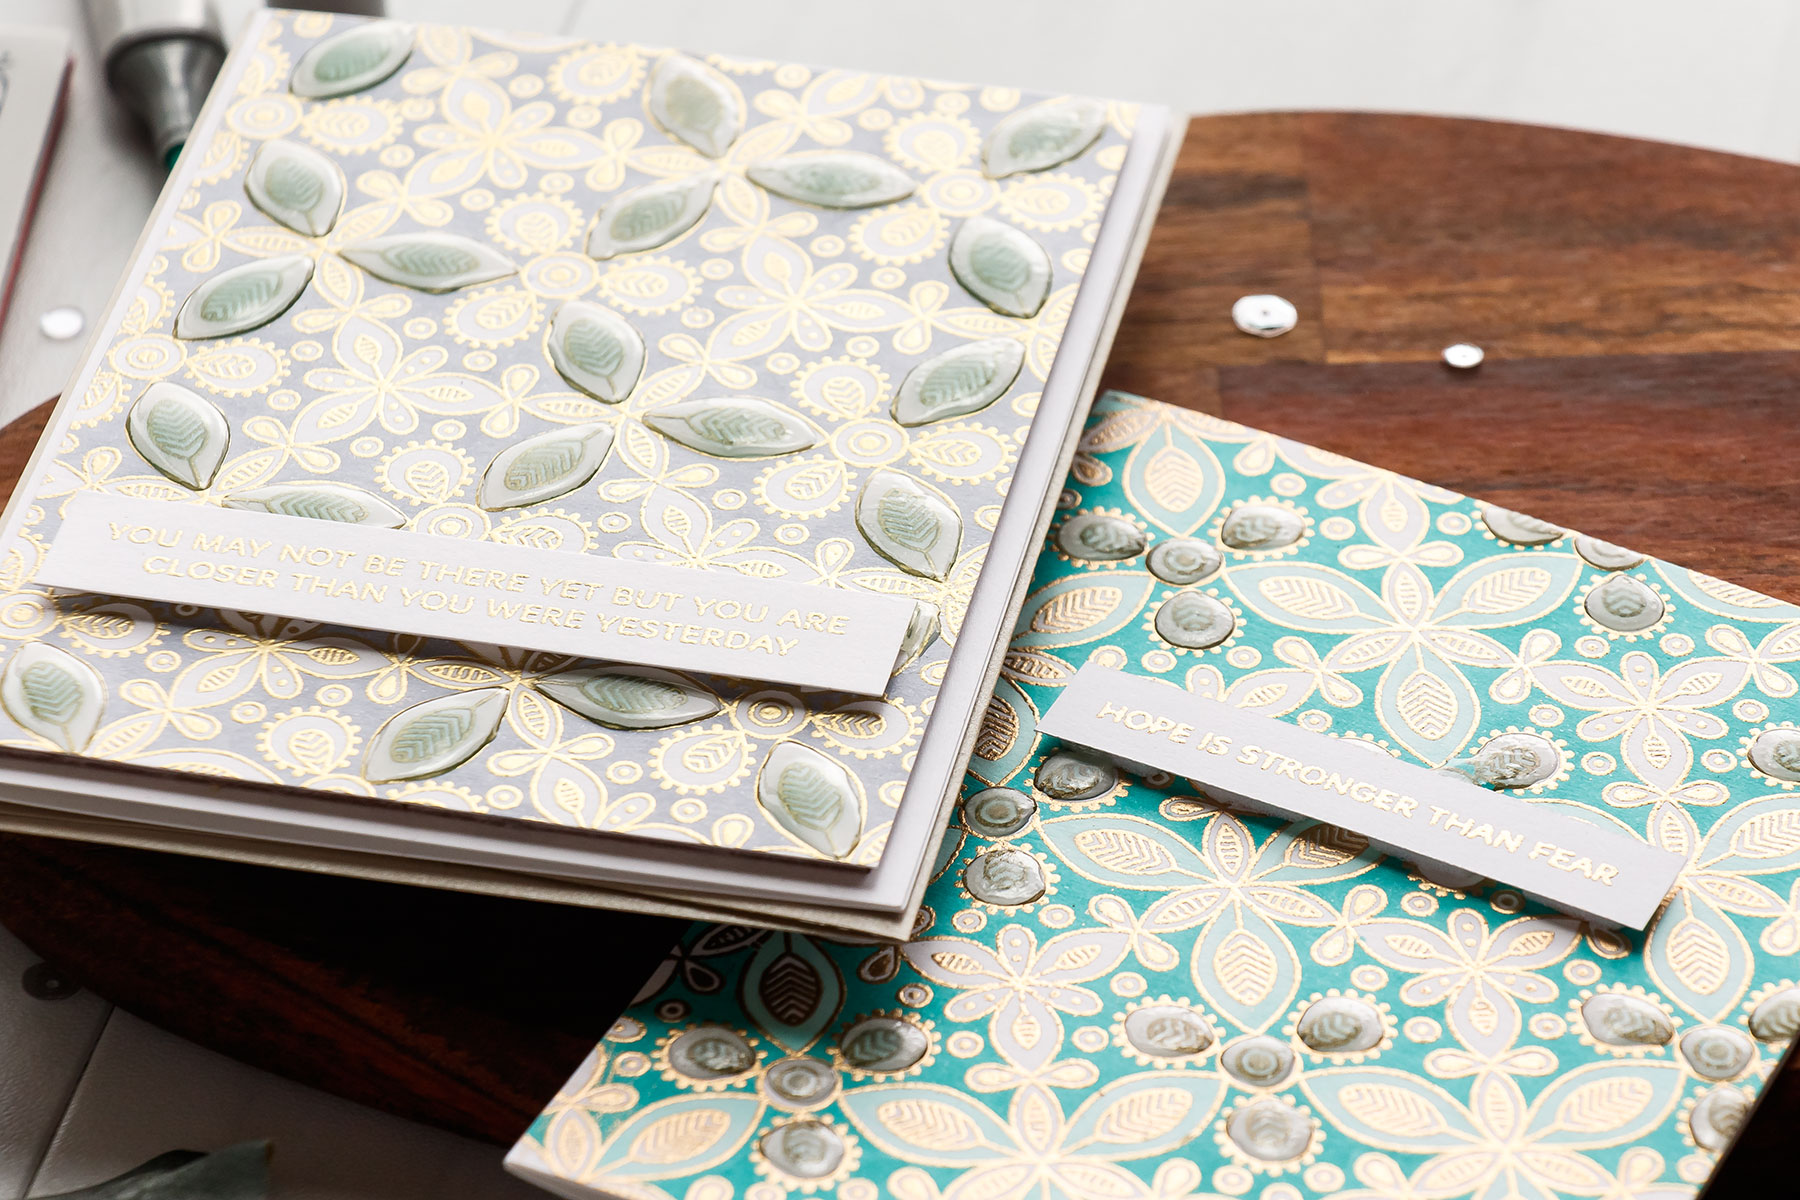
I adhered my colored background onto A2 white card base and added a simple heat embossed sentiment on top. With the background being so pretty I didn’t want to cover much of it up so I embossed a sentiment onto a skinny strip. My sentiment reads “Every Little Thing Is Going To Be Alright” and comes from the Uplifting Thoughts stamp set.
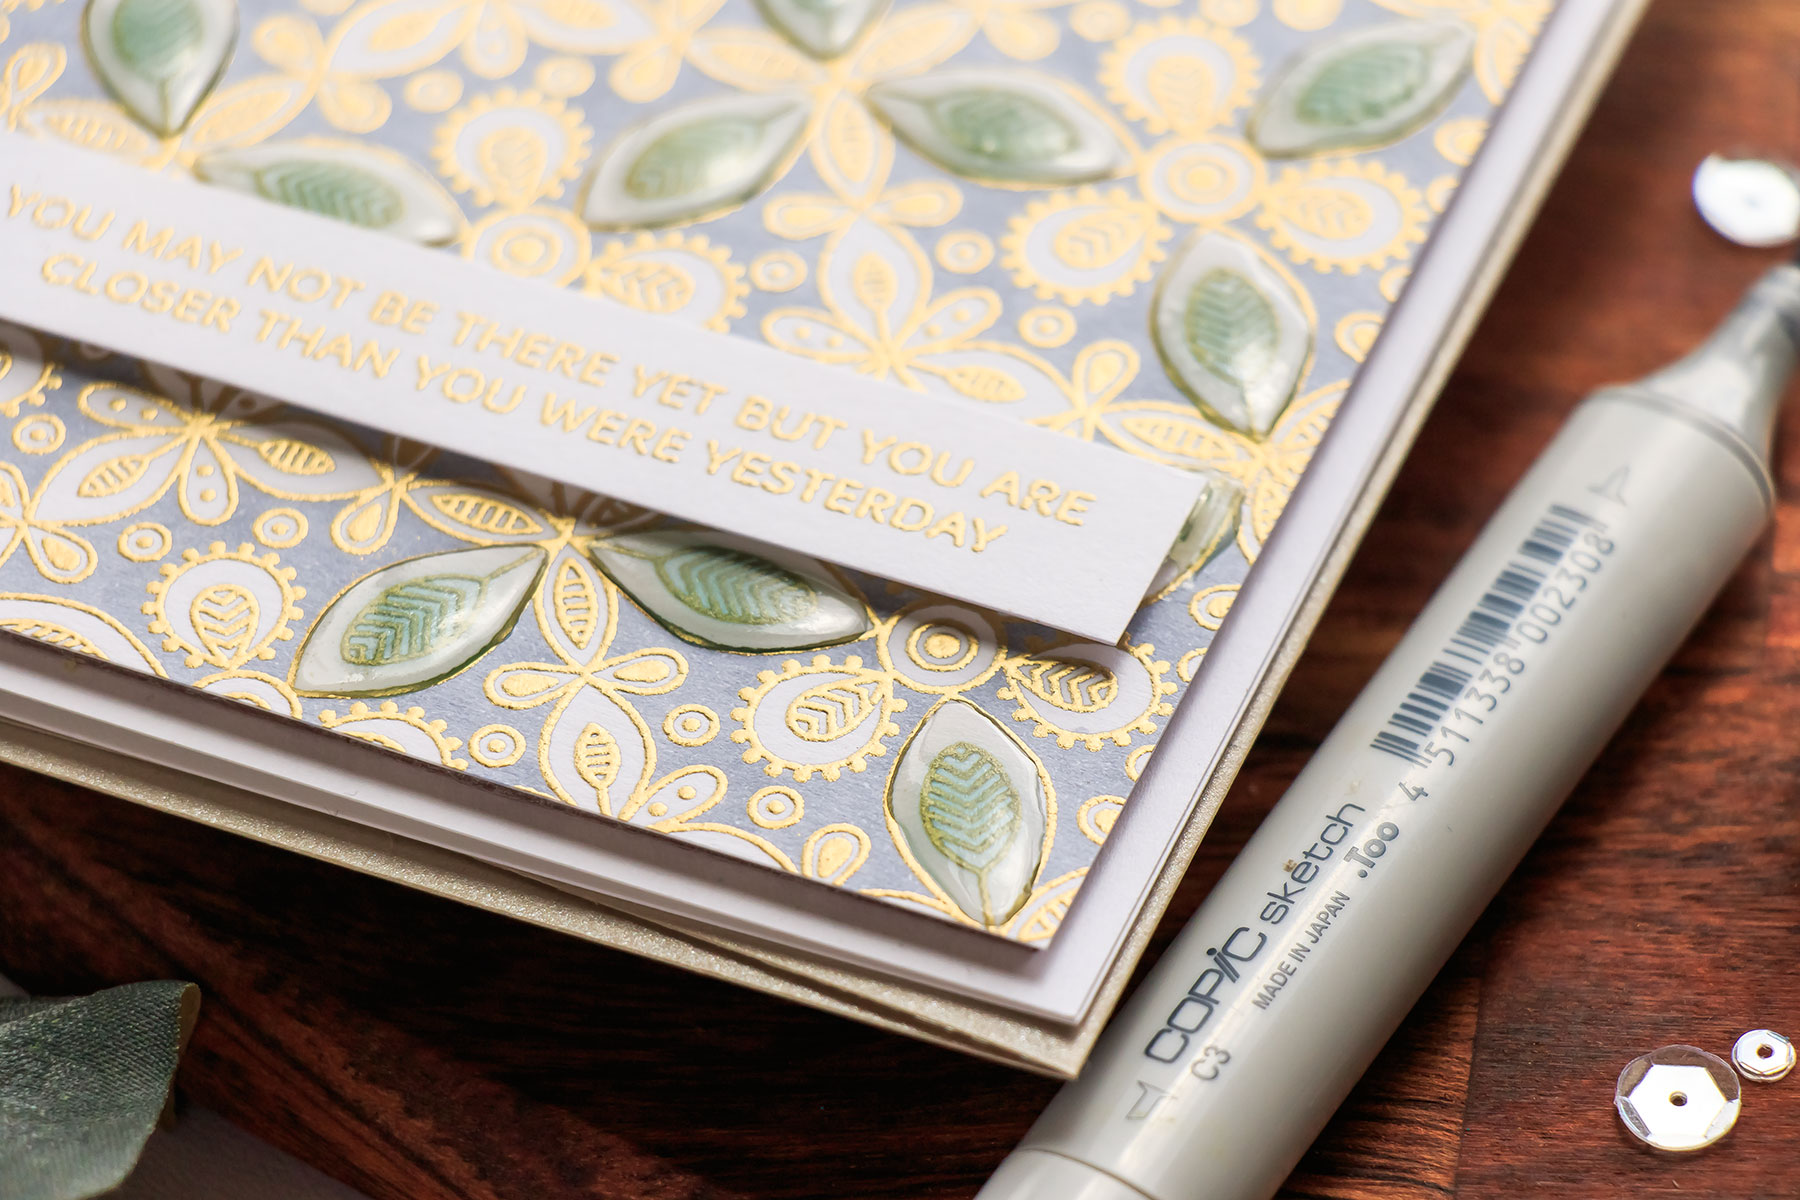
Finally, I coated some of the white sections on my background using Nuvo Glaze from Tonic. I love to use this product to add dimension to my stamped images and I’ve actually used up almost an entire bottle already, I was struggling to finish coating shapes on this card.
It’s best to leave it to dry overnight and make sure you set it on a flat surface, sturdy surface.
P.S. After Nuvo Glaze dried I noticed a slight blue tint to it. I’ve never noticed it before (I think this might be the first time I coated it over white). Just something to note and keep in mind.
I hope you’ll give this a try. Have fun stamping!
P.P.S. SNEAK PEEK!
I wanted to share a STAMPTEMBER sneak peek before I finish this post. If you liked the technique I shared today, you’ll LOVE my tomorrow’s projects:
SUPPLIES
I’m listing the products I used below. Click on the link to go directly to the product. Where available I use compensated affiliate links which means if you make a purchase I receive a small commission at no extra cost to you. Thank you so much for your support
 Simon Says Stamp Kaleidoscope Background Shop at: SSS |
 Simon Says Clear Stamps Uplifting Thoughts Shop at: SSS |
 Simon Says Stamp Embossing Ink Pad Shop at: SSS |
 Simon Says Stamp Antique Gold Embossing Powder Shop at: SSS |
 Tonic Crystal Glaze Nuvo Shop at: SSS |
 Neenah 110 Lb Solar White Cardstock Shop at: SSS |
 Hero Arts Heat Embossing Gun PW200 Shop at: SSS |
 ScraPerfect Crafting Pouch Shop at: SSS |
 EK Success Powder Tool Applicator Shop at: SSS |
 Scor-Tape 1/8 Inch Crafting Tape Shop at: SSS |
 Copic Sketch Marker YG93 Grayish Yellow Shop at: SSS |
 Copic Sketch Marker YG95 Pale Olive Shop at: SSS |
 Scrapbook Adhesives White Foam Squares Shop at: SSS |

Absolutely stunning and elegant card. Love the technique and I’m off to buy that stamp!
I can’t wait to try my hand at making this card. It is just beautiful. Your choice of design and colors is spot on. TFS your God given talent with the paper crafting world.
I’ve always been afraid to use my Copics on embossed images. Thank you for showing me the proper way to do that Yana!
This is one gorgeous card! It looks so elegant in the gold embossing. The pattern you coloured is just perfect and adding the dark background really makes the pattern pop.
I love how you do different looking cards – sort of against the grain. So beautiful! This release is fantastic.
Such beautiful card So!
What a stunning card!! I love what you did with the colouring!! Thanks for sharing!!
Beautiful card!
Lots of coloring…stunning effect.
Gorgeous! Your coloring detail is amazing, Yana! Love that extra detail of embossing and clear glazing. Thank you for the great ideas!
Yana, I just love the saying and your card is stunning!
Love your card and the colours you used. Thanks for sharing.
I love, love LOVE this card! Your color combo is just so cool. I can’t wait to try it! Thank you for all your fabulous inspiration!
The card and colors are just stunning!
Thank you for sharing!
Very beautiful card! The coloring is just wonderful and the stamp is perfect! Thanks for sharing.
All I can say is, “WOW!”
Very striking card! Thanks for sharing your ideas with all of us.
Absolutely gorgeous card! This is a great way to use those alcohol markers! And this is even better than a coloring book – you can give the card away when you are done! Love it. I’ll have to get this stamp for sure.
Love the gold embossing of this background stamp!
Great card and coloring. SSS background stamps for this release are wonderful and I’m ready to get more than a sneak peek at tomorrow’s card.
I love the fact that you used gold embossed powder! Beautiful!
Beautiful card
Wow…. the effort was well worth it…. it’s a beautiful card. The dimension you added at the end really sets it apart.
Love all the ideas using the one stamp. Thanks for the great video!
I love your color choices so great for the fall season. I have bought several of the supplies myself today and am going to try to make something similar for my Thanksgiving cards.
Love the embossing!
Lovely card.
Love this card.
Such an elegant card!
Thanks for the inspiration!
Love your videos.
Very nice! Love the colors!
Love this stamp. Your card is gorgeous!
Such patience. Wonderful card.
Beautiful cards!! Such creativity! Thanks for sharing.
I’m loving that background stamp!
This card is so beautiful!
Another gorgeous card Yana! I also must say, you have a lot of patience to have colored this intricate background, but absolutely worth the effort!
Stunning.