

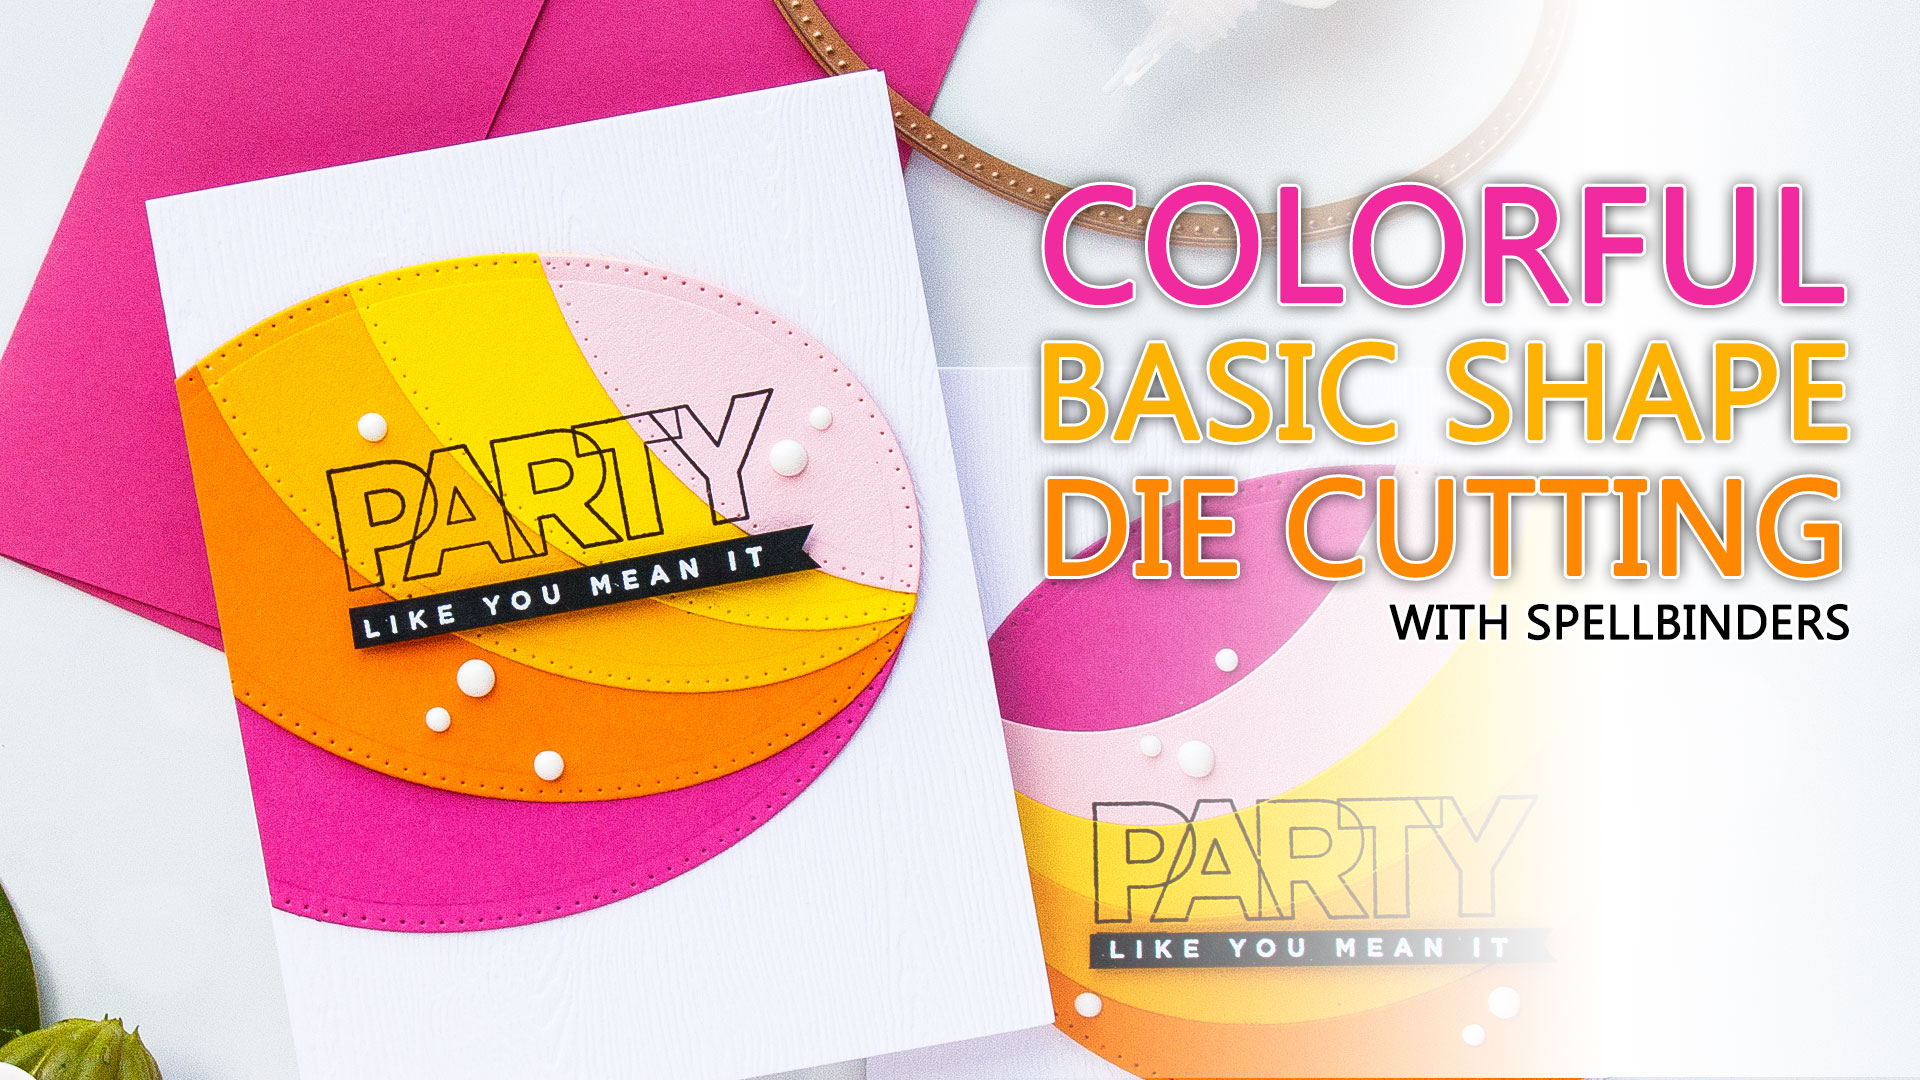
Hello friends! We’re moving early next week (I still have plenty to pack – I’m posting some photos on my Instagram Stories in case you’d like to see), but in the meantime I have new cards and a video to share. Today I’m joining Spellbinders March release blog hop and brining you 10 cards created using their March Classics release which is all about basic shape dies. I talk in detail about 2 projects in this post and video and I share supplies for the rest of the cards at the bottom of my post.
The cards I have today were created awhile back (aside from the 2 video projects) as part of the “packaging” projects – the cards that you see on the Spellbinders packaging. I had a blast making them as I wanted to share them with you as I believe that basic shape dies are always the must haves. If you have the basic elements – circles, ovals etc – you can use your other supplies and build upon them.
Like this project? Pin it and save for later | Curious about my project photography? Click for details.
As of September 2016 I work as an in-house creative designer at Spellbinders office in Phoenix. While I do a lot of work for them and create a number of different projects I am only sharing what I truly love made using their products here on my blog. I do not and never will share projects or mention products I not love.
VIDEO TUTORIAL
As always, I filmed a video tutorial showing how to create this project from start to finish. I’m hoping you’ll enjoy it. Watch it below or on my Youtube channel.
Like this video? Please give it a big thumbs up (you can do this on Youtube video page right under the video) and share with a crafty friend! Leave me a comment too, I love hearing from you!
If you are visiting my blog for the first time or have not yet subscribed – be sure to do so! I share lots of handmade projects every week delivering them straight to your inbox! I also occasionally share information about crafty sales and new product releases I love. Subscribe here.
CARDS DETAILS
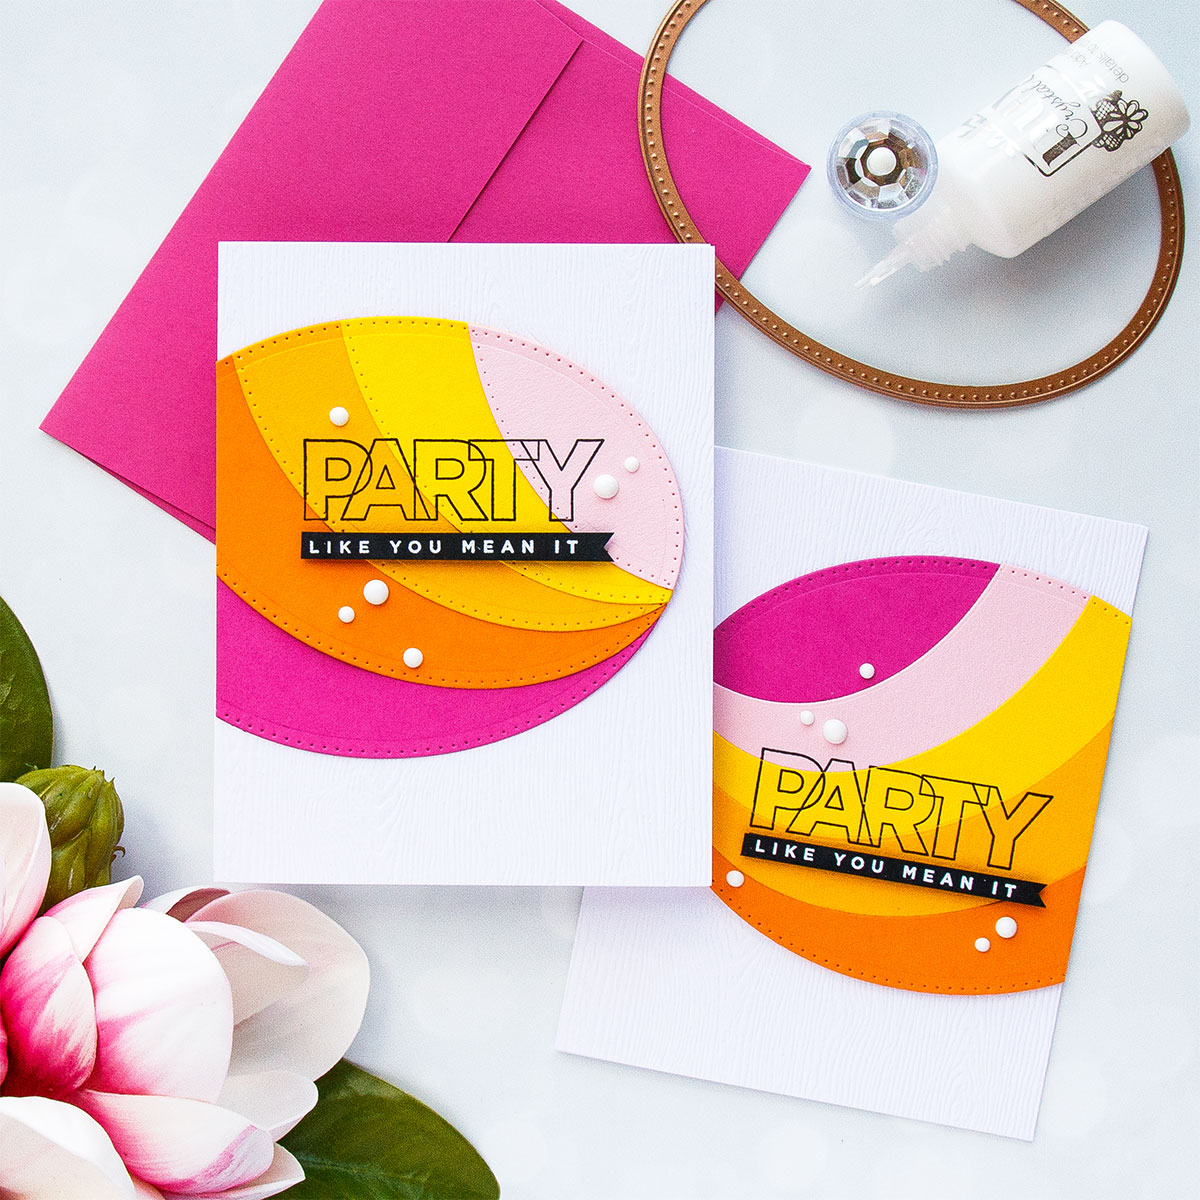
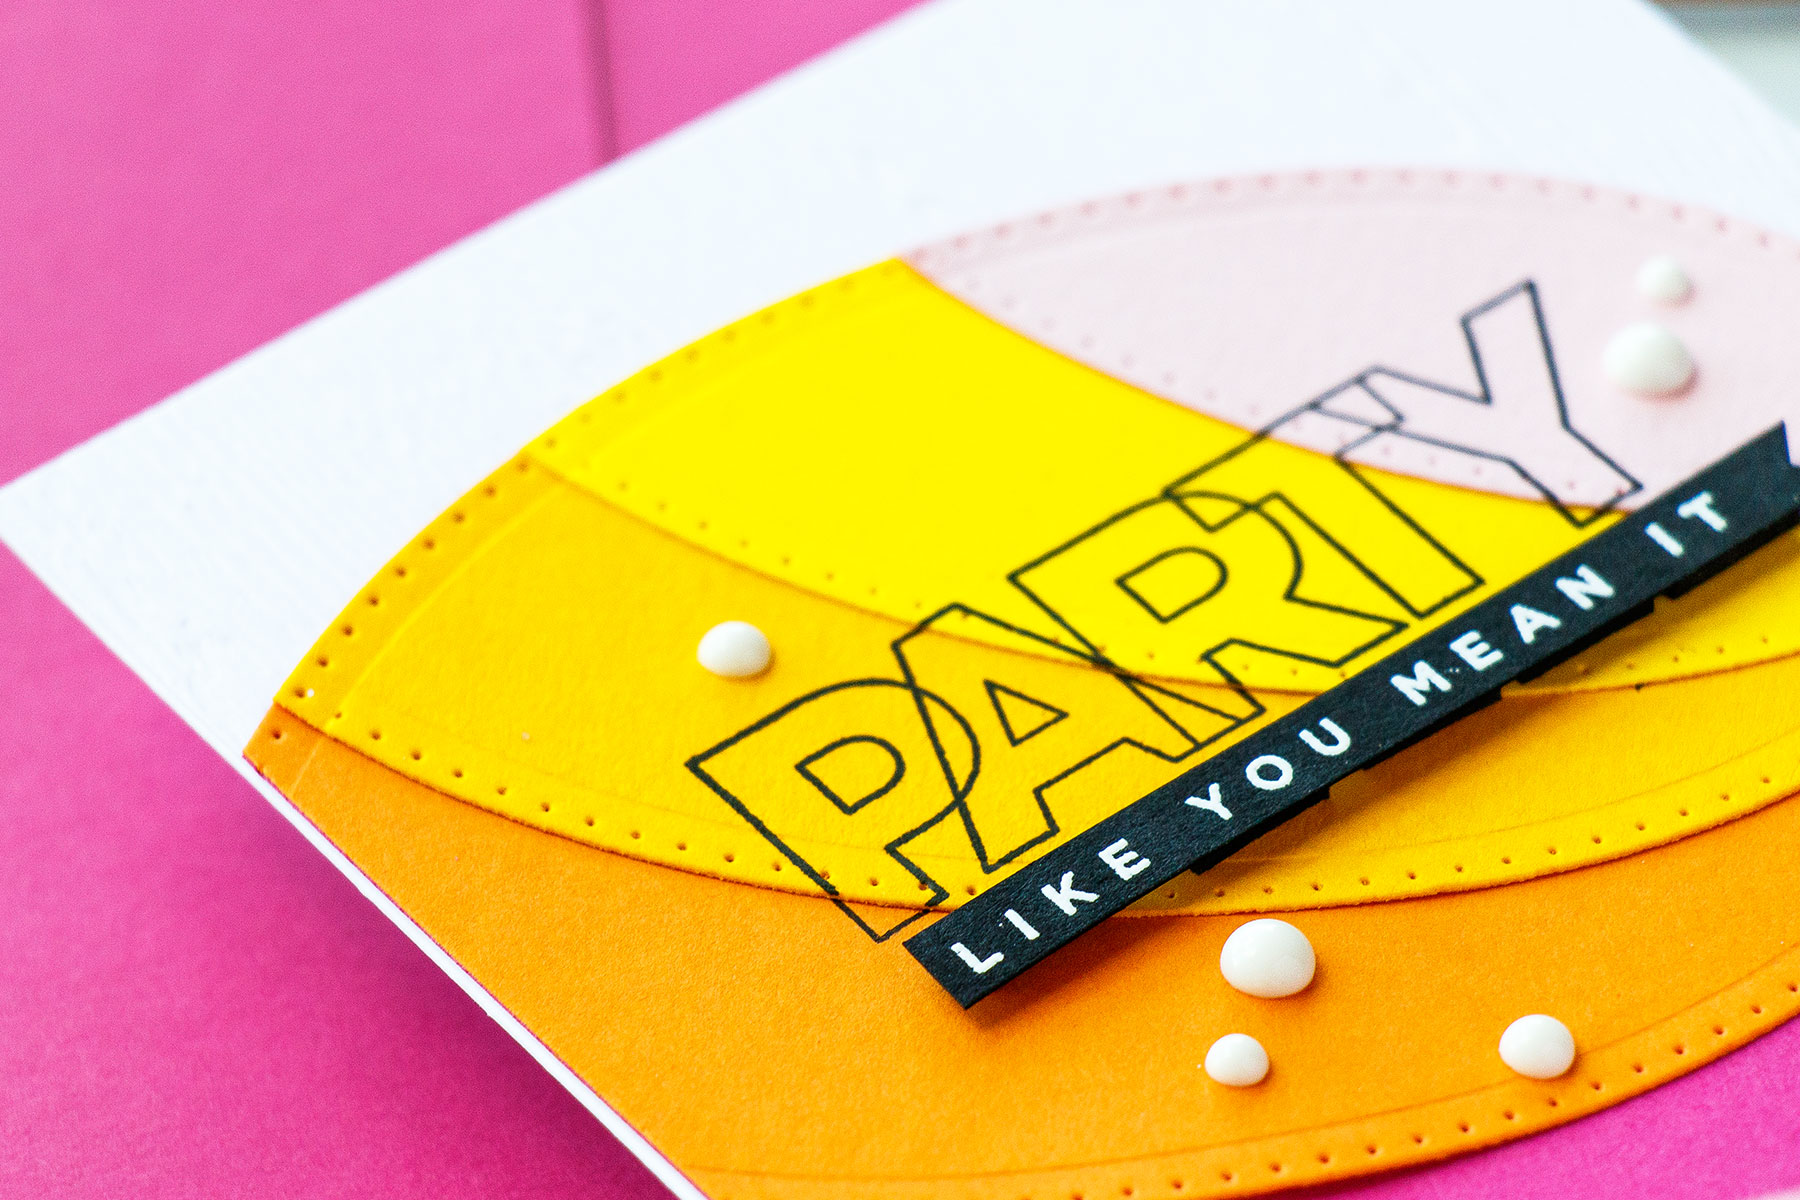
I used colored cardstock from Simon Says Stamp in Doll Pink, Orange Peel, Sunshine, Banana and Cotton Candy to die-cut the largest oval from the Scored & Pierced Ovals set. I arranged my ovals “fanning” them out on the base hot pink oval, taped them in place and die-cut once again one by one using same oval die to create colorful partial ovals.

To stamp the sentiment I used my mini MISTI tool and placed my ovals one by one inside the MISTI stamping sentiment onto each of the layers going across 4 of the ovals.
If you assemble your colored cardstock oval and than stamp sentiment you’ll ruin your piece as you will have different number of cardstock layers and you’ll end up overstamping the sentiment in one part and under stamping in another even if you use a stamp positioner. So stamping the sentiment onto each oval separately and than assembling the oval cluster is a better idea.
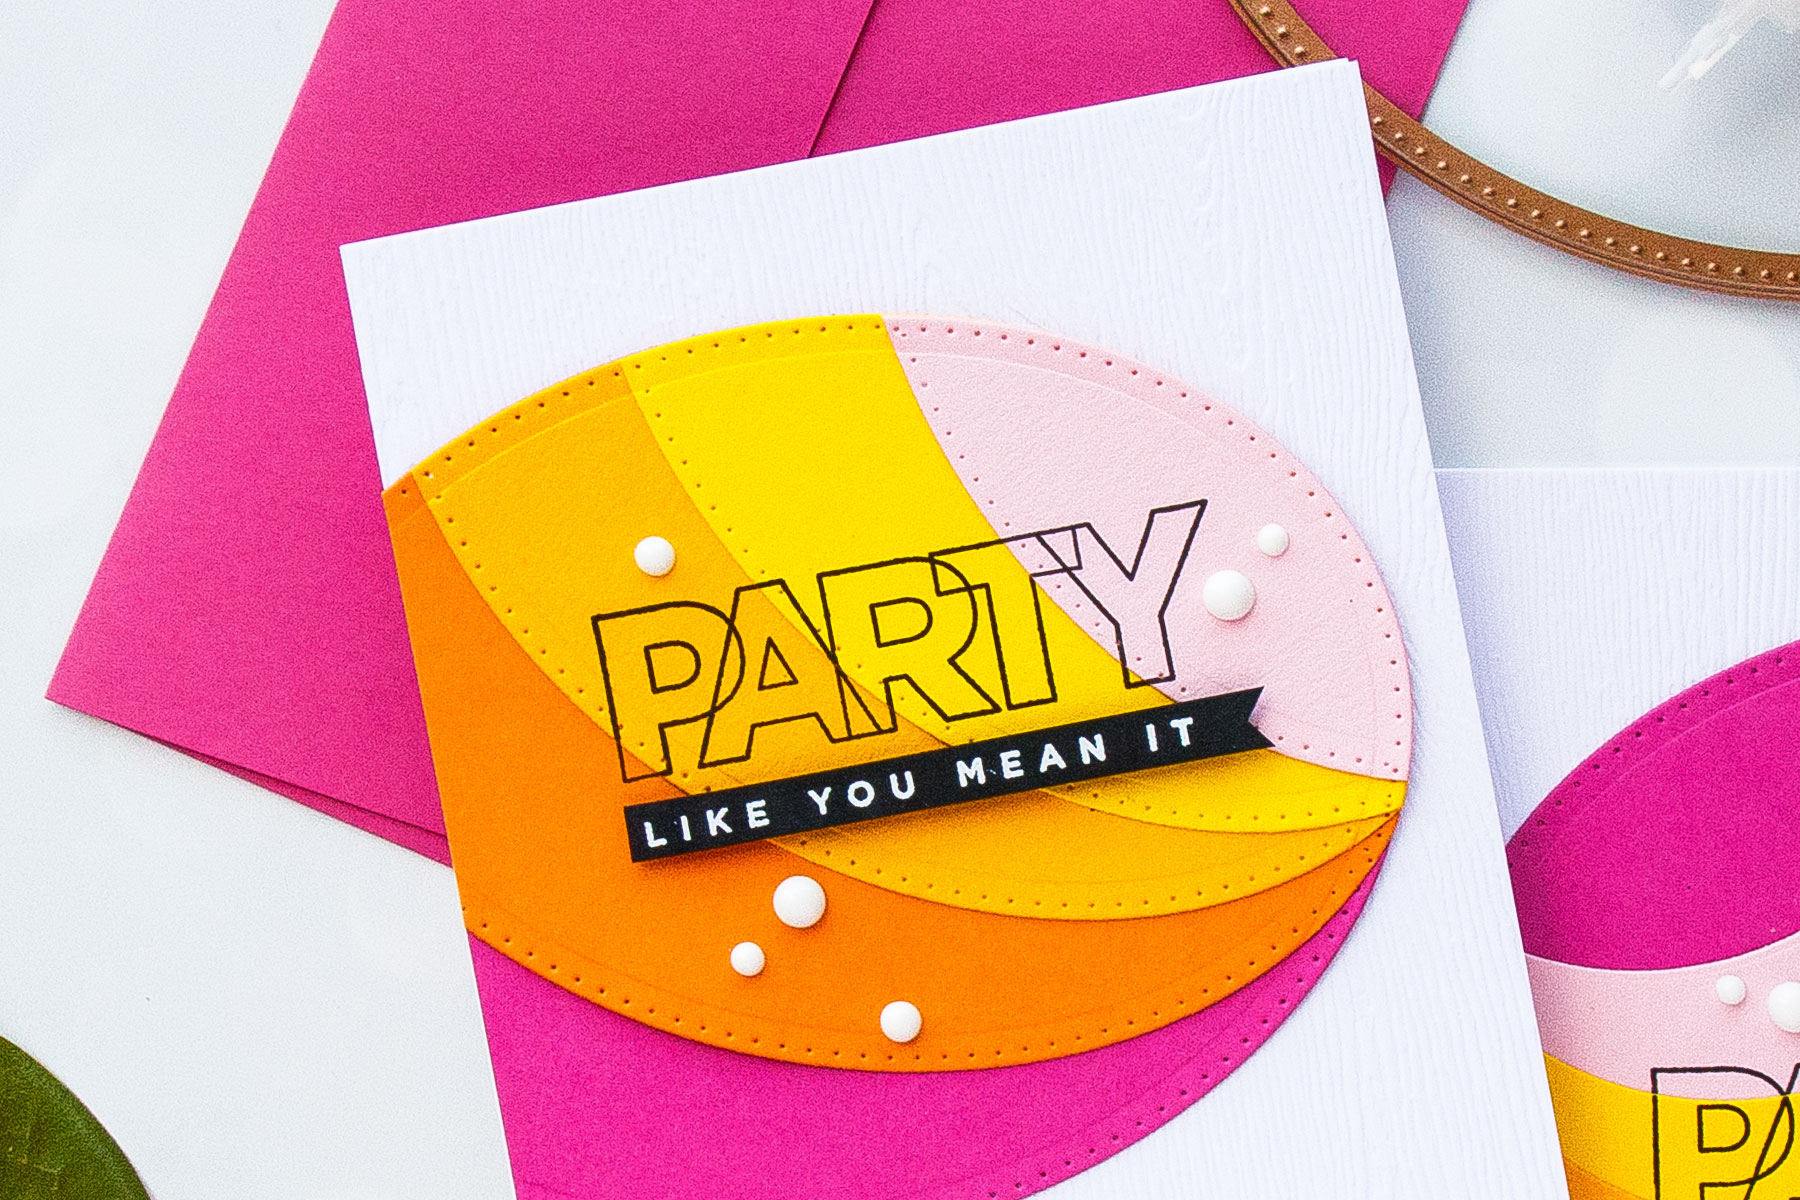
My sentiment reads Party Like You Mean it and it comes from the Birthday Palooza stamp set by Cathy Zielske for Simon Says Stamp. To have a lot of contrast I used black ink for stamping.
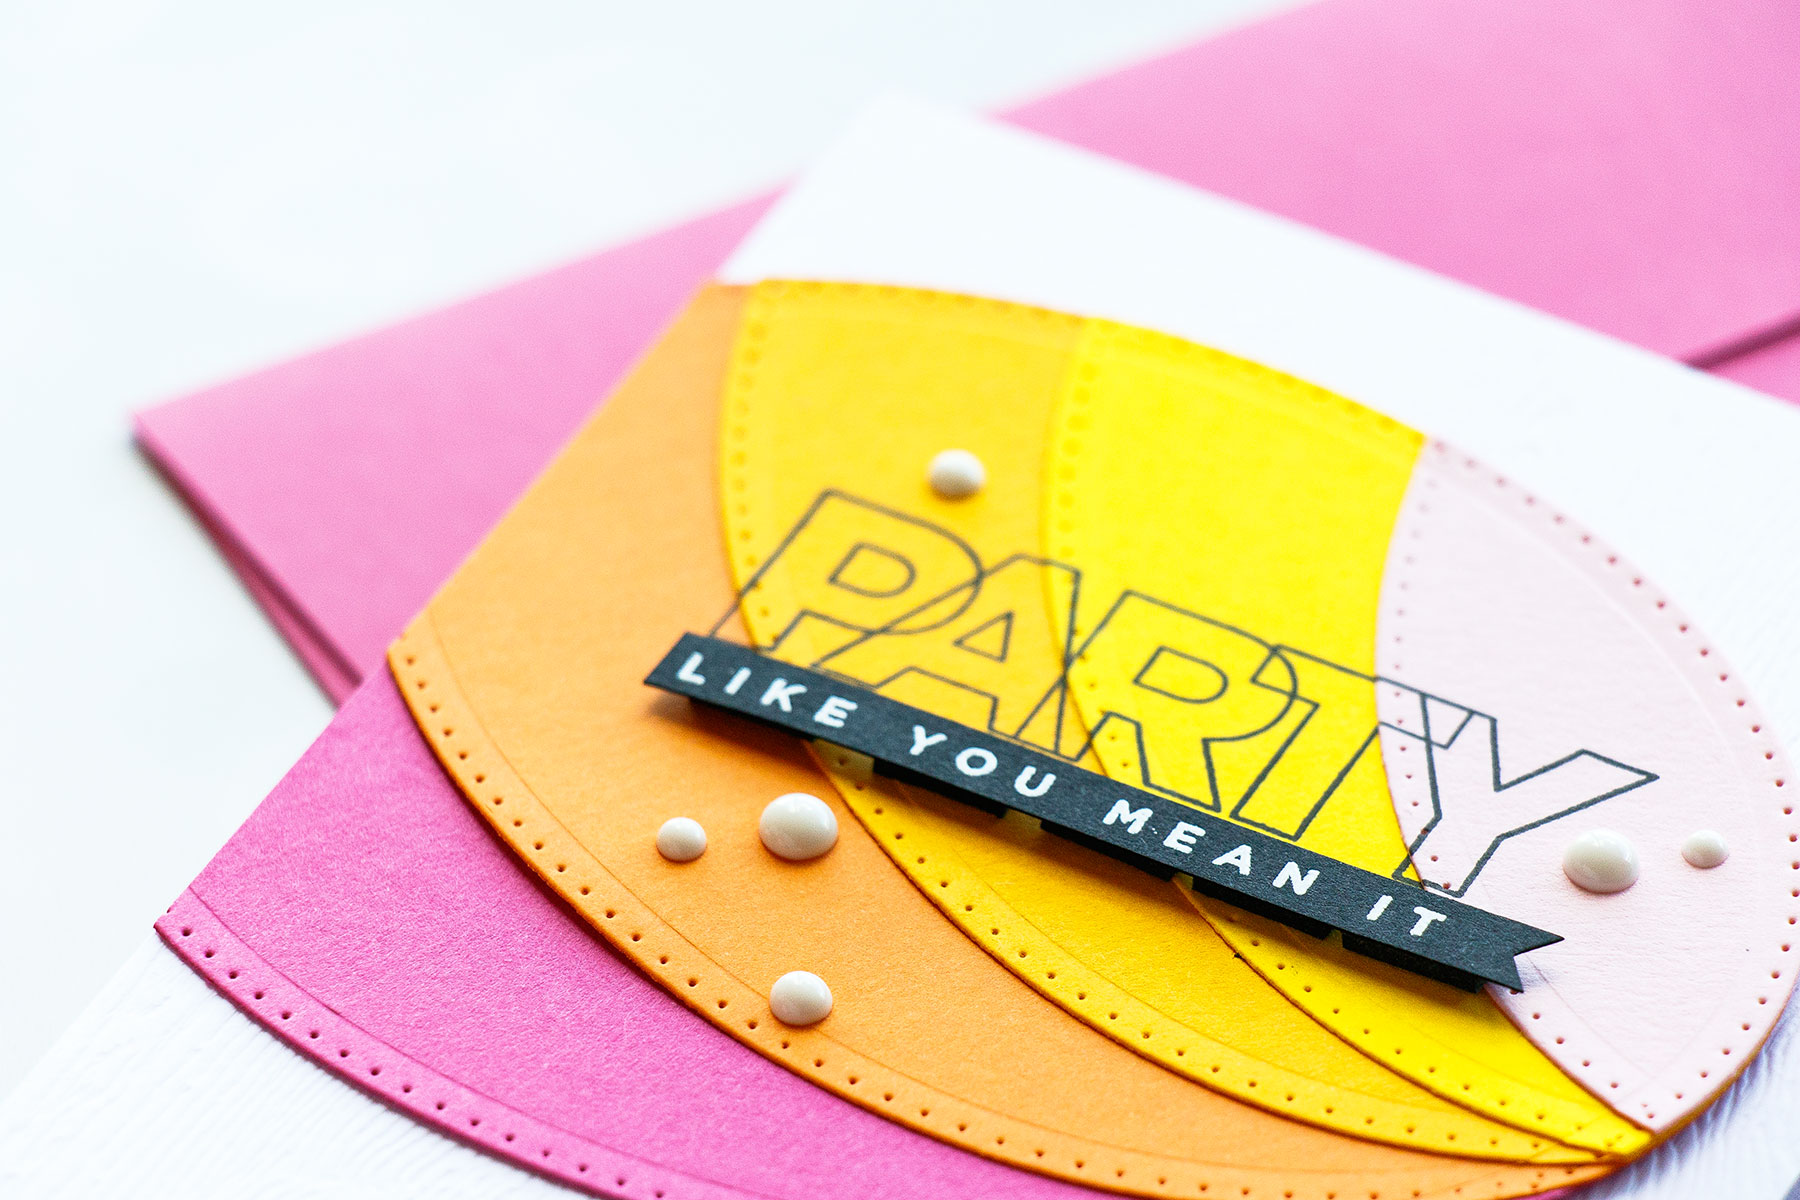
Once my stamping was done I adhered my ovals together forming a colorful oval cluster. Next, I used my paper trimmer and cut the oval to be able to fit it on an A2 card base.
I had a lot of leftover oval pieces, I saved those and used to create another, similar card. I just needed to die-cut one more hot pink oval for the base.
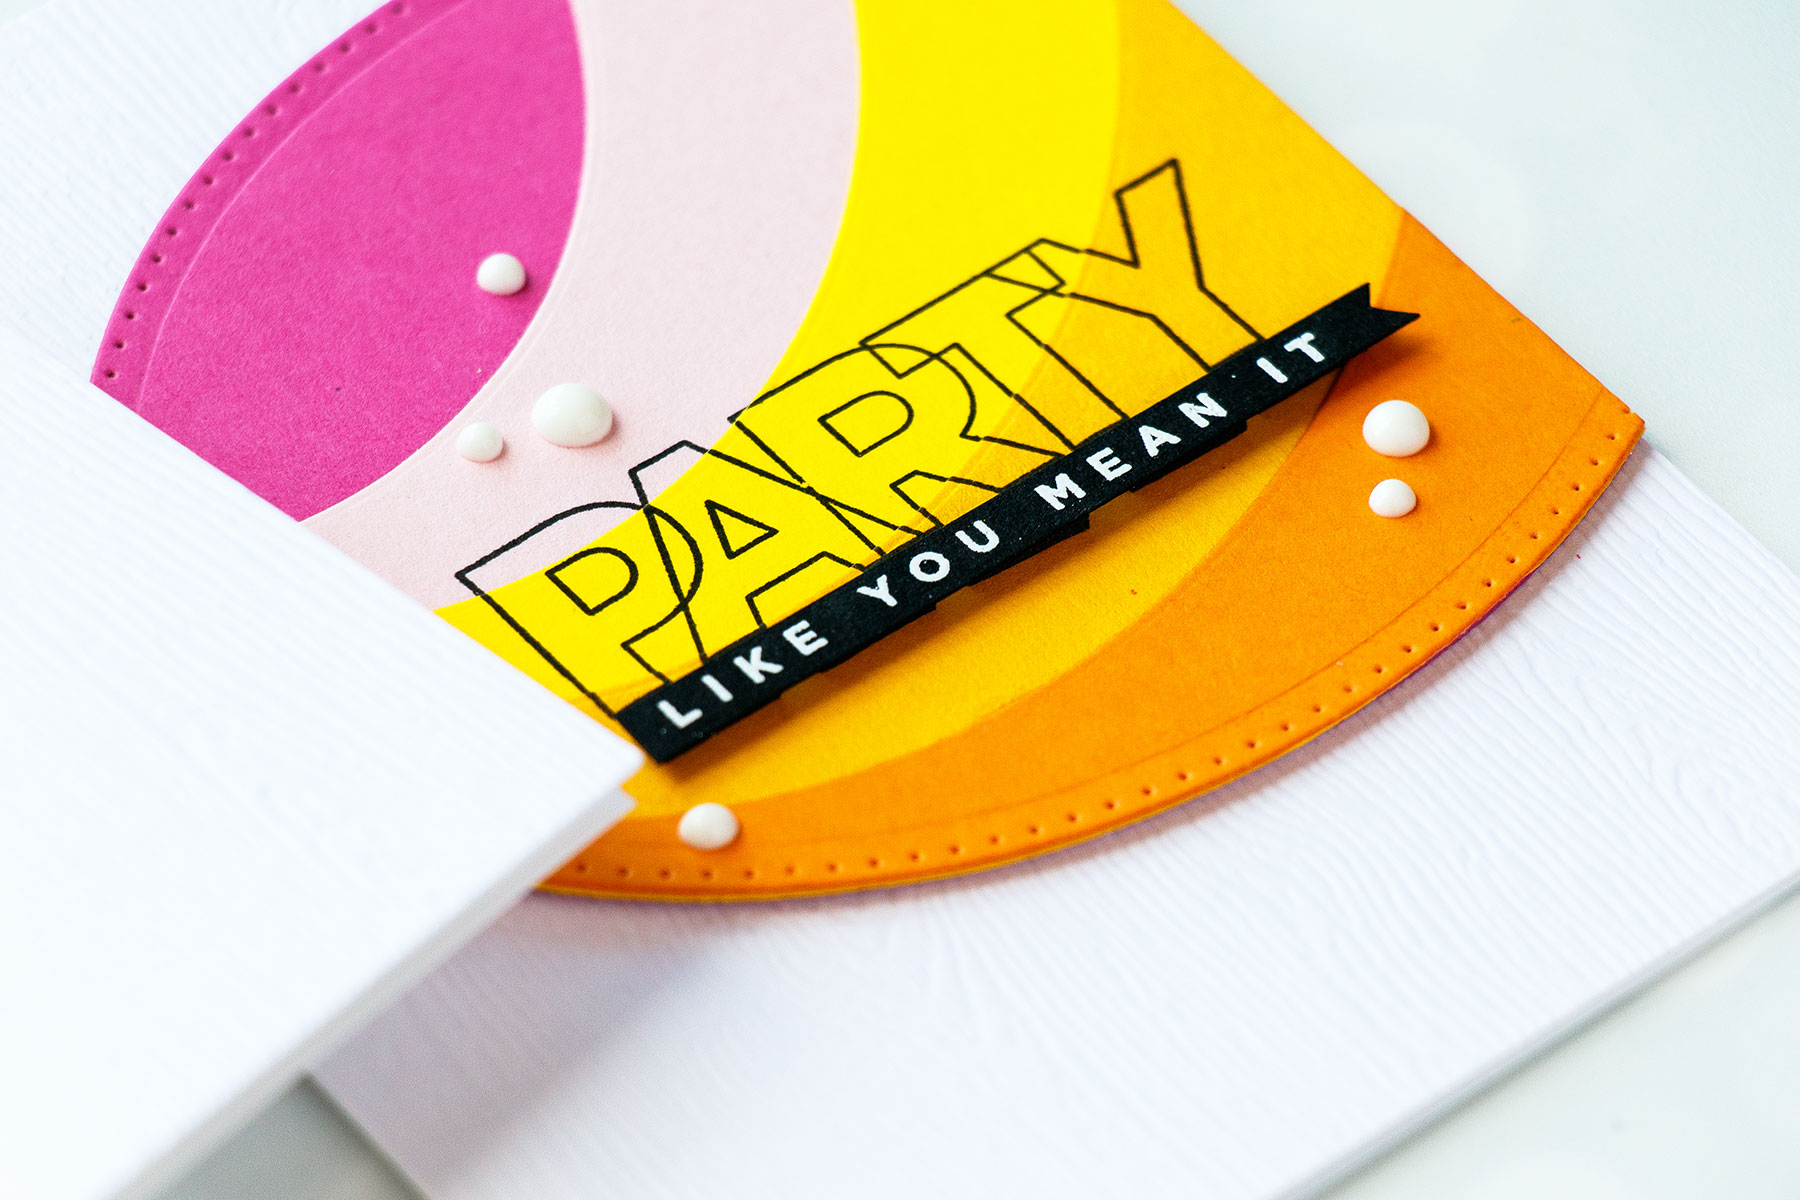
I adhered my oval onto a white card base covered with white woodgrain paper from Hero Arts. I love using this paper for super simple and clean projects as it adds a nice amount of detail to my cards. I also use black foam adhesive tape and foam mounted “Like You Mean It” right under the stamped “Party”.
Finally, I used Nuvo Drops in white and embellished my cards with a few drops here and there forming a visual triangle around the sentiments on the colorful ovals.
This handmade card uses Nuvo Drops as a final touch. Want to see 4 other ways you can use Nuvo Drops from Tonic Studios in card making? Check out this article – 5 Ways to Use Nuvo Drops.
MORE INSPIRATION
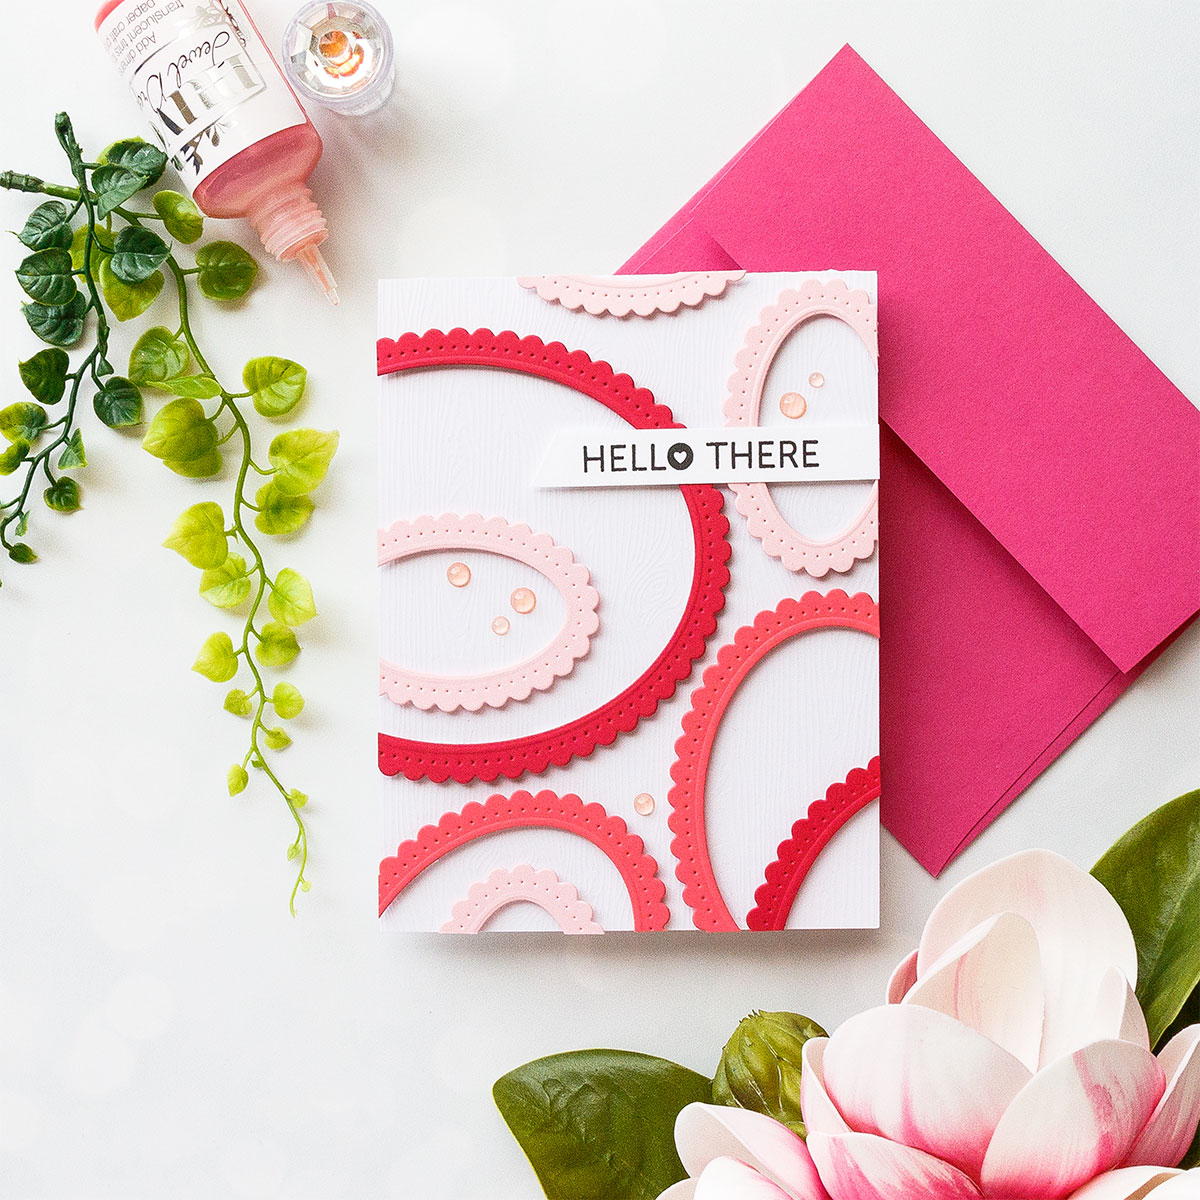
White cardstock (Neenah 110 LB), Colored Cardstock – My Colors Cardstock (Rose Chintz, Ballerina Pink, Watermelon Pink); White Woodgrain Cardstock; Clear Stamp – Mama Elephant Good Times; Black Ink; Fun Foam; Nuvo Jewel Drops in Rosewater
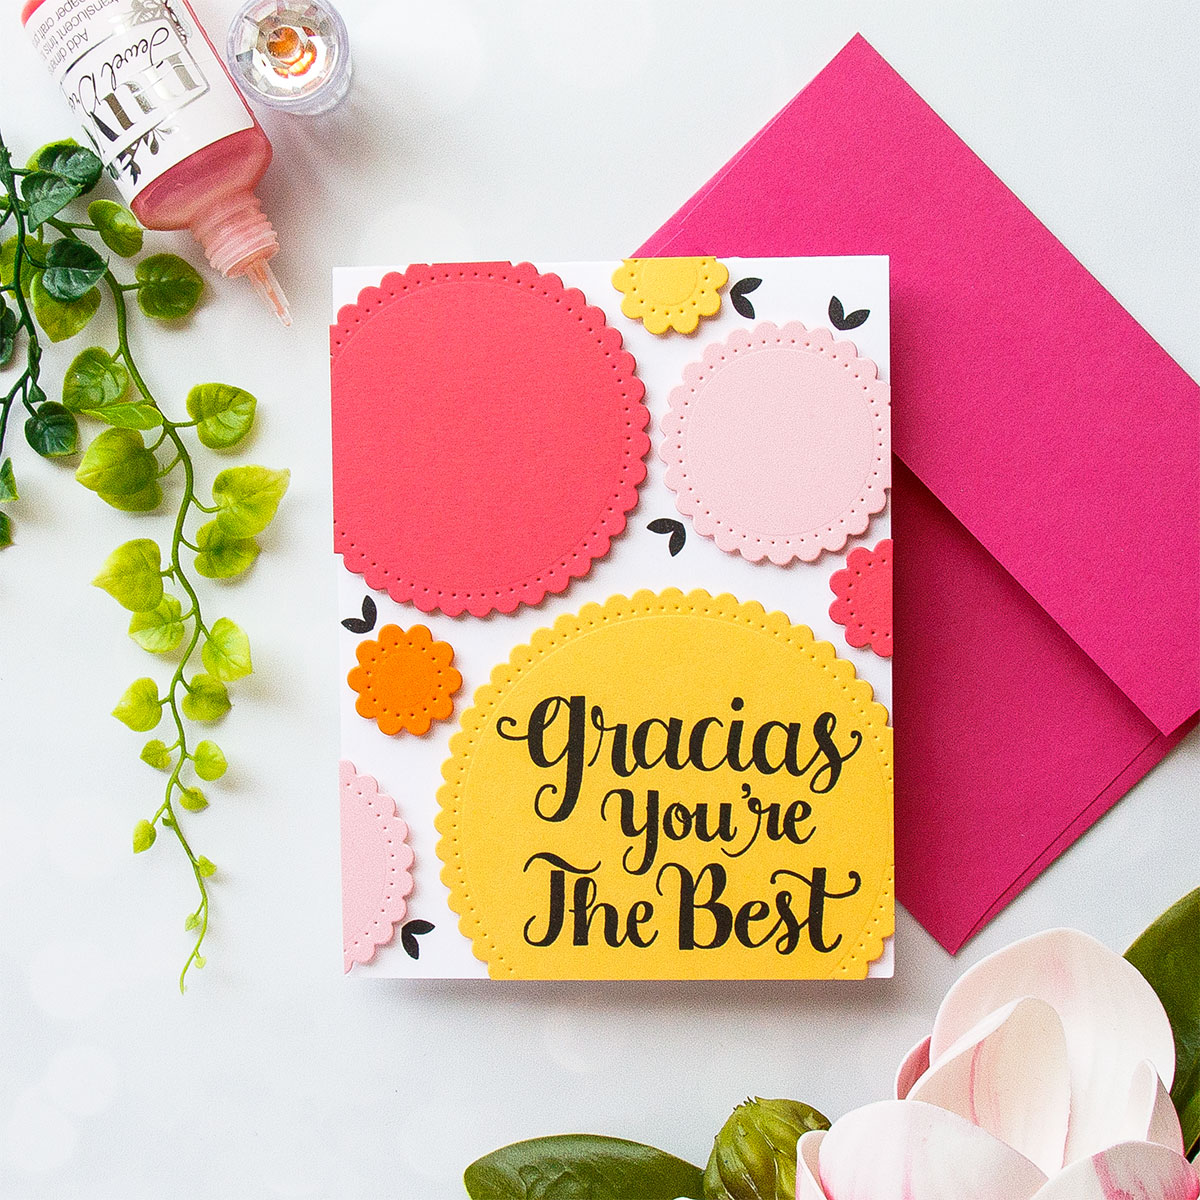
White cardstock (Neenah 110 LB), Colored Cardstock – My Colors Cardstock (Rose Chintz, Ballerina Pink, Antique Gold, Candied Yam); Clear Stamp – Mama Elephant Merci; Black Ink.
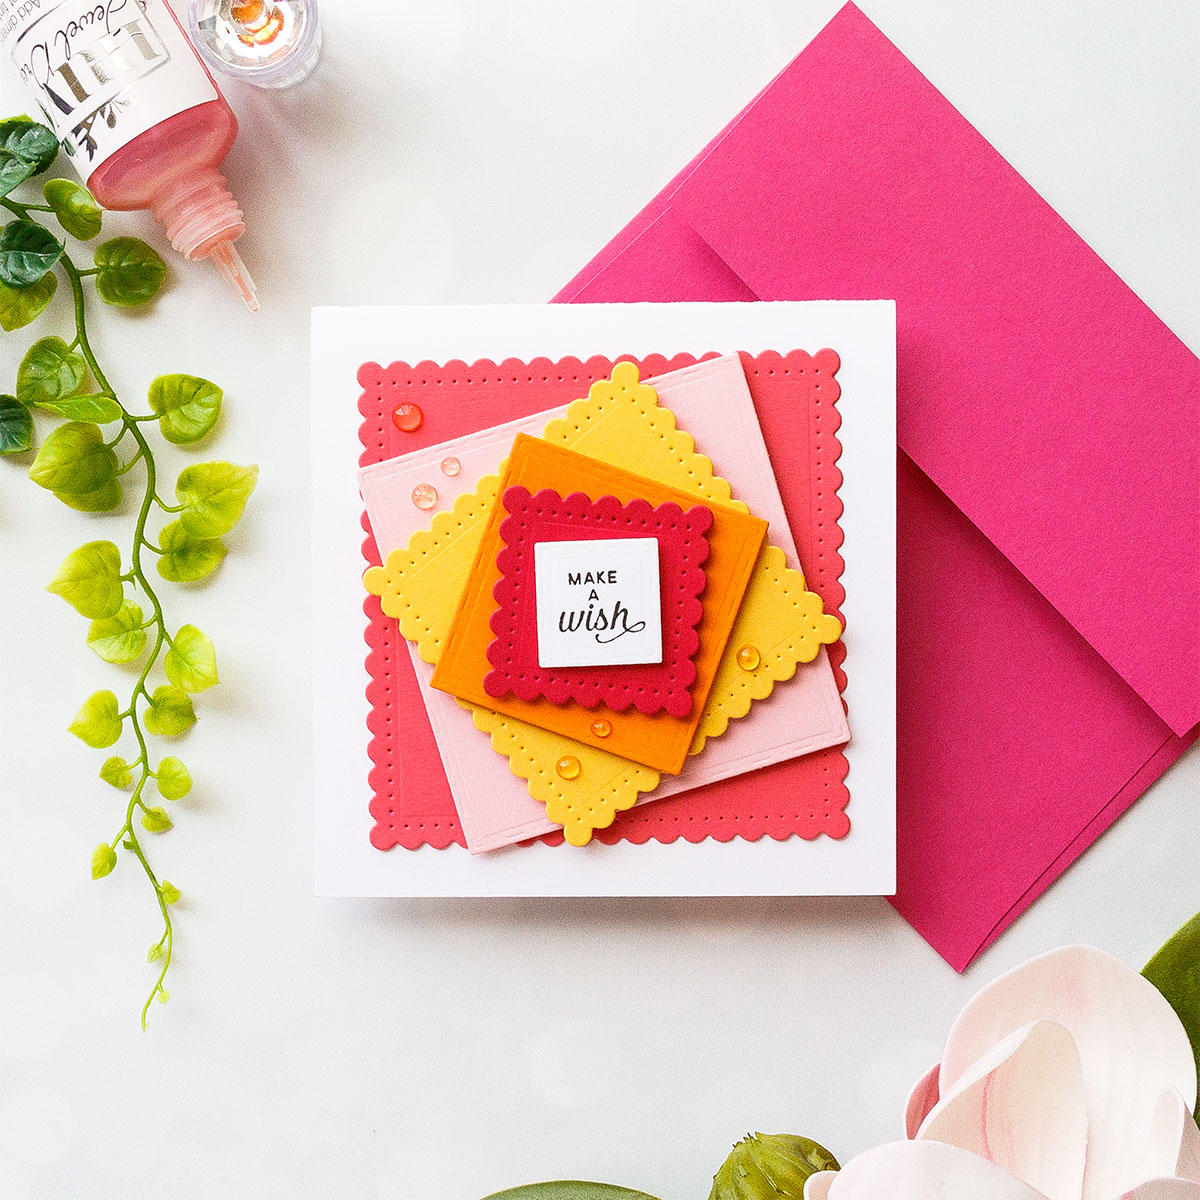
White cardstock (Neenah 110 LB), Colored Cardstock – My Colors Cardstock (Rose Chintz, Ballerina Pink, Watermelon Pink, Antique Gold, Candied Yam); Clear Stamp – Mama Elephant Mini Messages; Black Ink; Fun Foam; Nuvo Jewel Drops in Rosewater
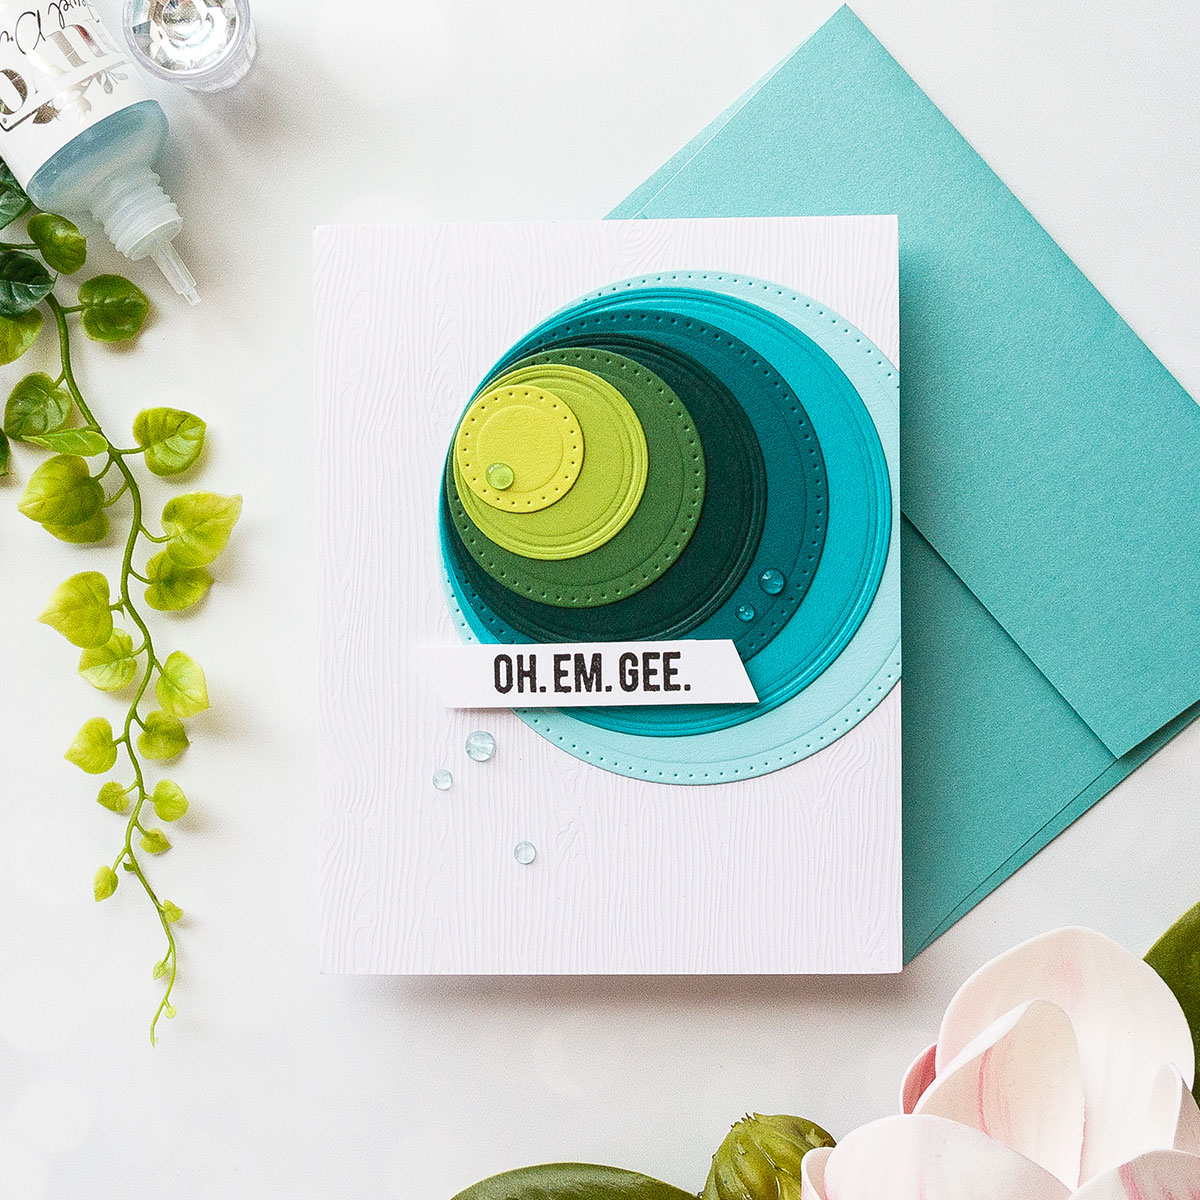
White cardstock (Neenah 110 LB), Colored Cardstock – My Colors Cardstock (Lemon Lime, Crisp Green, Herb Garden, Forest Green, Hunter Green, Tropical Sea, Pale Aqua); White Woodgrain Cardstock; Clear Stamp – Mama Elephant Good Times; Nuvo Jewel Drops – Sea Breeze; Black Ink.

Love the release. Your cards are so fabulous!!!!
Wonderful colors and cards. I love the bright rich colors and the layers are wonderful and great dies. Thanks for the inspiration you always give me.
Love all your cards and the video too. Great ways to use the dies with all the layering.
Fantastic layering and a great use of the basic dies! Love the colours you chose!
I tend to use basic shapes exclusively for months to a year at a time, then I stop for awhile. Not sure why.
Its amazing what beautiful cards you can create using simple shape dies!
Love what you did with the ovals. You are so inspiring! It is fun to learn new things to do with old classics.
Yana, these cards are stunning! Love the colorful, clean lines. Brilliant.
These cards are great, love the shapes & colors.
Yana, your cards are SO CREATIVE!!!! I LOVE that SB is coming out with the Classics again! I was never able to get all of the previous classics they had out before! LOL SUPER JOB on your cards!
Those cards are amazing Yana! Good luck with your move!
Fabulous cards with
these basic shapes.
I like to use rectangle
frames on my cards.
Also circles.
Carla from Utah
This is really different from anything I’ve seen. Love it!
What an incredible array of cards you’ve created from basic shapes, Yana! This alone has given me so many ideas…so no wonder I found your video so helpful on the spread of oval cuts for your initial card. The many tips and suggestions are invaluable. Thanks for sharing it all on this blog hop.
I love the vibrant colors and circles.
Wow!!! I typically only use the classic Spellbinders shapes as a base and then add the more decorative dies as mats, but you are certainly make me rethink this! What stunning cards! And beautifully vivid colors, too.
Thanks for inspiring us to try something new and different!
I love your bold color choices. These cards are incredible! I always look forward to your videos.
What a creative imagination! Love your brightly colored combinations, especially the ovals! Amazing!
I love the use of simple shapes and beautiful colors. Would love to see hexagon Nestabilities from Spellbinders.
Very clever and colorful card designs using these basic shapes. I usually just use them as matting layers.
Very original!! I love the happy colours of cardstock you used!
Hi Yana,
I am in awe of your cards, and am so inspired. I can’t wait until the weekend, to pull out some of my basic shapes and see what I can create. Thank you for all the inspiration.
Take care
Tracy
I love the way you stack the die cuts to create a card front. I have never thought of doing that. Once I get a layered die cut, I’m going to try that.
So glad you shared these amazing cards! I have several spellbinder dies and know I must this technique a try! Thank you for sharing! Just Beautiful!
I love the clever way you used these dies Yana! Wonderful cards! TFS
Love the simplicity of these cards!!
I love the vibrancy of the colored cardstock, great technique,
Hello, I love this new release. I love what you did with the card and all the othercards.
who knew you can make amazing cards with little supplies.
WOW you made so many card samples to remind me just how versatile the basic dies are. I want to thank you for the suggestion regarding the first card with the stamping, PARTY. It was something that I always struggled with.
Pretty cards! I love the different ideas on using the basic shapes! Awesome color combos on your cards!
Very pretty and creative Yana. I would not have thought of using basic dies in this manner. I love them all! Thanks again for sharing. Can’t wait to get started!!!
WOW such vibrant and creative designs!!!
I love your cards there are amazing, with fantastic color combos!
All of your cards look wonderful. Thanks for showing a way to use simple shapes to get great-looking cards.
Wow, love you use of the nesting dies. The graphic effect is stunning.
I love all of these new ideas!
LOVE these cards!!! Definitely will try this technique.
OMG, Yana so many Gorgeous cards, you were busy, and yes I do like using the basic shapes in my crafting. I think if you use your iminagation you can make even basic shapes look unique. Back to your cards, I loved the bright colors you used. Great post today.
Such clever cards, Yana! I love that they are unique and bright.
Thanks for the tip on die cutting the ovals, I would never have thought of that! Love the bright colors!
AWESOME cards, I love how you used the classics, especially the multiple cuts for the oval rainbow of colors!
Fabulous cards and what great new ies!!!
Yana, your cards are so beautiful! Love all of the cards you showed in the video and your PARTY cards are just amazing! Thanks for the inspiration.
Those were so much fun, Yana! I especially like the third one.
Wonderful tips as usual. Thank you for the terrific instructions.
I haven’t used basic shapes as focus for cardmaking however I’m so inspired by your ideas that I’ll be trying it soon. Thanks for the inspiration!
Thanks for the inspiration! I loved seeing how to use the shapes in different ways. I love the bright colors too.
Great release! I love your happy colored cards, simple but so pretty!
Very creative cards using simple shapes and beautiful paper! Enjoyed the video; everything made sense after watching it.
What a great use of dies, Yana! Love the cards! Thanks so much for all the awesome inspiration.