


Hello and welcome back for another Yippee For Yana video! In this episode, I will show you how to do some basic calligraphy to create personalized monogram cards.
I am not a pro when it comes to calligraphy, it fascinates me, but I don’t really have any special skills to be able to do calligraphy beautifully. Still, this doesn’t mean I cannot try.

Like this project? Pin it and save for later | Curious about my project photography? Click for details.
VIDEO TUTORIAL
As always, I filmed a video tutorial showing how to create this project from start to finish. I’m hoping you’ll enjoy it. Watch it below or on my Youtube channel:
Like this video? Please give it a big thumbs up (you can do this on Youtube video page right under the video) and share with a crafty friend! Leave me a comment too, I love hearing from you!
CALLIGRAPHY MONOGRAMMED CARDS DETAILS
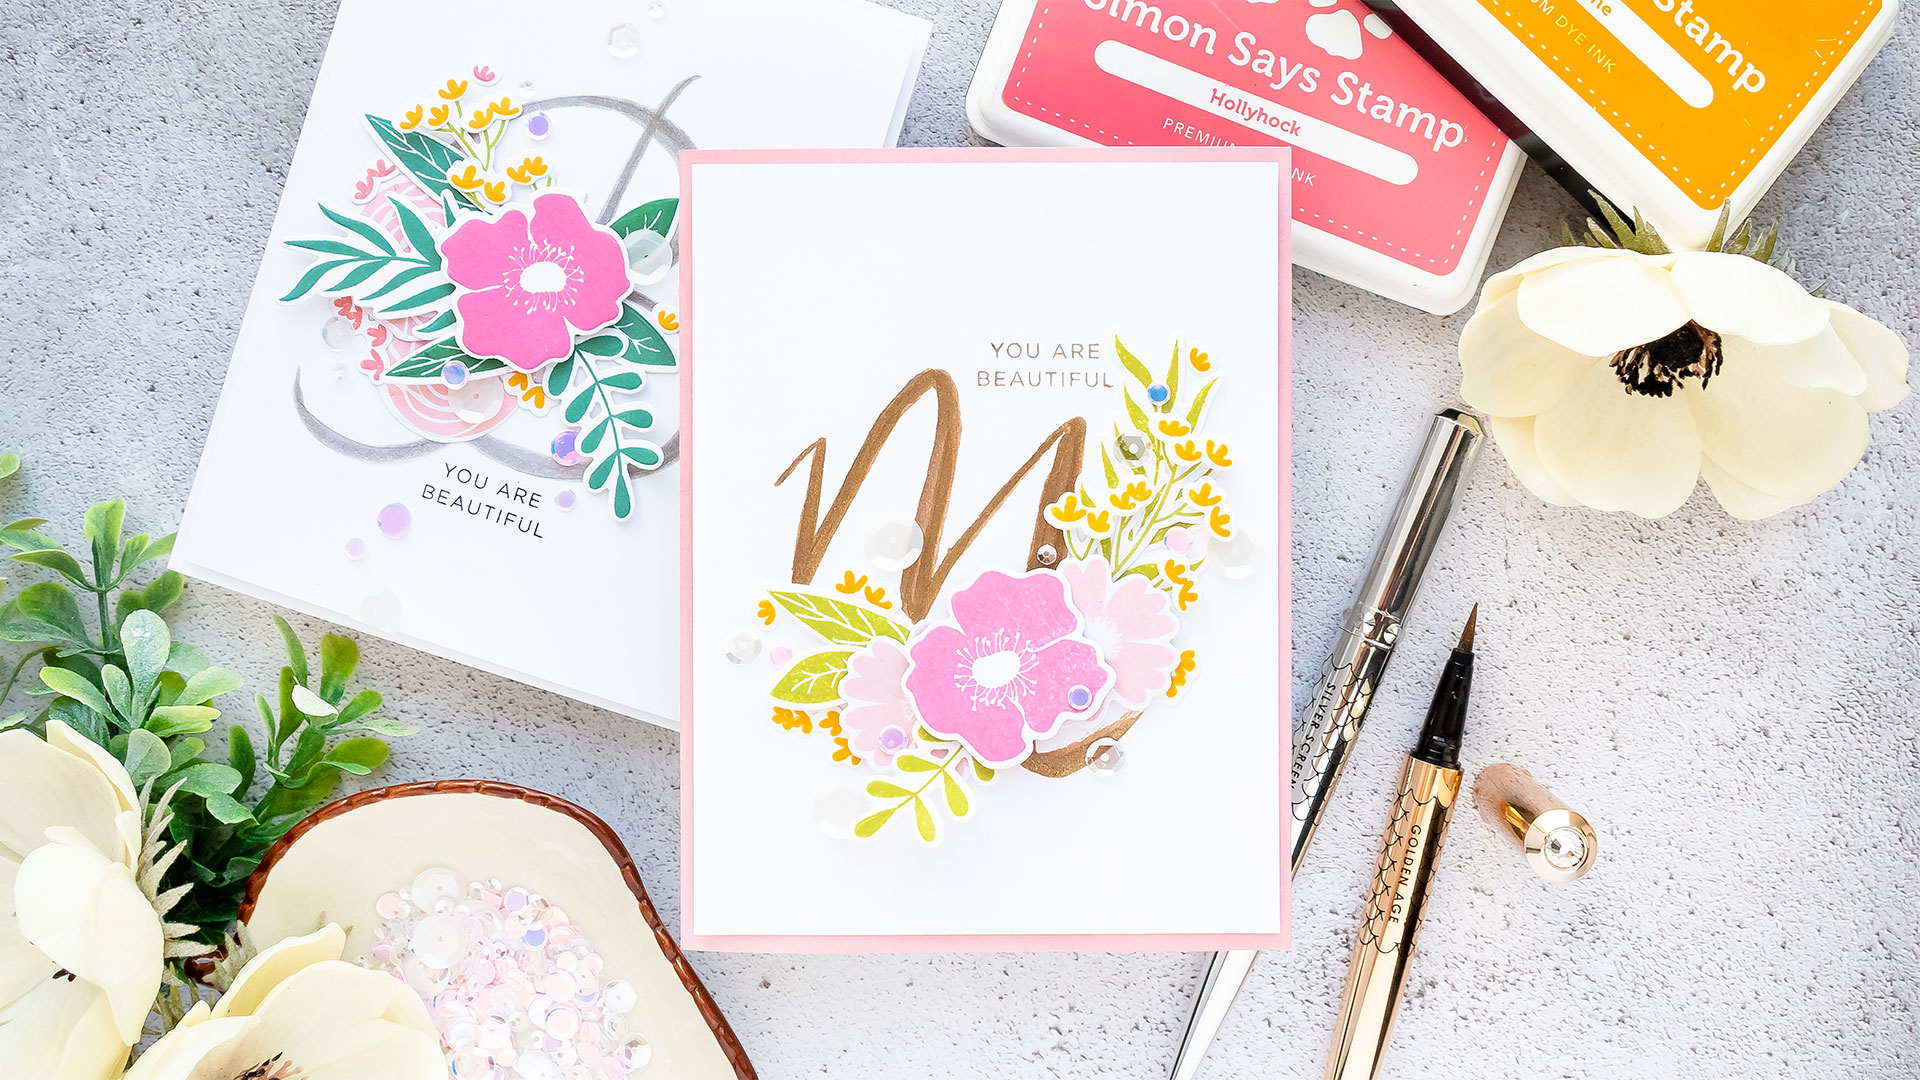
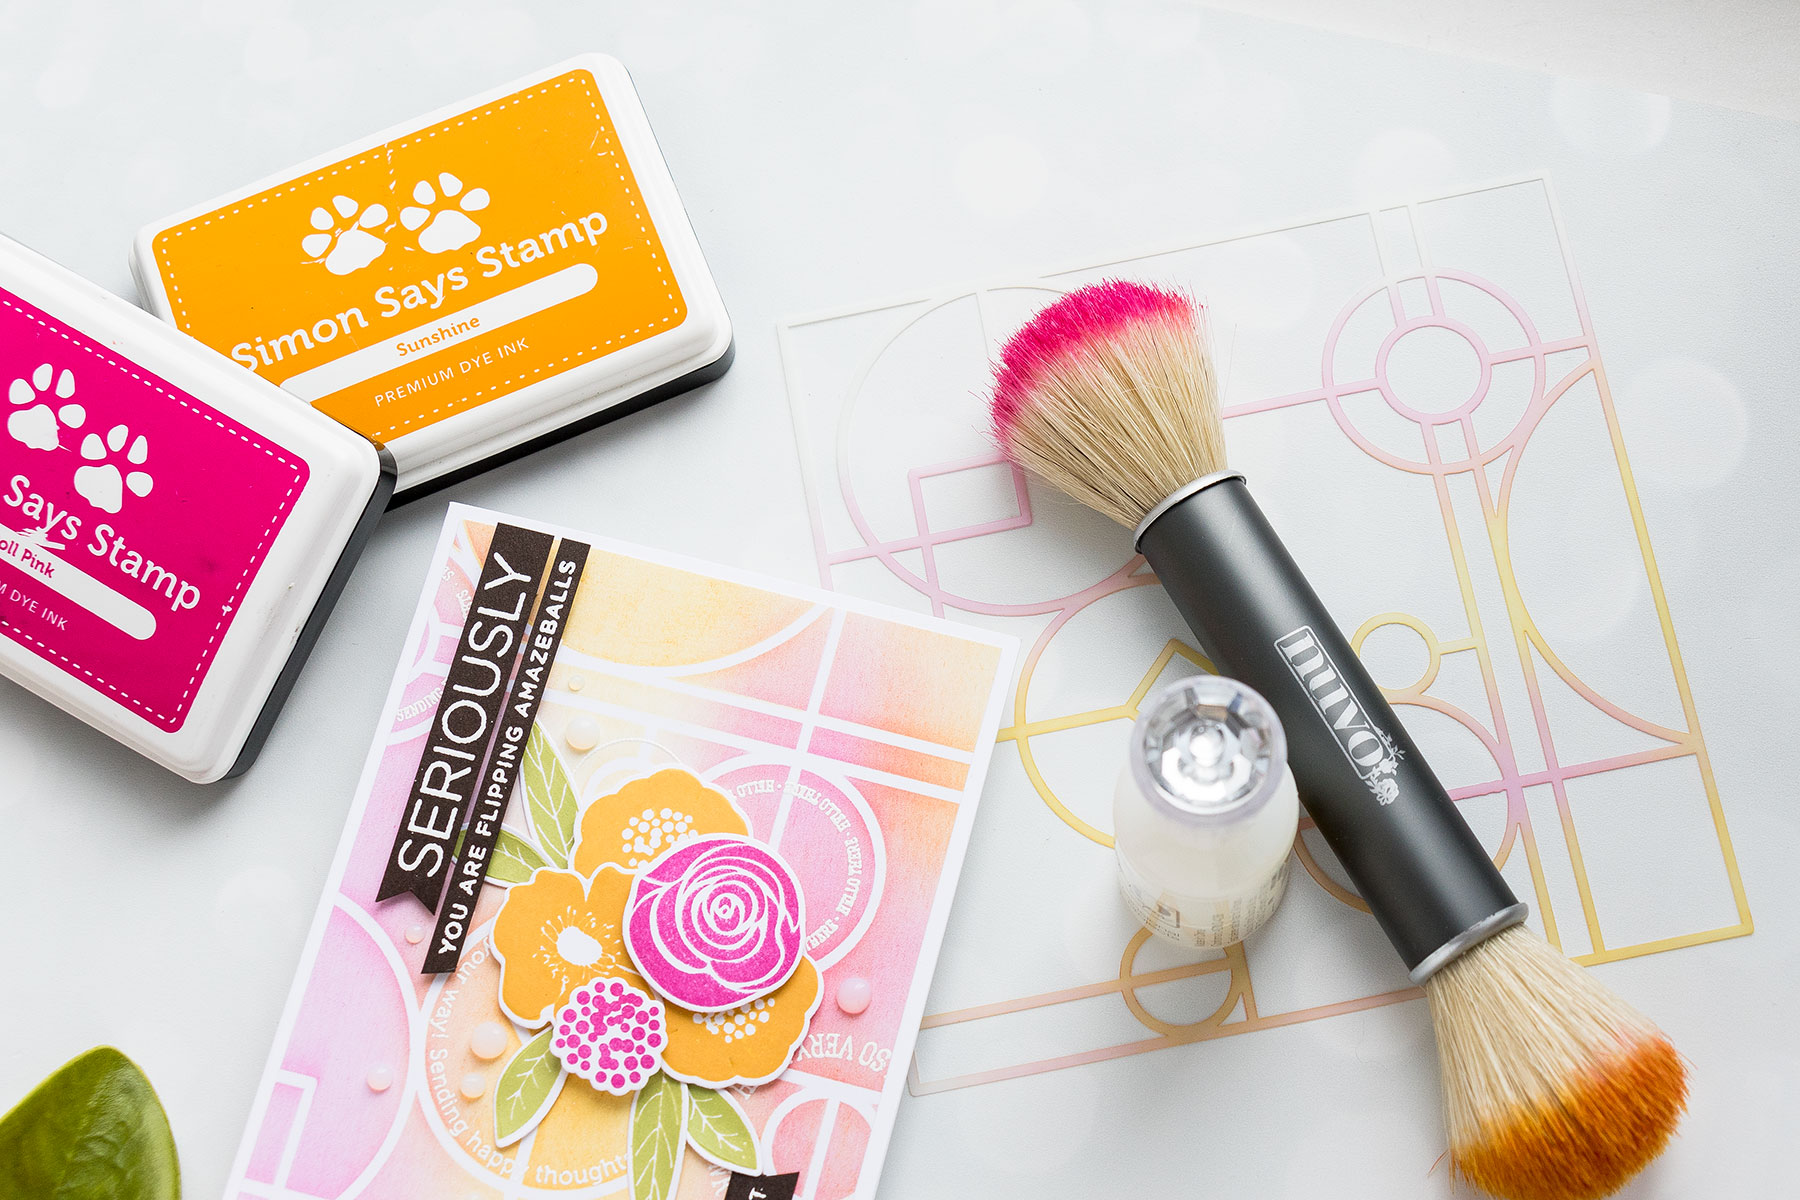
I am using two pens to do my calligraphy today, these are designed to be used as accent pets and not as calligraphy pens, but I wanted to try and see if I could use them to create custom monogrammed cards.

These pens are by Jane Davenport for Spellbinders – there are silver and gold. They have glitter in them and they are waterproof brush pens. Jane combined a fine and flexible brush tip with intense waterproof color to make the Ultimate Pen for creating smooth, detailed finishing touches to your artwork. These are available in eight colors, including two metallic glitter tones that I am showing in this blog post & video.

I first used a pencil to sketch out a letter on my paper. Next, used a silver or gold pen and followed the pencil line to create the letter on my card. I was using a very light hand and took my time to have the best result. I went back and thickened some of the lines of the letter while keeping others pretty thin.

The result wasn’t exactly perfect, you can tell that this was hand drawn, but it was the look I was going for and the look I was happy with. Where I had the pencil lines show I used a pencil eraser and gently erased them.

Next, to dress up this monogram and turn it into a card I used one of my longtime favorite floral stamps from Simon Says Stamp – the Bold Flowers. I picked several and stamped them in various light colors of ink. I used Hollyhock, Twirling Tutu and Sunshine for the flowers. To make my stamping easier I used the mini MISTI stamping tool and of course double and even triple stamped some of these to have nice solid impressions. To stamp the greenery I used Laurel Green ink and also Willow.

Using coordinating dies I cut these images out and arranged them over the letter to create a beautiful floral cluster. This also helped me to hide any imperfections in my calligraphy. Once the floral cluster was arranged the way I liked it I used foam adhesive and also glue to adhere everything in place. I added many extra tiny flowers stamped in yellow and pink scattering them around the cluster to make it look a bit fuller.

Finally, I stamped a simple sentiment that reads “You Are Beautiful”. I trimmed my background pane to 4 x 5 1/4”, adhered it to A2 white side folding card base and embellished this card using several sequins from SSS from the Girl’s Best Friends mix.
Have fun stamping!
SUPPLIES
I’m listing the products I used below. Click on the link to go directly to the product. Where available I use compensated affiliate links which means if you make a purchase I receive a small commission at no extra cost to you. Thank you so much for your support!
 Simon Says Clear Stamps Bold Flowers Shop at: SSS |
 Simon Says Stamp Bold Flowers Wafer Dies Shop at: SSS |
 Cz Design Clear Stamps Tabbed Sentiments 2 Shop at: SSS |
 Spellbinders Silver Screen Ultimate Waterproof Brush Pen Shop at: SSS |
 Spellbinders Golden Age Ultimate Waterproof Brush Pen Shop at: SSS |
 Simon Says Stamp Hollyhock Ink Pad Shop at: SSS |
 Simon Says Stamp Sunshine Ink Pad Shop at: SSS |
 Simon Says Stamp Willow Dye Ink Pad Shop at: SSS |
 Simon Says Stamp Laurel Green Dye Ink Pad Shop at: SSS |
 Simon Says Stamp Twirling Tutu Dye Ink Pad Shop at: SSS |
 Neenah 80LB Solar White Cardstock Shop at: SSS |
 Spellbinders Deep Sea Die Cutting Machine Shop at: SSS |
 Neenah 110 Lb Solar White Cardstock Shop at: SSS |
 Tsukineko VersaFine Onyx Black Ink Shop at: SSS |
 Hero Arts Crystal Clear Lacquer Pen Shop at: SSS |
 Mini Misti Stamping Tool Shop at: SSS |
 White Foam Squares Shop at: SSS |
Beautiful cards! 🙂
Great try, if I covered up my imperfections with florals or embellishments then you would never see the calligraphy. I was so blessed that when my wonderful mother in law passed away I was given her calligraphy pens, inks, papers & books. I’m so excited to be able to try to be as good as she was.
Great idea!!!
Fabulous cards Yana, you are SO talented!
Lovely, Yana! You always have the most interesting videos.Thank you!
Lovely! Your calligraphy monogram with the pretty flowers is perfect!! Thanks!
What a lovely idea, your cards are beautiful.
Beautiful cards. A wonderful idea to personalize a card.