

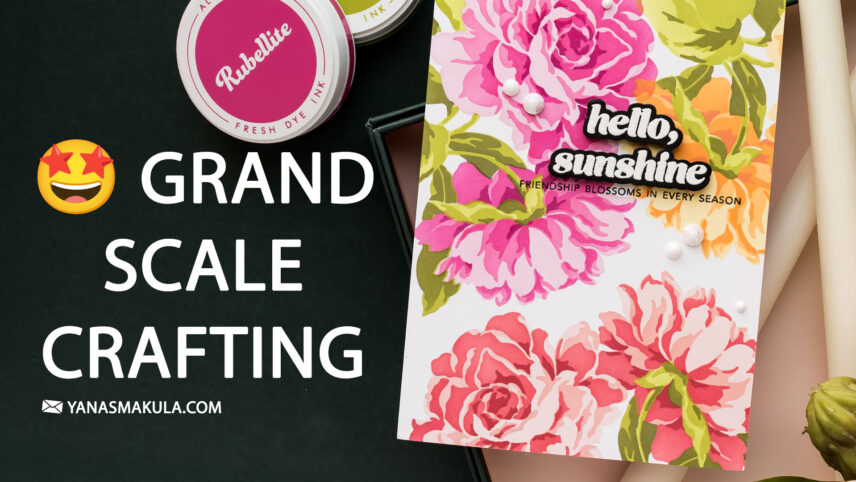
If you love bold floral cards and relaxing ink blending sessions, you are going to love this technique. Today I’m sharing how to create large-scale stamped and stenciled backgrounds using a full letter-size sheet of cardstock and why working big can actually save you time while giving you more creative flexibility.
Instead of blending individual card panels, this approach lets you create multiple card fronts from one beautifully blended background, all using layering stencils and ink blending.
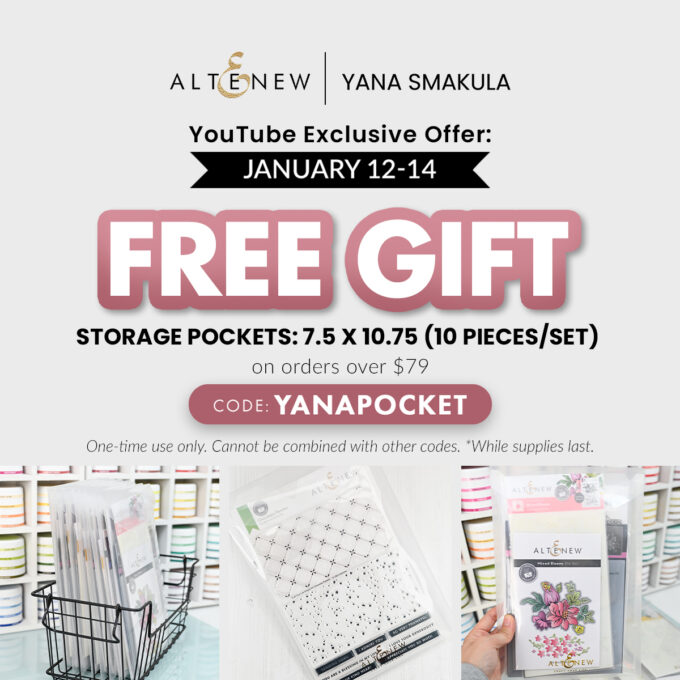
SPECIAL OFFER
I’m excited to share a special Altenew exclusive just for you! If you’ve been planning to stock up on storage pockets, now is a great time. Get FREE Storage Pockets: 7.5″ x 10.75″ (10 pieces/set) on orders over $79 (worth $13.99).
How to redeem: Add the Storage Pockets: 7.5″ x 10.75″ to your cart of at least $79 and use the code YANAPOCKET at checkout to get it for free.
Offer valid: From January 12, 2026 at 12:00 am EST to January 14, 2026 at 11:59 pm EST
Cannot be combined with order codes
VIDEO TUTORIAL
Watch the video below or on my YouTube channel.
Why Stamp and Stencil on a Large Scale?
Most of us are used to working on A2 or 5×7 panels. But taking your design to a full 8.5″ x 11″ sheet opens up so many possibilities:
-
Create multiple coordinated card panels at once
-
Save time by blending once instead of repeating the process
-
Achieve a seamless, repeating background pattern
-
Experiment with color without committing to a single card
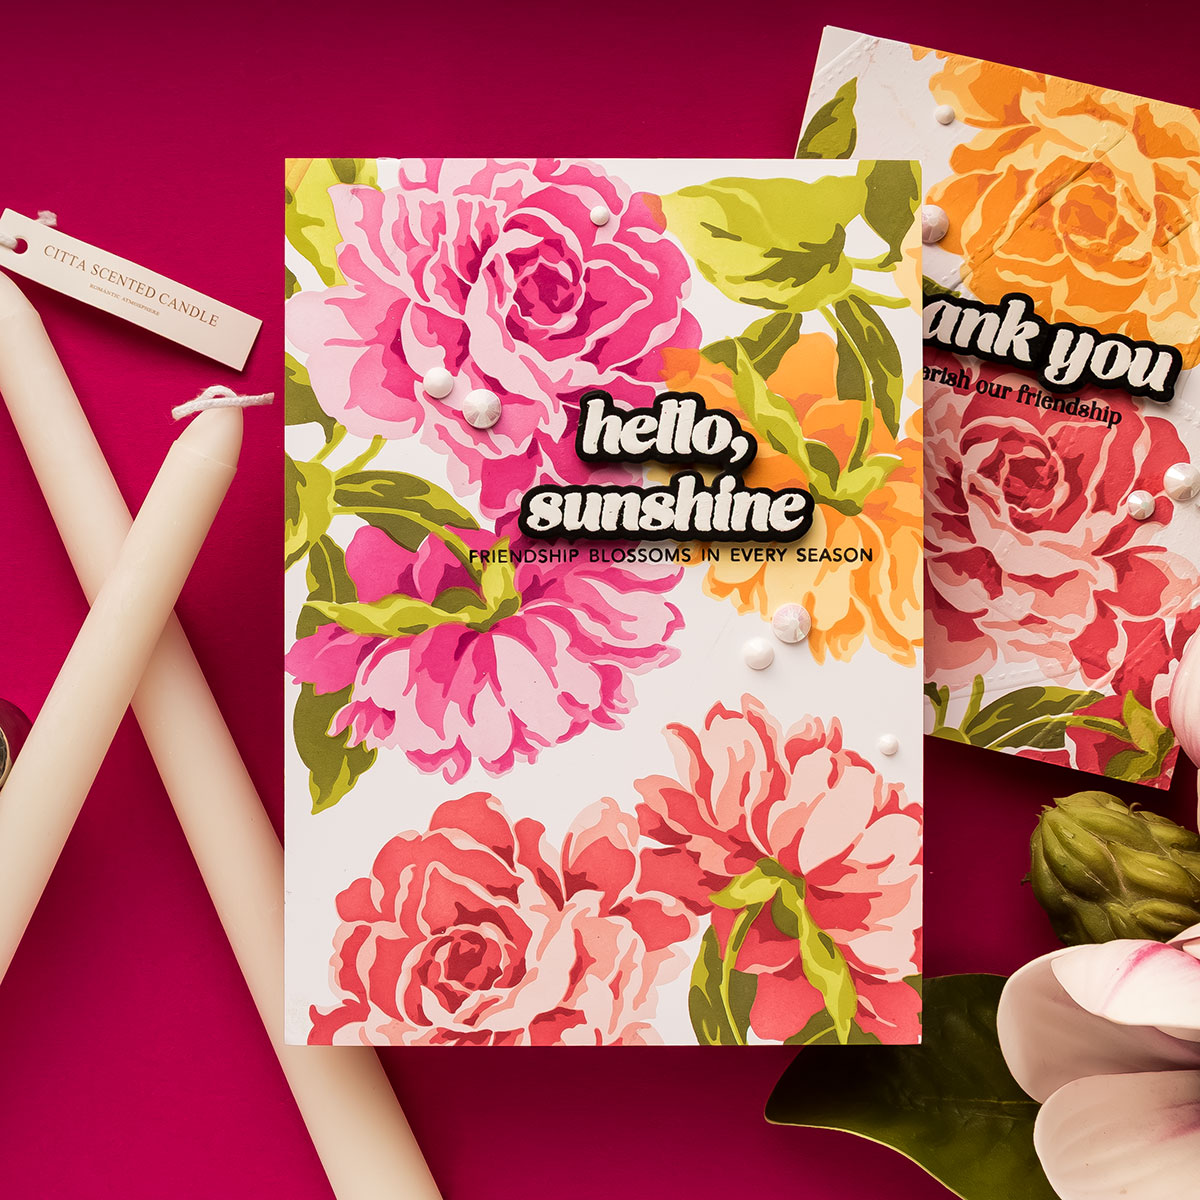
Once the background is done, you can trim it down into A2 cards, 5×7 cards, or even slimline panels.
Supplies Used for Large-Scale Ink Blending
Here’s what I used to create this project:
-
Stencil Art: Majestic Roses Layering Stencil Set (7-in-1) from Altenew
-
Letter-size white cardstock (Hammermill cardstock works beautifully for ink blending)
-
Clear acetate sheets (for masking)
-
Ink blending brushes (large, small, and detail sizes)
-
Coordinating dye inks in multiple color families
Choosing the Right Stencil for a Full Background
When working on a large surface, the key is choosing a stencil design that is:
-
Bold and eye-catching
-
Easy to repeat across the background
-
Designed with multiple layers for depth
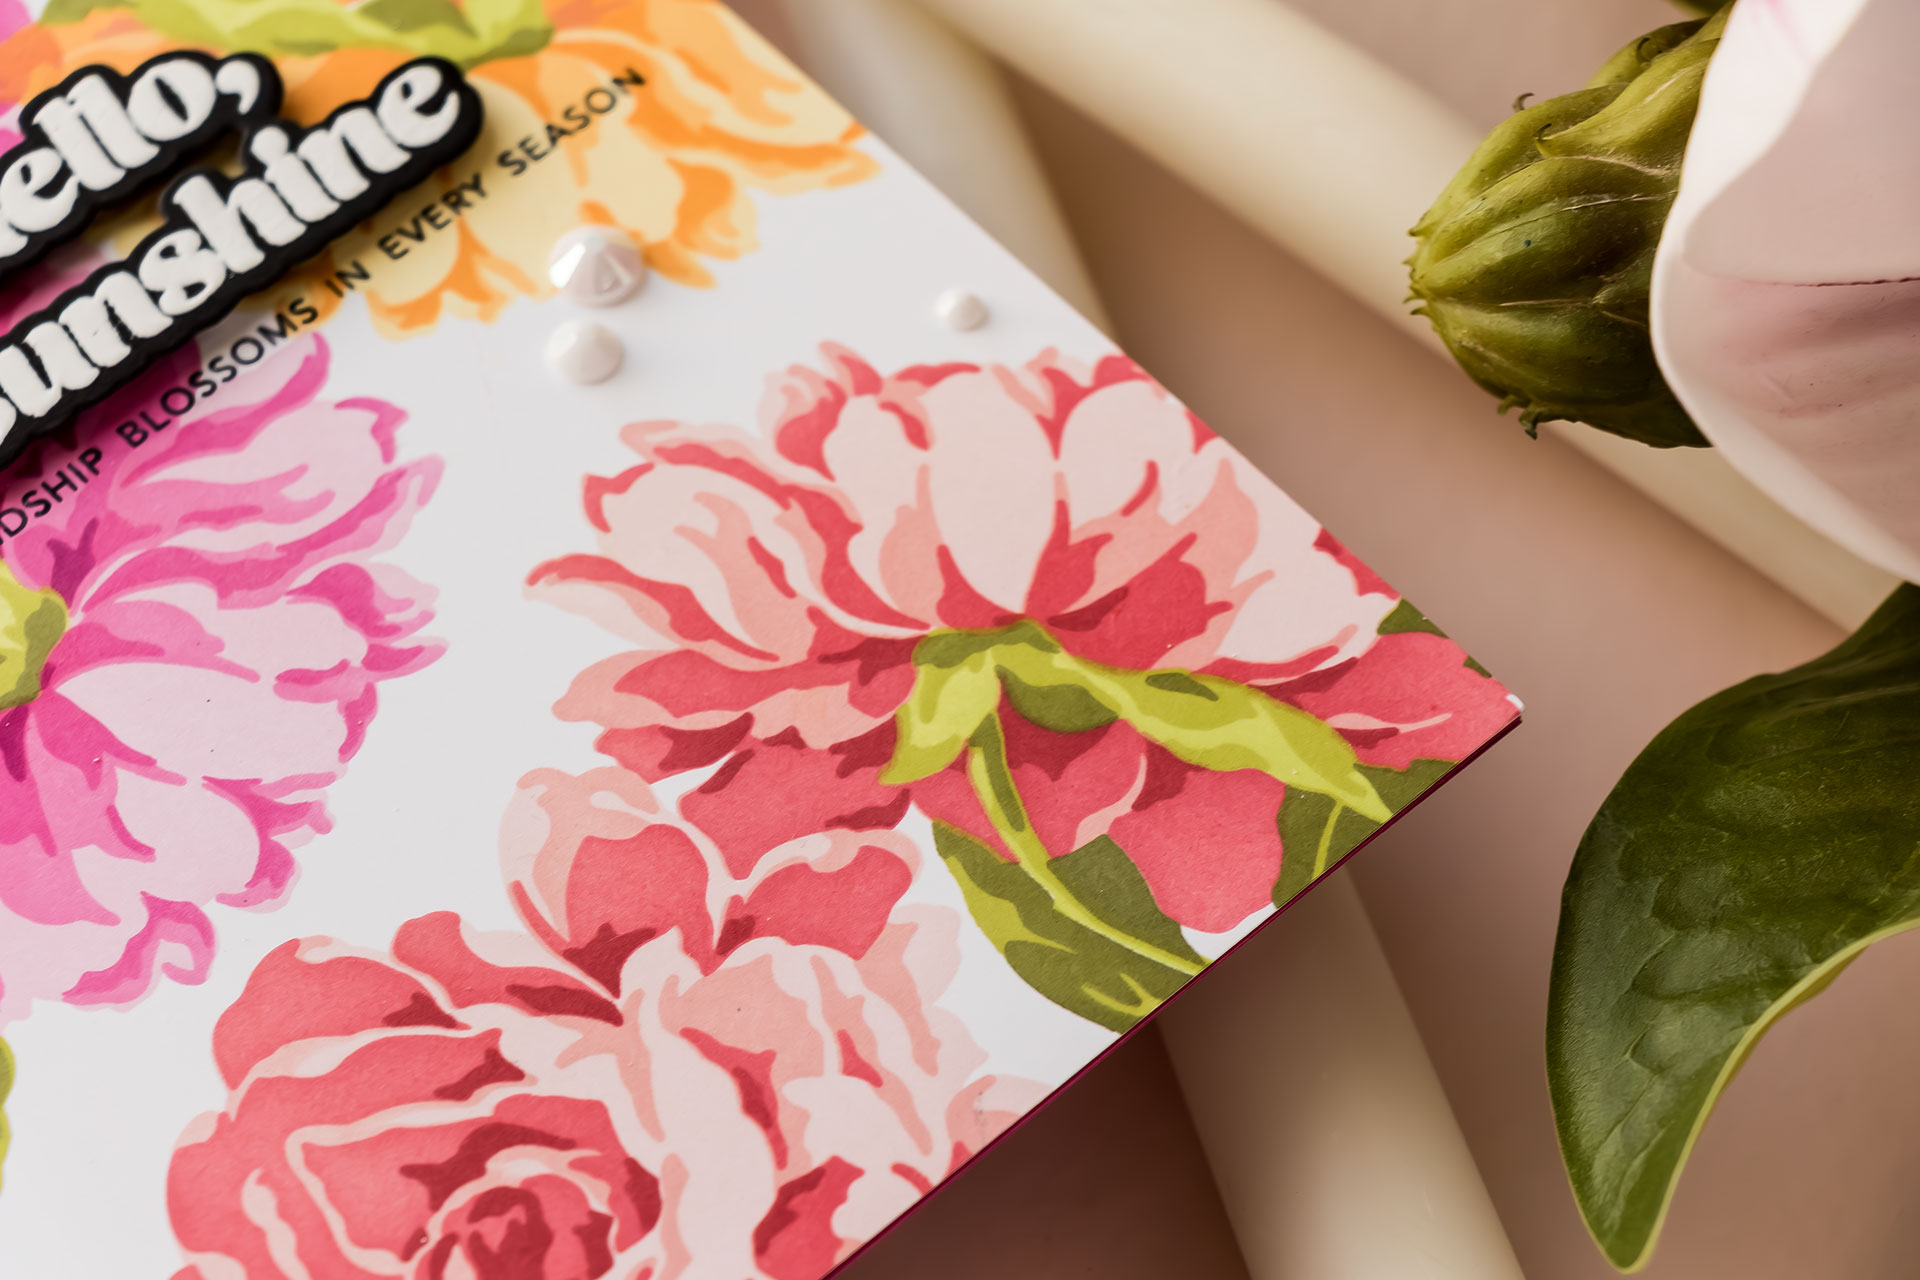
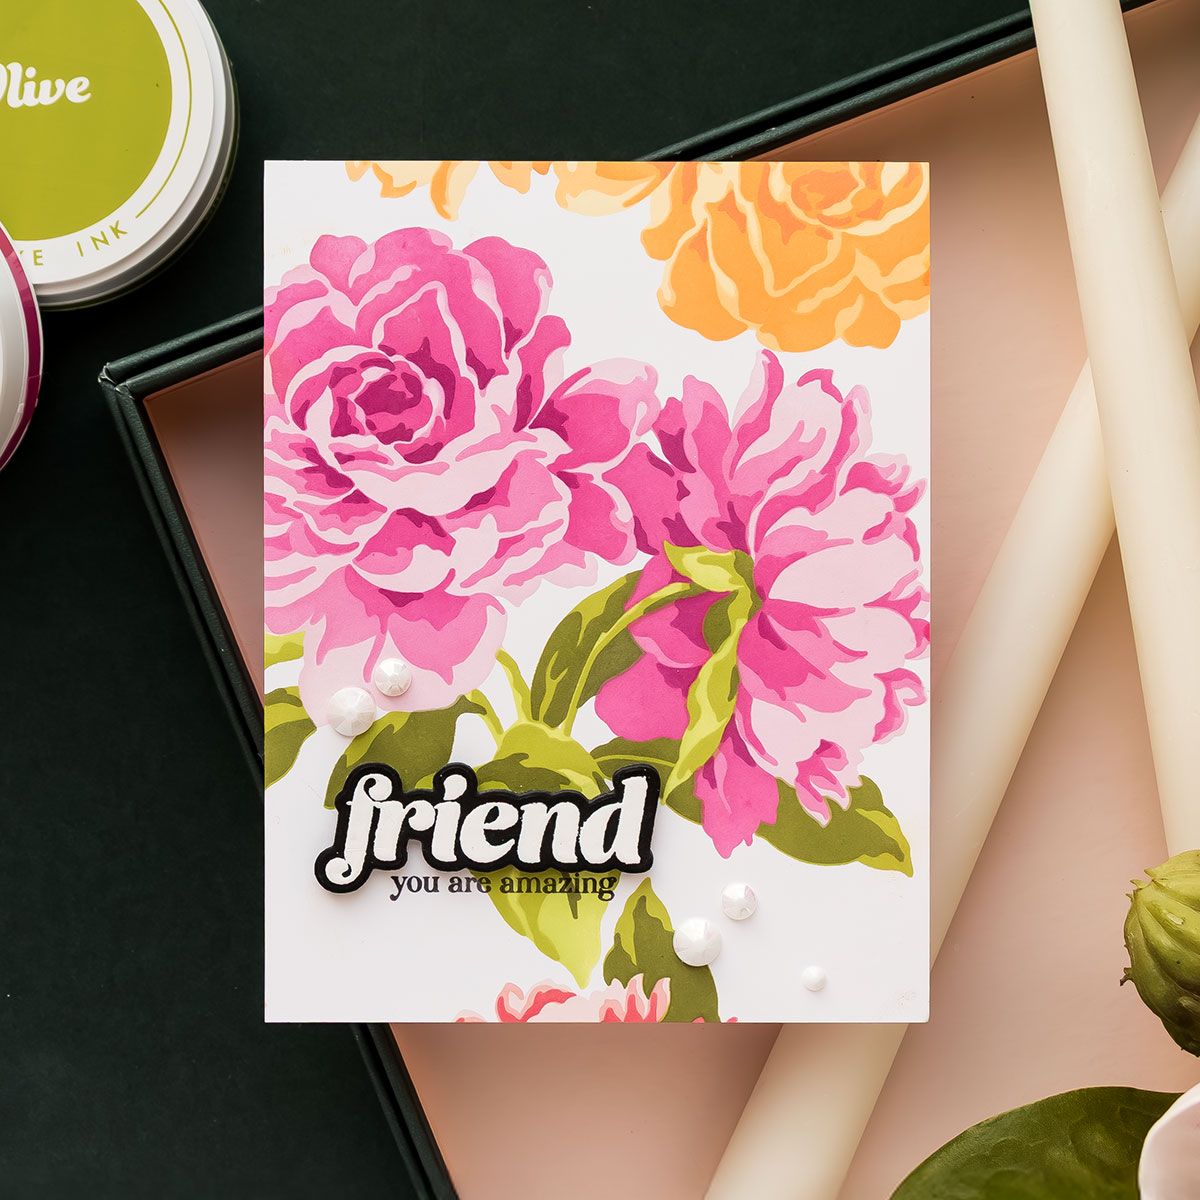
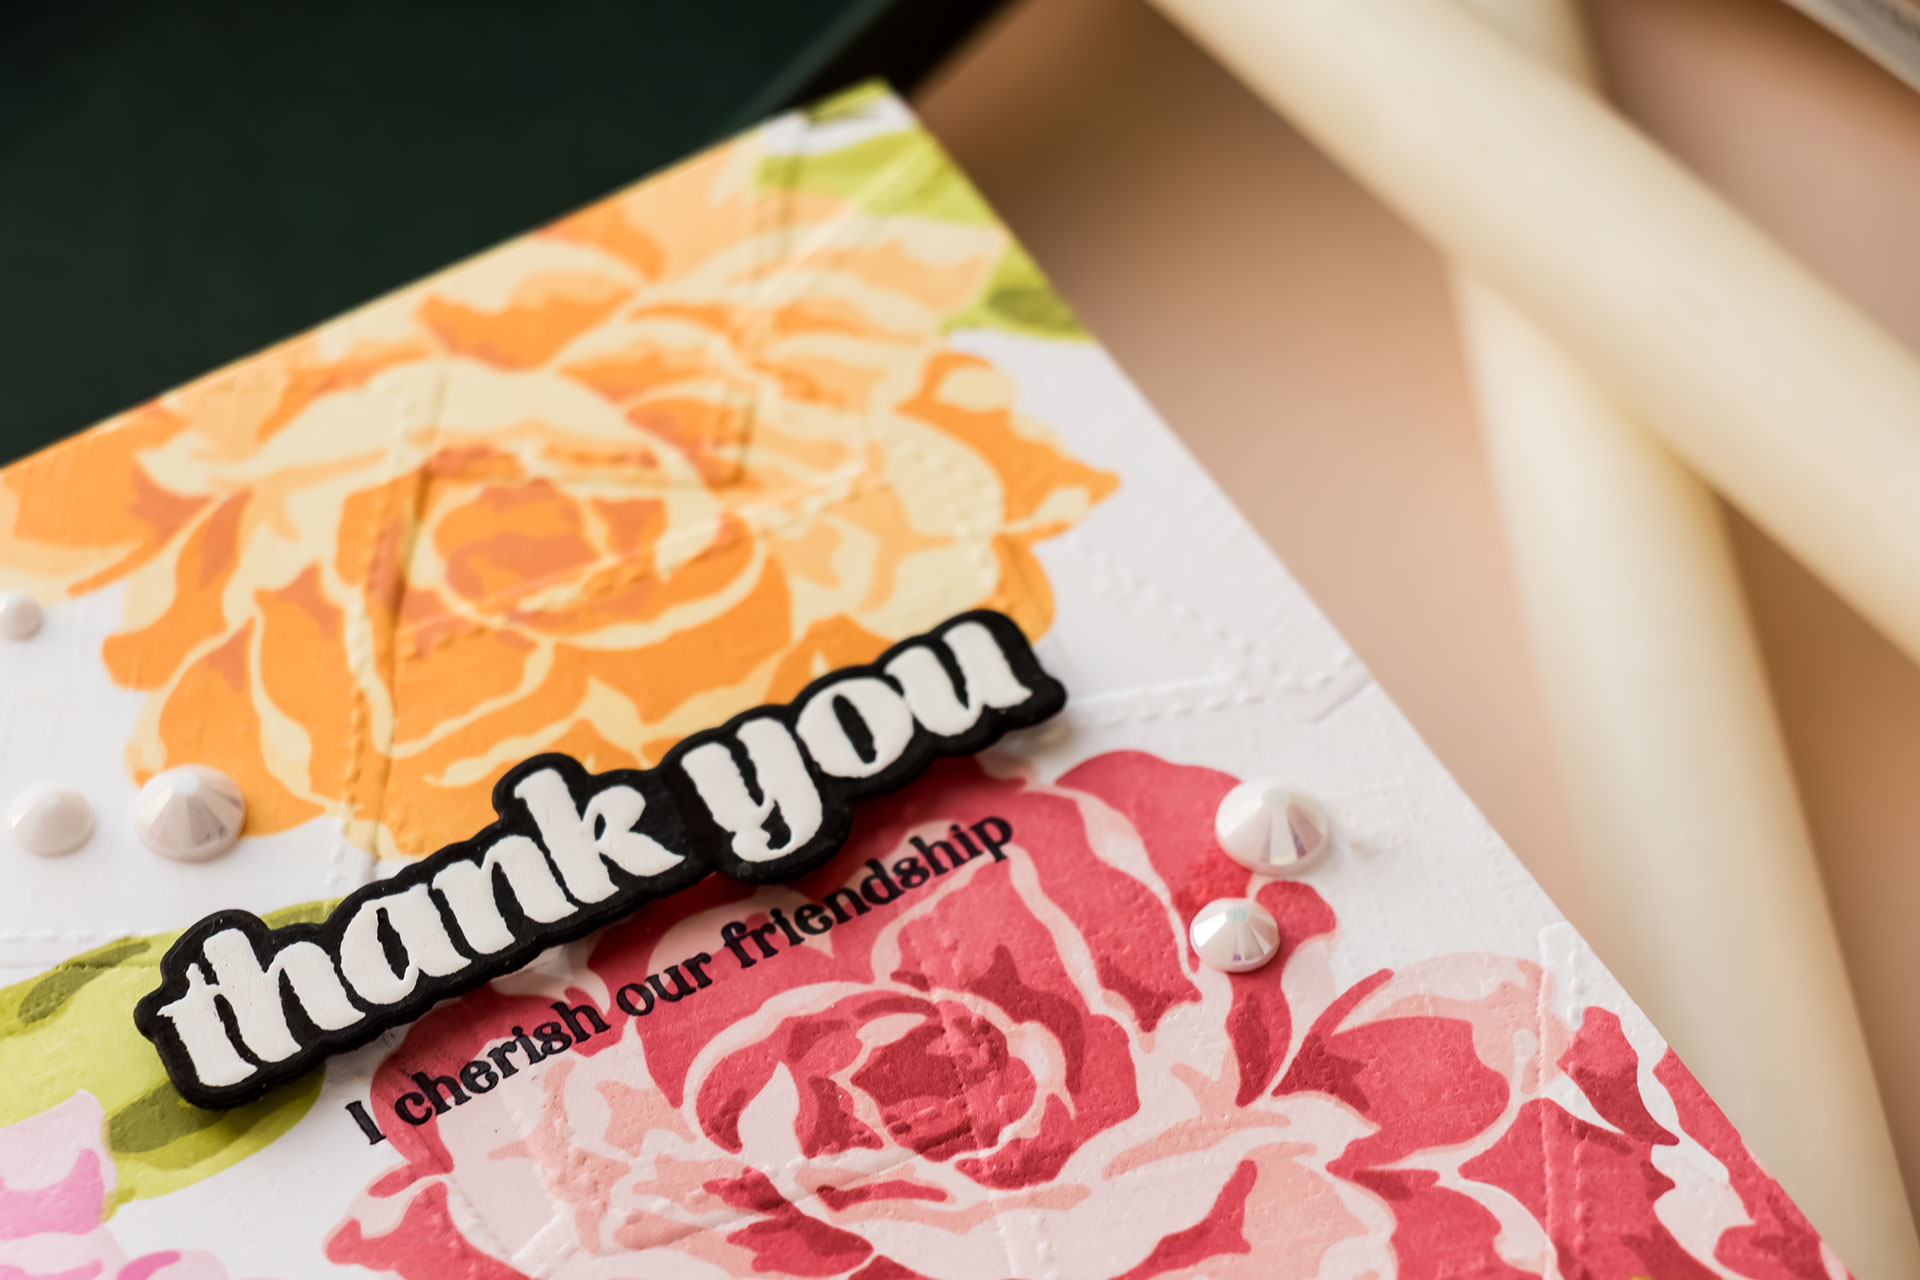
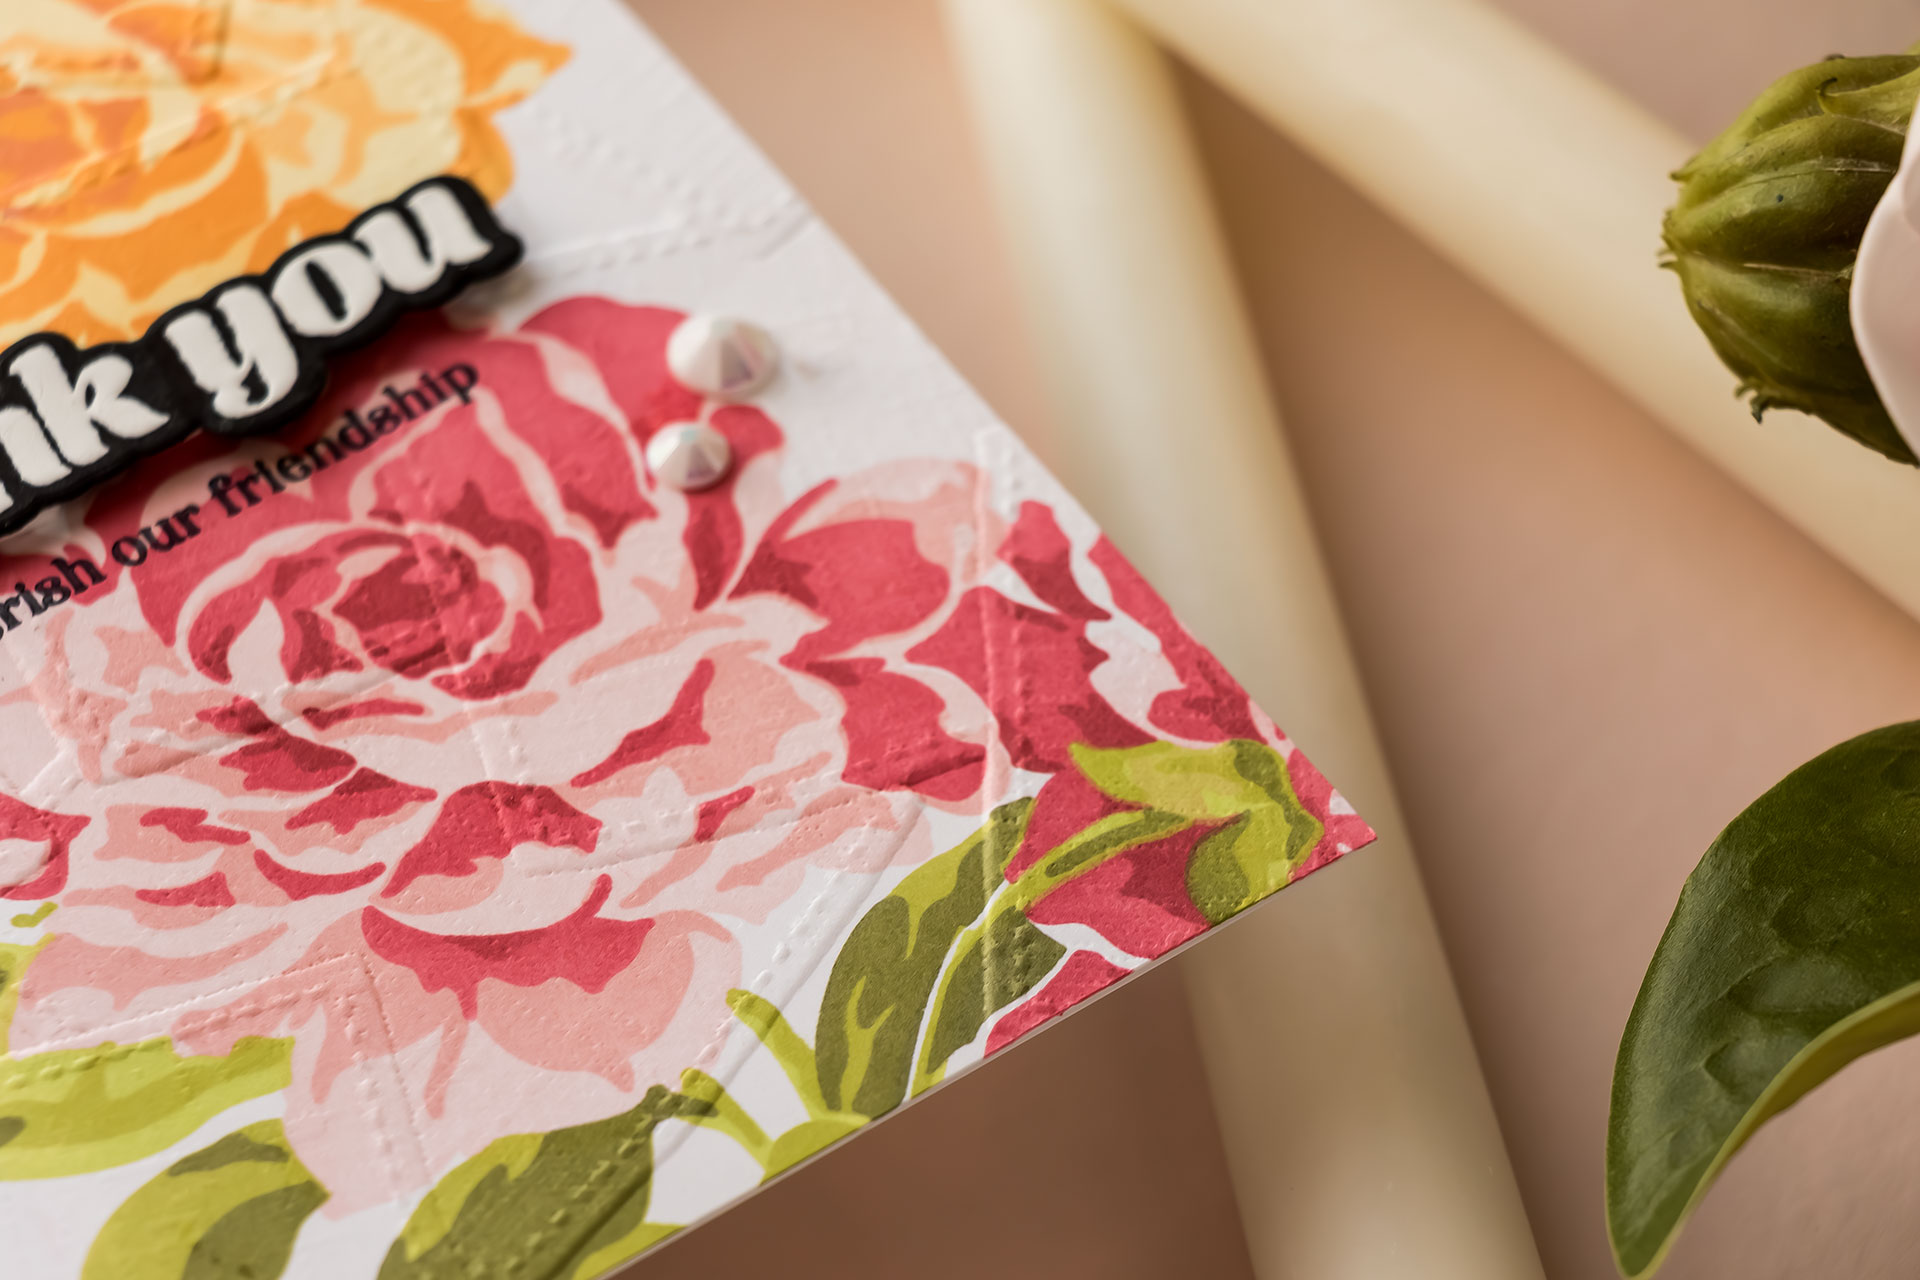
The Majestic Roses stencil set includes seven layers, four for flowers and three for leaves, which makes the final result incredibly detailed and dimensional.
Ink Blending Tips for Layering Stencils
Use Four Shades Per Flower Color
For best results, use four shades of the same color family:
-
Very light (base layer)
-
Light
-
Medium
-
Dark
This gives the flowers realistic depth without needing fancy blending techniques.
Color Combinations Used
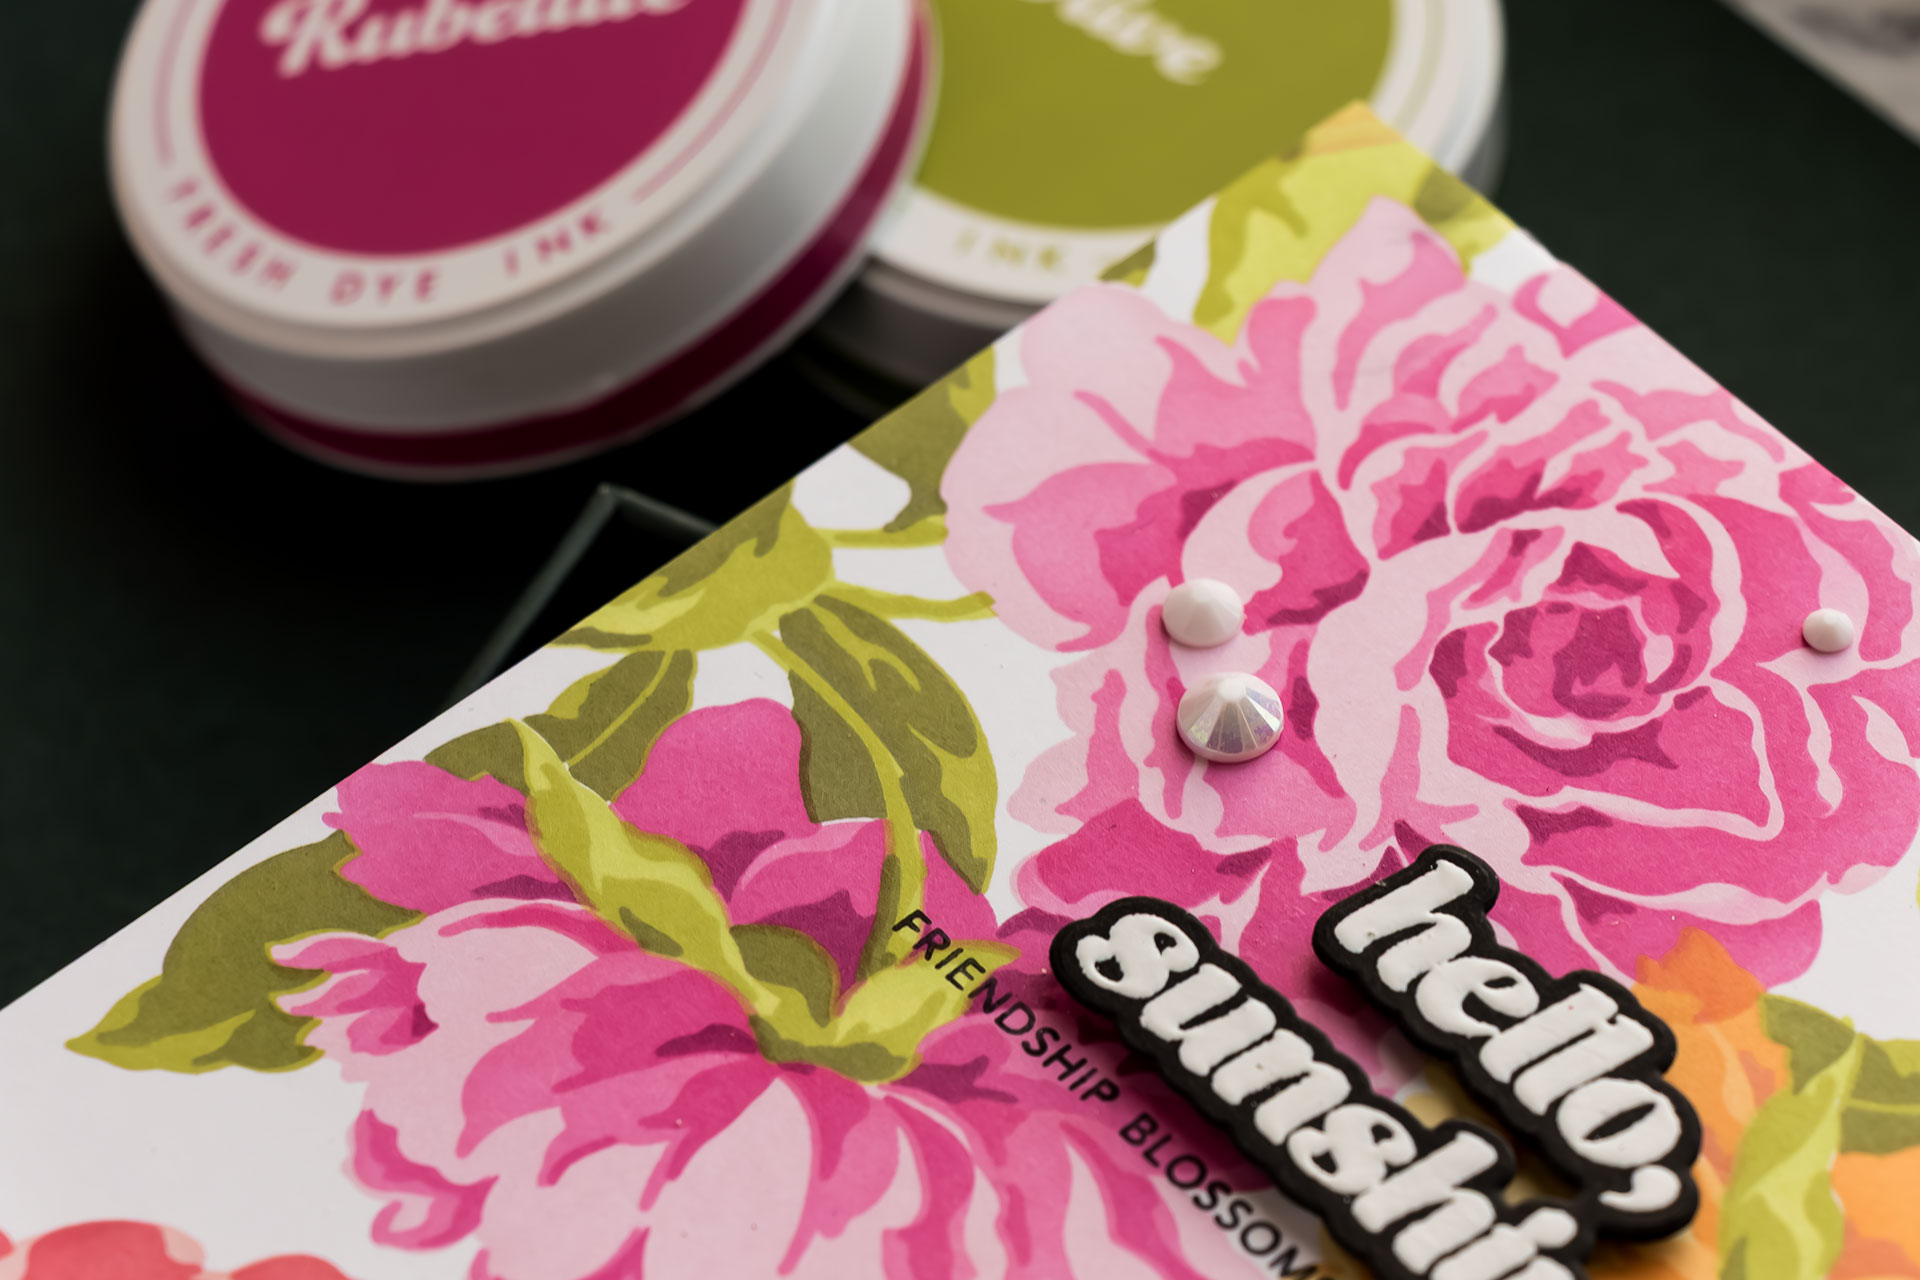
-
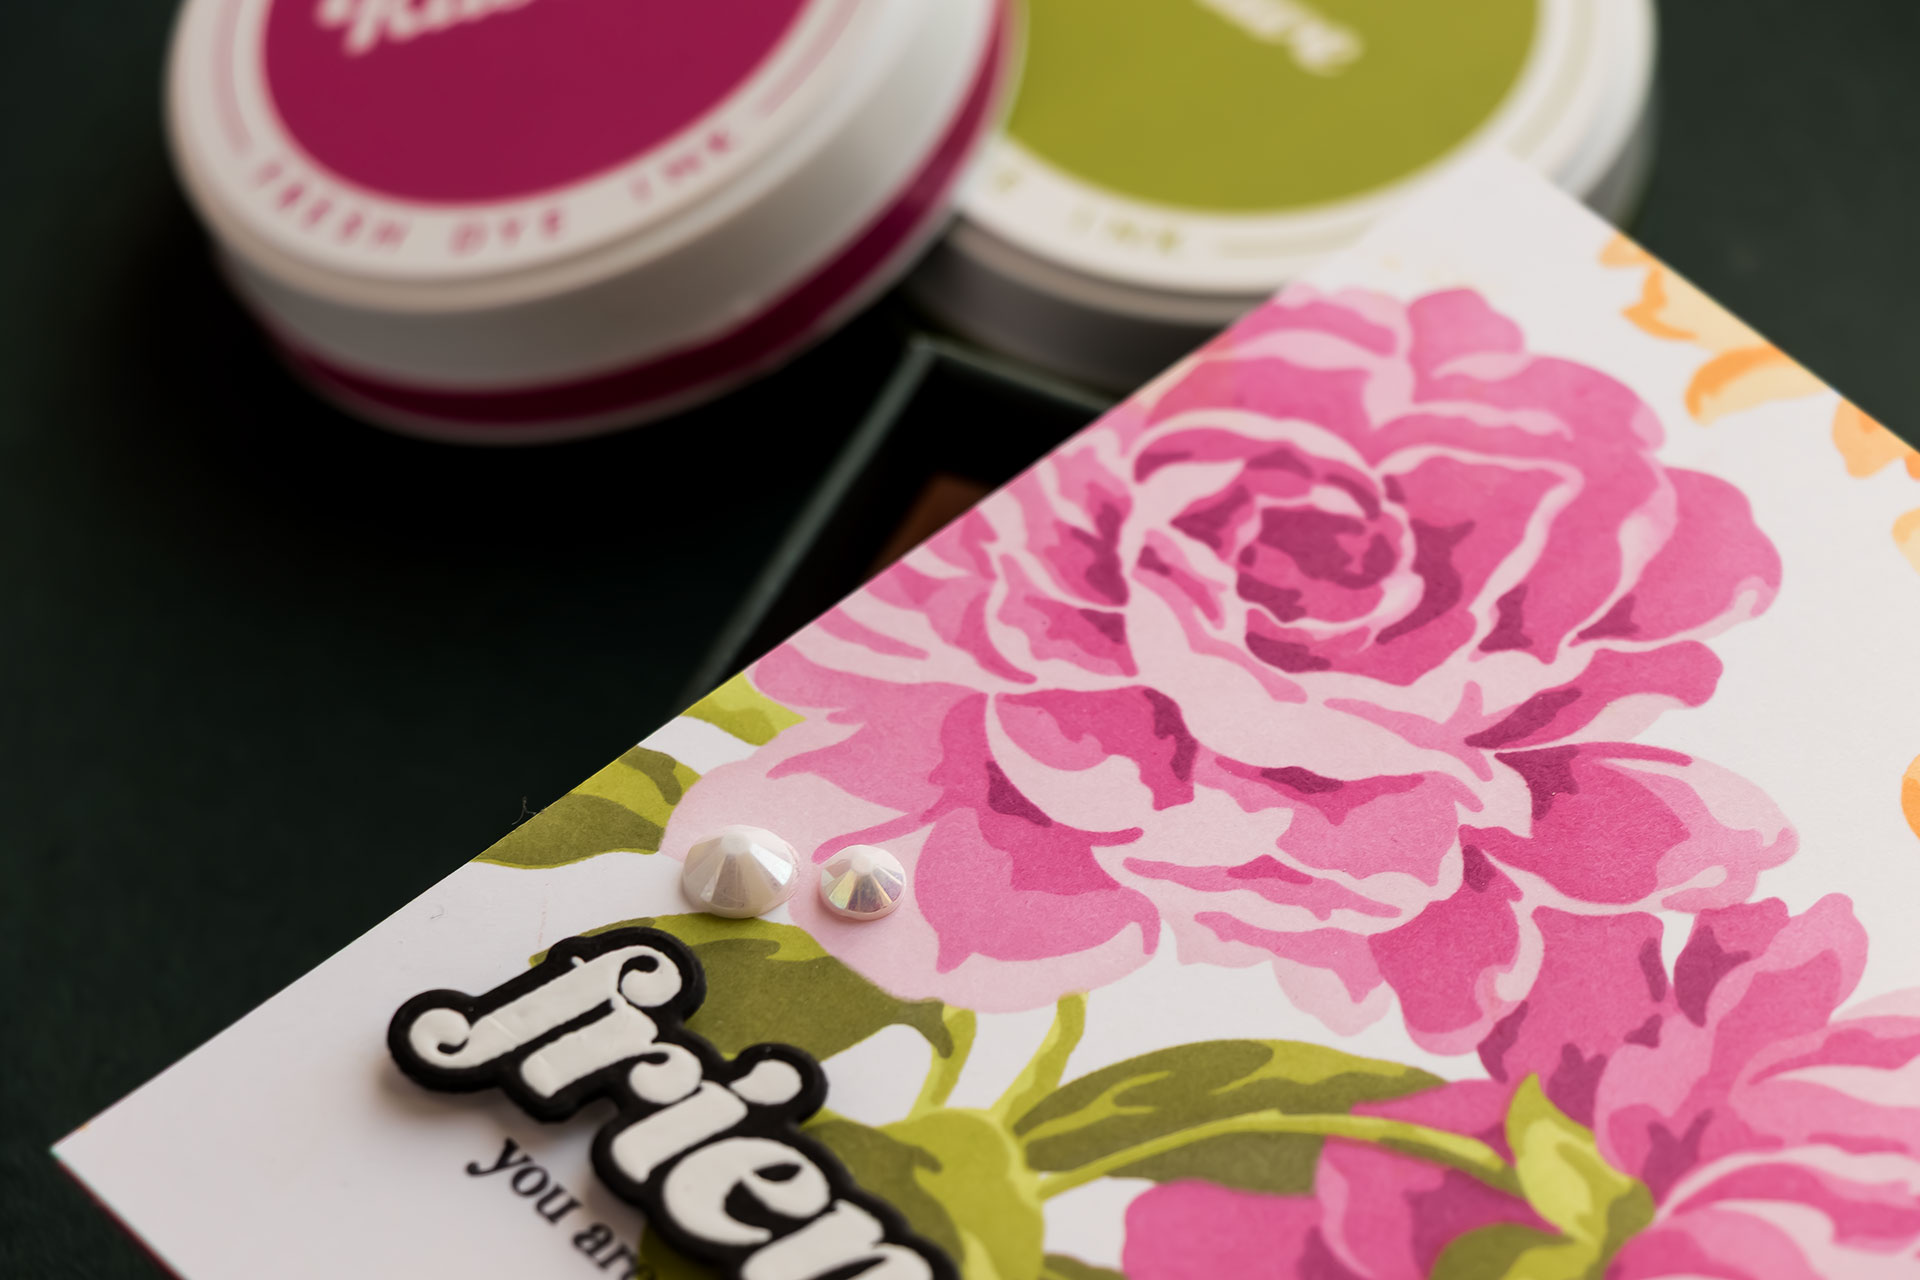
Pink roses: Pink Diamond, Pinkalicious, Rubellite, Razzleberry
-
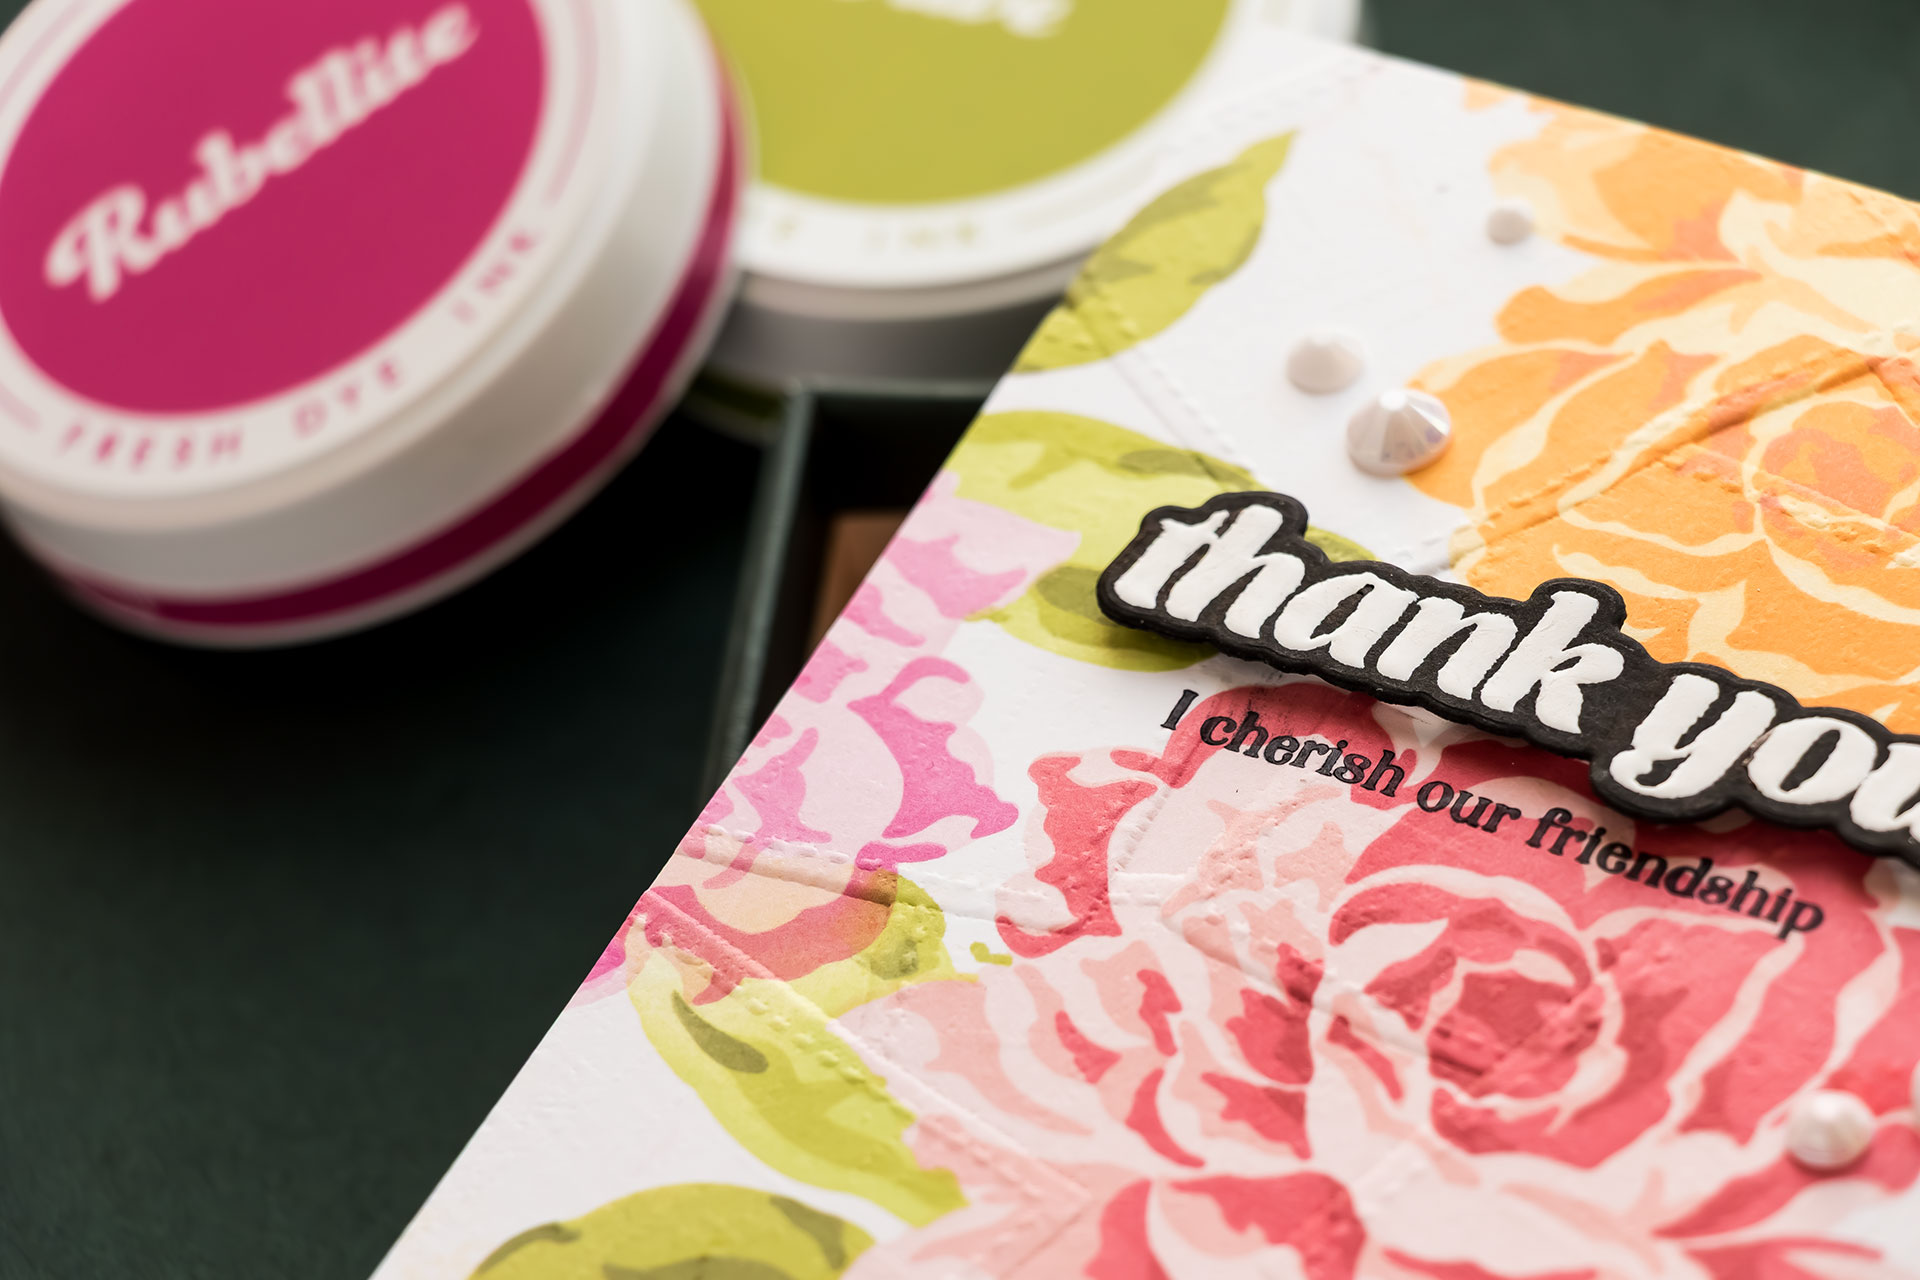
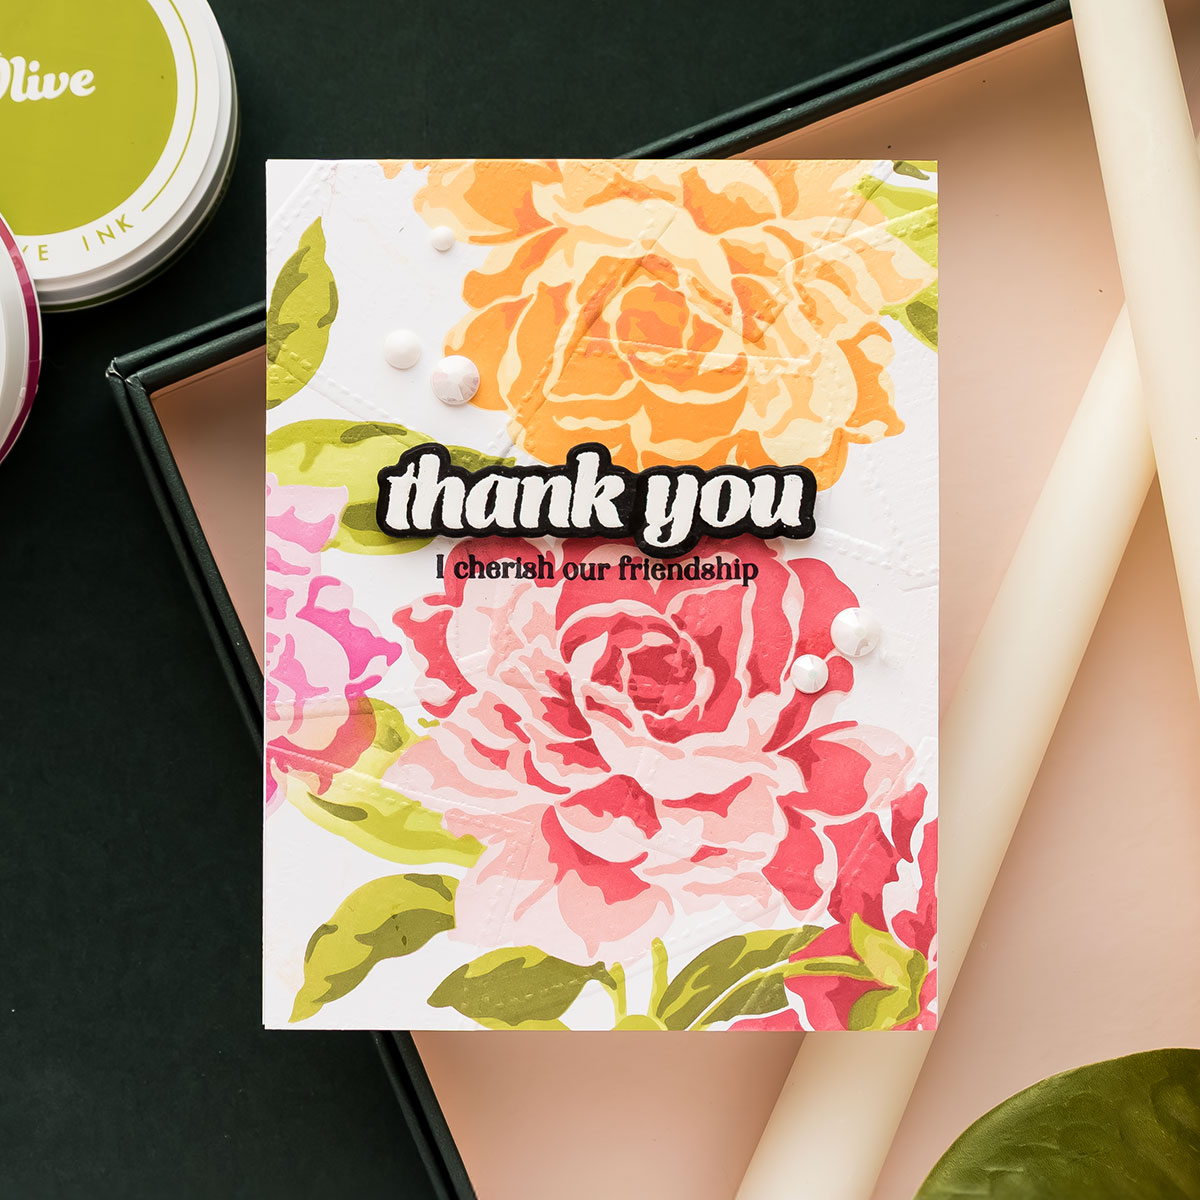
Yellow/orange roses: Sunray, Camomile, Snapdragon, Terracotta
-
Peach roses: Blush Rouge, Crimson, Velvet
-
Leaves: Bamboo, Olive, Moss
You can absolutely customize these colors based on what you have in your stash.
Dedicated Blending Brushes Help
Having dedicated brushes for light and dark shades makes blending smoother and prevents muddy colors. If that’s not an option, clean your brushes between colors and work light to dark.
Masking with Acetate Sheets (A Game Changer!)
Clear acetate sheets are incredibly useful when working with overlapping stencils – especially on a large panel.
I cut old, clear card bases in half to create reusable masking sheets and added a small piece of bright tape to one edge so I wouldn’t lose them on my craft desk (clear supplies love to disappear).
These sheets help:
-
Prevent unwanted ink overlap
-
Protect finished areas
Planning Your Layout Matters
When adding multiple flower clusters in different colors, it’s important to plan placement – especially before adding leaves. Some stencil layers don’t account for foliage, so taking a moment to visualize the full design helps avoid accidental overlaps.
And if something goes slightly wrong? Don’t stress. Leaves, trimming, or embossing can fix a lot.
From One Sheet to Multiple Cards
From a single letter-size panel, I created:
-
One 5×7 card
-
Two A2 card panels
This approach is incredibly efficient and perfect for batch card making.
Finishing the Cards
Once the panels were trimmed, the card designs came together easily:
-
Mounted panels onto coordinating cardstock bases
-
Added extra cardstock layers behind panels for sturdiness
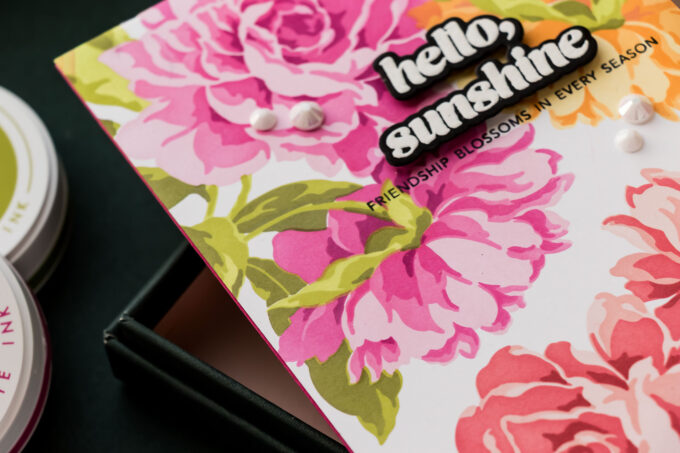
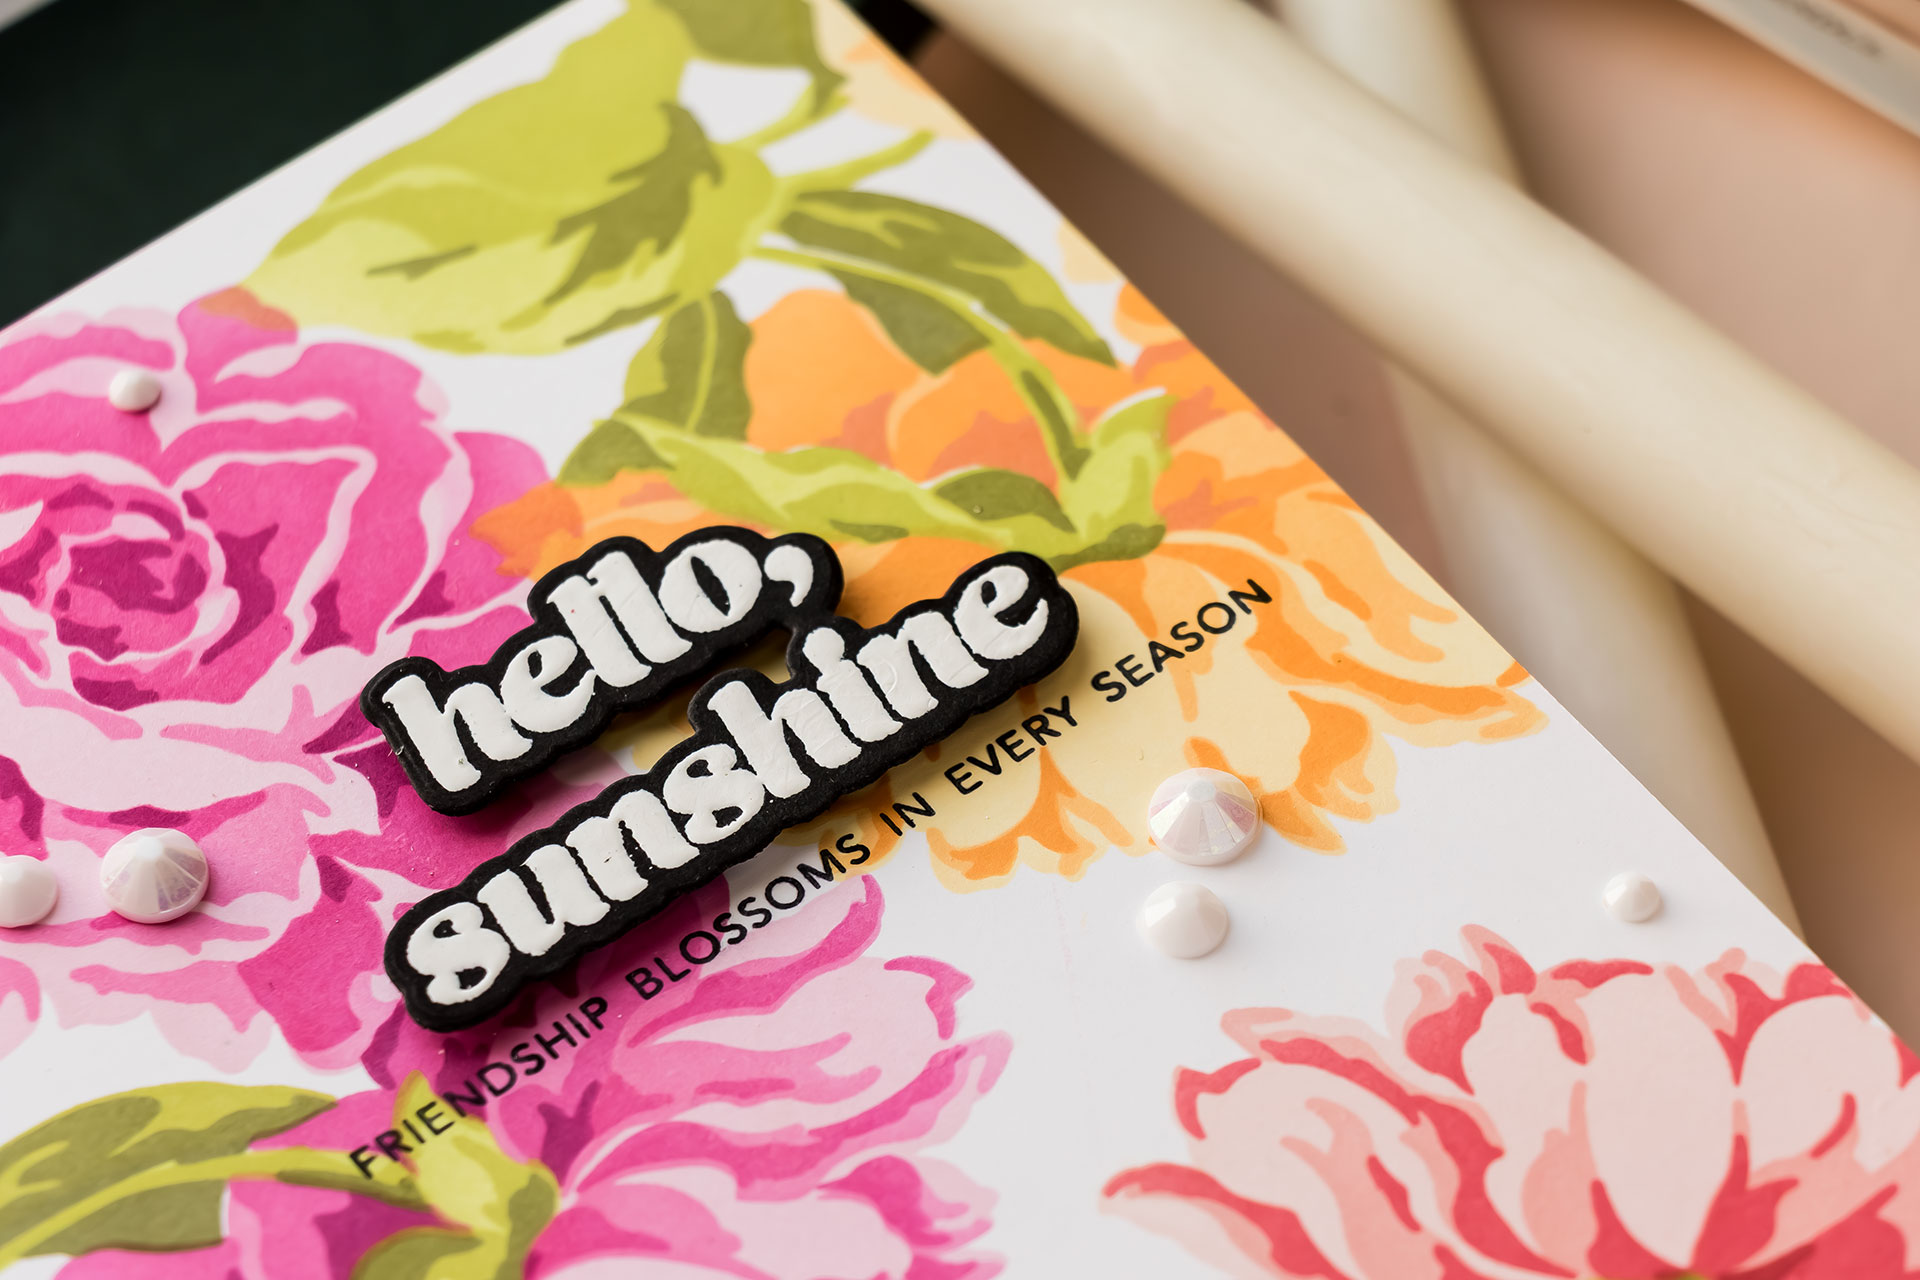
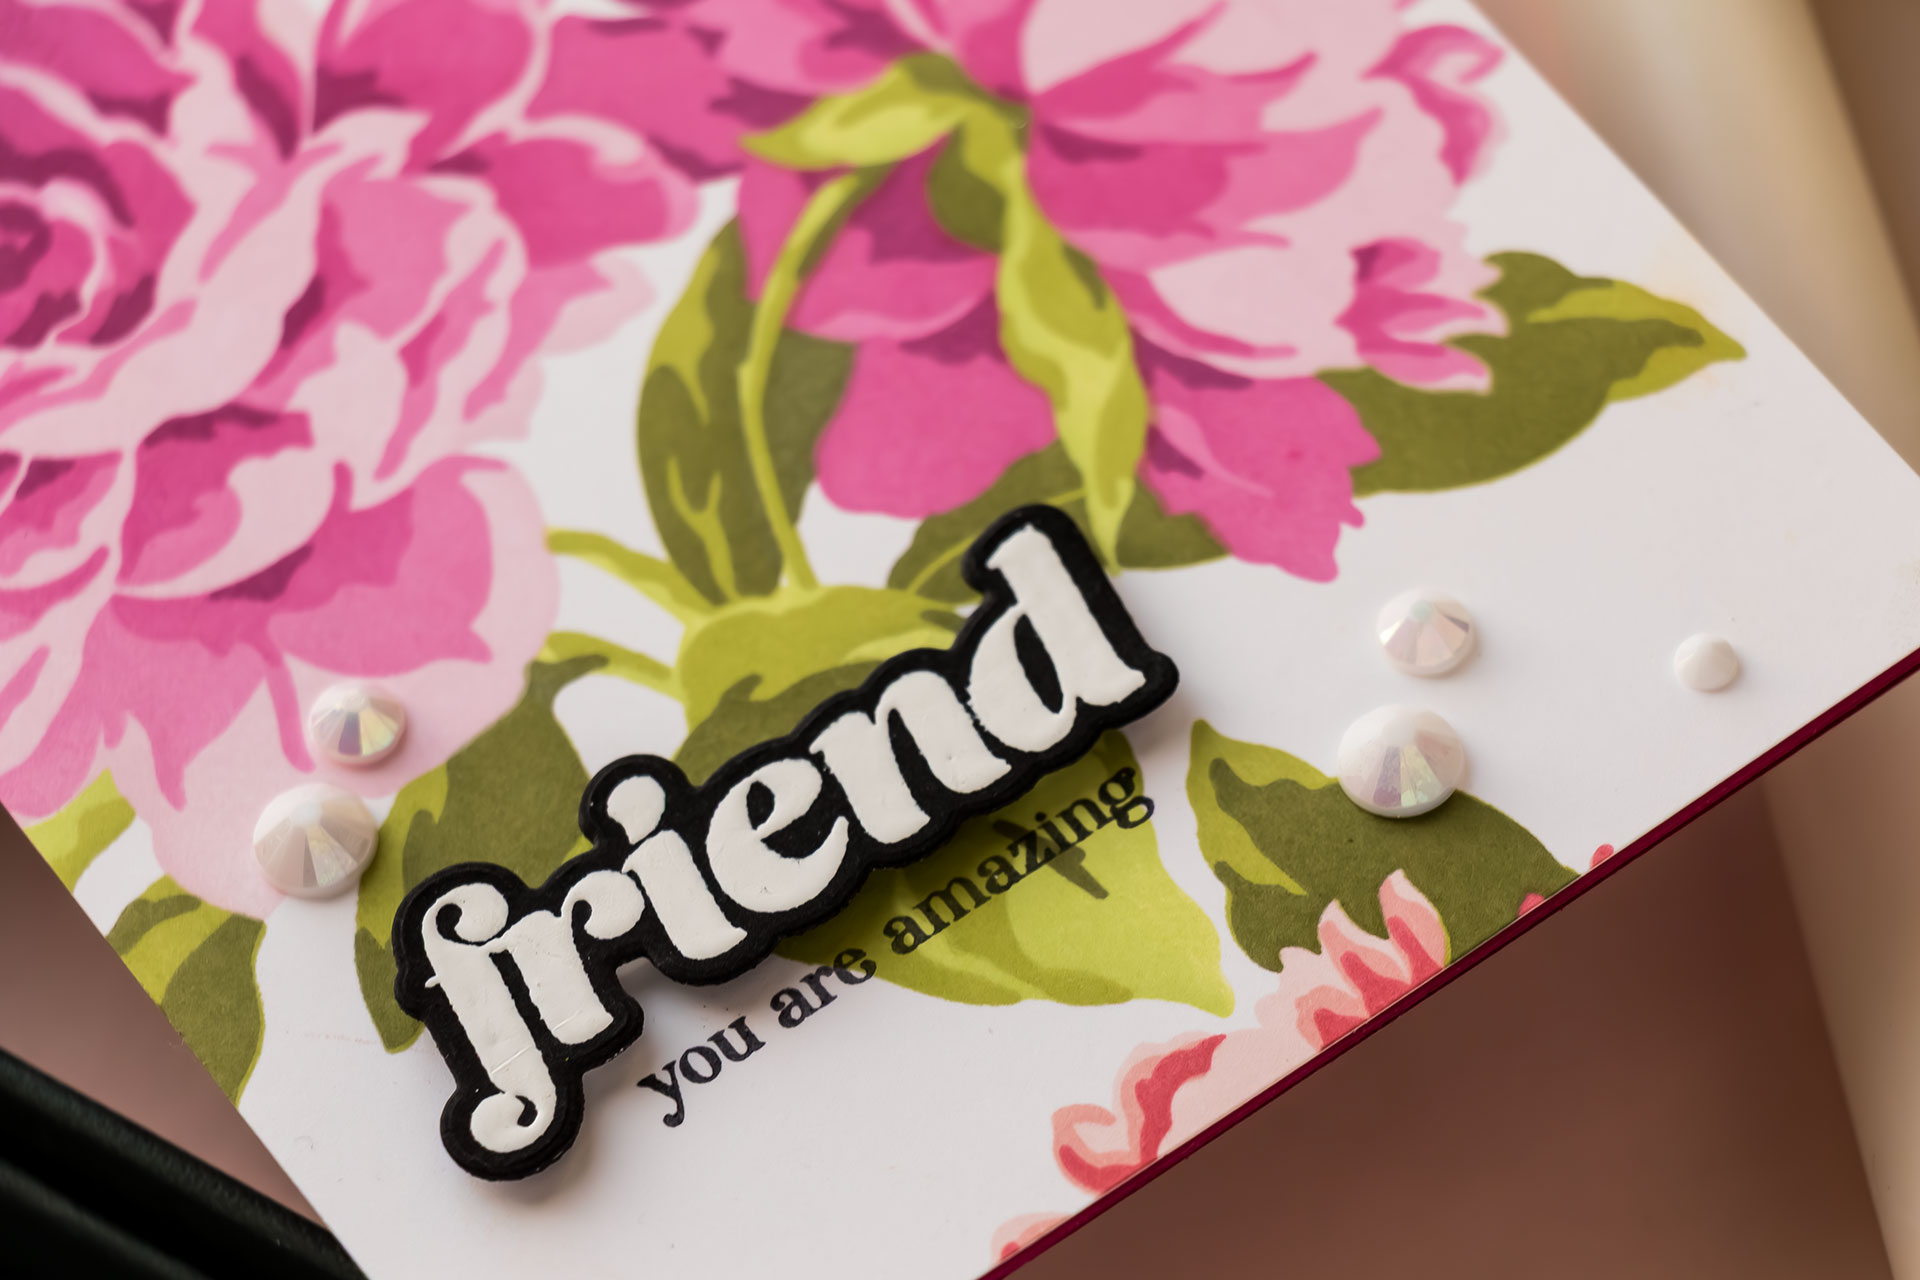
-
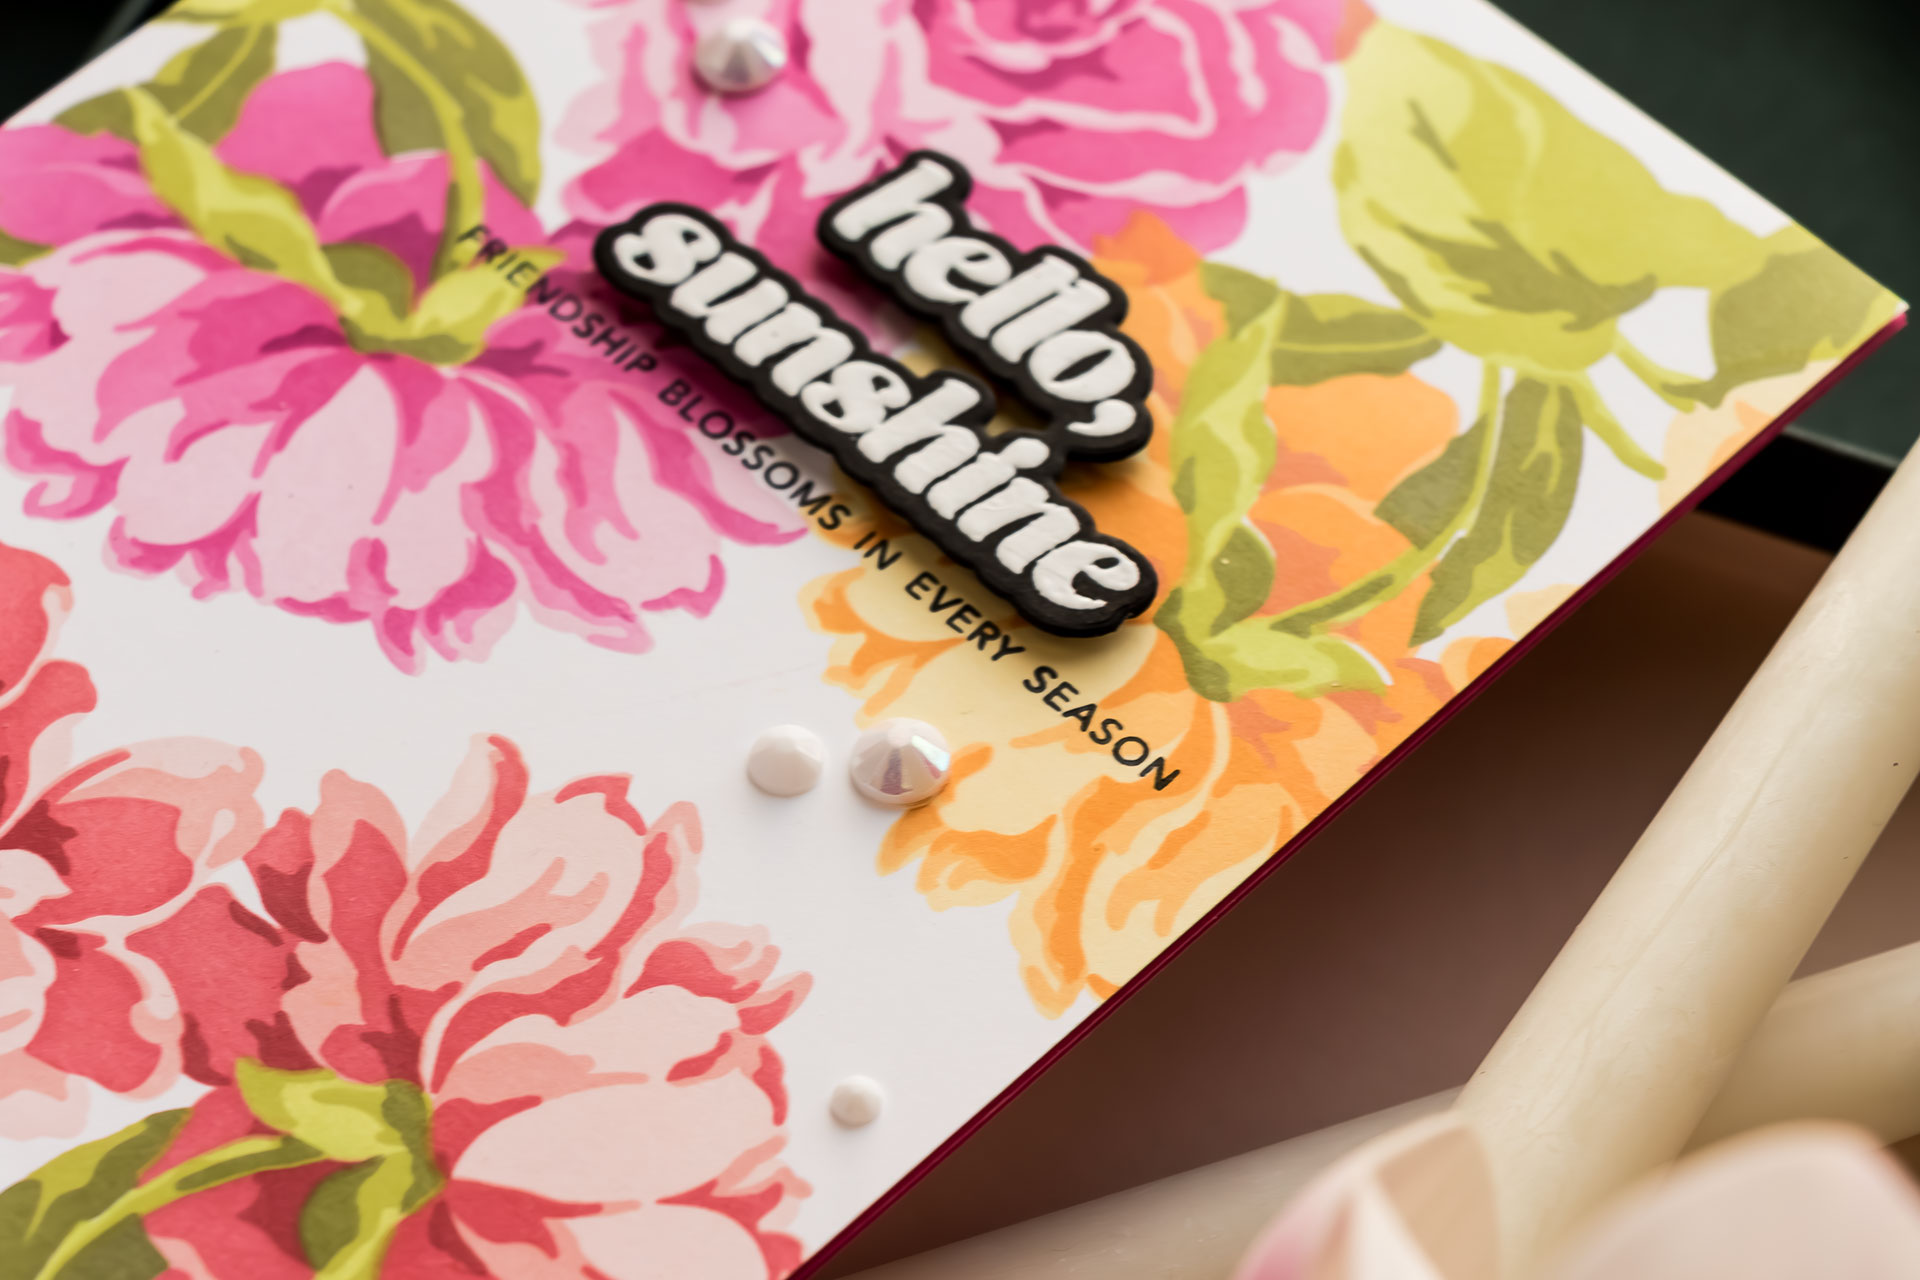
Used black sentiment die cuts for strong contrast
-
Heat embossed sentiments for added elegance
-
Finished with Mother-of-Pearl gems
One panel was also embossed using the Sweet Harvest 3D Embossing Folder, adding subtle texture without overpowering the florals.
Final Thoughts on Large-Scale Stenciling
Stamping and stenciling on a grand scale is:
-
Relaxing
-
Efficient
-
Incredibly versatile
If you enjoy long, uninterrupted crafting sessions and love floral designs, this technique is absolutely worth trying. One blended sheet can fuel several cards—and that’s always a win.
Have you ever created a full-sheet background like this? If not, I hope you’ll give it a try. It’s super fun, very rewarding, and a great way to get more out of your stencils.
Happy crafting!
SUPPLIES
I’m listing the products I used below. Click on the link to go directly to the product. Where available, I use compensated affiliate links, which means if you make a purchase, I receive a small commission at no extra cost to you. Thank you so much for your support!
") Stencil Art: Majestic Roses Layering Stencil Set (7 in 1) Shop at: AN |
 Altenew Craft Your Life Project Kit: Sweet Harvest & Add-on Die Bundle Shop at: AN |
 Altenew Craft Your Life Project Kit: Whispers in the Canopy & Add-On Die Bundle Shop at: AN |
 Altenew Large Blending Brushes Shop at: SSS | AN | PFS |
 Altenew Small Blending Brush Shop at: AN | PFS |
 Altenew Mini Blending Brush Set Shop at: SSS | AN | PFS |
 Altenew Crafter’s Showcase Mini Blending Brush Storage Shop at: SSS | SC | AN | PFS |
 Altenew 9″x12″ Ultra Sticky Mat: Grid Shop at: AN | PFS |
 Altenew Satin Masking Tape Shop at: AN | PFS |
 Spellbinders Platinum 6 Machine With Universal Plate System Shop at: SSS | SC | SB USA | SB UK | AMZ | PFS |
") Altenew Tropical Forest Fresh Dye Ink (Bamboo, Parrot, Olive, Moss) Shop at: AN |
") Altenew Cherry Blossom Fresh Dye Ink (Pink Diamond, Pinkalicious, Rubellite, Razzleberry) Shop at: SSS | AN | PFS |
") Altenew Red Sunset Fresh Dye Inks (Blush, Rouge, Crimson, Velvet) Shop at: SSS | AN | PFS |
") Altenew Golden Sunset Fresh Dye Ink (Sunray, Chamomile, Snapdragon, Terracotta) Shop at: SSS | AN | PFS |
 Hammermill White 100 Lb Smooth Premium Color Copy Pack 25 Sheets Shop at: SSS |
") Crafty Necessities: Rubellite Cardstock (10 sheets/set) Shop at: AN |
 Tsukineko Versafine Onyx Black Ink Shop at: SSS | AMZ | PFS |
 Altenew Mother of Pearl Gem Sparkles Shop at: SSS | AN | PFS |
 Tonic Studios 8.5 Inch Paper Trimmer Shop at: SSS | SC | AMZ | GBS |
 Glassboard Studio Scrapbook Magnetic Glass Craft Mat Shop at: GBS |
 Glassboard Studio Super Strong Magnets Shop at: GBS |
Glassboard Studio Glass Craft Mat – Code YANA15 Shop at: GBS |
 Glassboardstudio Mega Strong Neodymium MegaPawn Magnets Shop at: GBS |
 Glassboardstudio HexaFlex Organizer Set Shop at: GBS |
These are gorgeous
Thank you so much! I really appreciate you taking the time to comment — I’m so glad you enjoyed them!