


Hello friends! I’ve never been much of a fan of ink blending, but now – now that’s all I do! Ink blending is a fantastic technique that allows you to create beautiful backgrounds using your ink pads alone or in combination with stencils. Add some cool pastes on top – and you have yourself a fabulous one of a kind background.
Like this project? Pin it and save for later | Curious about my project photography? Click for details.
CARD DETAILS
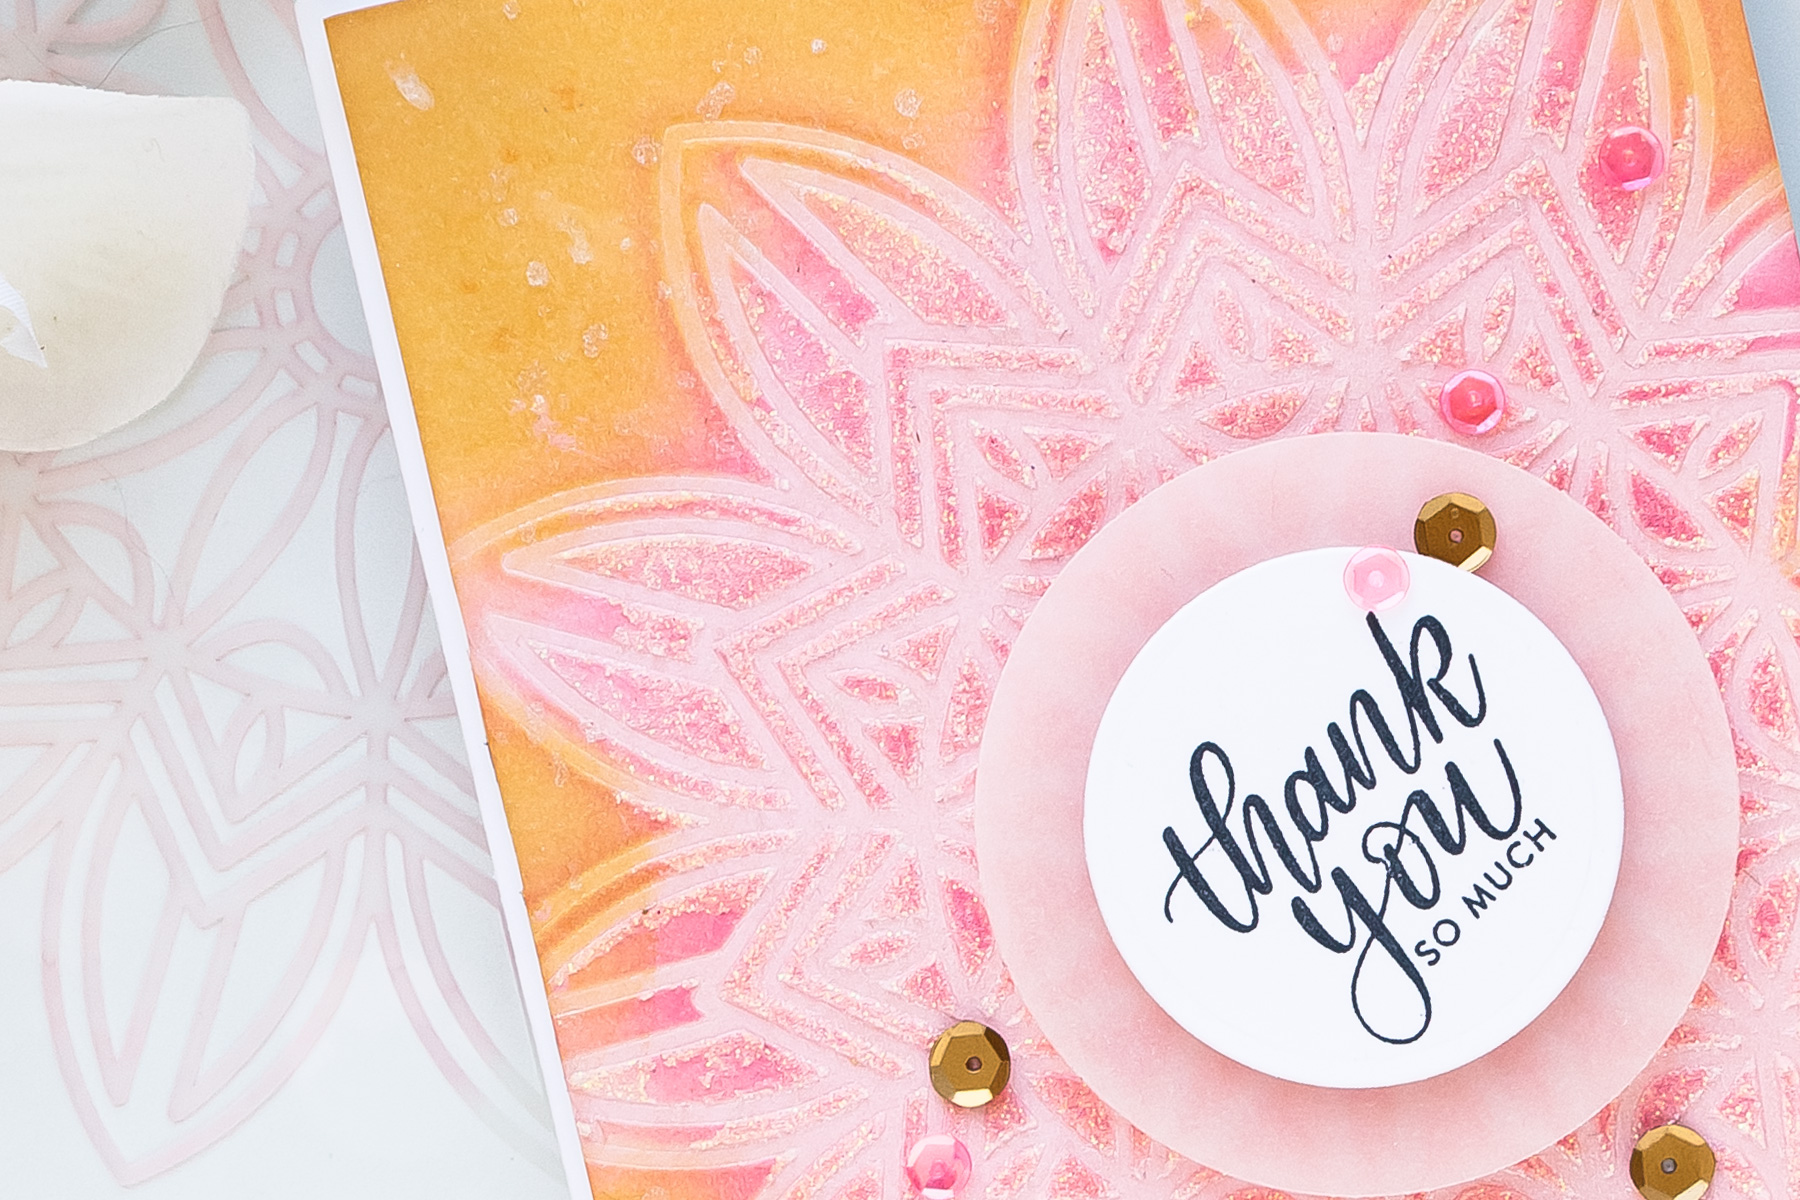
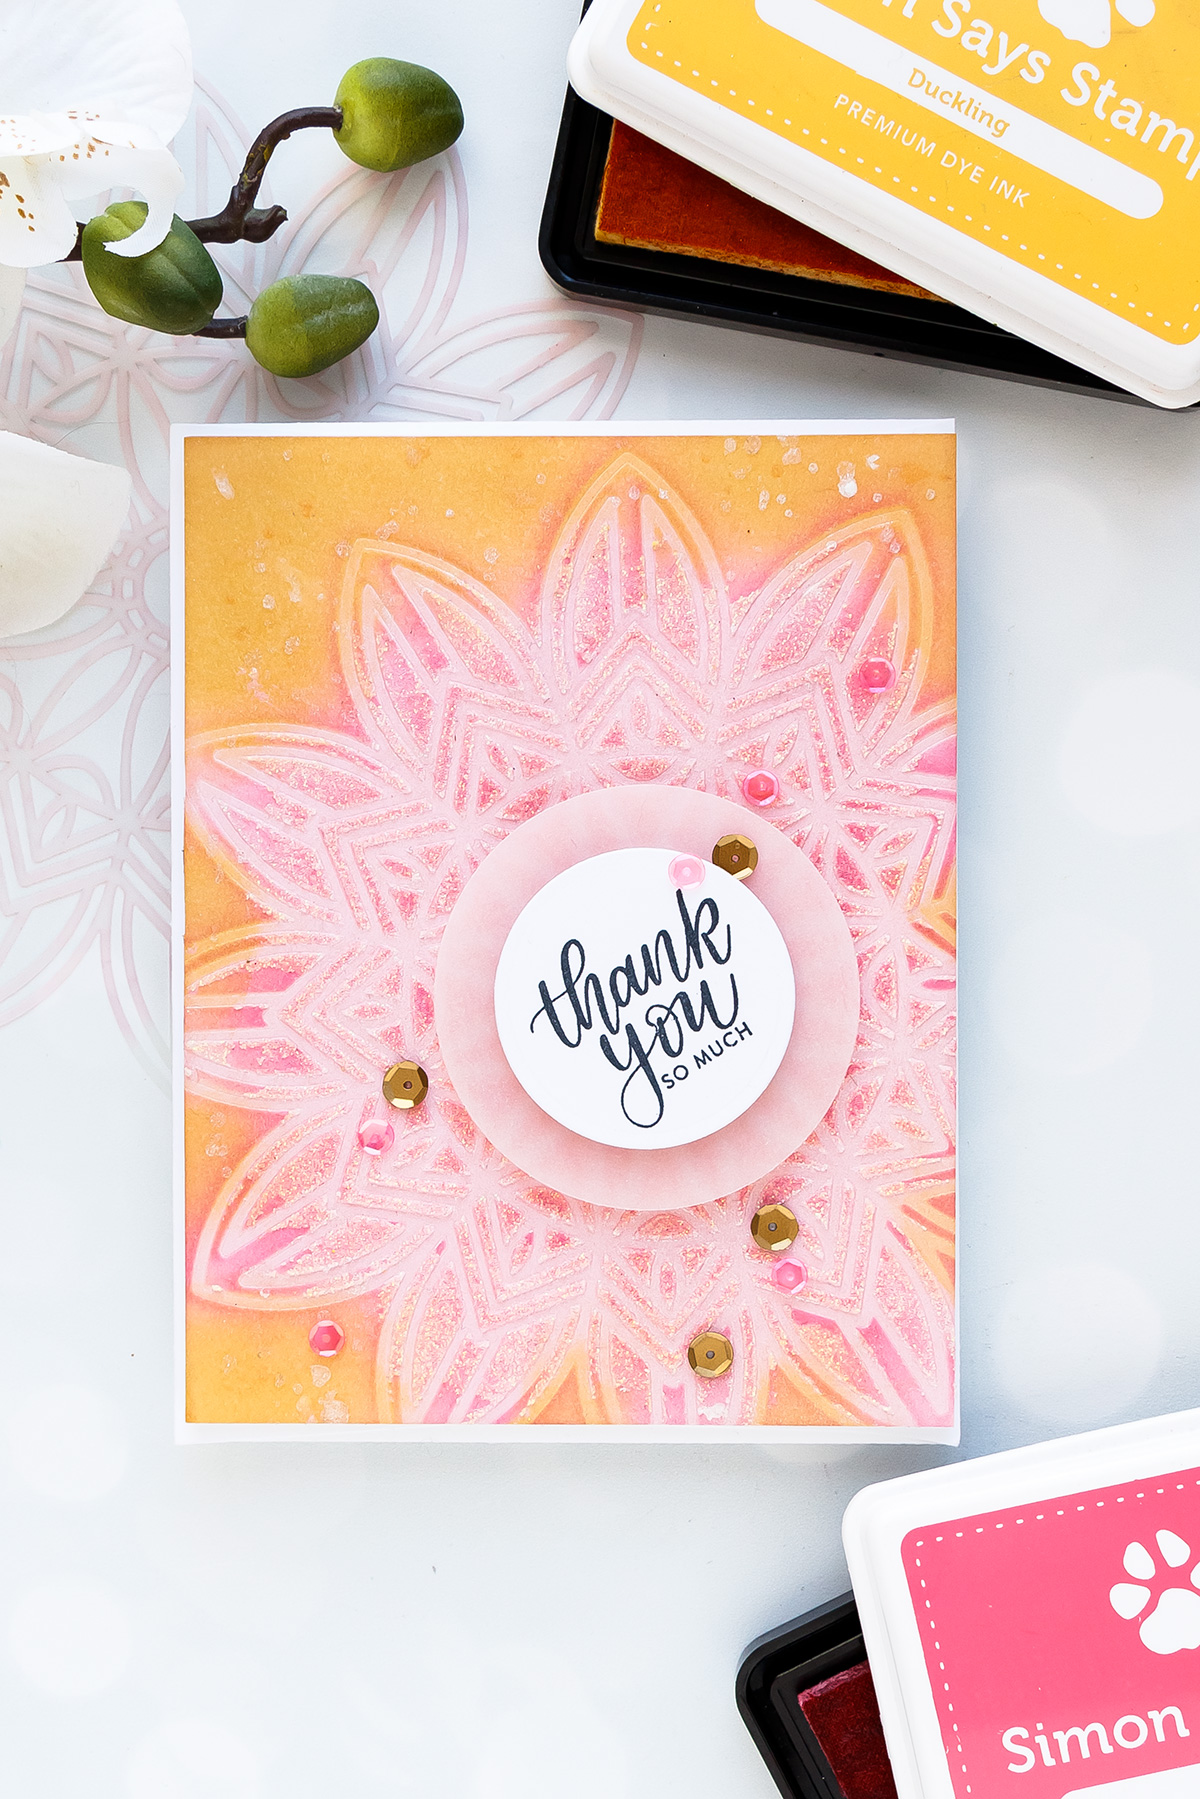
I started making this card by ink blending Twirling Tutu ink over an entire 4 1/4 x 5 1/2″ white cardstock panel. Next, I placed a beautiful Solar Burst stencil on top and blended Hollyhock over it (mostly in the center). While I still had my stencil taped in place (I used washi tape to attach it onto my panel) I dry embossed it in my Platinum die cutting machine.
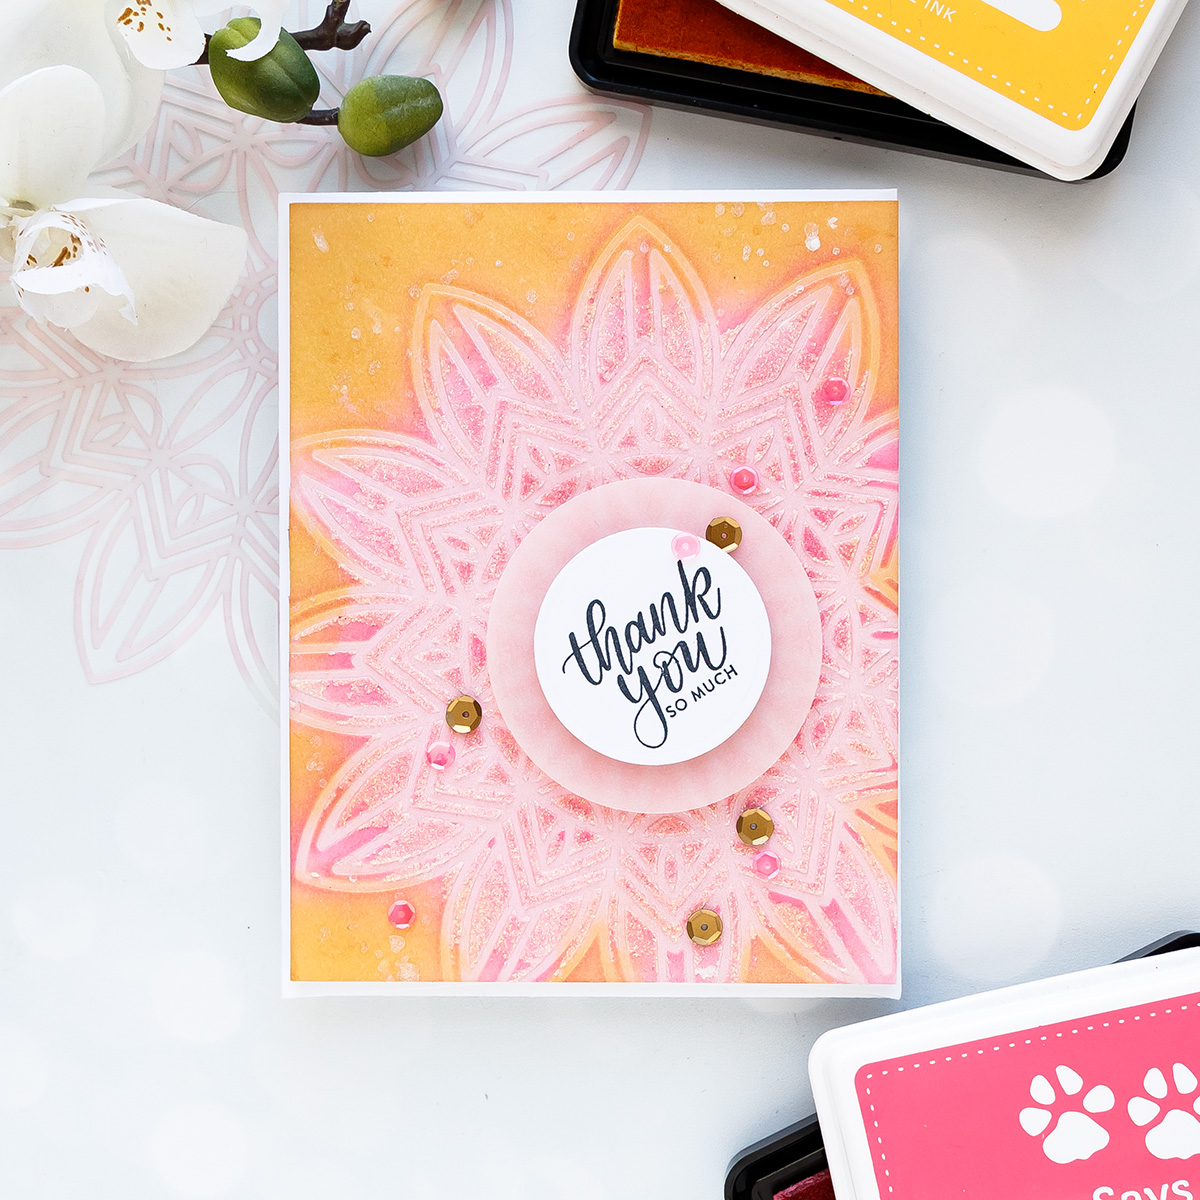
Again, I kept my stencil in place and applied Moonstone Glimmer Paste from Tonic Studios adding a bit of sparkle to this background. I removed my stencil and washed it (and the palette knife too) immediately in warm water. You need to do so right away to get rid of any paste that might be stuck on the stencil as it dries hard.
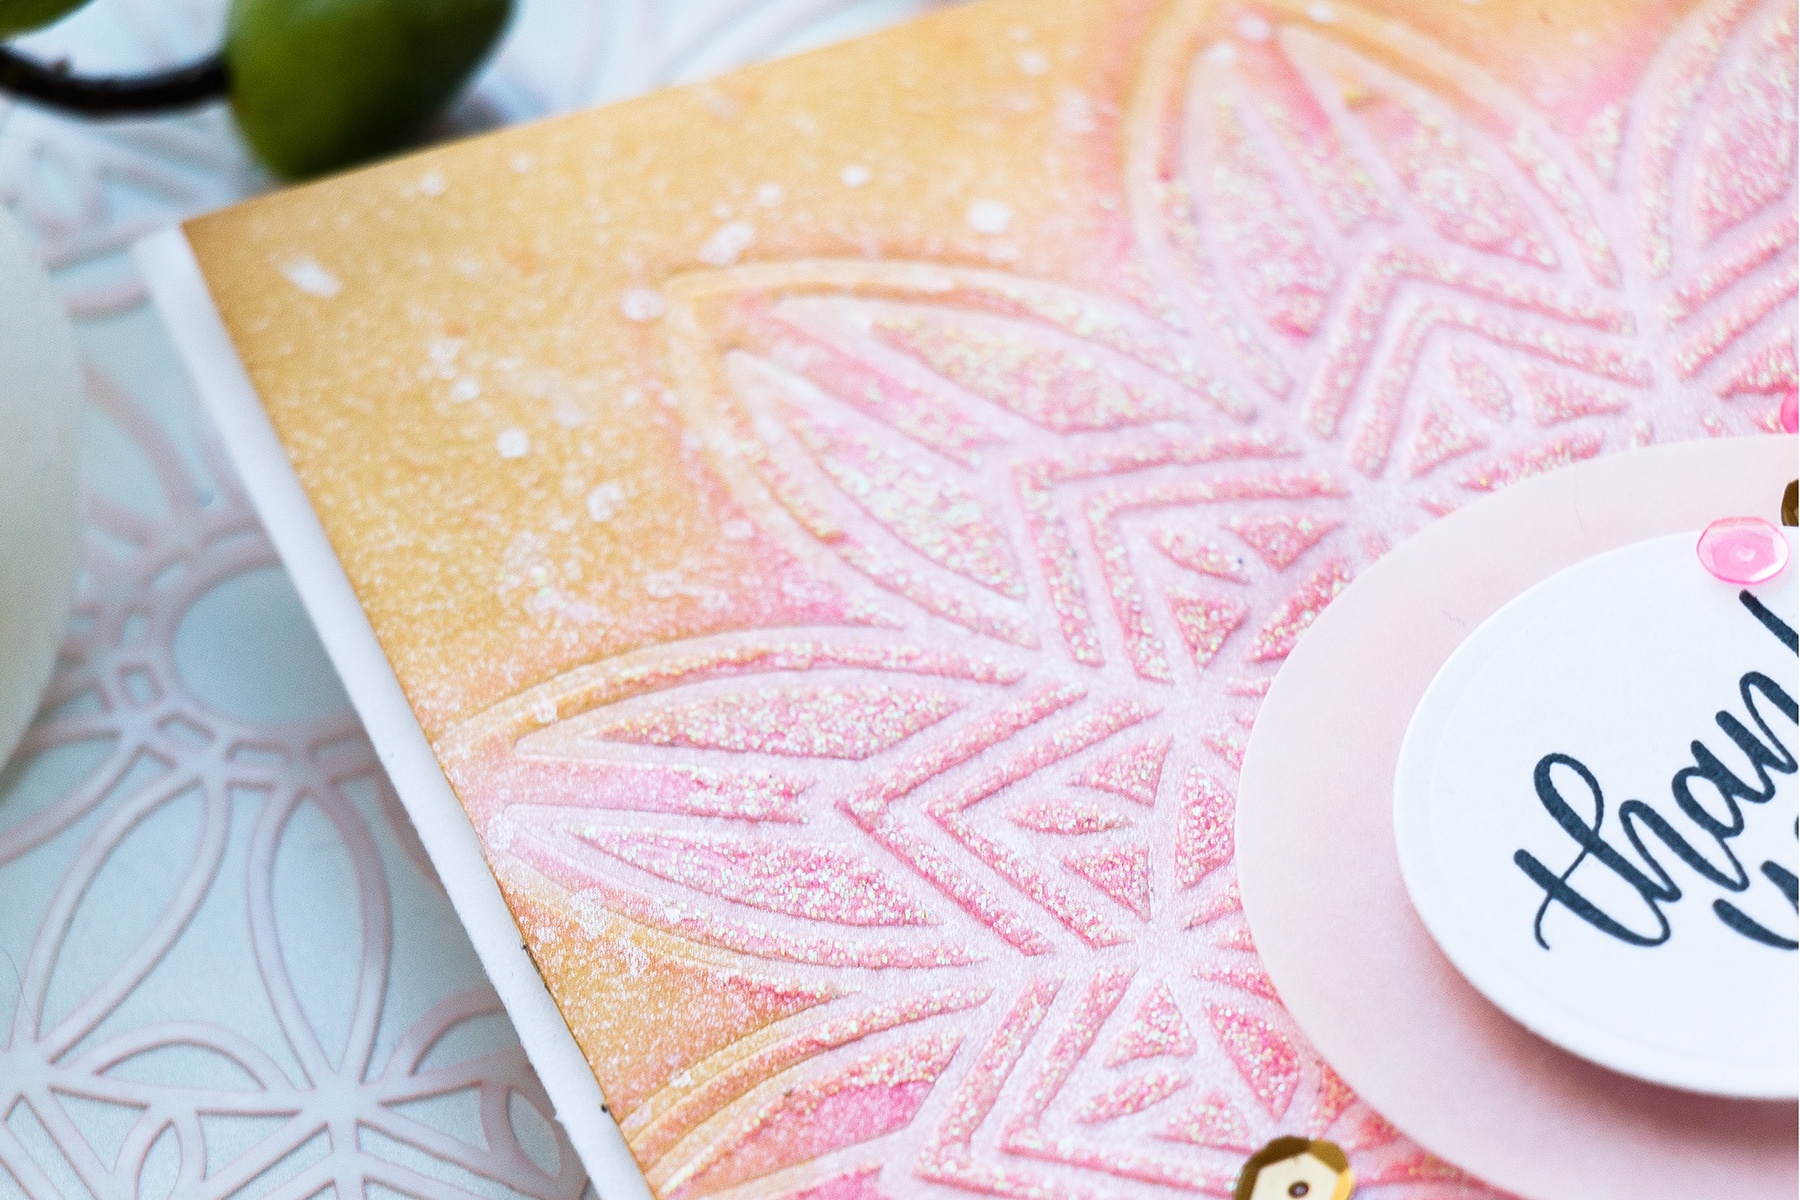
At this point I decided I wanted to bring in some yellow, so I blending Sunshine ink coming in from the edges of this panel (I did wait for the glimmer paste to be completely dry). I kept the center pink. I also sprayed this background using Hero Arts White Iridescent Shimmer Spray for ever more sparkle.
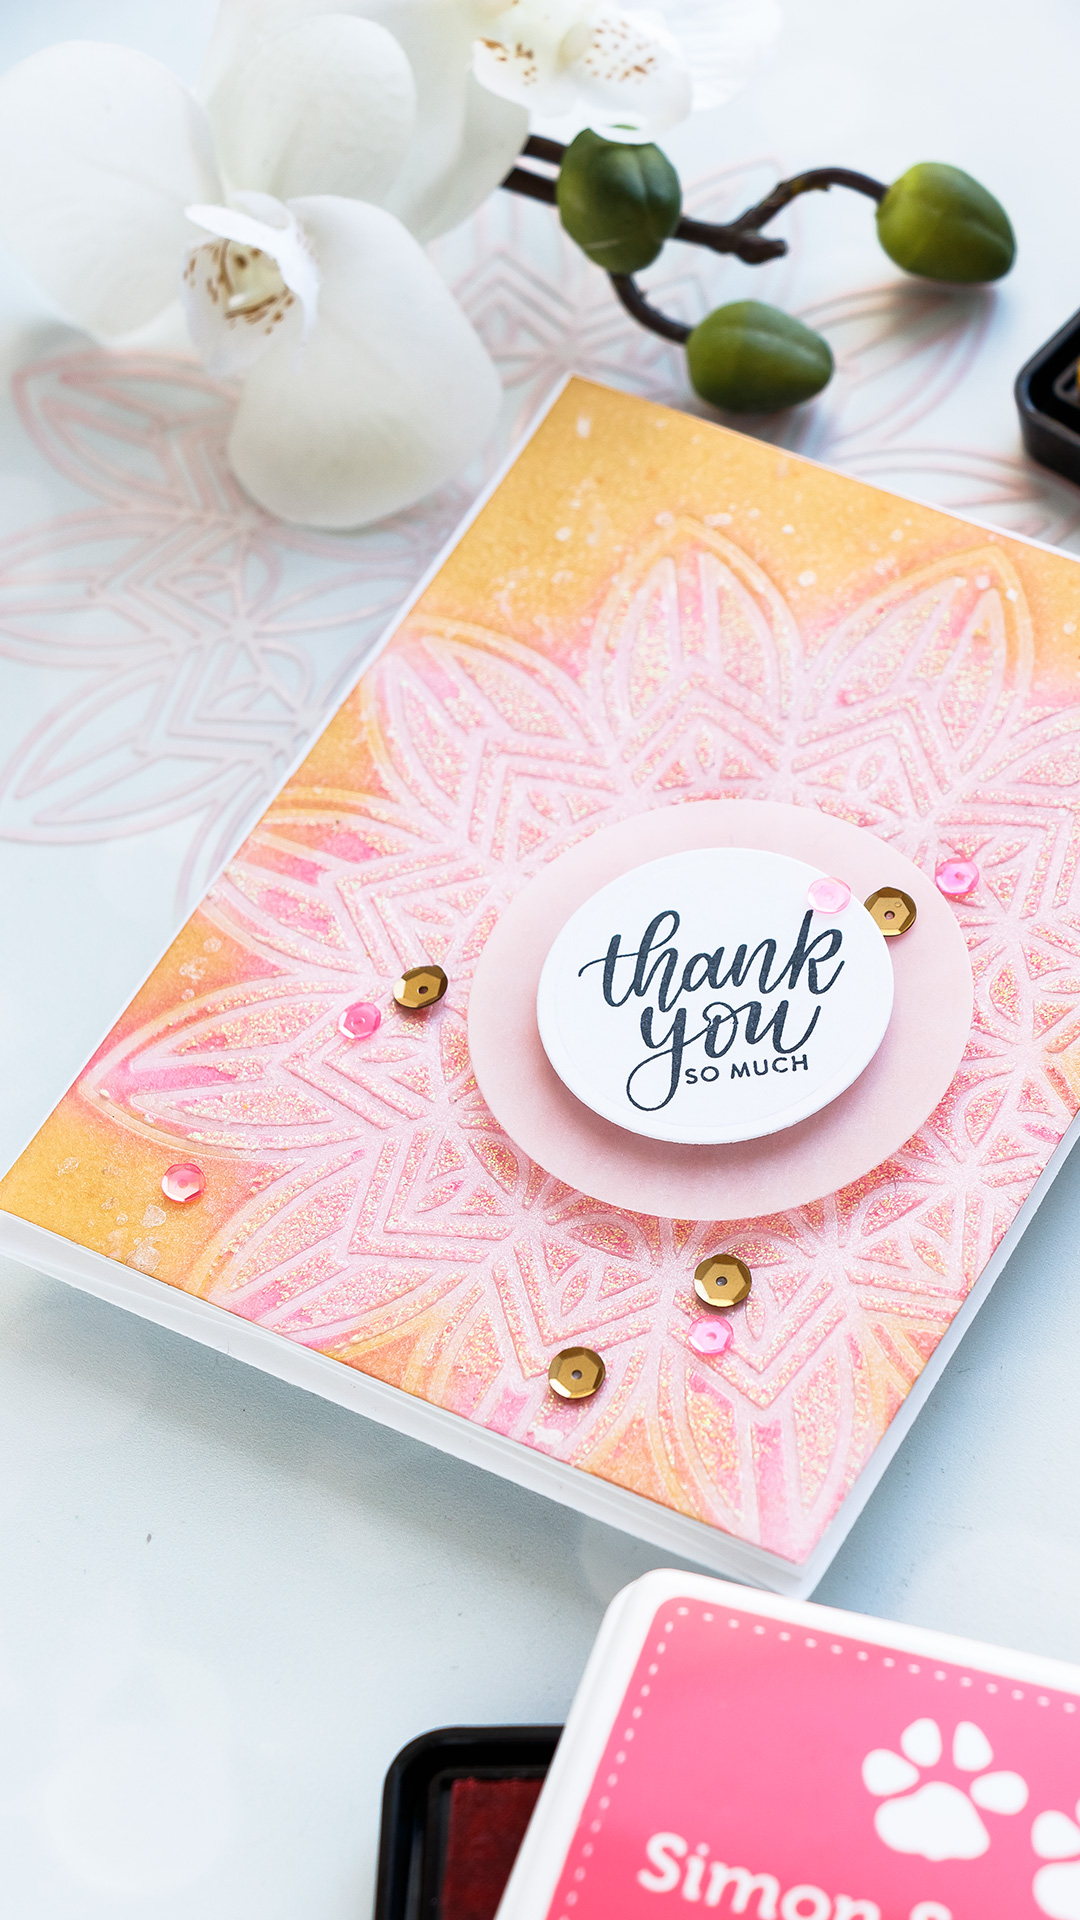
I went with a “Thank You So Much” sentiment (it comes from the Wreath Greetings stamp set) and stamped it in black onto a white die-cut circle. I also die-cut another, slightly larger circle out of vellum and layered both onto my card. Lastly, I embellished this project using sequins from the Peach Beach and Pool Party sequin sets.
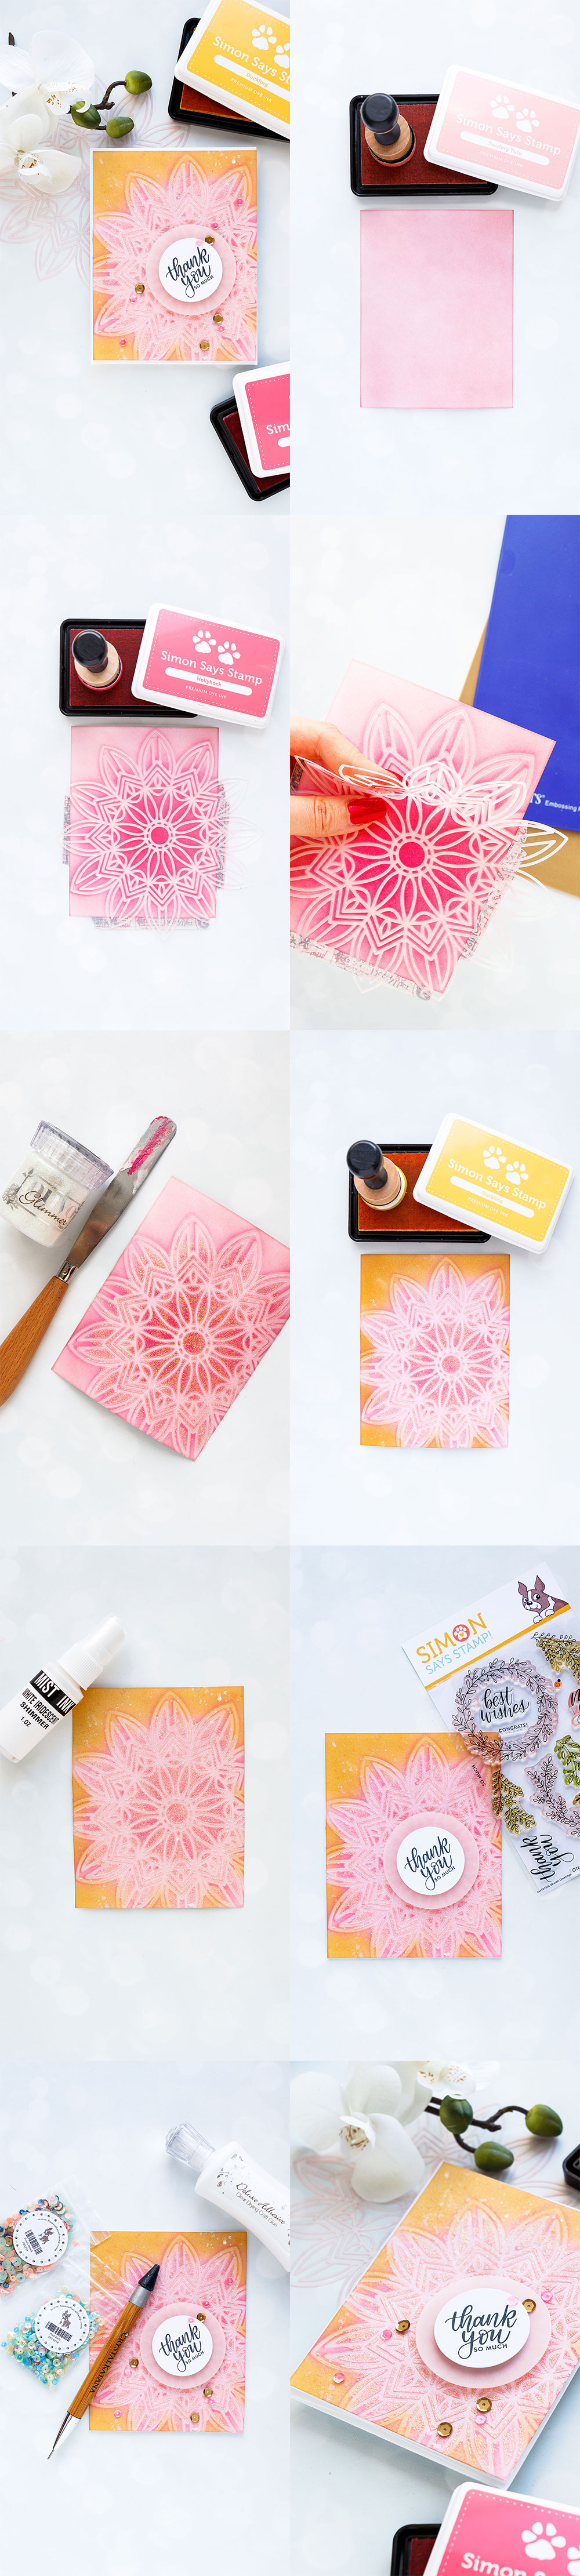
STEP BY STEP PHOTO TUTORIAL
Here’s a step-by-step photo tutorial showing how to make this card. Feel free to save/pin it for later.
SUPPLIES
I’m listing the products I used below. Click on the link to go directly to the product. Where available I use compensated affiliate links which means if you make a purchase I receive a small commission at no extra cost to you. Thank you so much for your support!
 Simon Says Stamps Wreath Greetings Shop at: SSS |
 Simon Says Stencils Solar Burst Shop at: SSS |
 Simon Says Stamp Peach Beach Sequins Shop at: SSS |
 Simon Says Stamp Pool Party Sequins Shop at: SSS |
 Simon Says Stamp Sunshine Ink Pad Shop at: SSS |
 Simon Says Stamp Twirling Tutu Dye Ink Pad Shop at: SSS |
 Simon Says Stamp Hollyhock Ink Pad Shop at: SSS |
 Spellbinders Platinum 6 Die Cutting Machine Shop at: SSS |
 Hero Arts White Iridescent Shimmer Spray Shop at: SSS |
 Neenah 110 Lb Solar White Cardstock Shop at: SSS |
 Spellbinders Standard Circles LG Dies Shop at: SSS |
 Tsukineko VersaFine Onyx Black Ink Shop at: SSS |
 Mini Misti Stamping Tool Shop at: SSS |
 Tonic Moonstone Nuvo Glimmer Paste Shop at: SSS |
 Ranger Mini Round Foam Refils Shop at: SSS |
 Ranger Mini Round Ink Blending Tools Shop at: SSS |
 Tonic Metal Palette Knife Shop at: SSS |
 Scor-Tape 1/8 Inch Crafting Tape Shop at: SSS |
 Crystal Ninja Crystal Katana Pick Up Tool Shop at: SSS |
 Scrapbook Adhesives White Foam Squares Shop at: SSS |
 Tonic Deluxe Adhesive Nuvo Glue Shop at: SSS |
Yana, I love this card! It’s gorgeous. I would never have thought of putting the yellow with the pink. I can’t get over how well they go together, and how soft and sweet this card is. Thank you again!!!
Gorgeous card! I love the stencil!!
Ooooh Yana, I like this! Love the glimmer paste with this stencil and the ink blended background, those colours are beautiful together.
Stunning background, beautifully designed card. LOVE IT!
So Pretty!
Beautiful!! Love all the details and color combo!
This is beautiful! Thank you for the detailed instructions on how you created it. I can’t wait to try it.
Oooh this is super pretty!
Yana what a fabulous card with various stages in its creation. I love the fact that it has been inked, dry embossed, embossing paste and then inked again. I love finding new ways to use vellum and to layer this under the sentiment is certainly a great idea because it is light and it doesn’t take away from the image or colours beneath it. Thank you for sharing this project with us crafters. xx