


Hello crafters! In this video, I’m going back to stamping and sharing several super easy-to-make greeting cards featuring some custom geometric floral designs.
Like this project? Pin it and save for later | Curious about my project photography? Click for details.
I have to say, I’ve missed stamping! I have been doing so much die-cutting lately, I have forgotten what it feels like to stamp a design and stamp solid designs. I used to love stamping and I used to do a ton of stamping before die cutting and I have to say I kind of miss it.
VIDEO TUTORIAL
Watch the video below or on my Youtube channel.
CARDS DETAILS
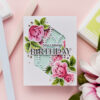
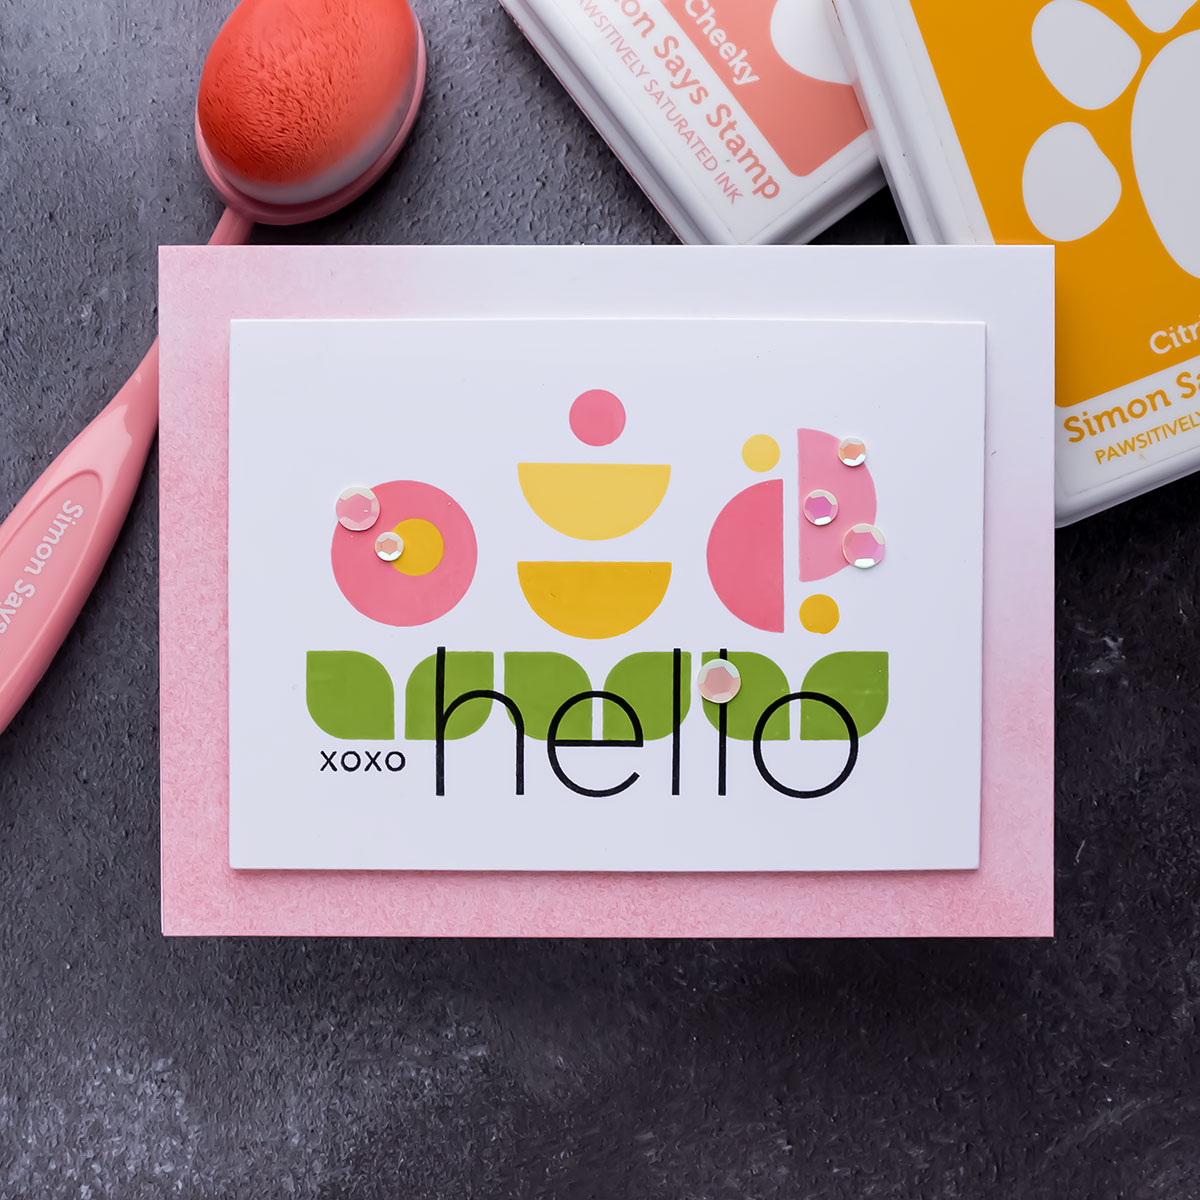
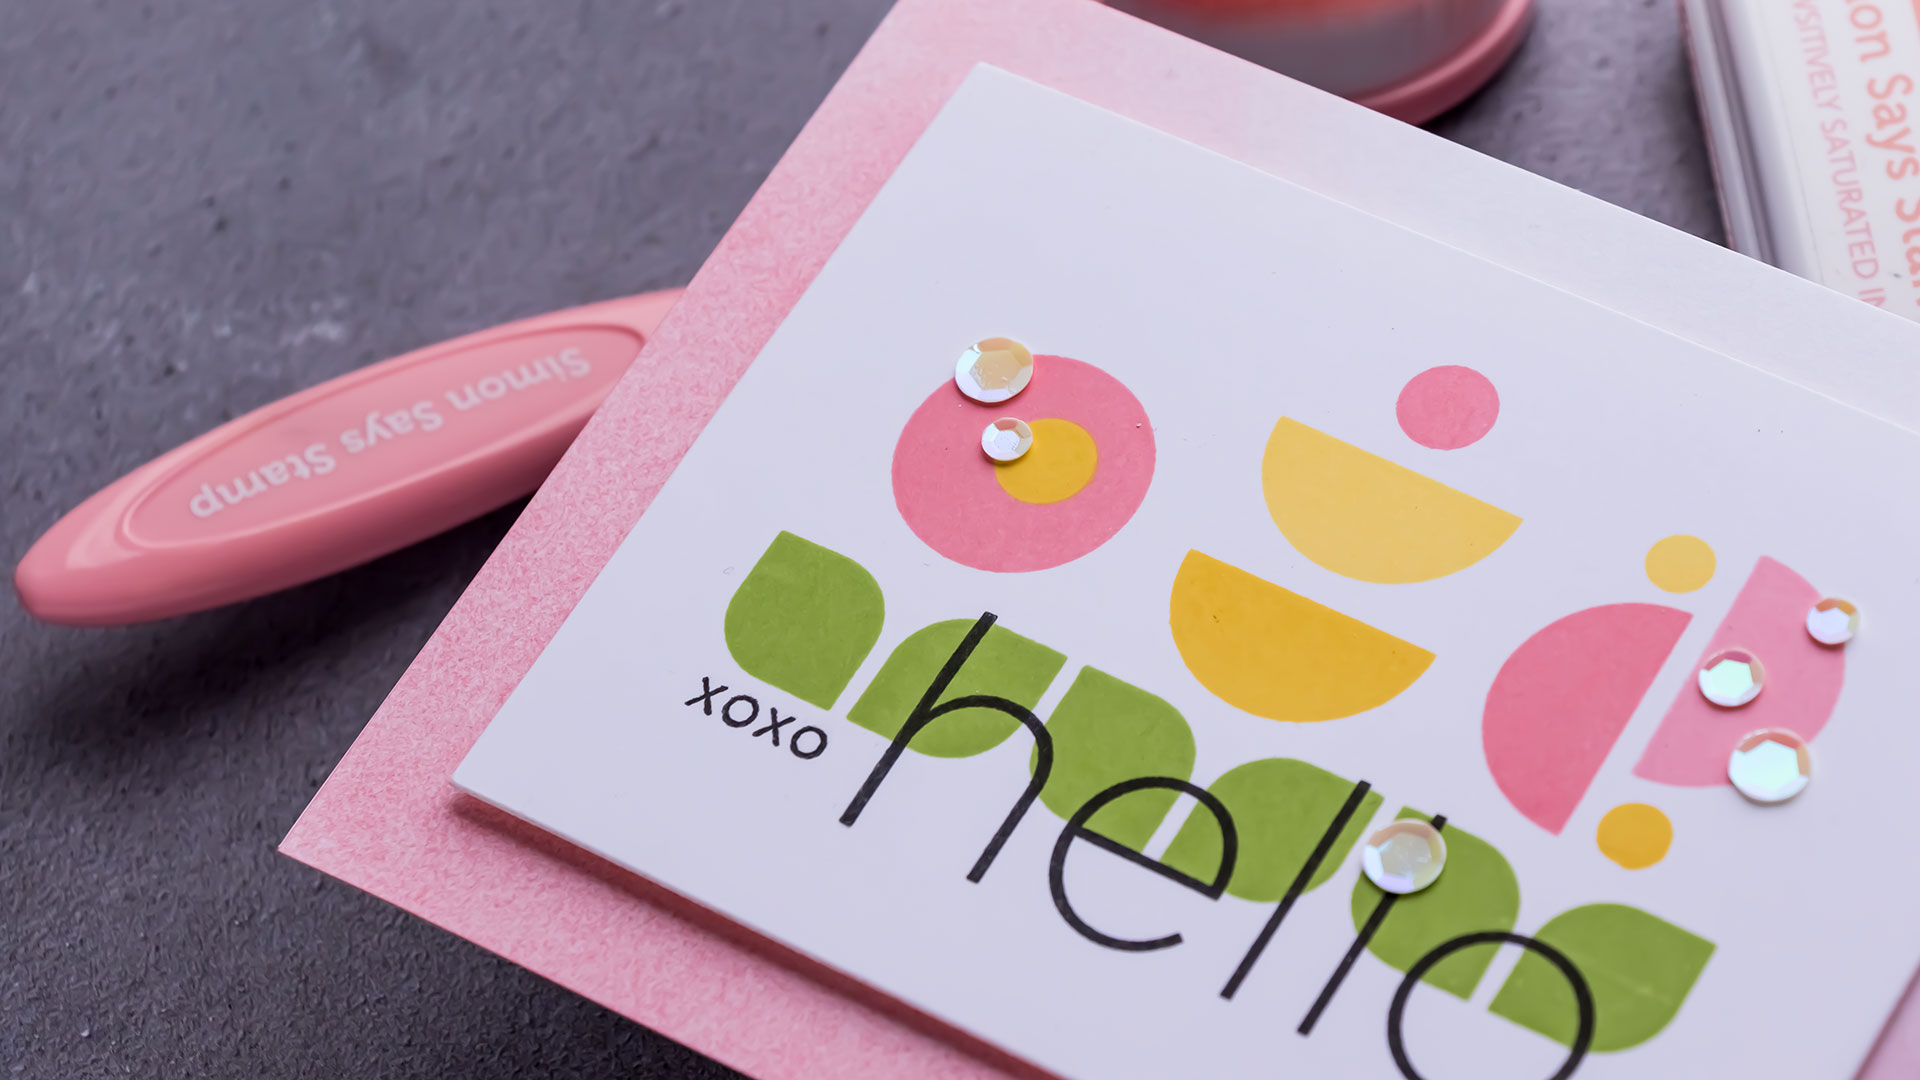
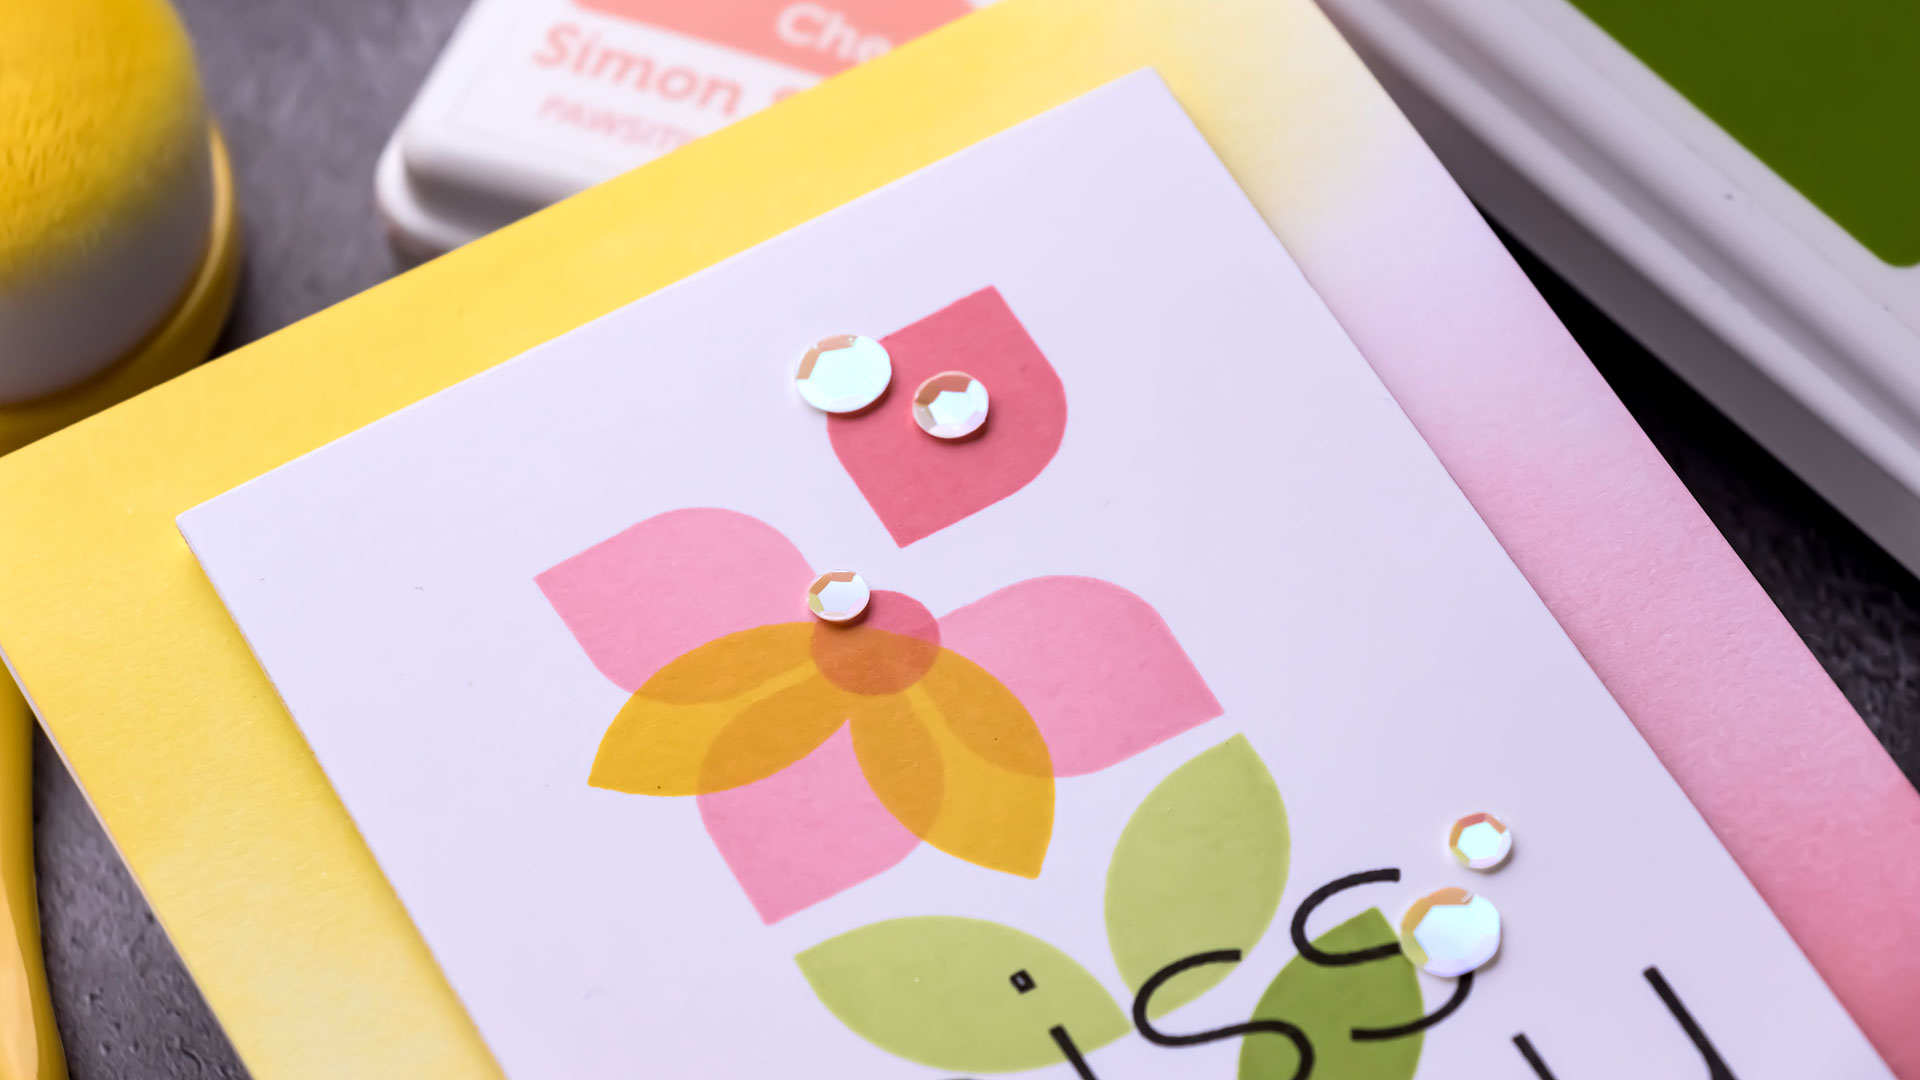
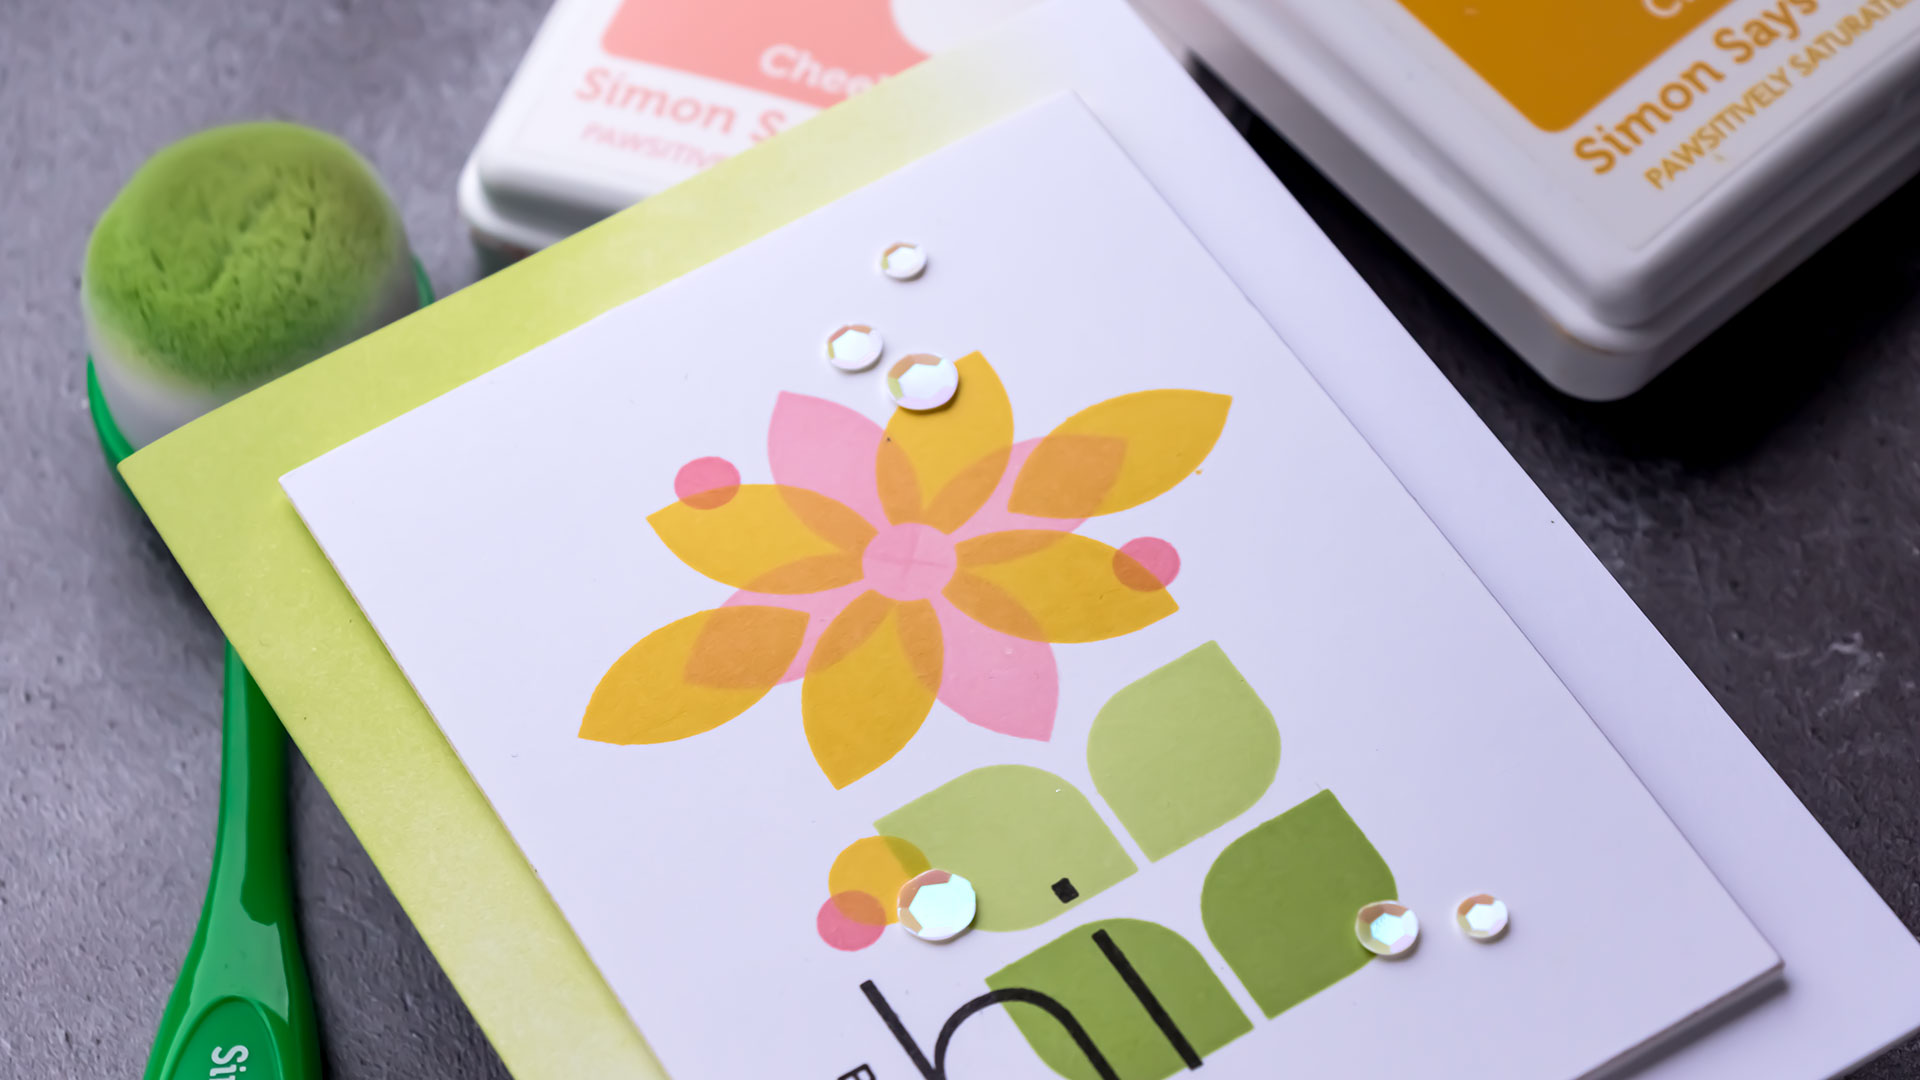
The stamp set I’m creating with today is a new one from Simon Says Stamp called the Geo Flower Building stamp set. And it is magnificent. When you first look at it it doesn’t seem like much, because all you see are just these random shapes, but as you start using it you realize the brilliance of this set and its versatility.
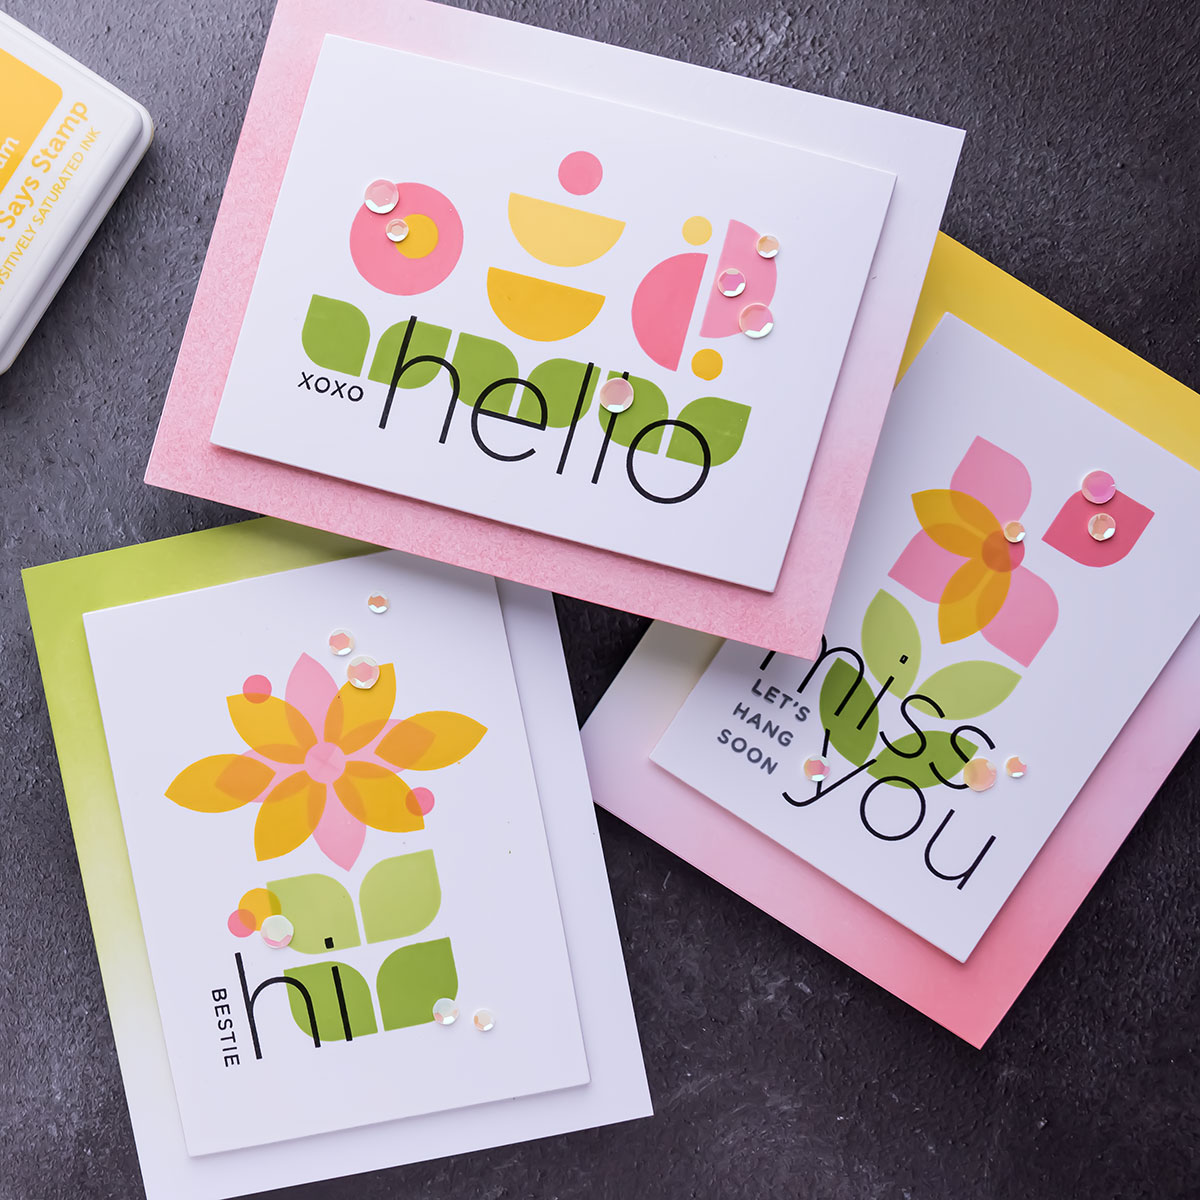
You have a bunch of different shapes here, all intended to help you build geometric-looking flowers. You have shapes that can be used to stamp leaves, shapes to stamp petals, and various size circles to stamp either flower centers or various flower accents. And basically, this is a stamp set that can be used over and over again to create all sorts of different images. I’m not going to say that the stamping possibilities with this stamp set are endless, but I will say that you do have so many different options with this set.
There is a set of coordinating dies available, giving you even more crafting possibilities, but I didn’t even use the dies today, that’s something I will save for another occasion, I’m just using the stamps.
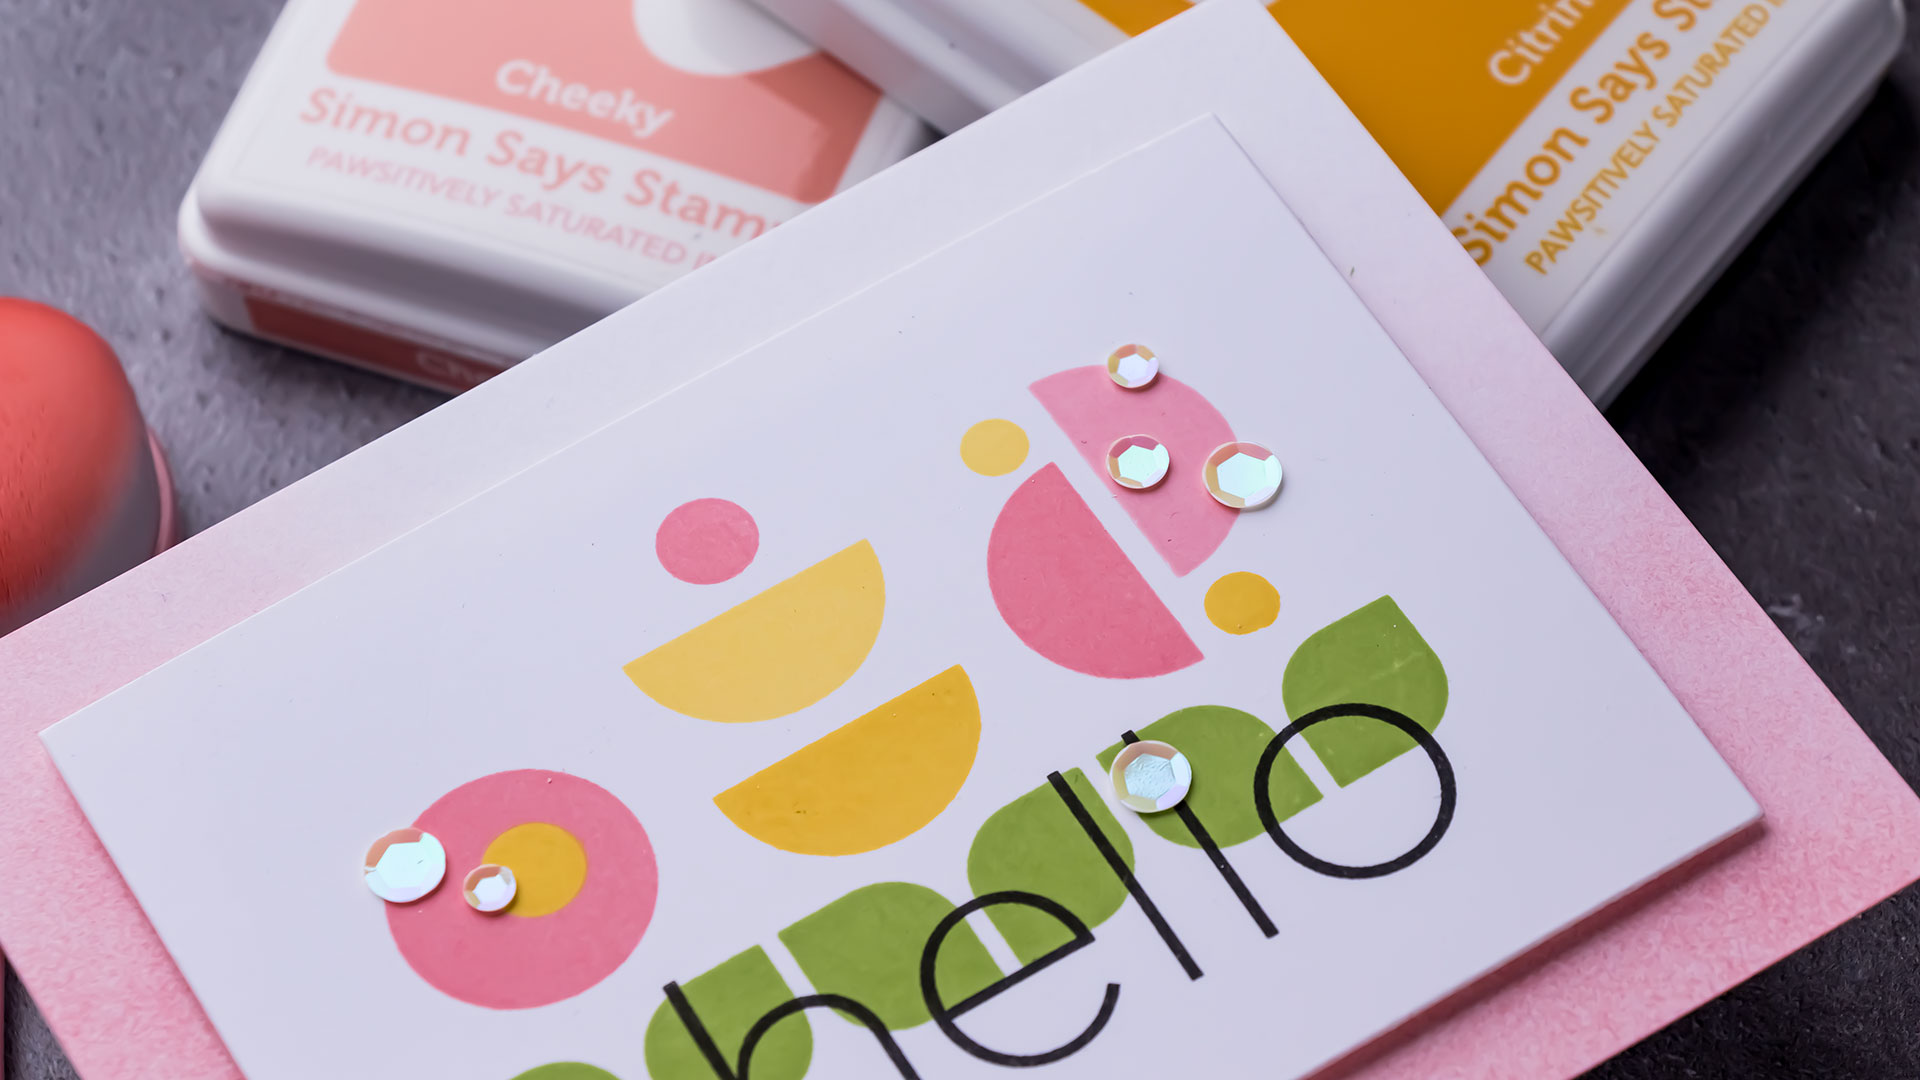
I have selected several colors of ink, a color combo for these cards and I have green, yellow, and peach colors and there are 2 shades for each color – a light shade and a medium shade. So very simple designs with very simple color combinations. All are linked below.
I used a mini MISTI stamping tool and I pre-cut Simon’s 130lb cardstock to 4 1/4 x 5 1/2” panels and did all of my stamping on this paper. You guys know how much I love this paper for stamping, I love it for coloring, it takes ink well and I love using it. It is a little bit on the expensive side, but worth every penny you pay for it.
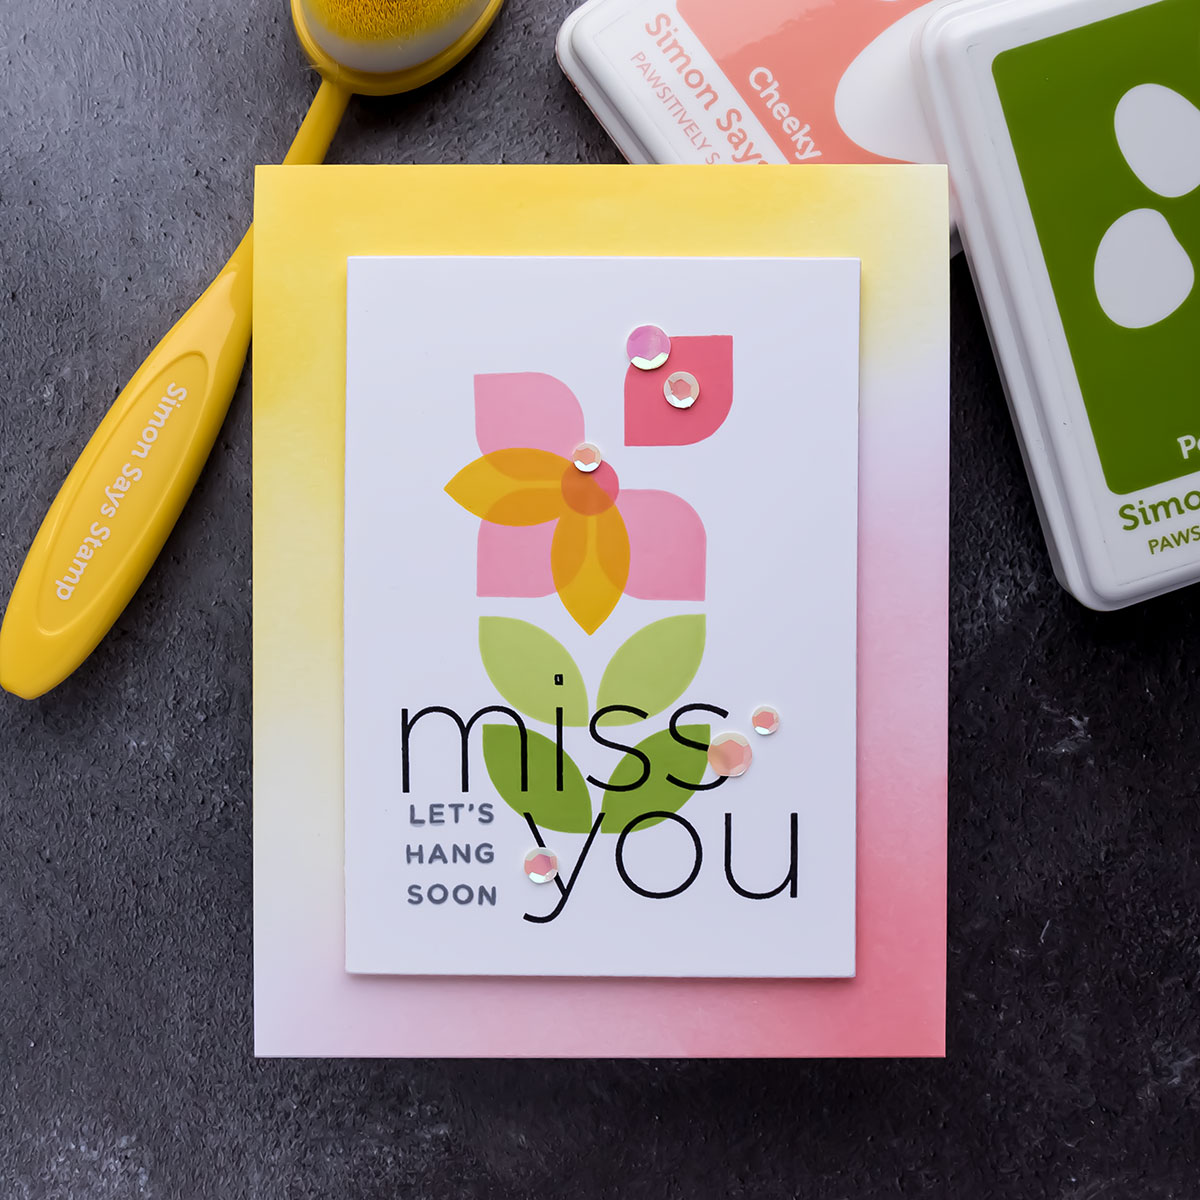
These flowers don’t have stems to them and at first, I kind of wanted to have a stem to these flowers, they looked as if they needed a stem, so I tried drawing one using a pencil, then I looked through my stash to find a skinny line stamp to be able to stamp the stem and I did so that on some of my test pieces, I didn’t like. These flowers do look better without the stem, so I guess that’s why there’s no stem in the stamp set. Your mind sort of continues the design and envisions the stem on its own.
With the flowers stamped, I moved on to stamping the sentiments, and to me, these flowers needed big bold sentiments so I used one of my favorite stamp sets from CZ Clean Line XL set, I love the font and the size of these messages, I use them a lot for my cards. I did a lot of overlapping when stamping these to create a balanced design.

I trimmed each panel using a rectangle die. I decided I needed to add some color to the background, so I wanted to foam mount this panel onto a colored card base. I first wanted to use a piece of cardstock that matches the color of the stamping, of course, I didn’t have any cardstock in that particular color, I so wish Simon would manufacture this color cardstock, it is very pretty, I don’t have anything like that in my stash, so what I did – I decided to ink blend the panel using that same ink color to match the color of my stamping.
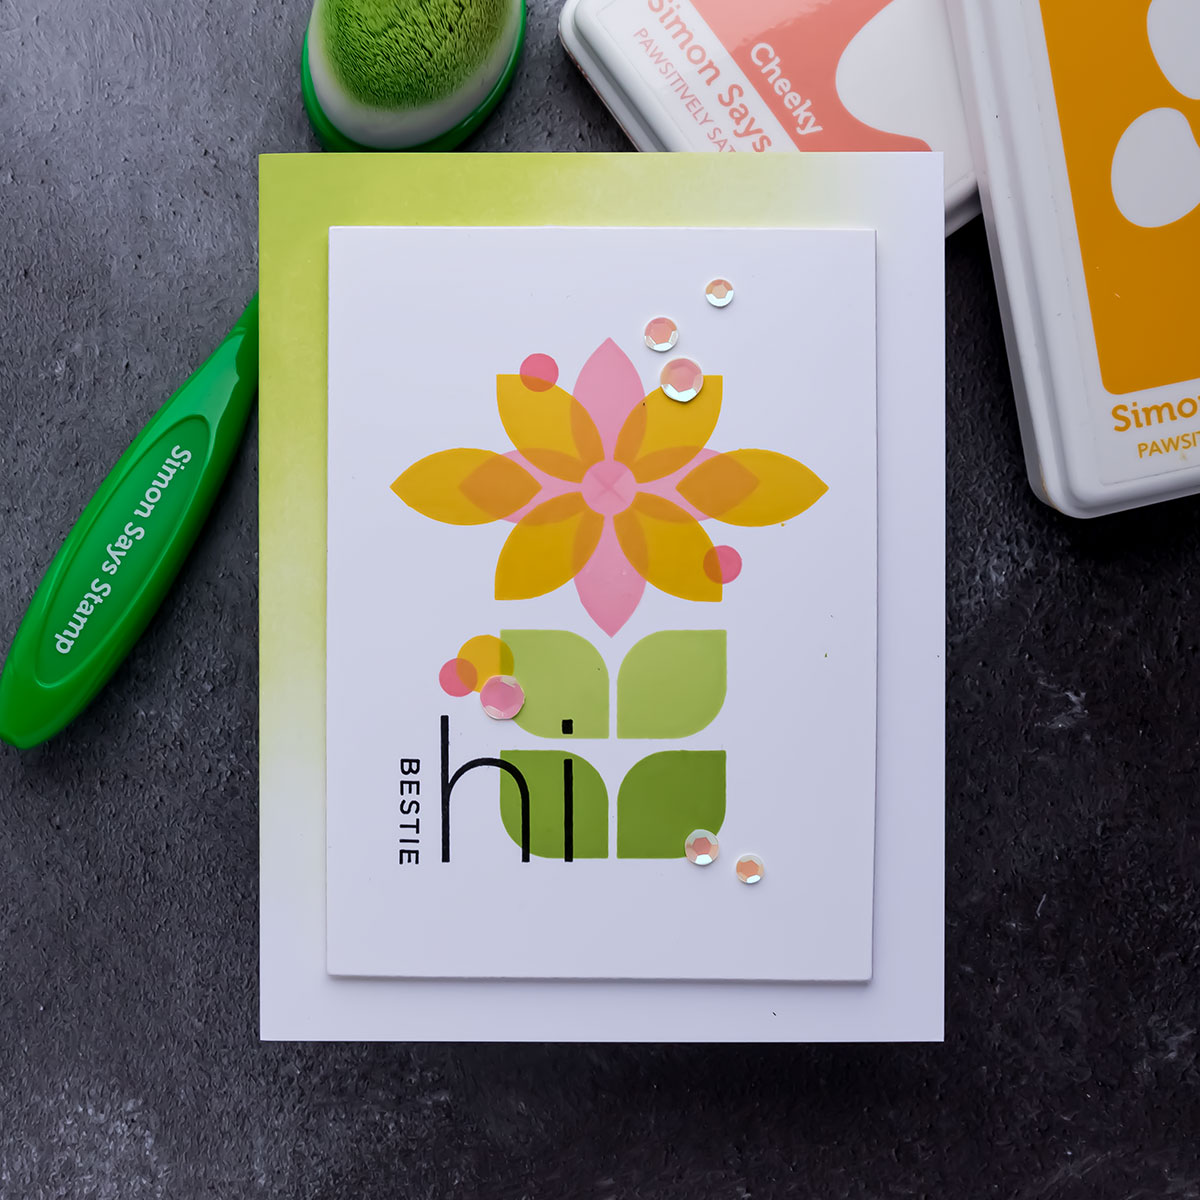
I first wanted to ink blend the entire panel but as I stamped blending I liked having just a part of it blended and I decided I didn’t need to blend the whole thing. I just blended half of it. I foam mounted the stamped panel onto my ink-blended panels which I adhered to an A2 card base and next I used Spellbinders sequins in the color aura and added a couple onto the card – the circle sequin shape went well with the circle and half circle flower shapes.
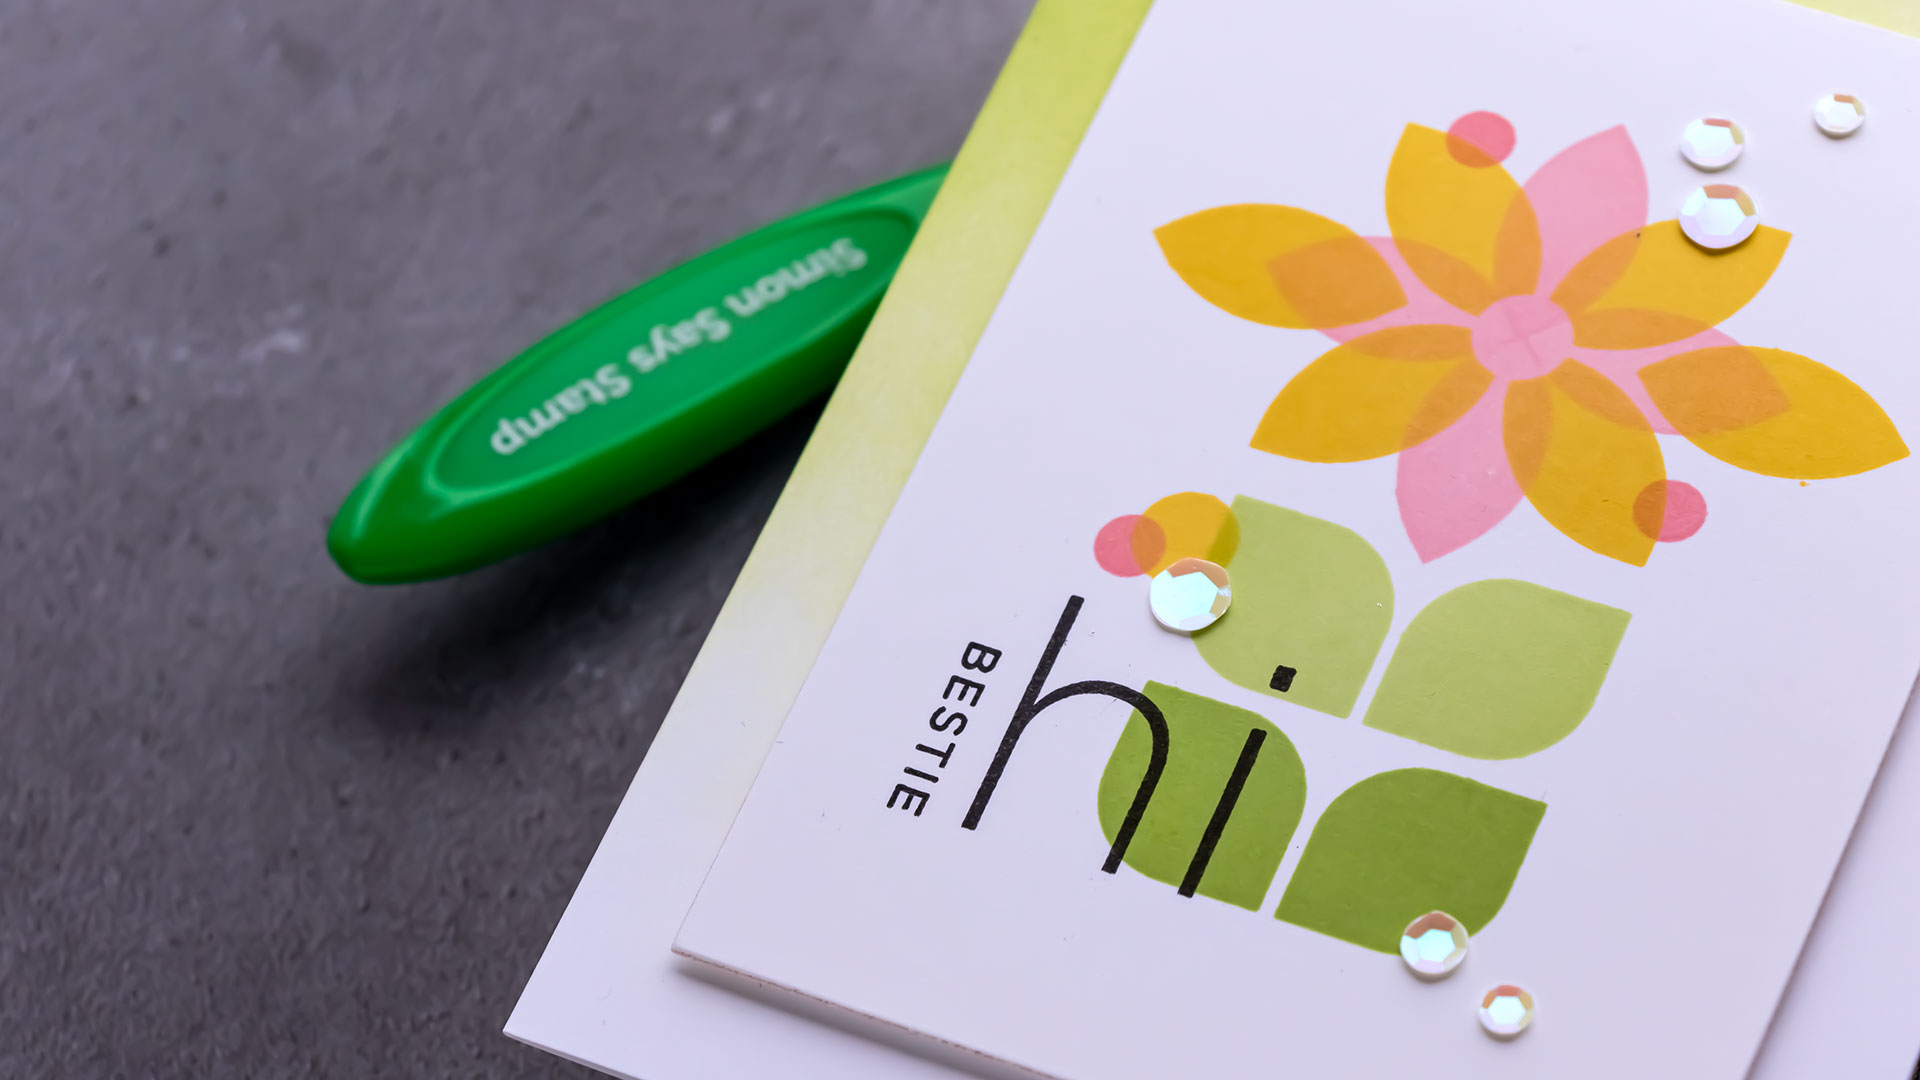
I also used a new detail pick-up tool from Simon – the Place and Score Embellishment Wand. You have a wax tip on one end to help you pick up and position the embellishments such as these sequins and the other end is perfect for scoring paper. There’s also another embellishment wand – the Place & Pierce and it has a piercing end instead of the scoring one.
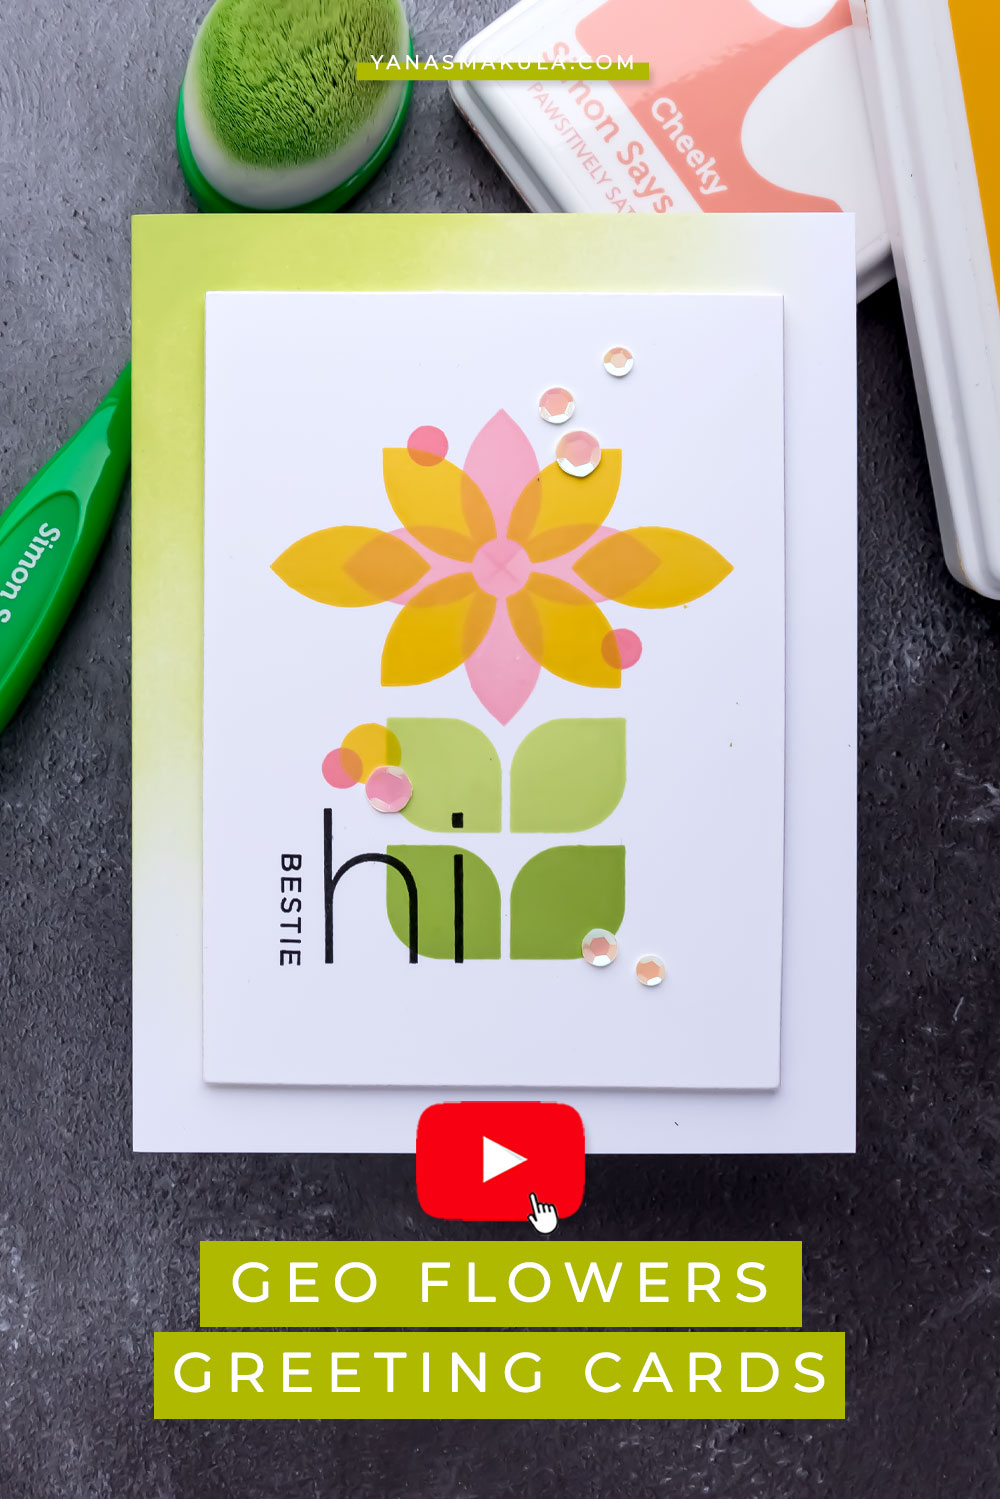
So here’s a look at the finished cards created using the Geo Flower Building stamp set from Simon. Btw, there is a new release happening today with lots of great products, this stamp set is my favorite, but there’s a lot to choose from, so I encourage you to take a look and explore!
Have fun stamping!
SUPPLIES
I’m listing the products I used below. Click on the link to go directly to the product. Where available I use compensated affiliate links which means if you make a purchase I receive a small commission at no extra cost to you. Thank you so much for your support!
 Simon Says Clear Stamps Geo Flower Building Shop at: SSS |
 Simon Says Stamp Geo Flower Building Wafer Dies Shop at: SSS |
 Simon Says Stamps and Dies Geo Flower Building Shop at: SSS |
 CZ Design Clear Stamps Clean Line XL Shop at: SSS |
 Simon Says Stamp Place and Score Embellishment Wand Shop at: SSS |
 Simon Says Stamp Place and Score Wand Replacement Tips Shop at: SSS |
 Simon Says Stamp Place and Pierce Embellishment Tool Shop at: SSS |
 Simon Says Stamp Mega Thick White Cardstock 130LB Shop at: SSS |
 Simon Says Stamp White A2 Top Fold Scored Cards Shop at: SSS |
 Mini MISTI Stamping Tool Shop at: SSS |
 Simon Says Stamp Pawsitively Saturated Ink Pad Citrine Shop at: SSS |
 Simon Says Stamp Pawsitively Saturated Ink Pad Sunbeam Shop at: SSS |
 Simon Says Stamp Pawsitively Saturated Ink Pad Charcoal Shop at: SSS |
 Simon Says Stamp Pawsitively Saturated Ink Pad Pearfection Shop at: SSS |
 Simon Says Stamp Pawsitively Saturated Ink Pad Limelicious Shop at: SSS |
 Simon Says Stamp Pawsitively Saturated Ink Pad Cheeky Shop at: SSS |
 Simon Says Stamp Pawsitively Saturated Ink Pad Blush Shop at: SSS |
 Simon Says Stamp Blending Brush Set Large Shop at: SSS |
 Tsukineko Versafine Onyx Black Ink Shop at: SSS |
 Spellbinders Aura Opalescent Color Essentials Sequins Shop at: SSS |
 Simon Says Stamp Tear Rific Tape 1/4 Inch Shop at: SSS |
 New & Improved Platinum Six Machine With Universal Plate System Shop at: SSS |
 Spellbinders Precision Layering A2 A Set Shop at: SSS |
 Spellbinders Best Ever Craft Tape Shop at: SSS |
 Fun Foam Sheets Shop at: SSS |
 Bearly Art Mini Precision Craft Glue Shop at: SSS |
Yana, I love these. So springy and sweet. I hope all is well with you.
I love these!!! They’re so pretty and colorful. Thanks for sharing!,,
Very enthusiastic about this stamp set after watching your video…I have been missing “stamping” too after being carried away with die-cutting these last few years…
I. LOVE. THESE. So freaking much!!
I missed your stamping too. You have provided me with much inspiration for designs and color combos over the years. These colors look fabulous together and the designs are fun and whimsical. Great card.
Perfection Yana! So lovely 🙂
I LOVE your designs! Great job with building the flowers and colors!
Love the geometric shapes, and your cards!
Pretty cards. Thanks for sharing