


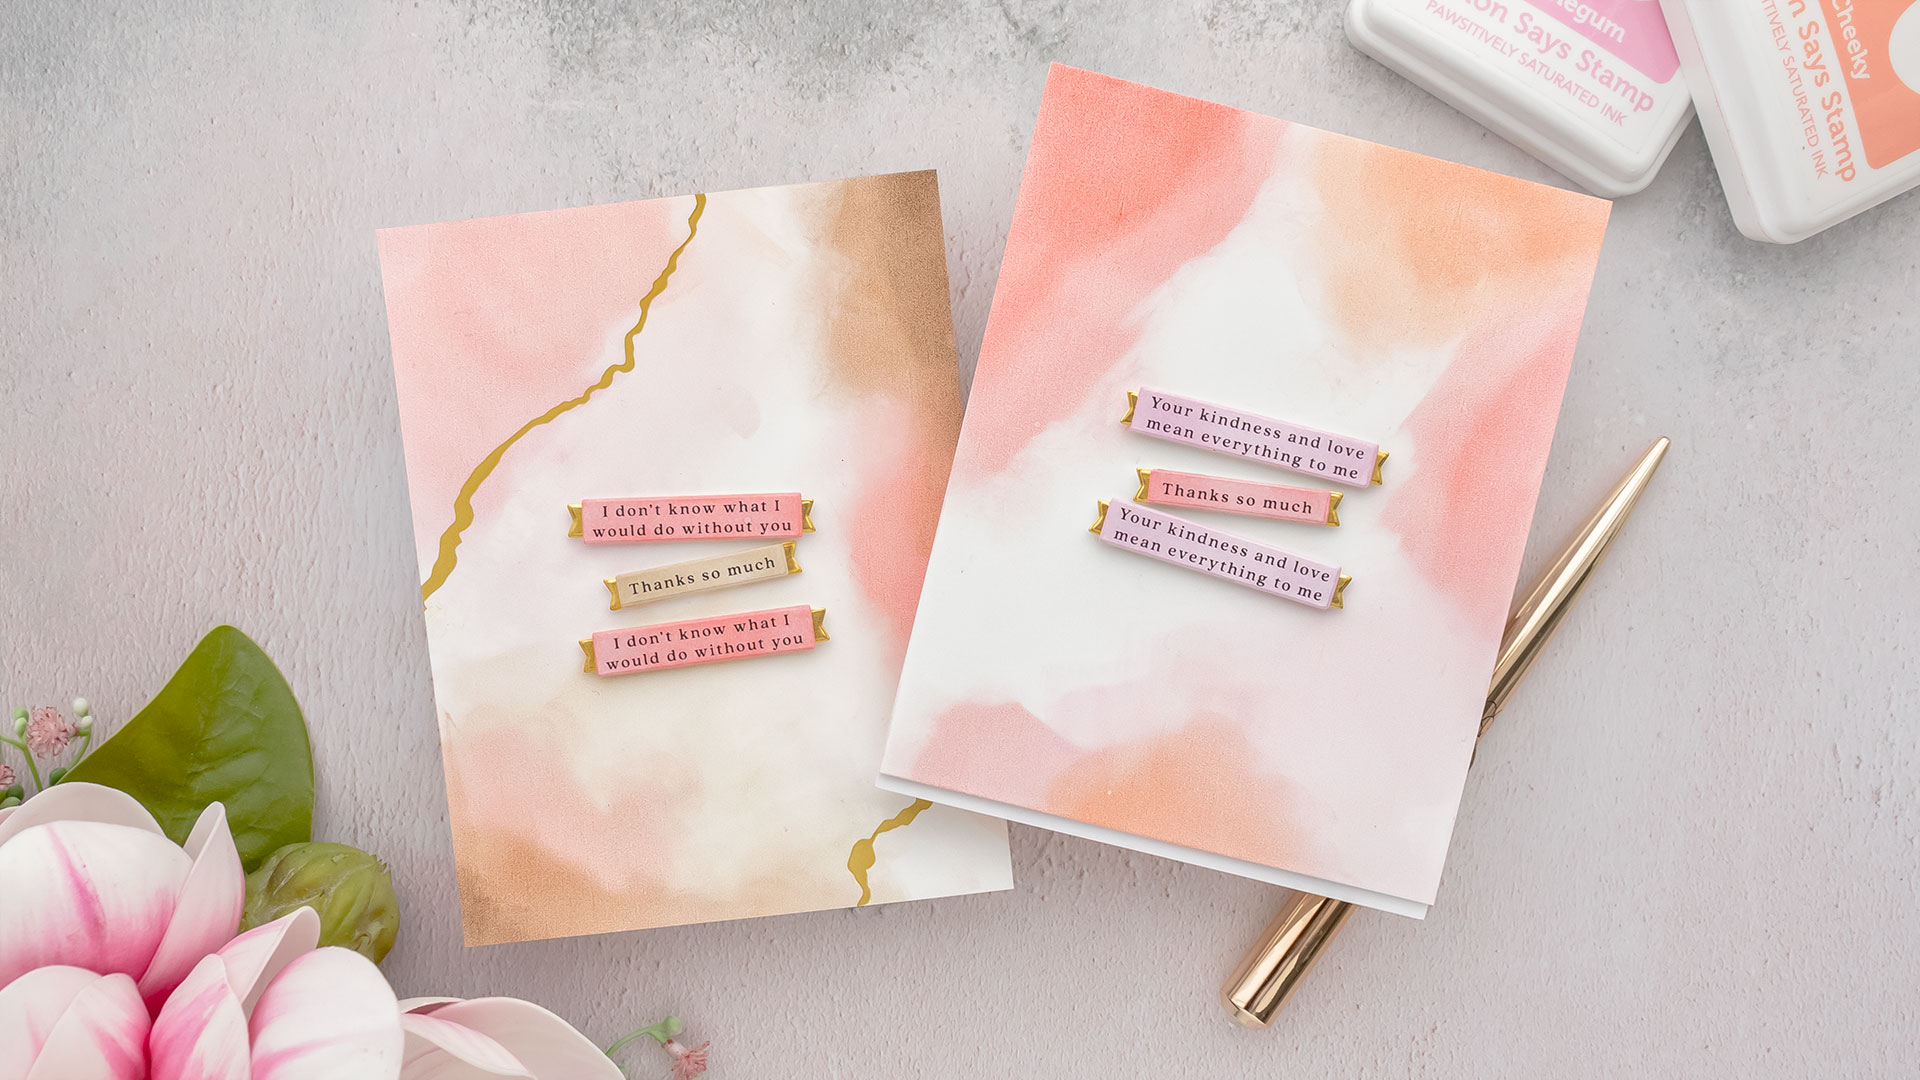
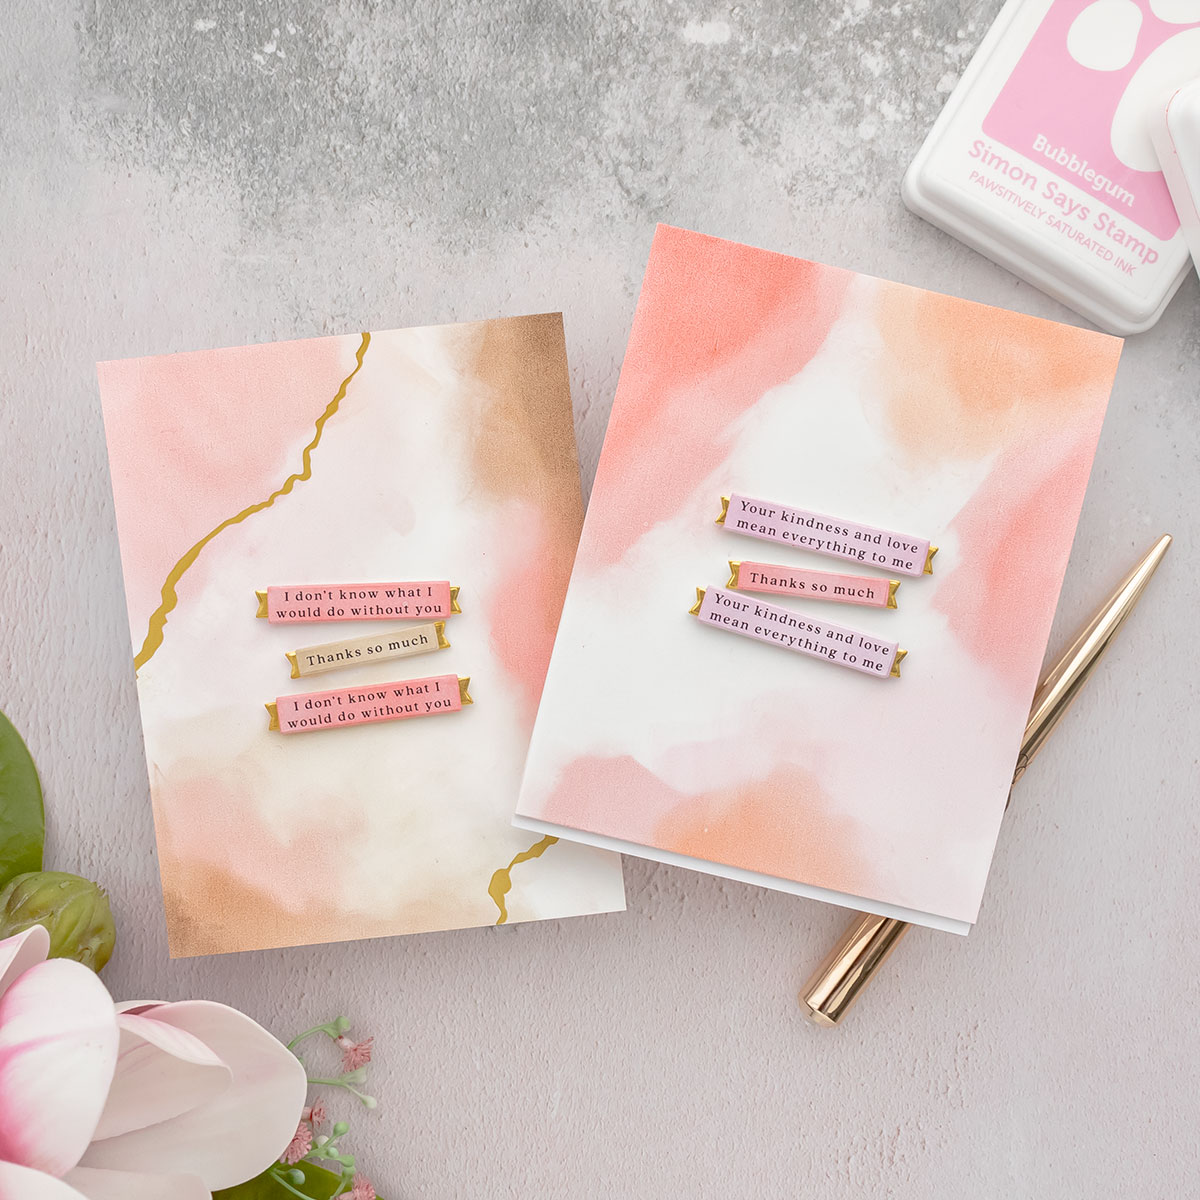
Hello and welcome back for another Yippee For Yana video! In this video, I’m sharing my secret for creating abstract painted-like backgrounds using nothing more but ink pads.
Like this project? Pin it and save for later | Curious about my project photography? Click for details.
VIDEO TUTORIAL
Watch the video below or on my Youtube channel.
CARD DETAILS
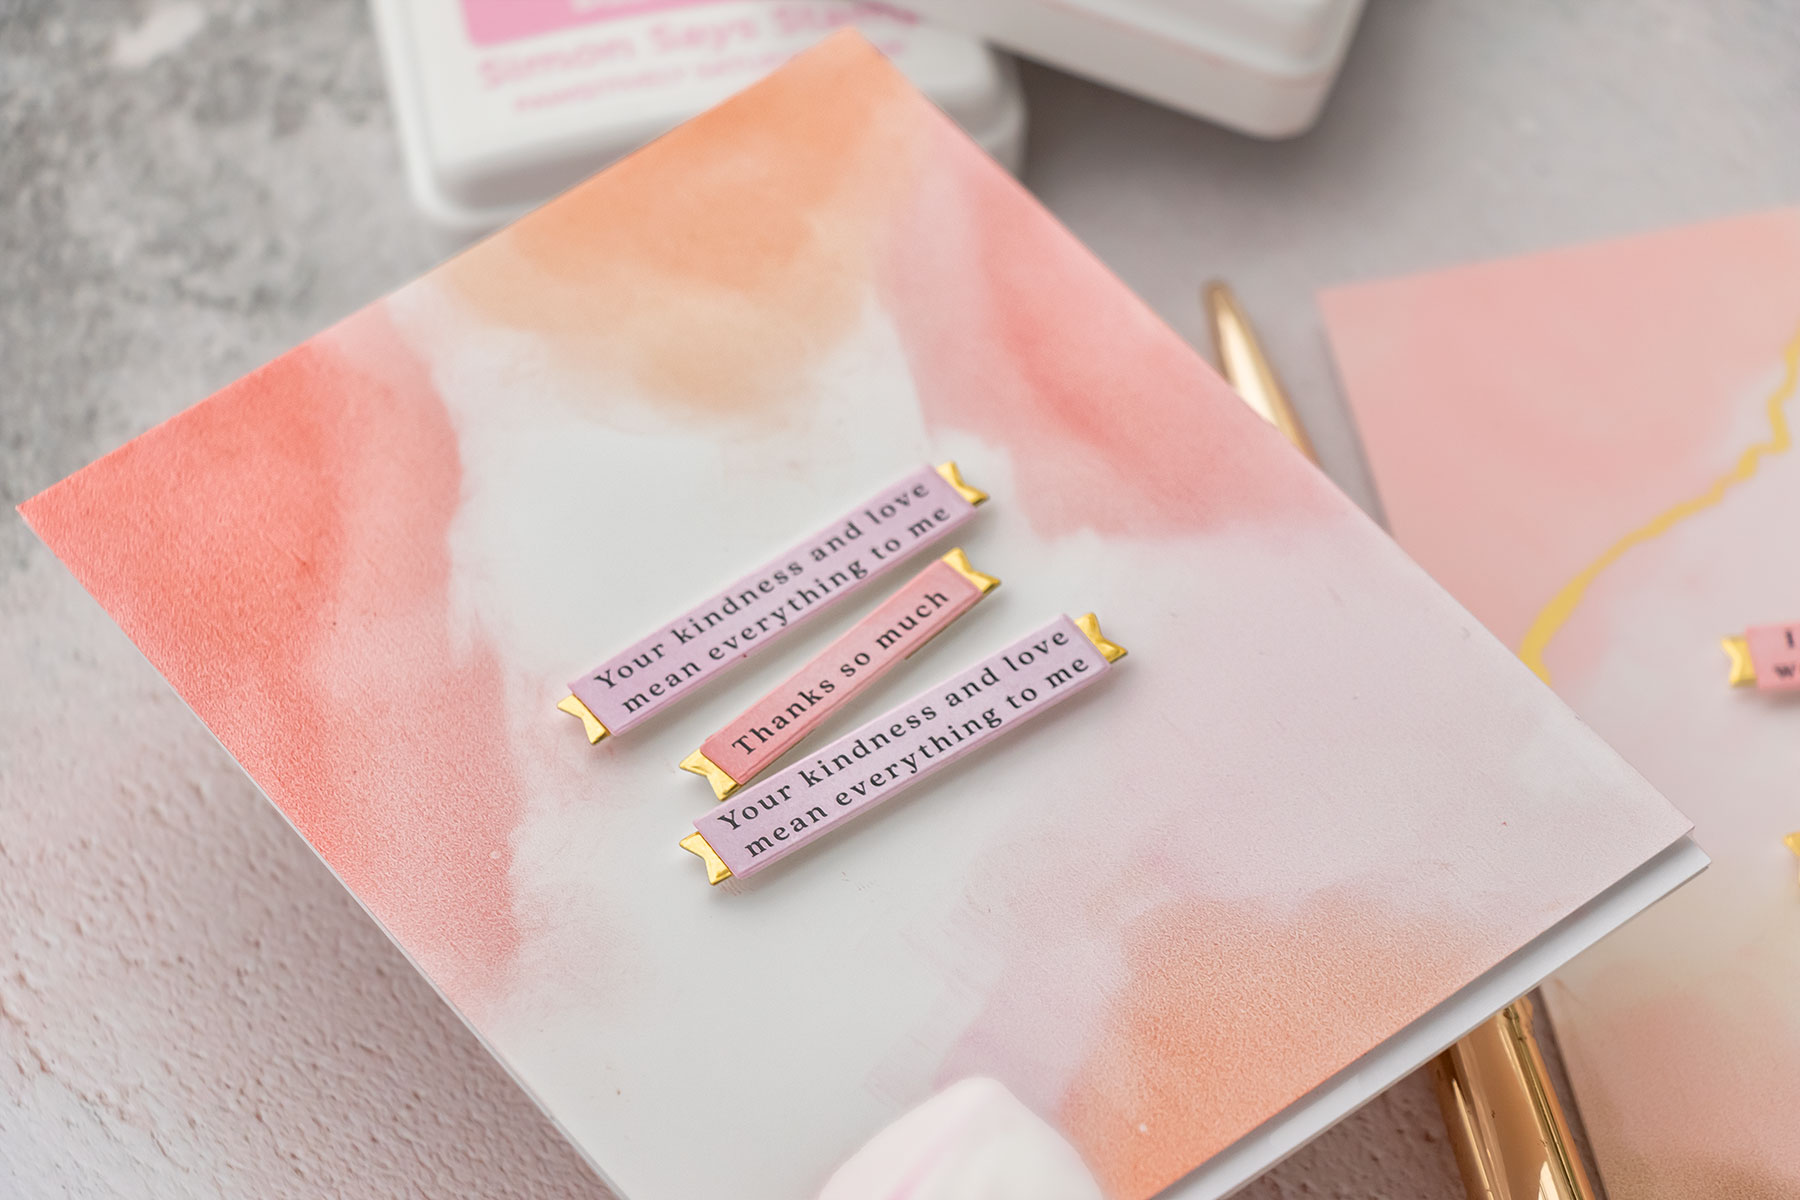
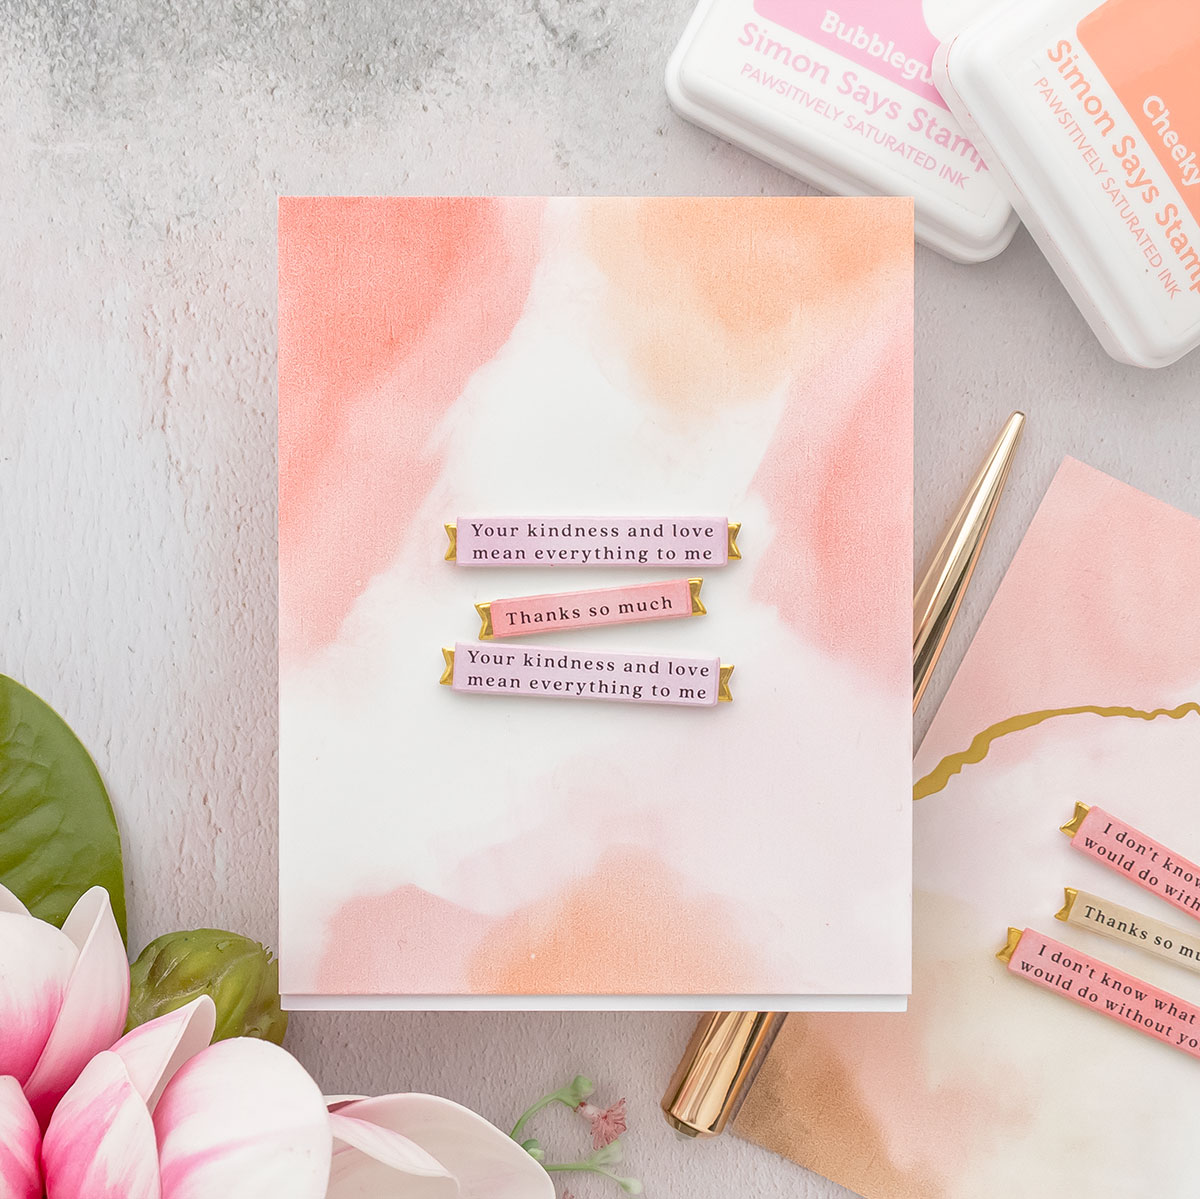
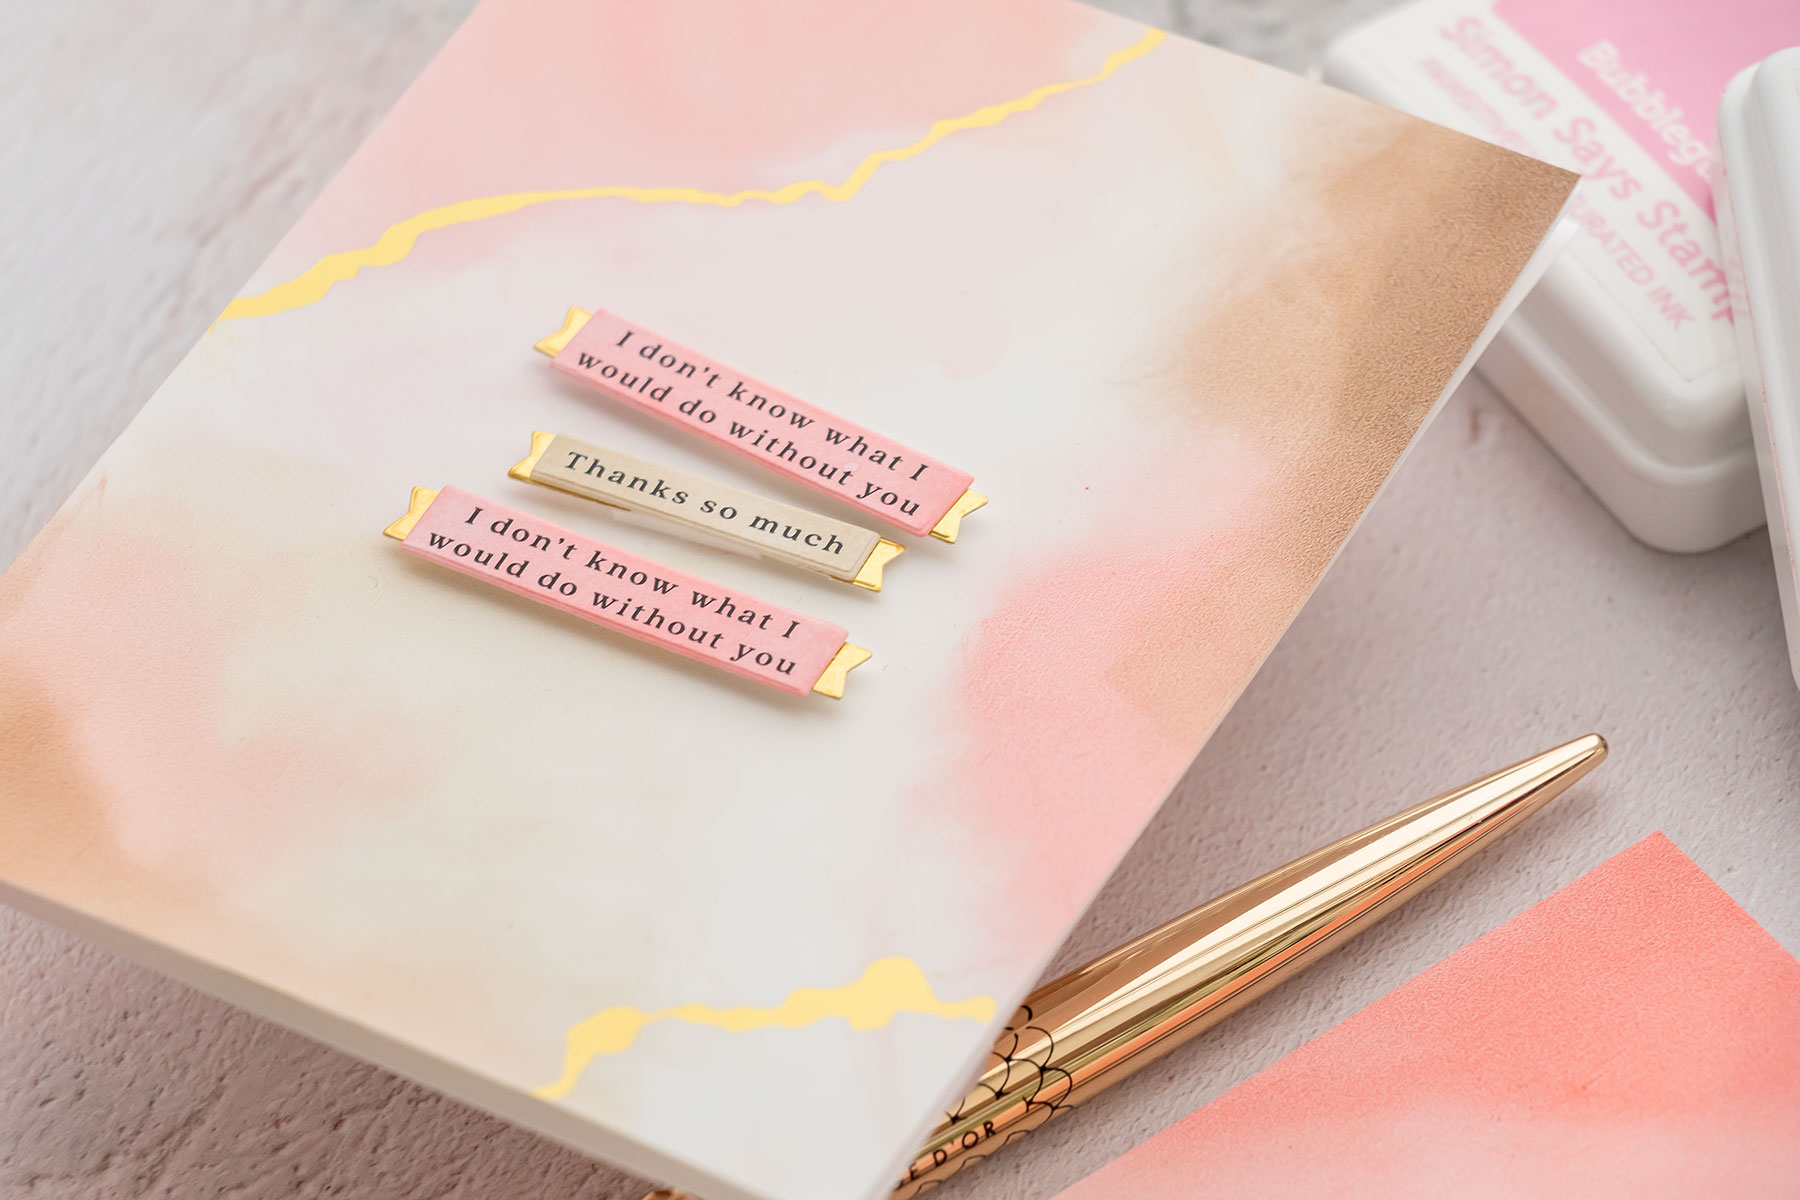
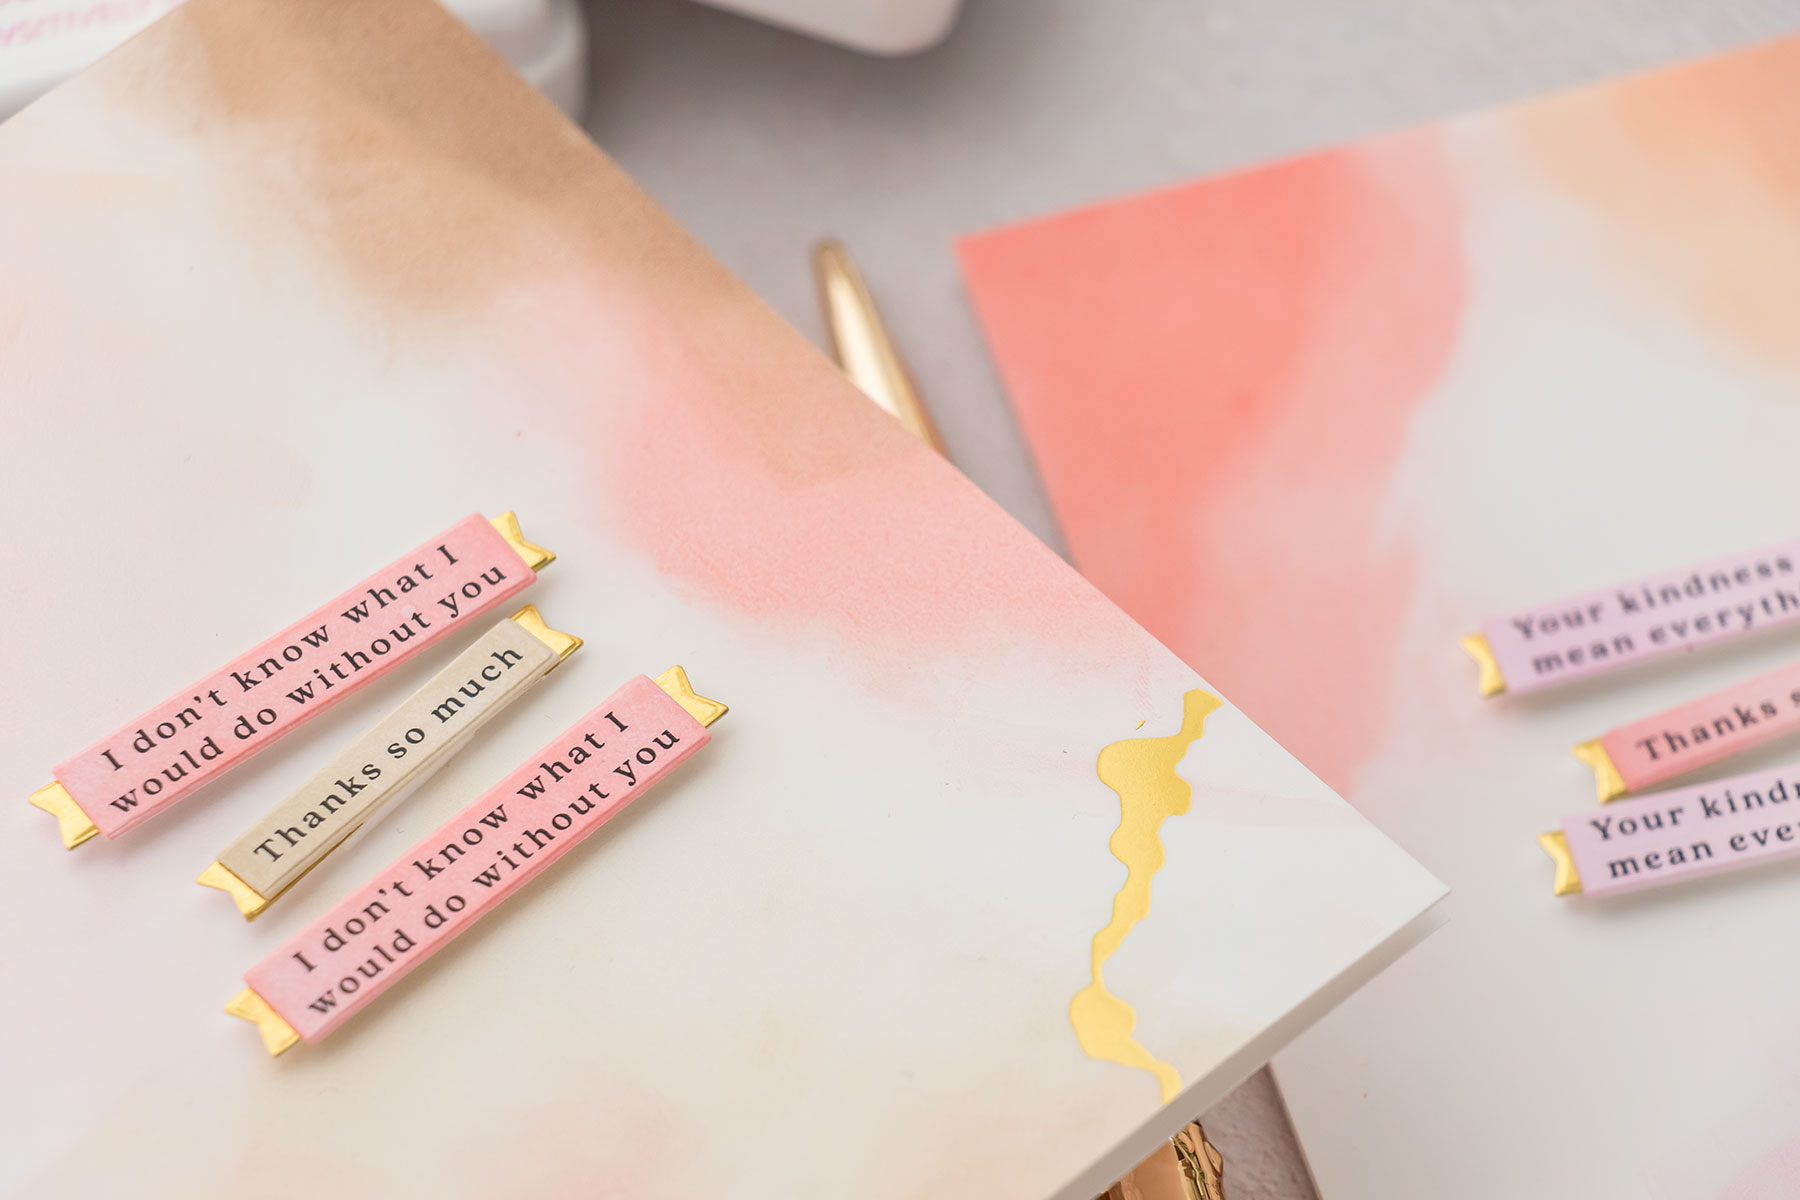
My trick to creating painted-like abstract backgrounds is using the right type of paper. I’ve found that glossy synthetic papers work best for this technique as they don’t absorb the ink as fast as the regular papers do, giving you lighter color and allowing you time to manipulate the ink on the paper.
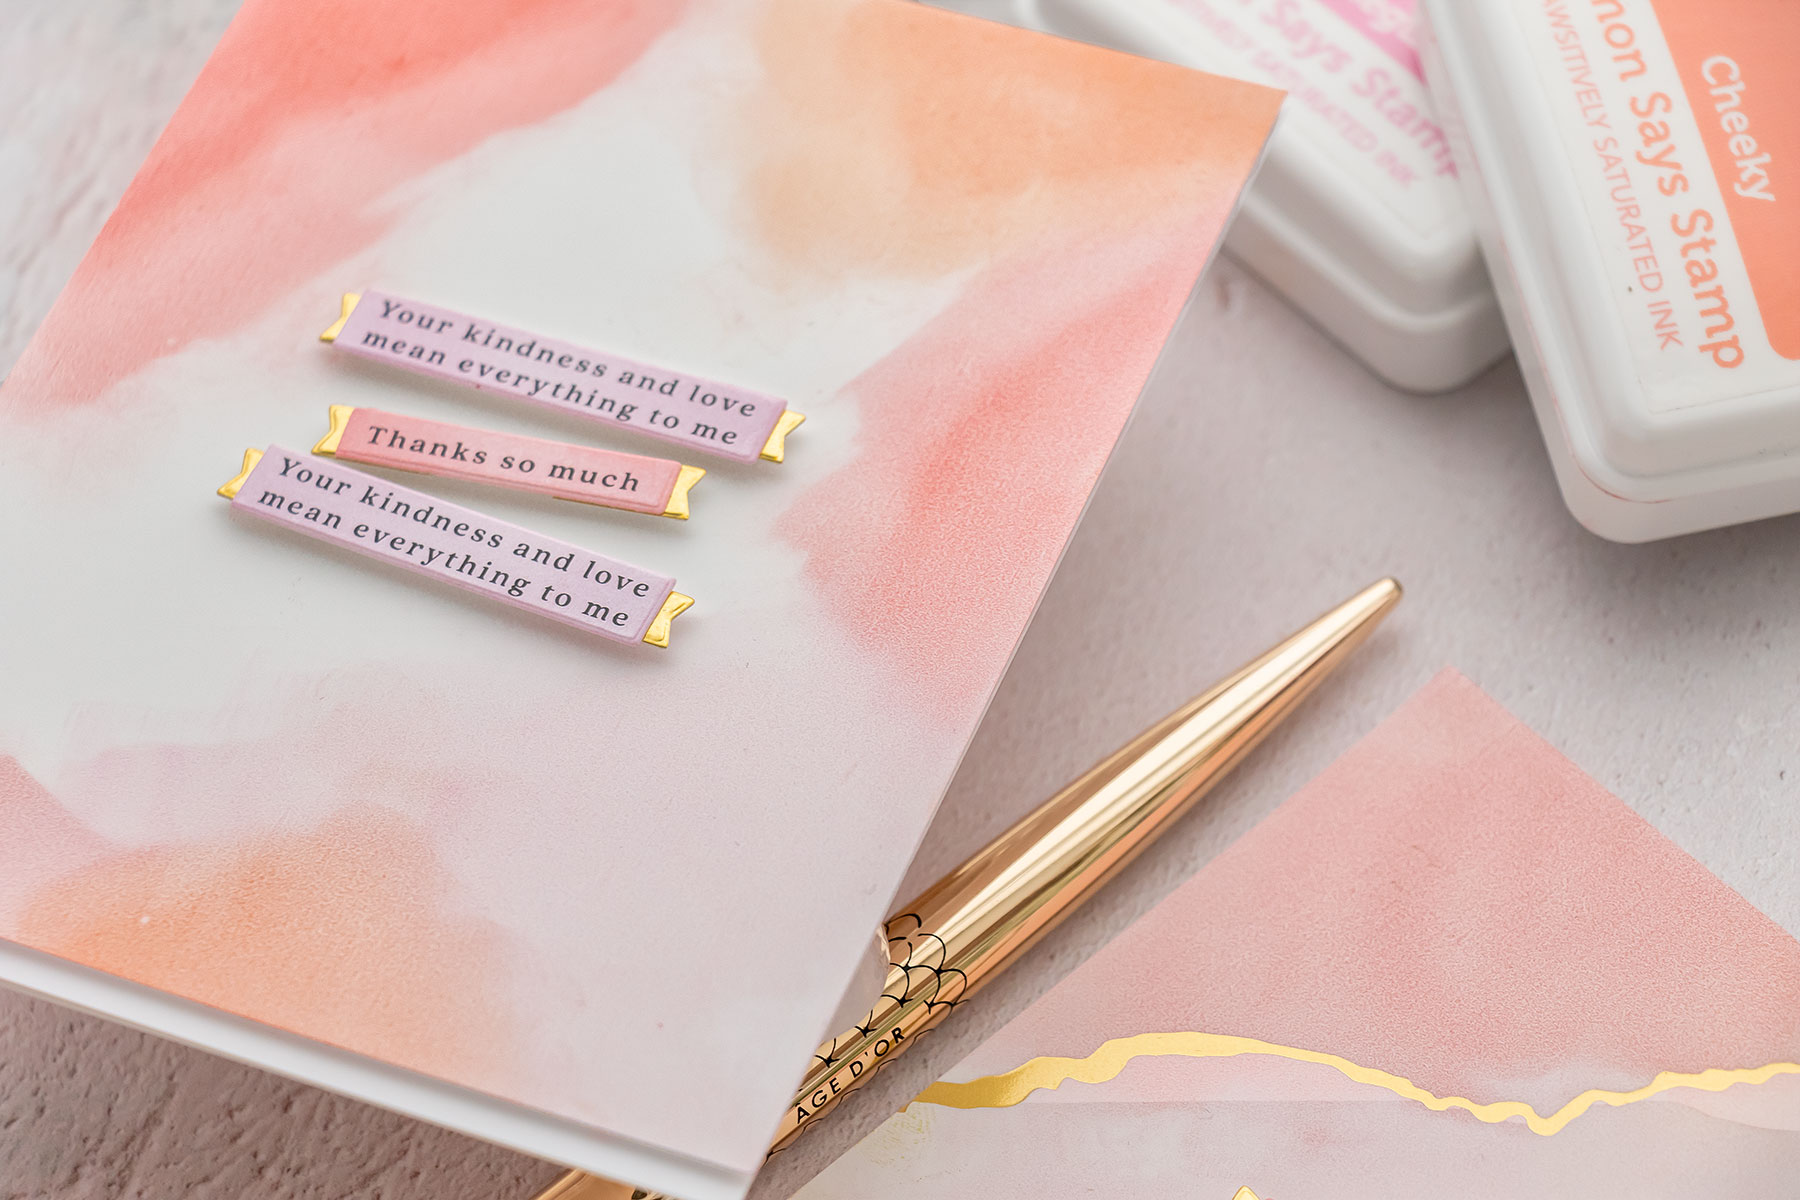
I am using Spellbinders Specialty Glimmer paper, it is designed for hot foil stamping, but I’ve found it works amazingly well for this technique. You can try other synthetic or glossy papers you have in your stash to achieve similar results.
I prefer to use Simon’s Positively Saturated inks for this technique. I find this type of ink and this type of ink pad foam to work much better for this technique.
And all I do is direct to paper. I apply the ink onto the paper and next, if I need to, I use my finger to blend it out. I’ve found that the dryer the ink pad, the less ink the ink pad has, the better results I get as I don’t transfer as much ink onto the paper and I don’t have to blend it out as much.
Top tips for building abstract backgrounds:
- Apply ink from the edges in. I don’t add ink in the center of the panel, I just add it to the sides of the panel. I can add the ink onto all 4 sides, or just in sections, but never to the center of the panel.
- Leave a bit of the panel free from ink, keep it white. You want some of that white to show. Although, you can create a completely colored background using this technique if you want. I want mine to have a bit of white.
- Start with the lightest color and layering on the darker colors you build your background. I do prefer to use lighter colors, and I stay away from the dark ones, as I feel these backgrounds look so much nicer when lighter colors are used.
- My rule for adding color is to add 90% of the lightest color, 60% of the medium color, and no more than 30% of the darkest color. This will give you a beautiful layered background.
It’s okay to mess your background up. You can wipe the ink away using a cloth if you don’t like the result. You can use a baby wipe to get a lot of the ink off of the background. That’s what’s great about using synthetic paper and this type of ink. The synthetic paper doesn’t allow the ink to go inside, the ink sits on top and because of the ink formula – if needed, the ink can be wiped off.
You can of course try this with other types of ink you have in your stash. I have tried it with dye ink, Simon’s dye inks, and it works, but I still prefer the softness of the Positively Saturated ink.
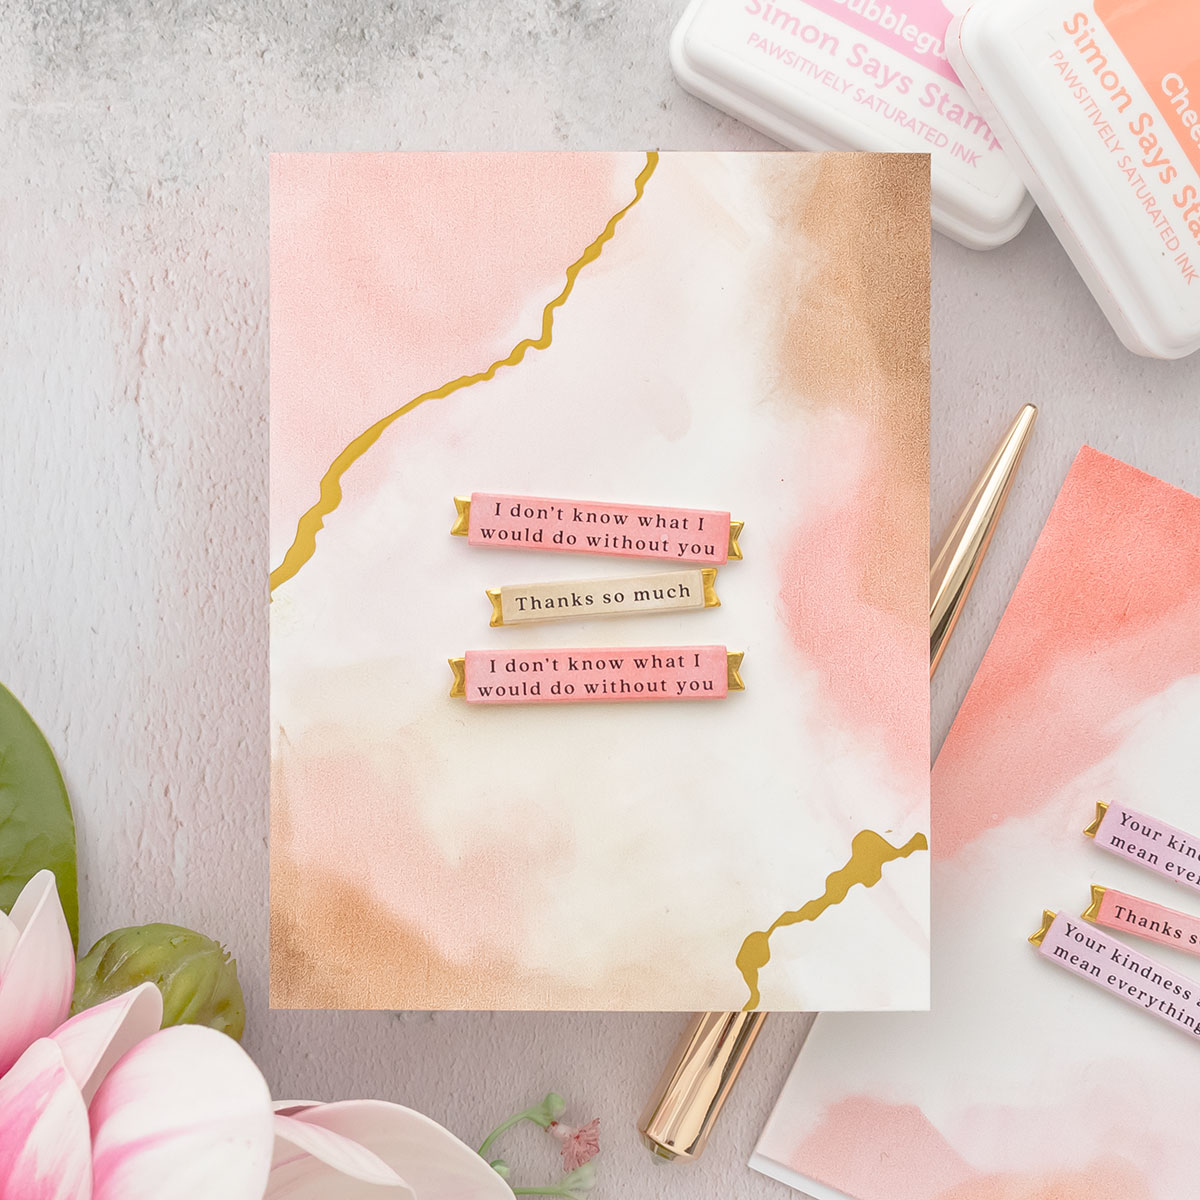
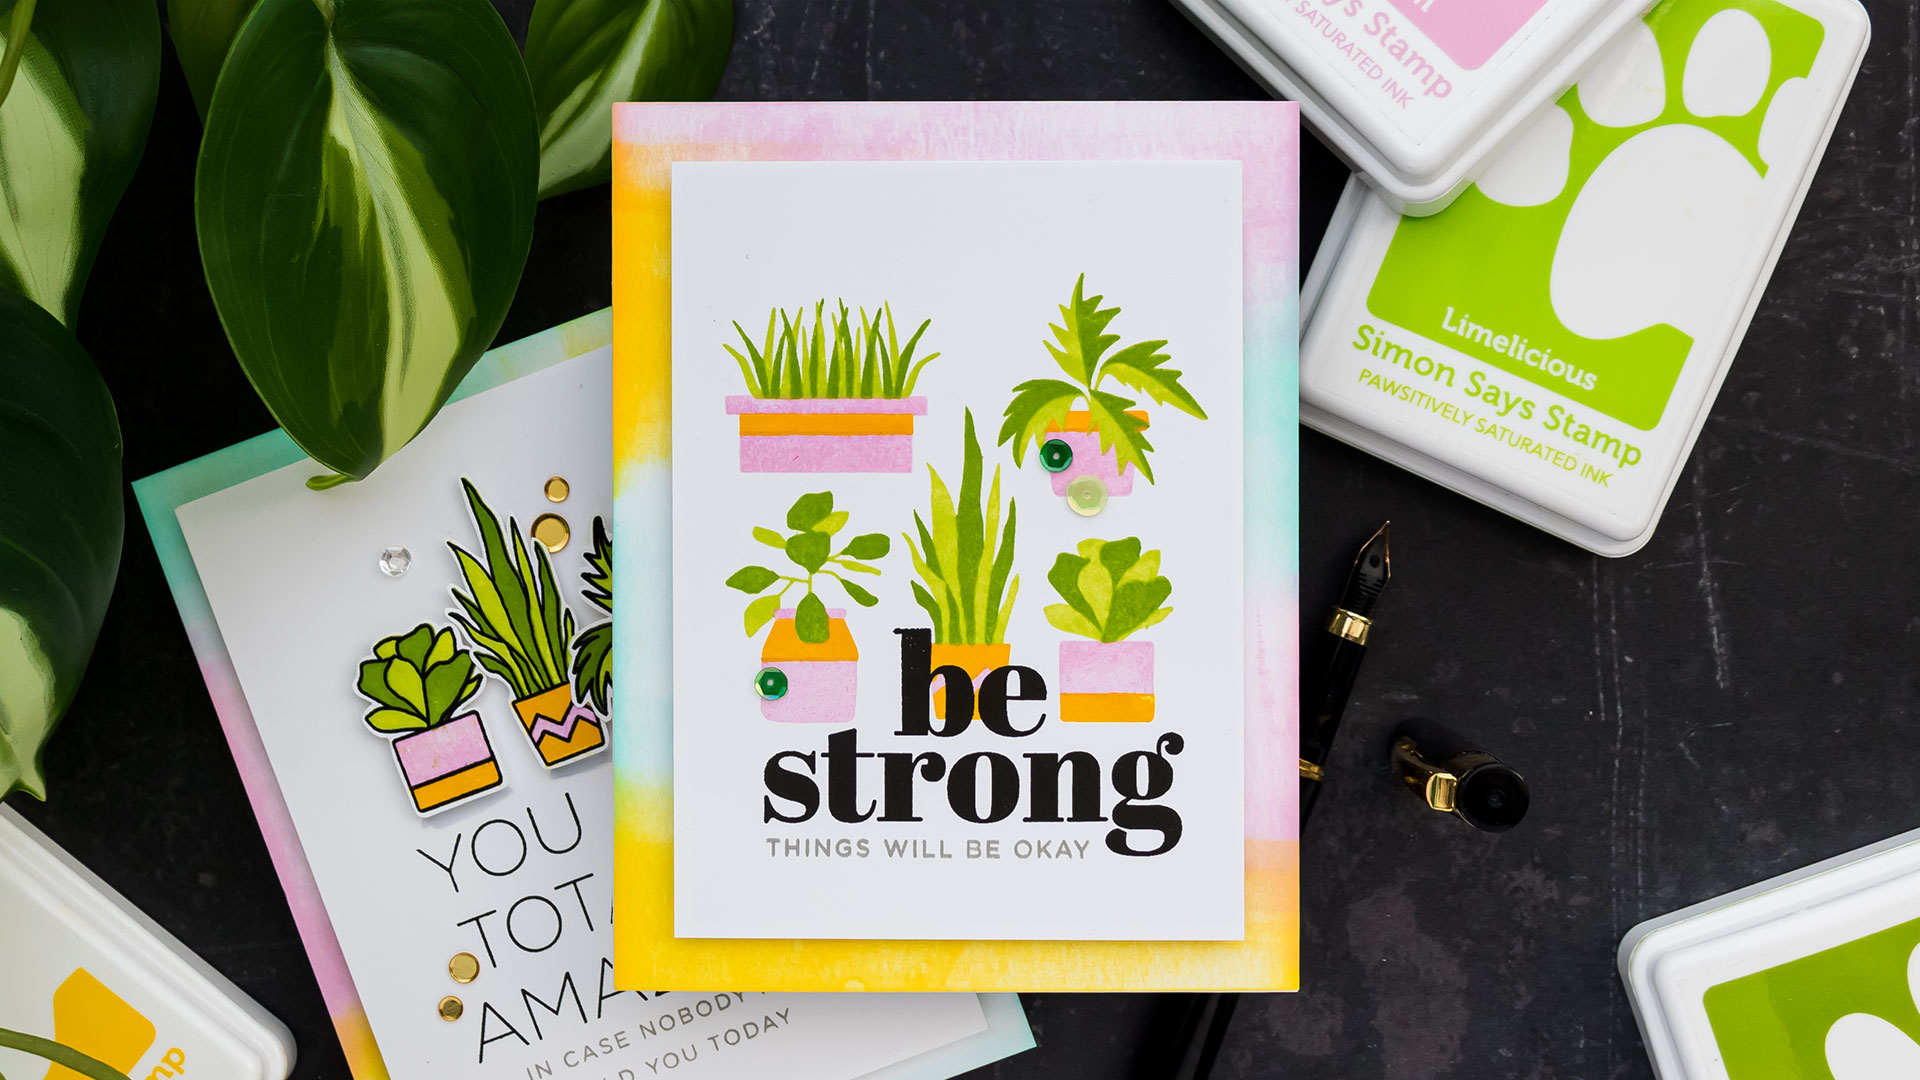
These backgrounds create beautiful backgrounds for cards, you can also use them to die cut something, perhaps a large focal element for your project. I used mine to create Clean and Simple cards and all I did was add a simple sentiment on top.
Thanks so much for joining me today, have fun crafting!
SUPPLIES
I’m listing the products I used below. Click on the link to go directly to the product. Where available I use compensated affiliate links which means if you make a purchase I receive a small commission at no extra cost to you. Thank you so much for your support!
 Simon Says Stamp Pawsitively Saturated Inks Shop at: SSS |
 Spellbinders Glimmer Specialty Cardstock 25 Sheet Pack Shop at: SSS |
 Glimmer Specialty Cardstock 10 Sheet Pack Shop at: SSS |
 Simon Says Stamp White A2 Side Fold Scored Cards Shop at: SSS |
 Simon Says Stamp Cardstock Matte Gold Mirror Shop at: SSS |
 Simon Says Stamp Sentiment Strips All the Thanks Shop at: SSS |
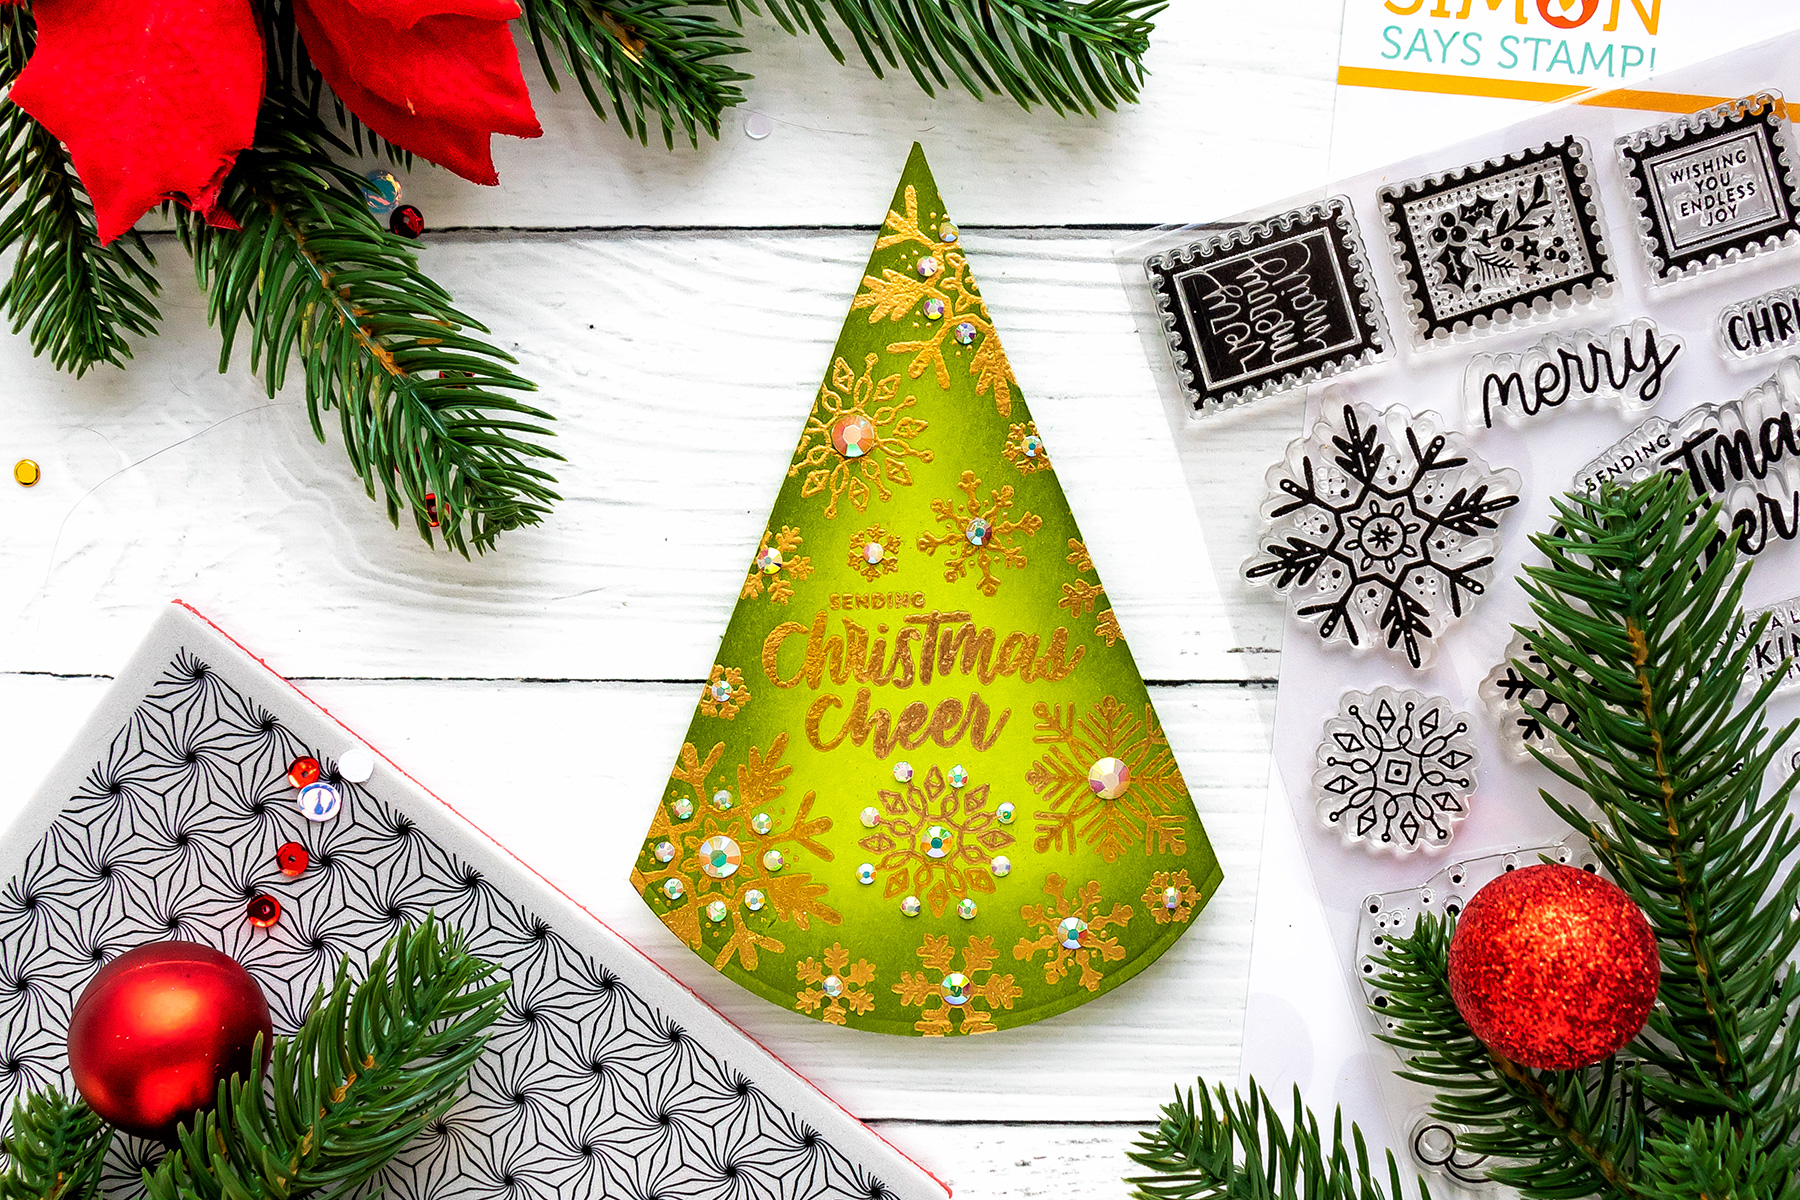
 Geo Foliage Glimmer Hot Foil Plate & Die Set Shop at: SSS |
 Spellbinders Glimmer Hot Foil System Shop at: SSS |
 Glimmer Hot Foil – Matte Gold Shop at: SSS |
 Simon Says Stamp Blending Brush Set Large Shop at: SSS |
 Spellbinders Best Ever Craft Tape Shop at: SSS |
 Bearly Art Mini Precision Craft Glue Shop at: SSS |
 Spellbinders Platinum Die Cutting Machine Shop at: SSS |
I have been following you for awhile now, love everything you do! Thanks Can you tell me what the folders you have your gold paper in, are? or where to find those?
Thank you, Dianne. Those folders are from Simon Says Stamp – https://shrsl.com/3dozk. Very durable and perfect for Letter size cardstock
Thanks!
These backgrounds are lovely and no special tools needed. The colors were outstanding. This is my kind of background and thank you for showing us this technique.
I’m glad you enjoyed it! I too love the simplicity of these. I can make a bunch in not time and just use them as needed.
These are just gorgeous – such pretty colours
thank you! this paper gives softer colors as compared to regular cardstock. The ink doesn’t go inside the paper, but sits on top resulting in a much softer look.
I loved your cards and set to work making a few! I used Yupo paper and the inks blended well!
However, the ink has not completely dried after 24 hours.
Should I set with some matte spray varnish?
Thanks for the inspiration!
I’ve never used the matte spray varnish, so I don’t know. I’d say try on one (or a scrap) and see if that works.
Oh my, exquisite! Ayana, which hot foil plates did you use to make the beautiful foil design? I don’t have a hot foil system but those little additions are the first time I’ve wanted one. Thank you!
thank you, Beth! these are from my Geo Foliage Glimmer Plate set – https://shrsl.com/3cbdm
Yikes, autospell changed your name?! My apologies Yana!
no worries 🙂
LOVE the muted effect of these colors and the gold accents really steps it up a notch! Just beautiful! Thanks for the ideas!
thank you, June! so glad you like it
Gorgeous! Thanks for the tips! I am so glad you are safe. I am praying every day and night for you and your country. God will bless you and Oles for the wonderful things you are doing.