


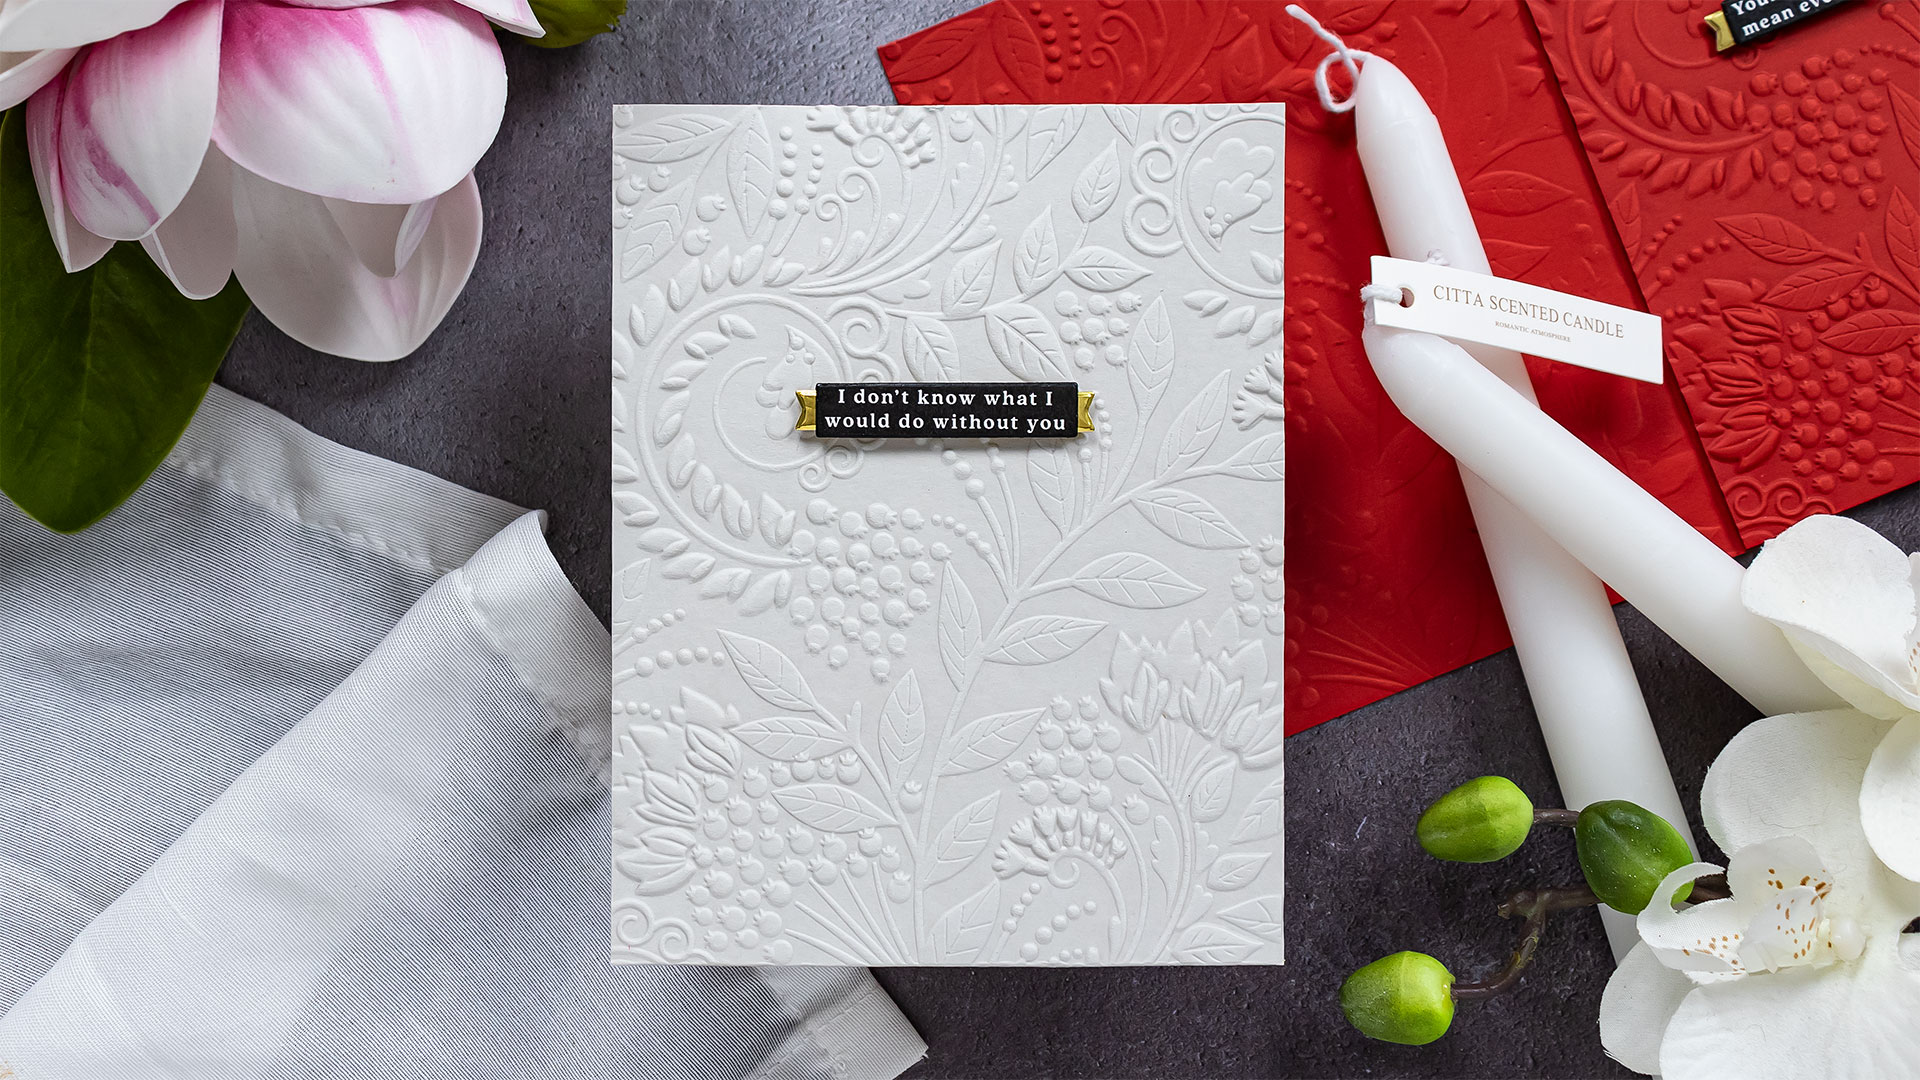
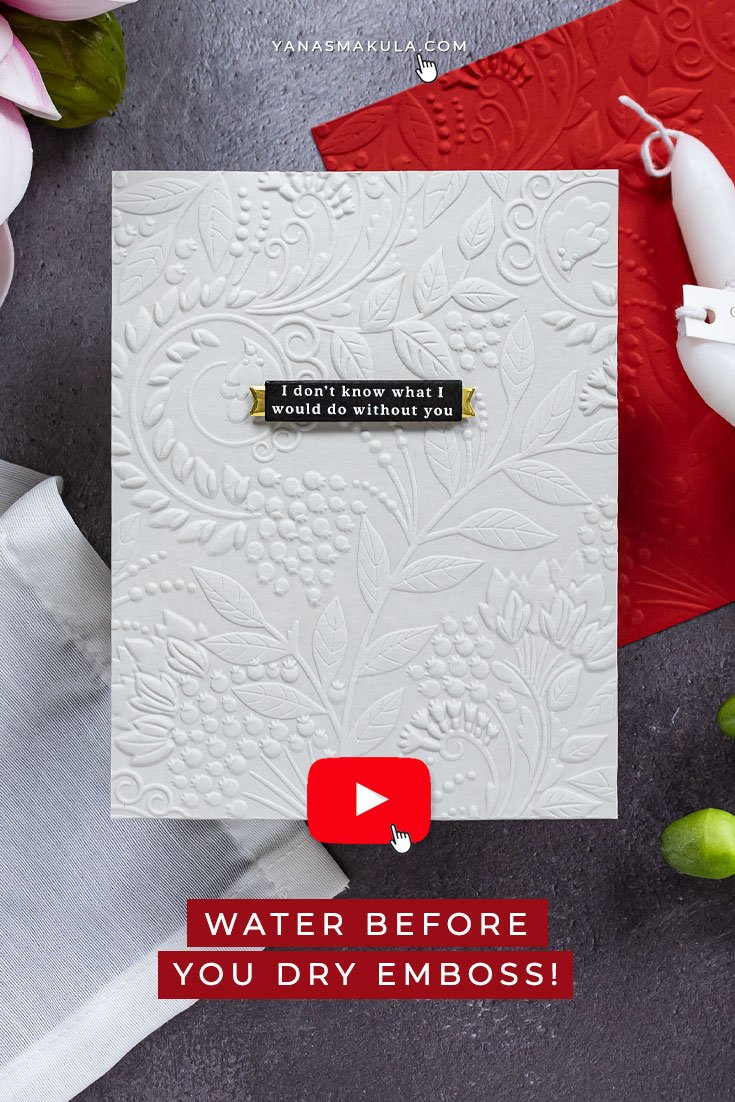
I have a quick dry embossing tip for you today. Simon Says Stamp has these amazing 3D embossing folders that give very deep detailed embossed results. When you see it in real life – it looks like some very expensive paper product, definitely not something you’d think you can create yourself. But you can.
Like this project? Pin it and save for later | Curious about my project photography? Click for details.
The embossing folders are designed for A2 cards, so they will emboss 4 1/4 x 5 1/2” panels. I am using a brand new embossing folder Exotic Vines folder, just released today. But Simon has many other 3D embossing folders with other wonderful designs on their website.
The trick to getting the best results with these folders is water. This is a very old tip, but it still works.
VIDEO TUTORIAL
Watch the video below or on my Youtube channel.
DETAILS
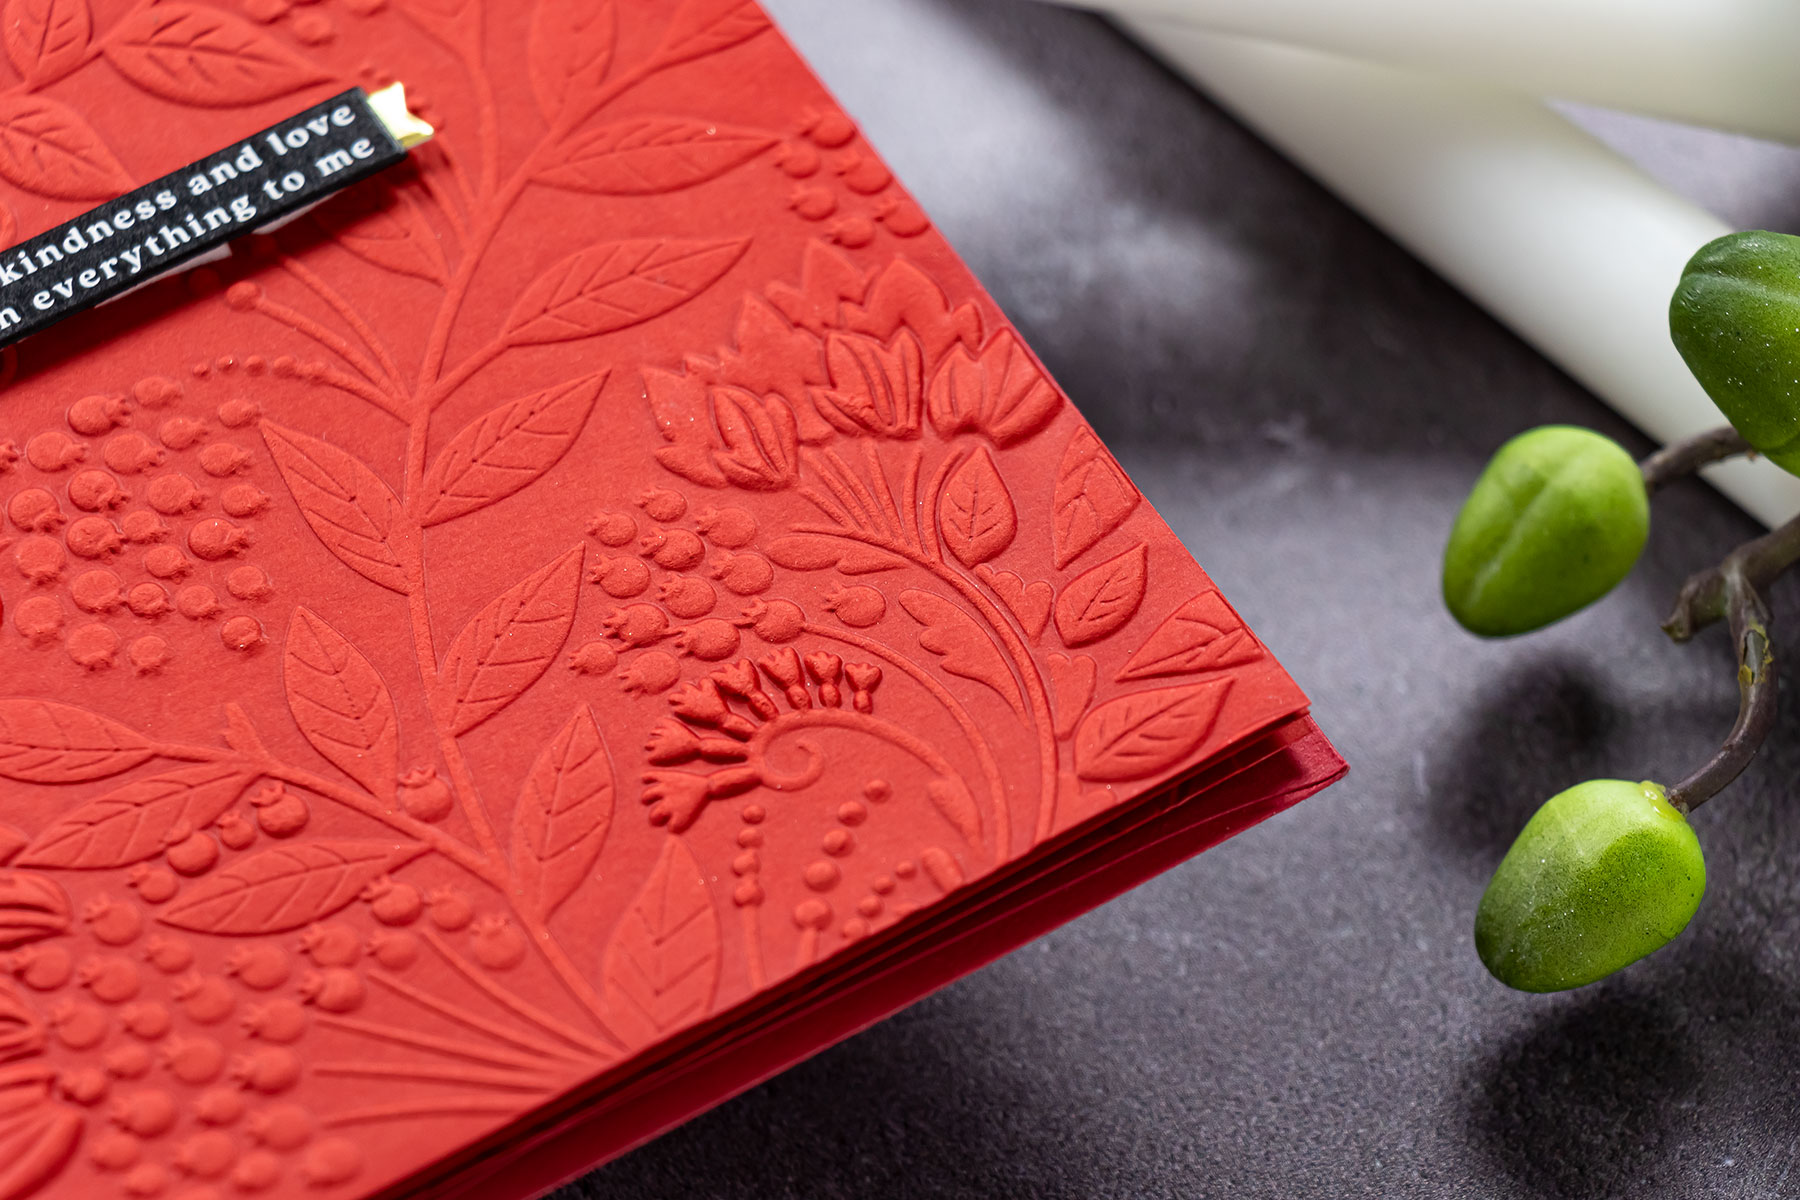
Generously spray your panel on both sides with water. You want the panel to be damp. Spray – and spread that water around with your fingers to make sure the panel is equally saturated with water.
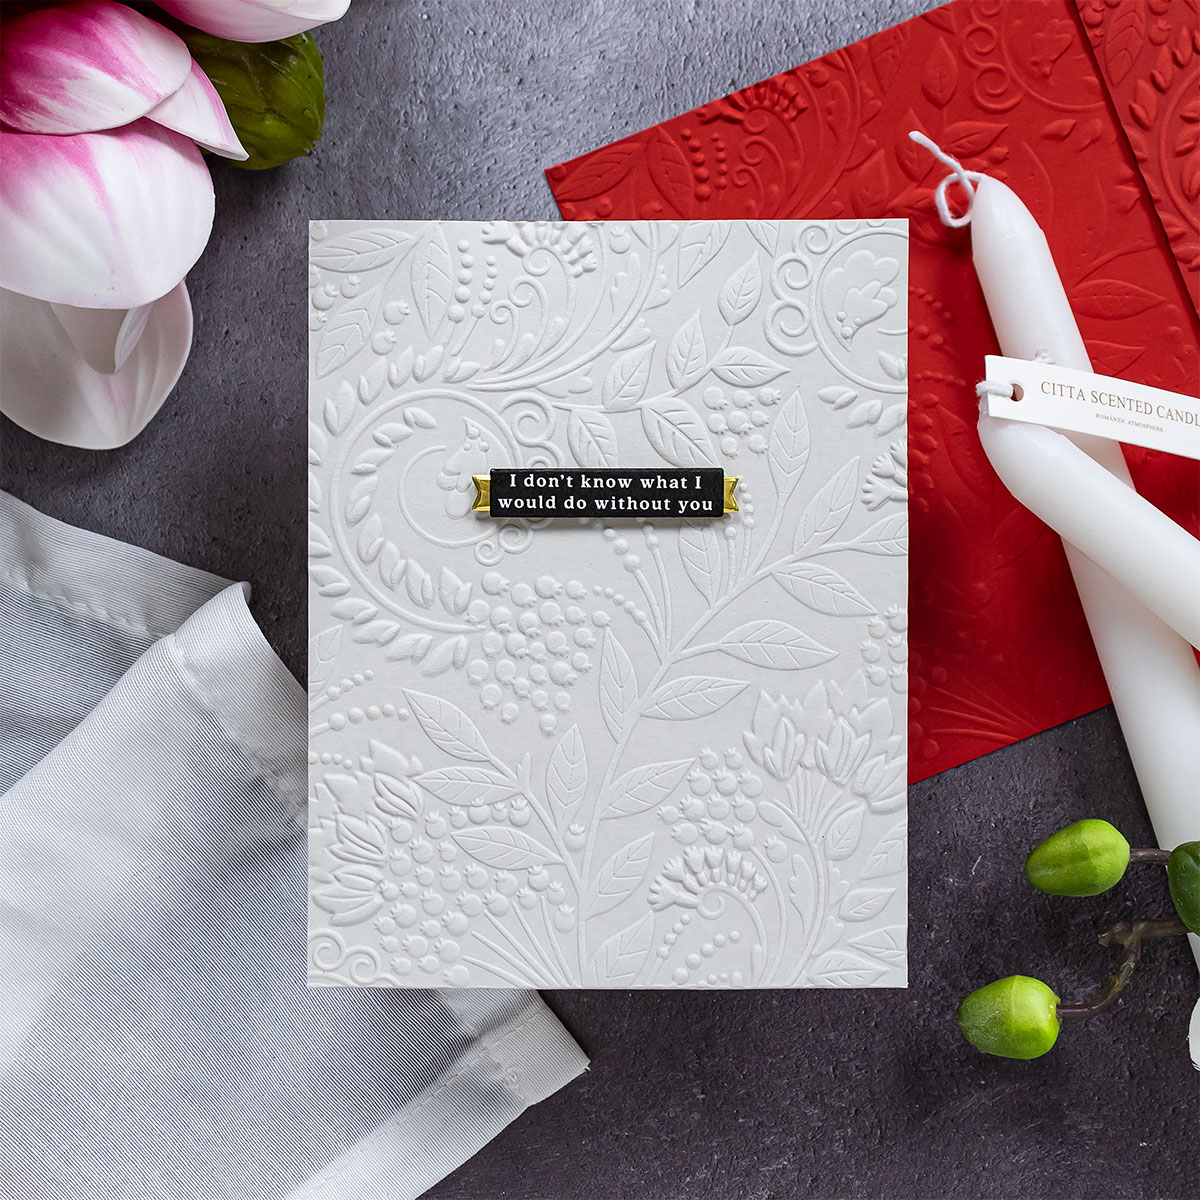
Next, place your panel inside the embossing folder, align it and close the folder. Build your sandwich and send it through the machine to emboss. Open up your folder and be amazed at how beautiful and deep the embossing is.
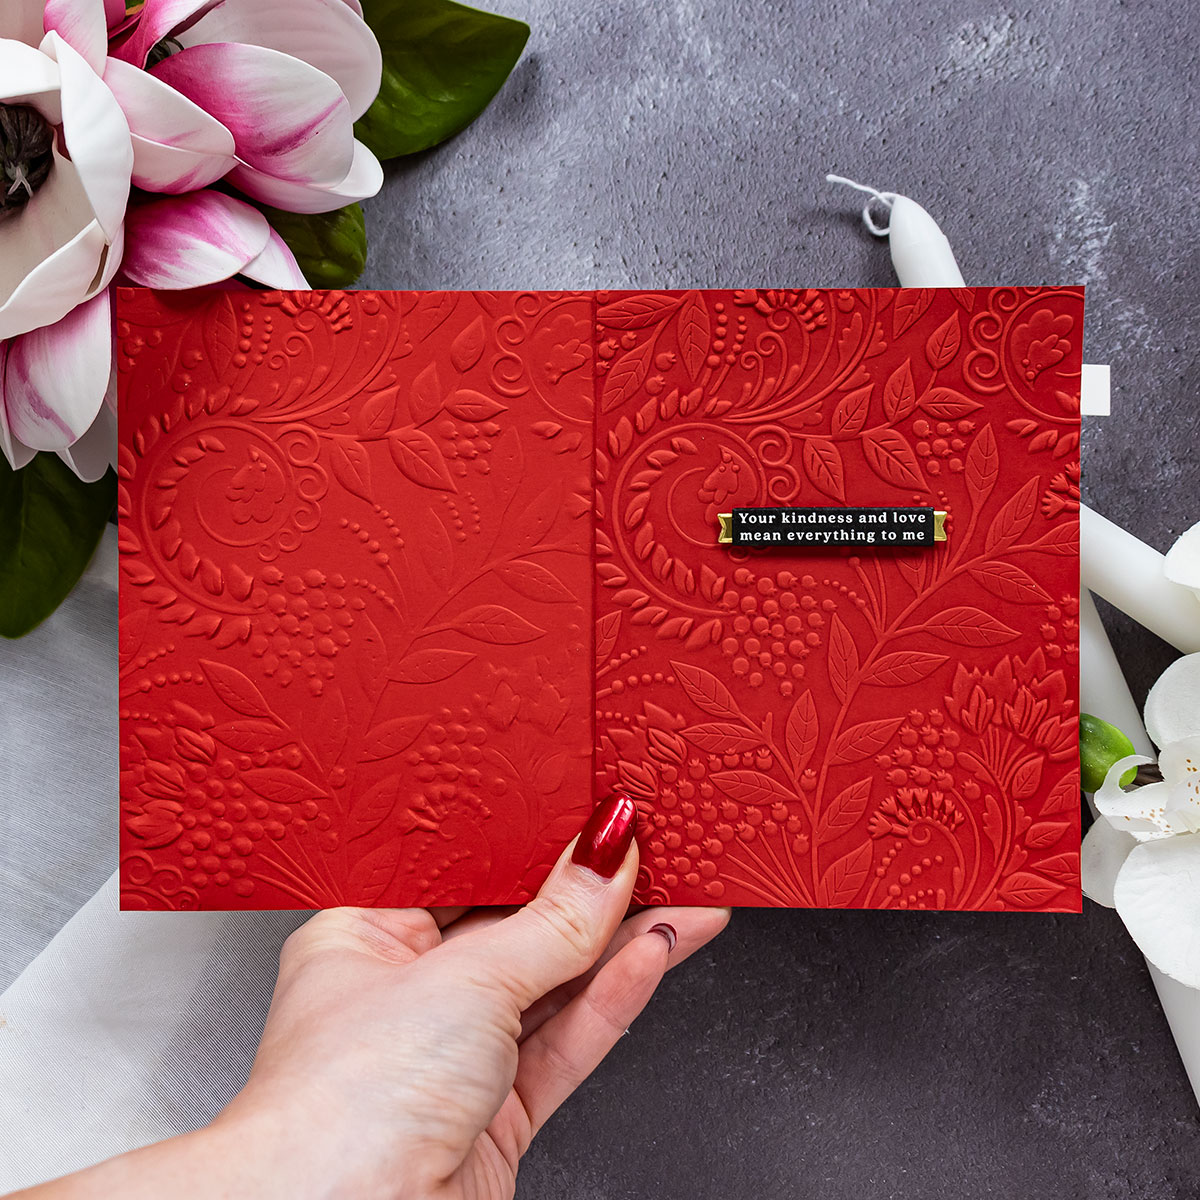
I thought about creating an embossed card front and a card back. Because why not? I cut a panel of colored cardstock, the same color as my embossed panel, Schoolhouse Red. I cut it to 5 1/2 x 8 1/2. I flipped the embossing folder backside up and I inserted my panel inside the folder to emboss the back flap. So the front of the embossing folder design is facing the back of the future card base. I did not spray this paper with water as I didn’t want it to warp, I was fine with this having less detail.

Once embossed I used my scoring tool and added a score line at 4 1/4″ to create an A2 card base.
I kept this design very simple, the embossing is so beautiful I didn’t want to add anything on top to cover it up so I just added a skinny strip sentiment. For this, I cut one from the Simon’s Reserve All The Thanks Pre Printed Sentiment Strips – I used one of my banners dies to cut it out. To make it look a bit more finished, I used a black pen and colored the white paper edge.
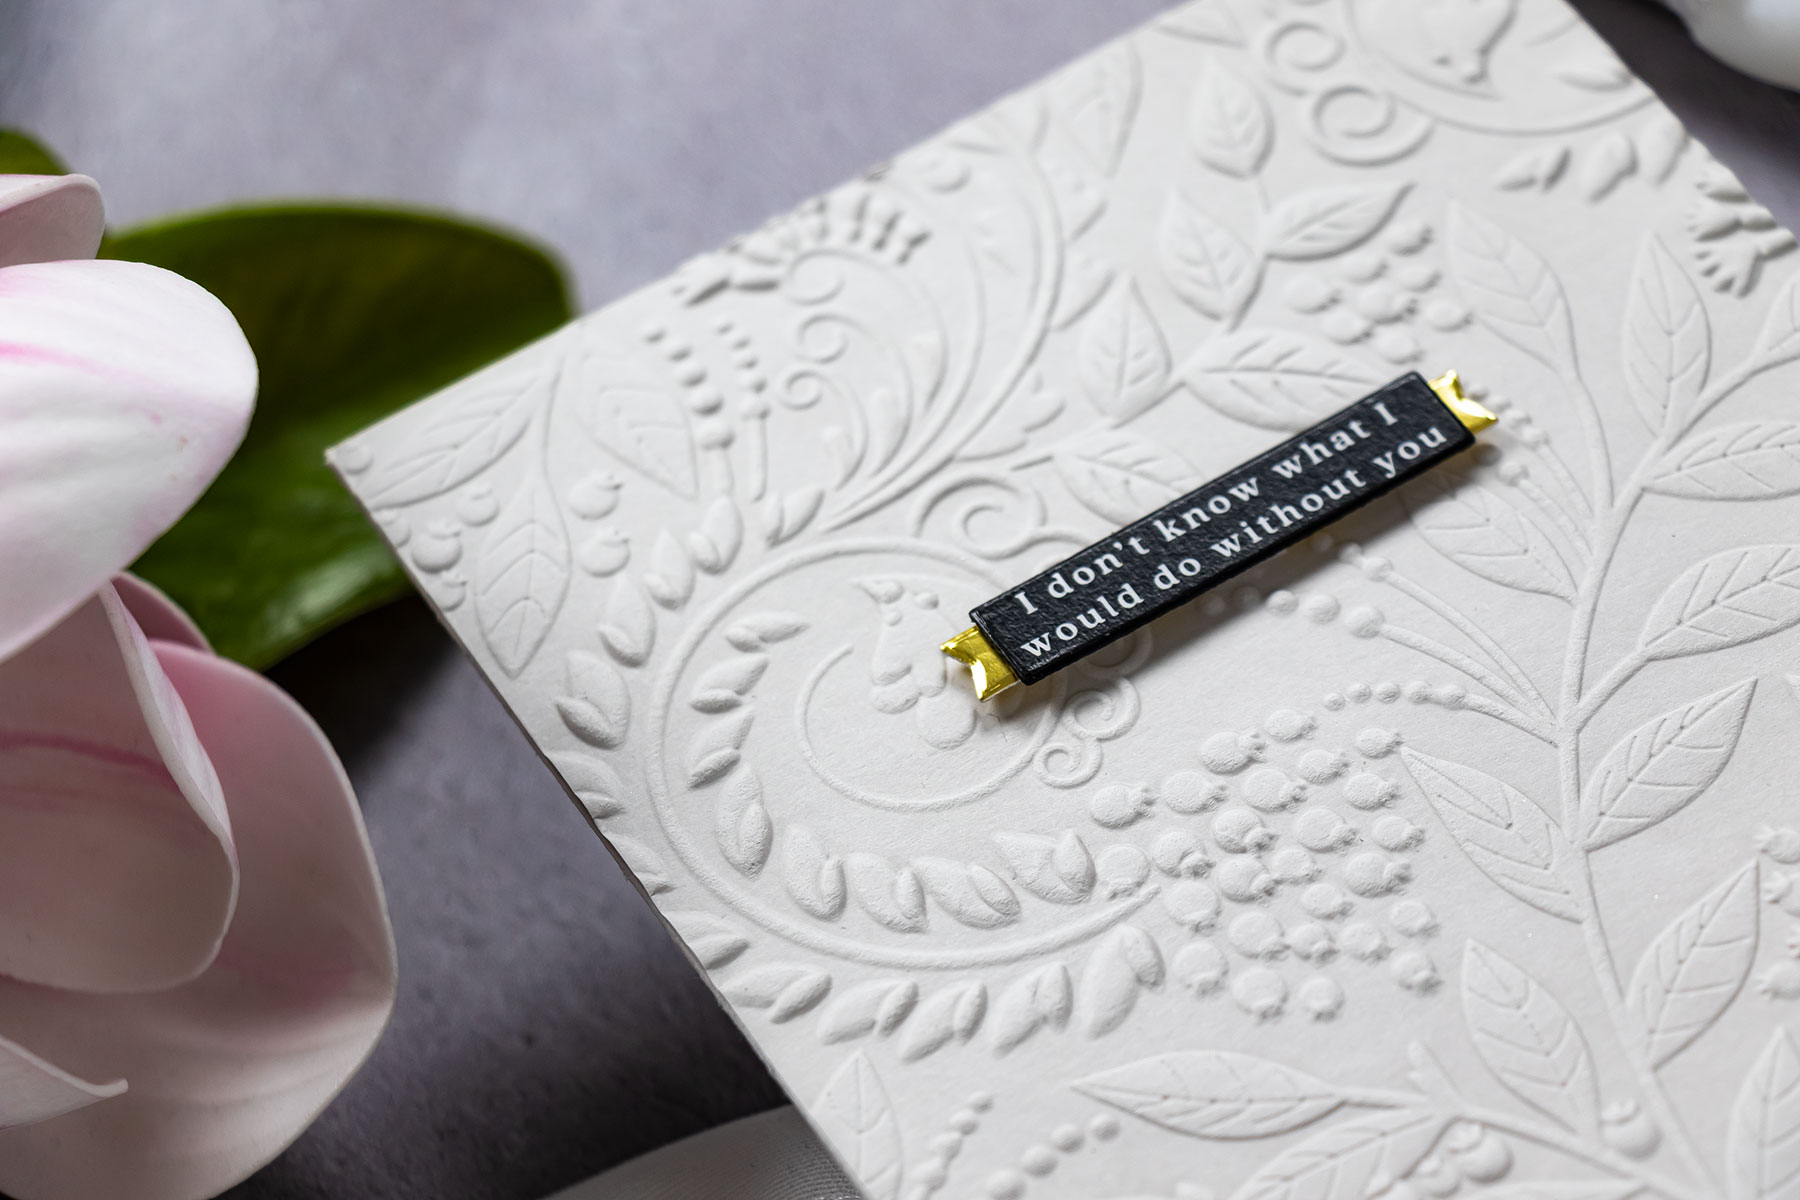
Next, I die cut a banner from gold mirror cardstock and I just added the black sentiment on top having just a bit of that gold show from the side. I leaner this trick from Yasmin Diaz, she is amazing and I was so inspired when I saw how she created banners for her sentiments. I added foam adhesive squares from the back and popped the banner onto the card. Super simple and easy to do and it adds so much interest to otherwise a simple sentiment.
I hope you’ll give this idea a try!
SUPPLIES
I’m listing the products I used below. Click on the link to go directly to the product. Where available I use compensated affiliate links which means if you make a purchase I receive a small commission at no extra cost to you. Thank you so much for your support
 Simon Says Stamp Embossing Folder Exotic Vines Shop at: SSS |
 Simon Says Stamp Sentiment Strips Reverse All the Thanks Shop at: SSS |
 Neenah 80lb Solar White Cardstock Shop at: SSS |
 Simon Says Stamp Schoolhouse Red Cardstock Shop at: SSS |
 Simon Says Stamp Fog Gray Cardstock Shop at: SSS |
 Simon Says Stamp Audrey Blue Cardstock Shop at: SSS |
 Tonic Honey Gold Mirror Card Satin Effect Cardstock Shop at: SSS |
 Tonic Light Mist Spray Bottle Nuvo Shop at: SSS |
 Simon Says Stamp Dot Runner and 2 Refills Shop at: SSS |
 Spellbinders Platinum Die Cutting Machine Shop at: SSS |
 White Foam Squares Shop at: SSS |
These are Gorgeous!!!! Very Elegant!!
glad you like them! ❤️❤️❤️
Gorgeous!
thank you!
This was very informative. I’ve seen people mist their cardstock when using embossing folders but never have. I really liked that you showed the comparison for misting and nonmisting and what a difference it made. Thank you for this.
yes, it makes a huge difference. It doesn’t show/matter much on 2D embossing folders, but you do need water for these 3D designs.
So elegant in perfectly executed simplicity.
thank you, Barb! ❤️
What a great side-by-side comparison! Thanks for showing this. I knew I could mist with an embossing folder but I did not know how great the difference was between misting and not. Also, isn’t Yaz’s trick with the gold under the sentiment terrific? She, like you, is a superior crafter!
Lori S in PA
yes! Her idea was amazing. thank you, Lori! ❤️
That red card is stunning! I want to try that damp paper technique.
I hope you do! Have fun ❤️
Cardmakers’ version of anaglypta wallpaper. Exceptional! Thanks for reminding us of the water tip, especially with the 3D embossing folders.
I had to look up “anaglypta wallpaper”. Yes! That wallpaper looks amazing. We had some similar in my mom’s home when I was growing up.
When you put weight on the damp cardstock panel, does it flatten the embossing?