


Hello! Hope you had a wonderful weekend. Mine was dedicated to cleaning my craft room, organizing, and purging the old supplies I no longer seem to use. It felt good!
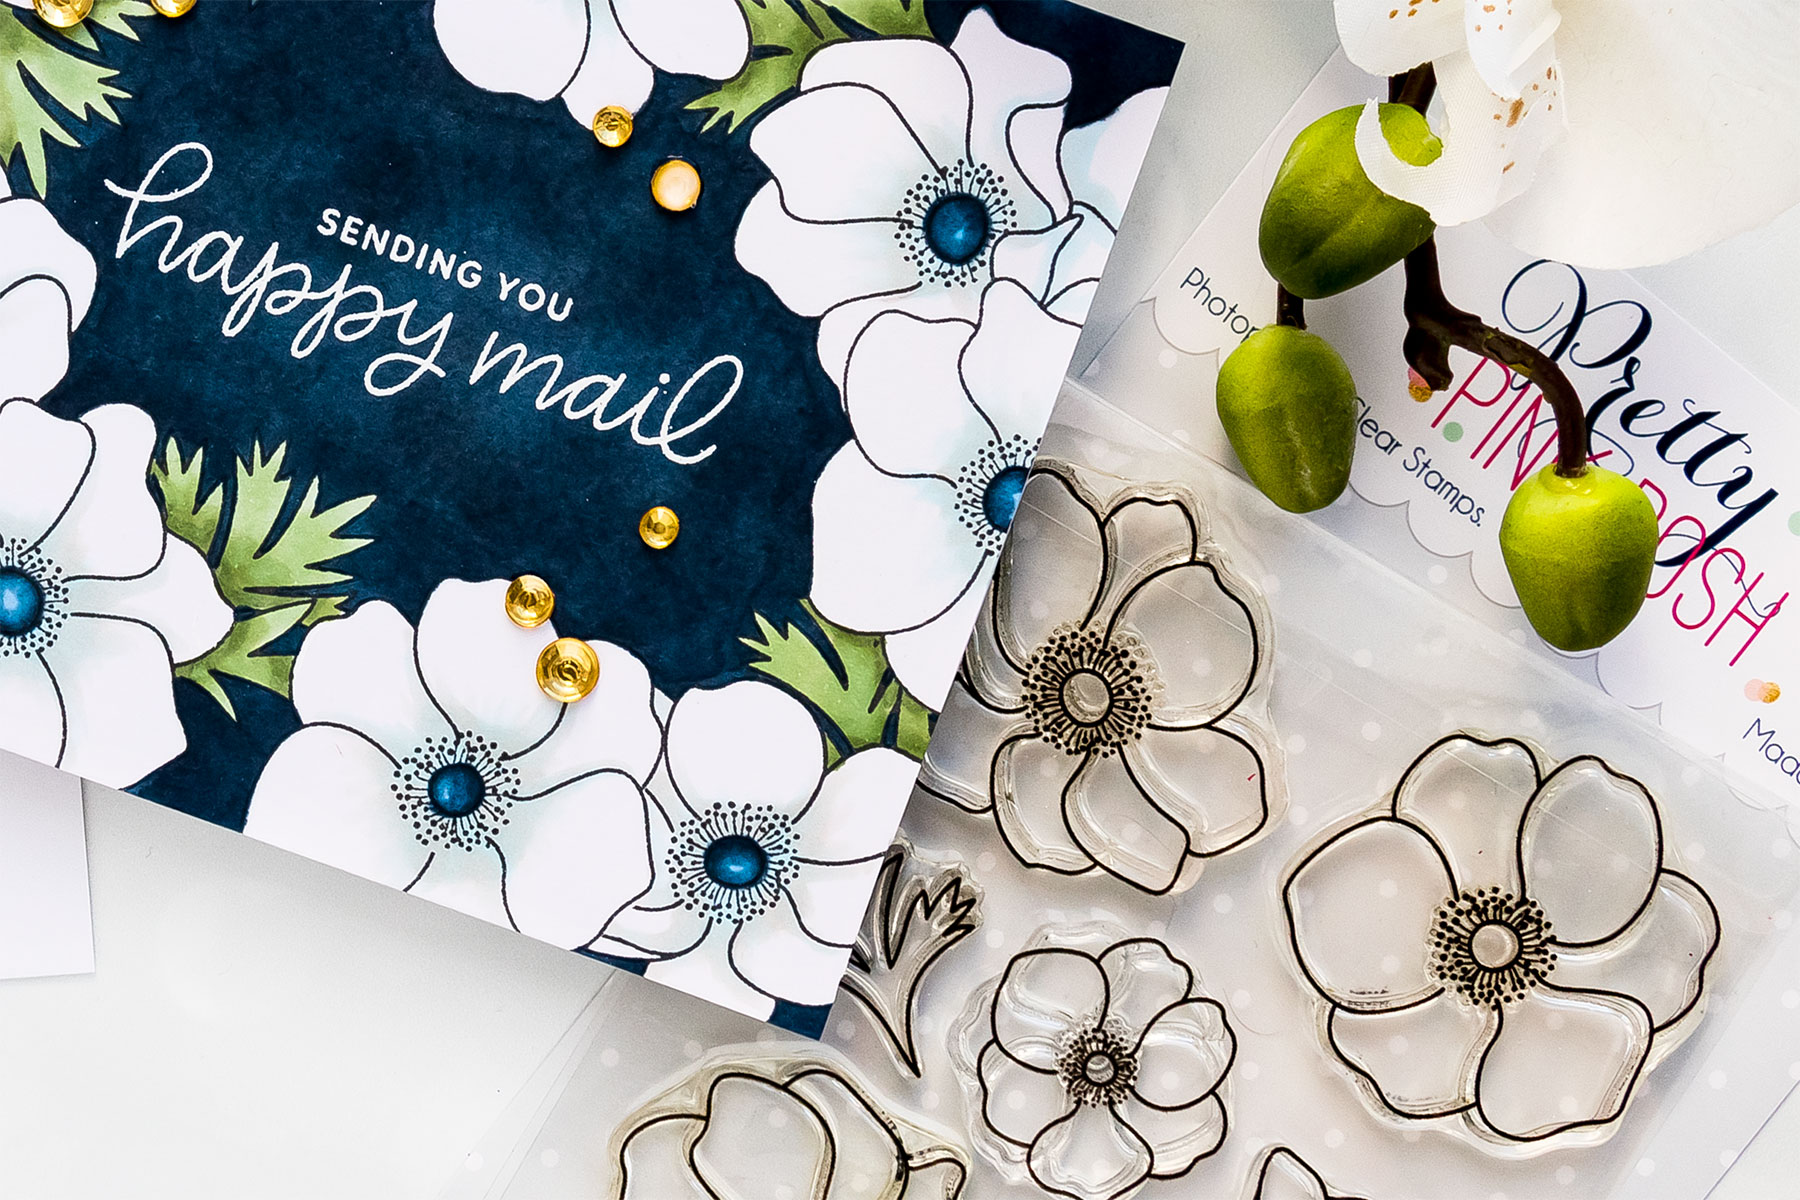
Today I am sharing a duo of cards featuring Pretty Pink Posh Anemones stamps & coordinating dies. Anemones come in several colors, white anemones are probably the most beautiful of all. While white seems a very easy color to work with, it’s actually the hardest one to color on paper, especially if everything else you have happening on your project is white. In this video, I’ll show you how you can use a dark background to help these white flowers come to life with minimum effort and very quick coloring.
Like this project? Pin it and save for later | Curious about my project photography? Click for details.
VIDEO TUTORIAL
Watch the video below or on my Youtube channel.
Like this video? Please give it a big thumbs up (you can do this on Youtube video page right under the video) and share it with a crafty friend! Leave me a comment too, I love hearing from you!
CARD DETAILS
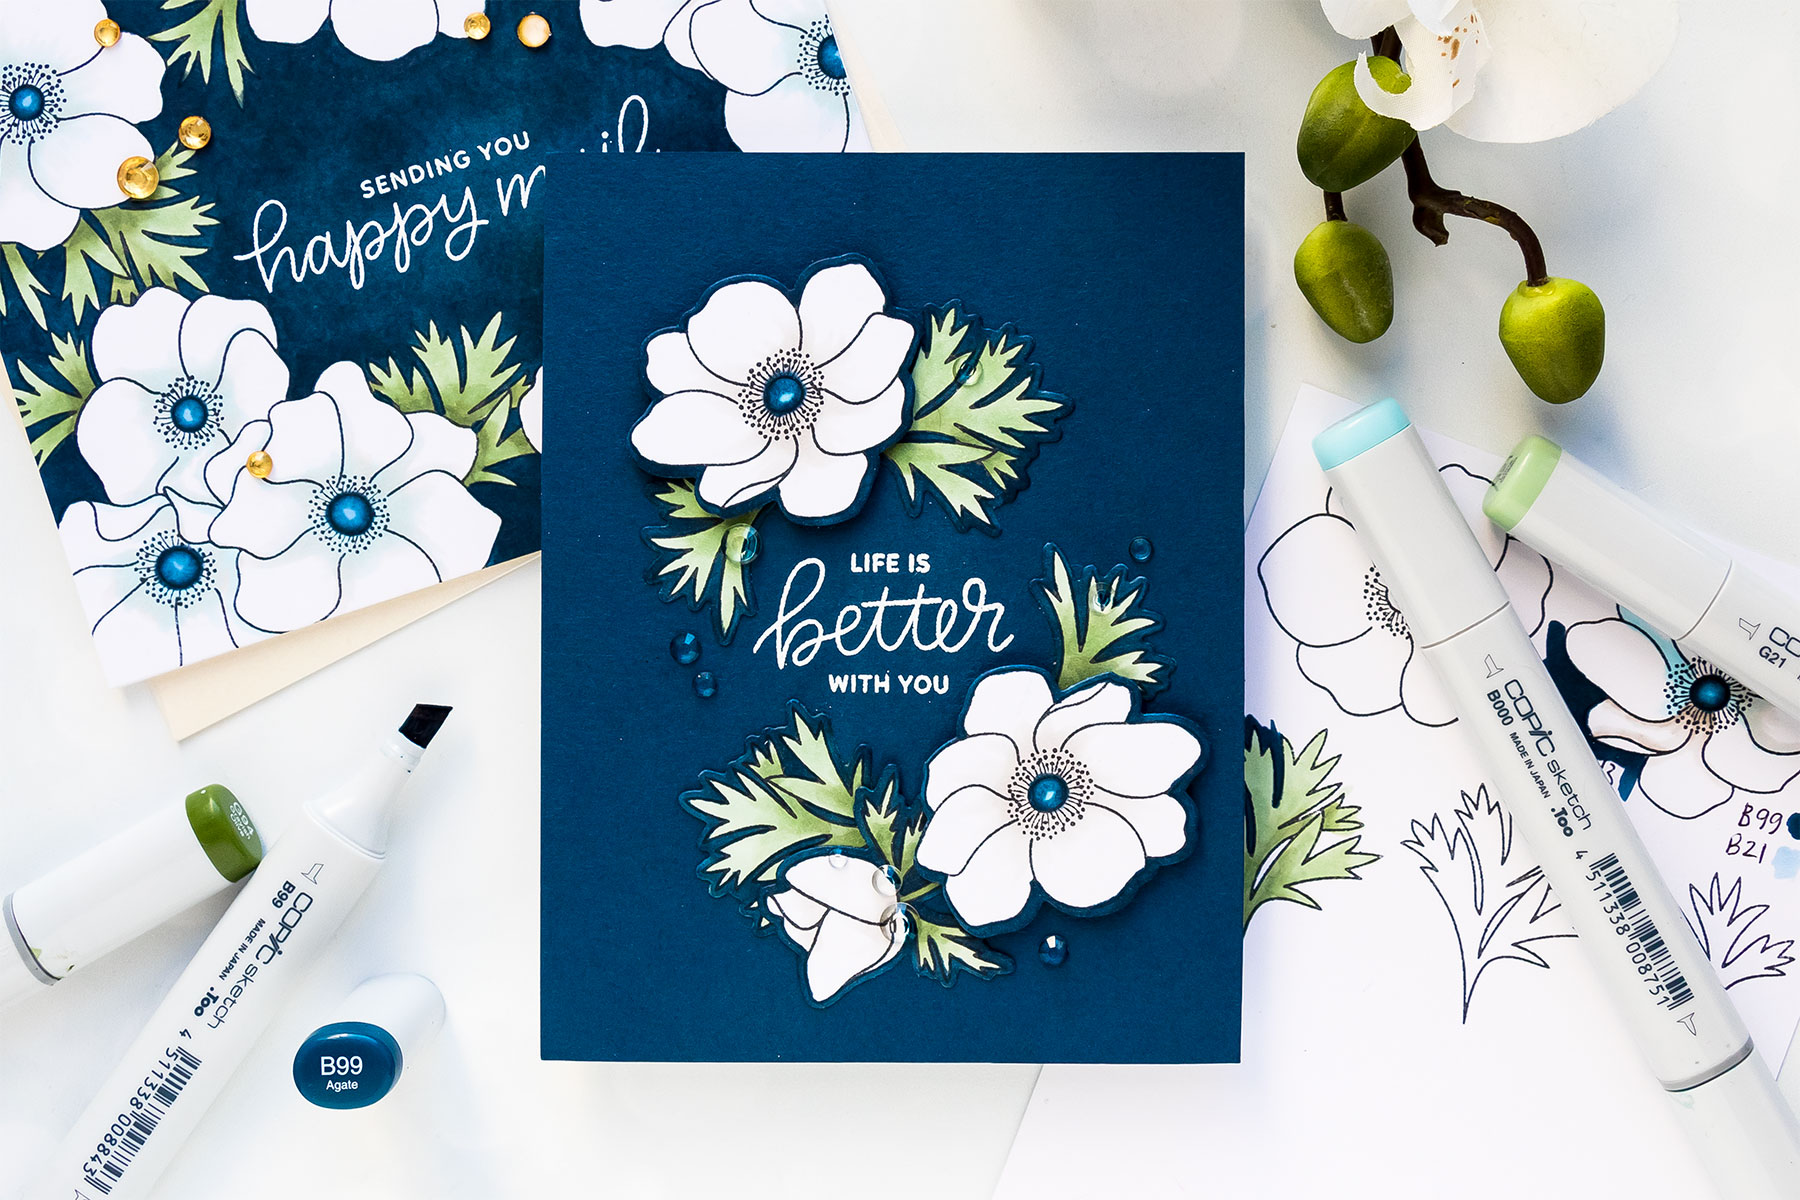
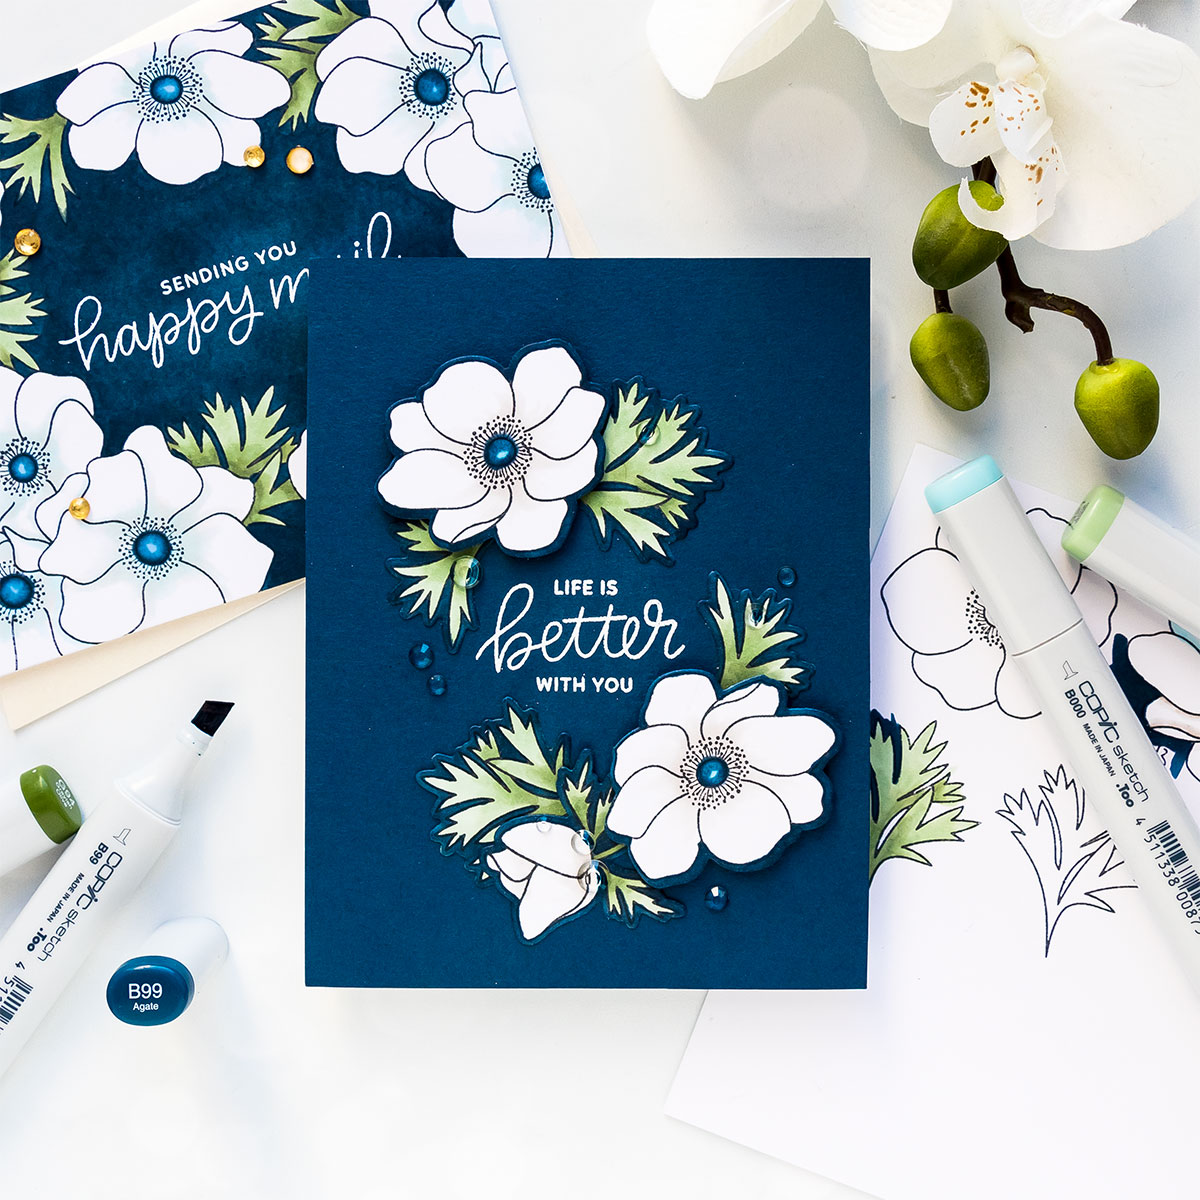
I have 2 cards and 2 similar, yet different techniques – first one featuring a one layer card with masking and another one, in case you are not into masking, featuring die-cutting and layering.
ONE LAYER CARD – COLORING THE BACKGROUND WITH COPICS
To create my first project, Sending Happy Mail, I stamped anemones around the edges of a 4 1⁄4 x 5 1⁄2” white cardstock panel. Next, I created masks for flowers, masked them, and stamped leaves in between the open spaces. I removed masks and ended up having a beautiful floral frame for my card.
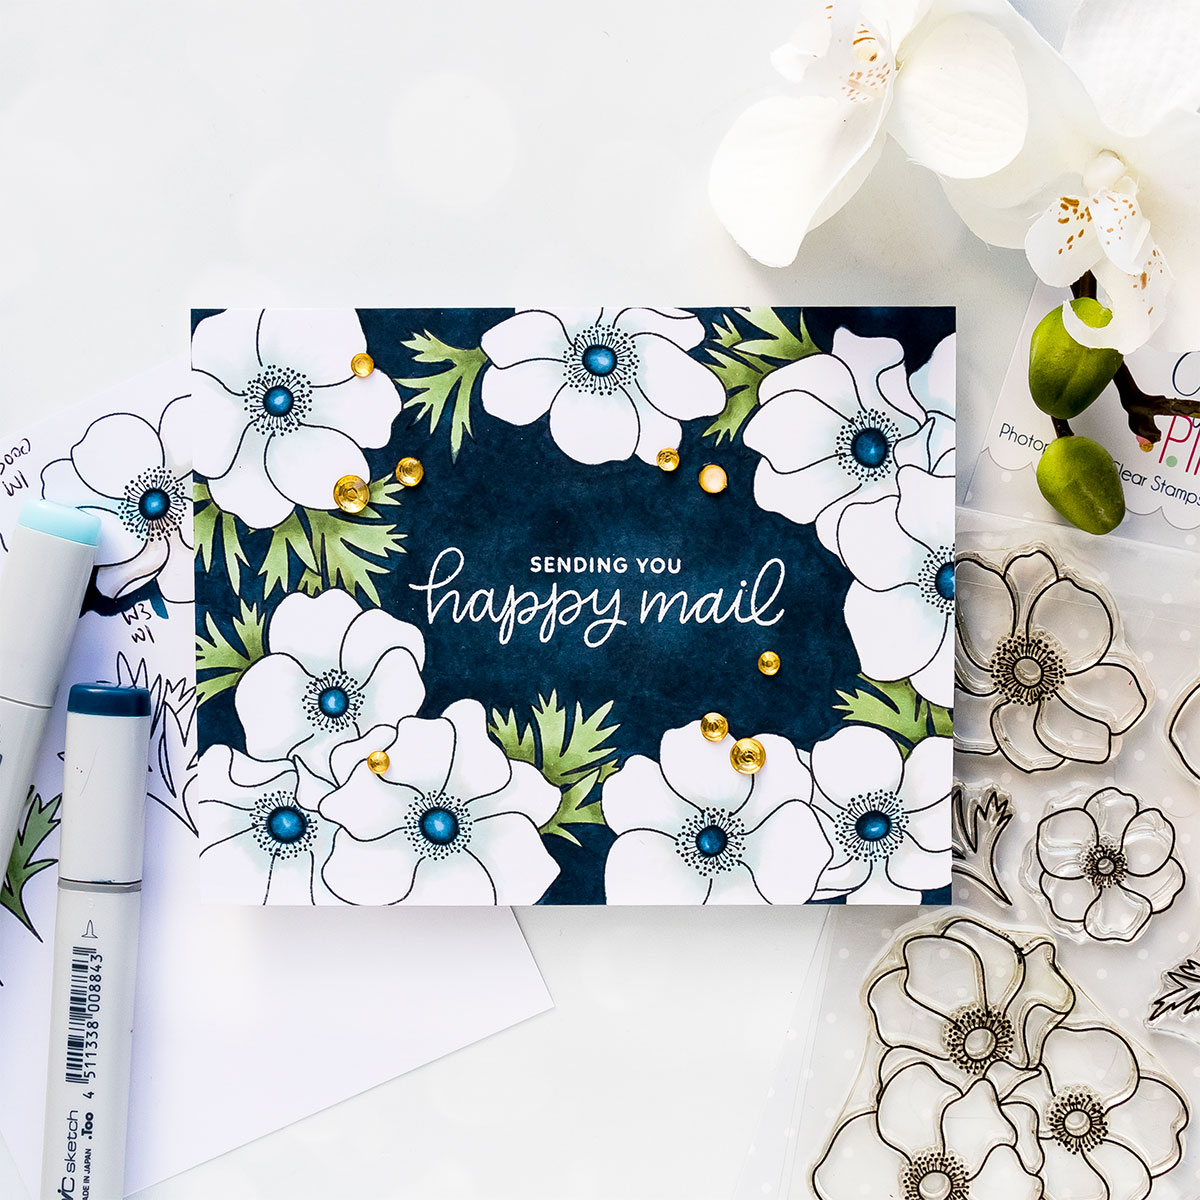
To color these, I used the following Copic Markers:
- G94, YG63 and G21 to color leaves;
- B99 and B21 to color flower centers;
- W1 and B000 to add hints of shadows where the petals overlap and meet.
Coloring white is very hard to do, this is something I am yet to master. Here you don’t have to be a pro at coloring white objects as we’ll add a blue background and our white images will come to life with very little effort and just minimal shading.
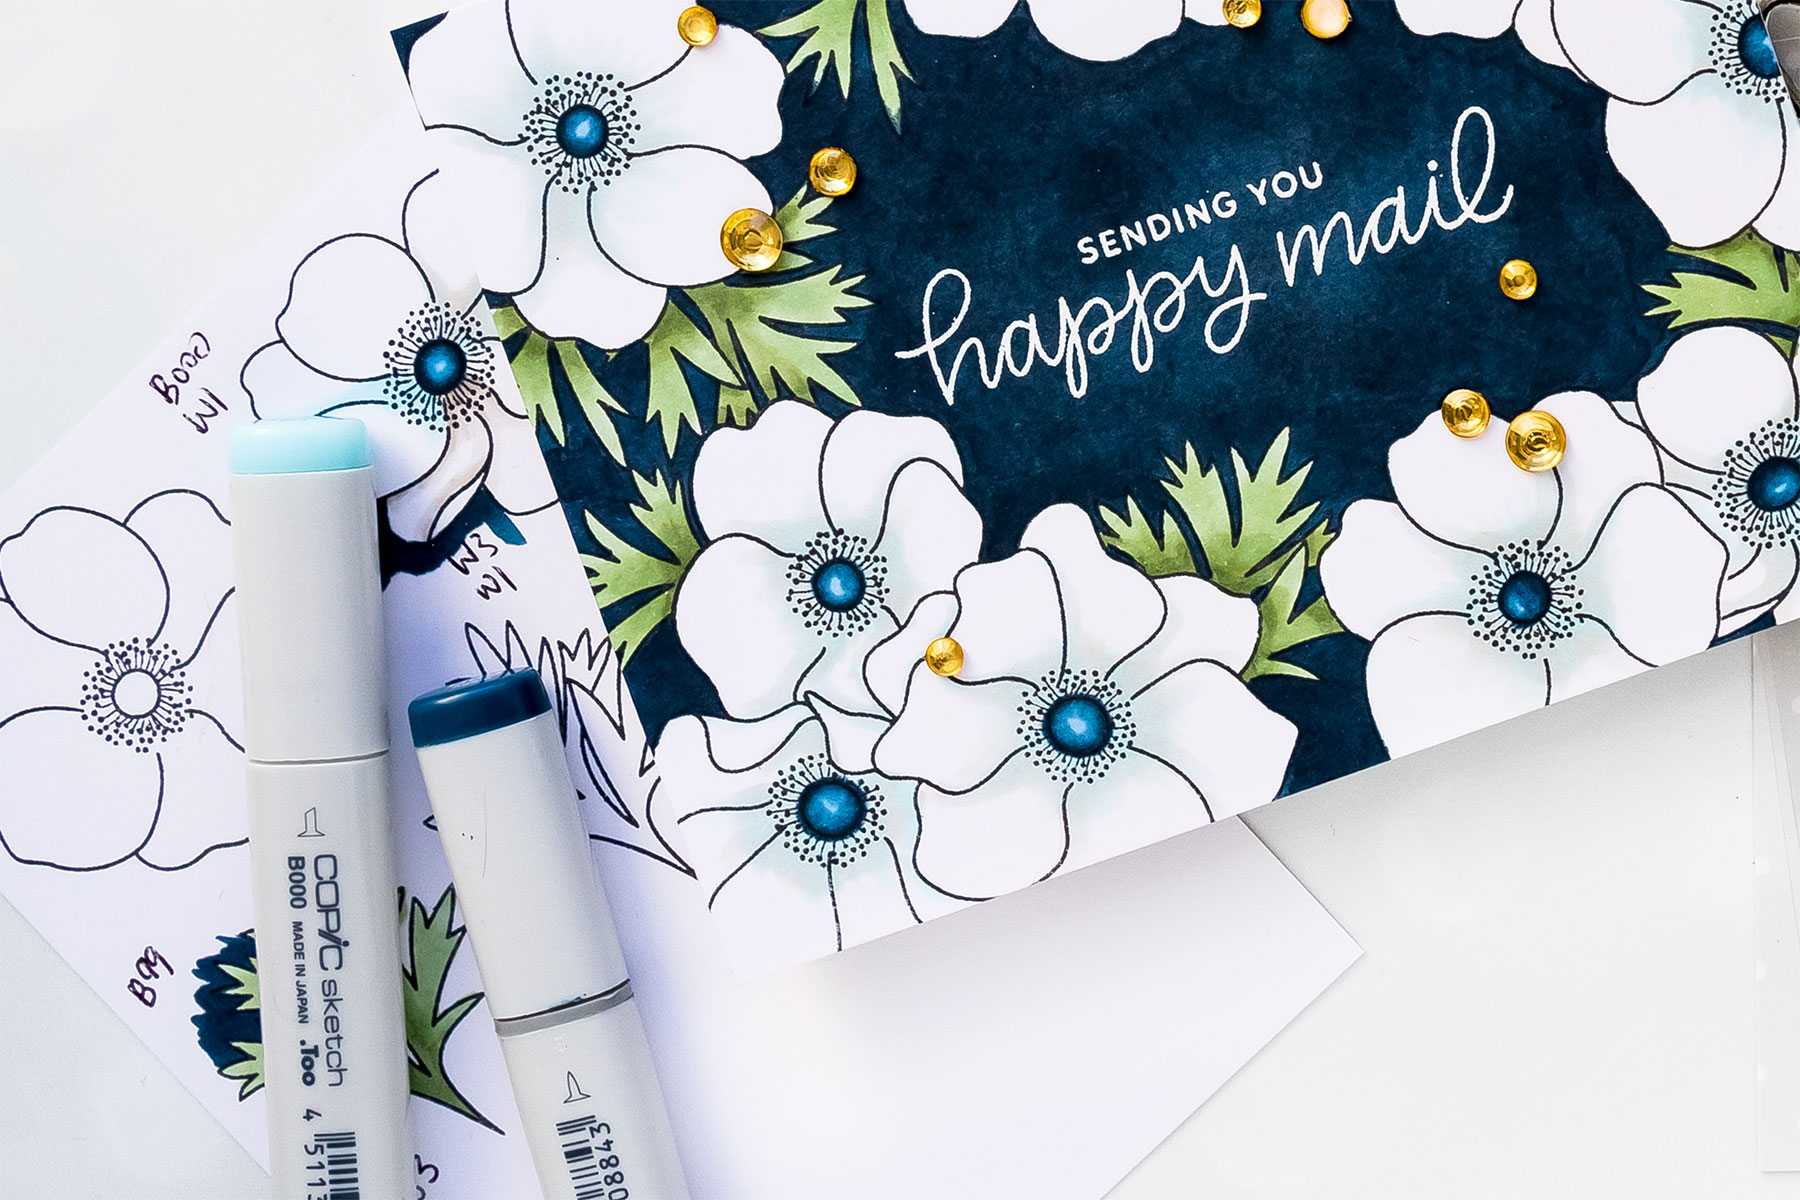
Once my coloring was done I used the B99 marker and colored the entire background. Think of this as coloring the negative space. It does take time to apply all of the color, especially next to the stamped images as you need to go slow and be patient, but it really does look phenomenal in the end.
Once my background coloring was finished I left my panel to dry for about 10 minutes. Next, I white heat embossed a sentiment – Sending You Happy Mail from the Happy Mail stamp set.
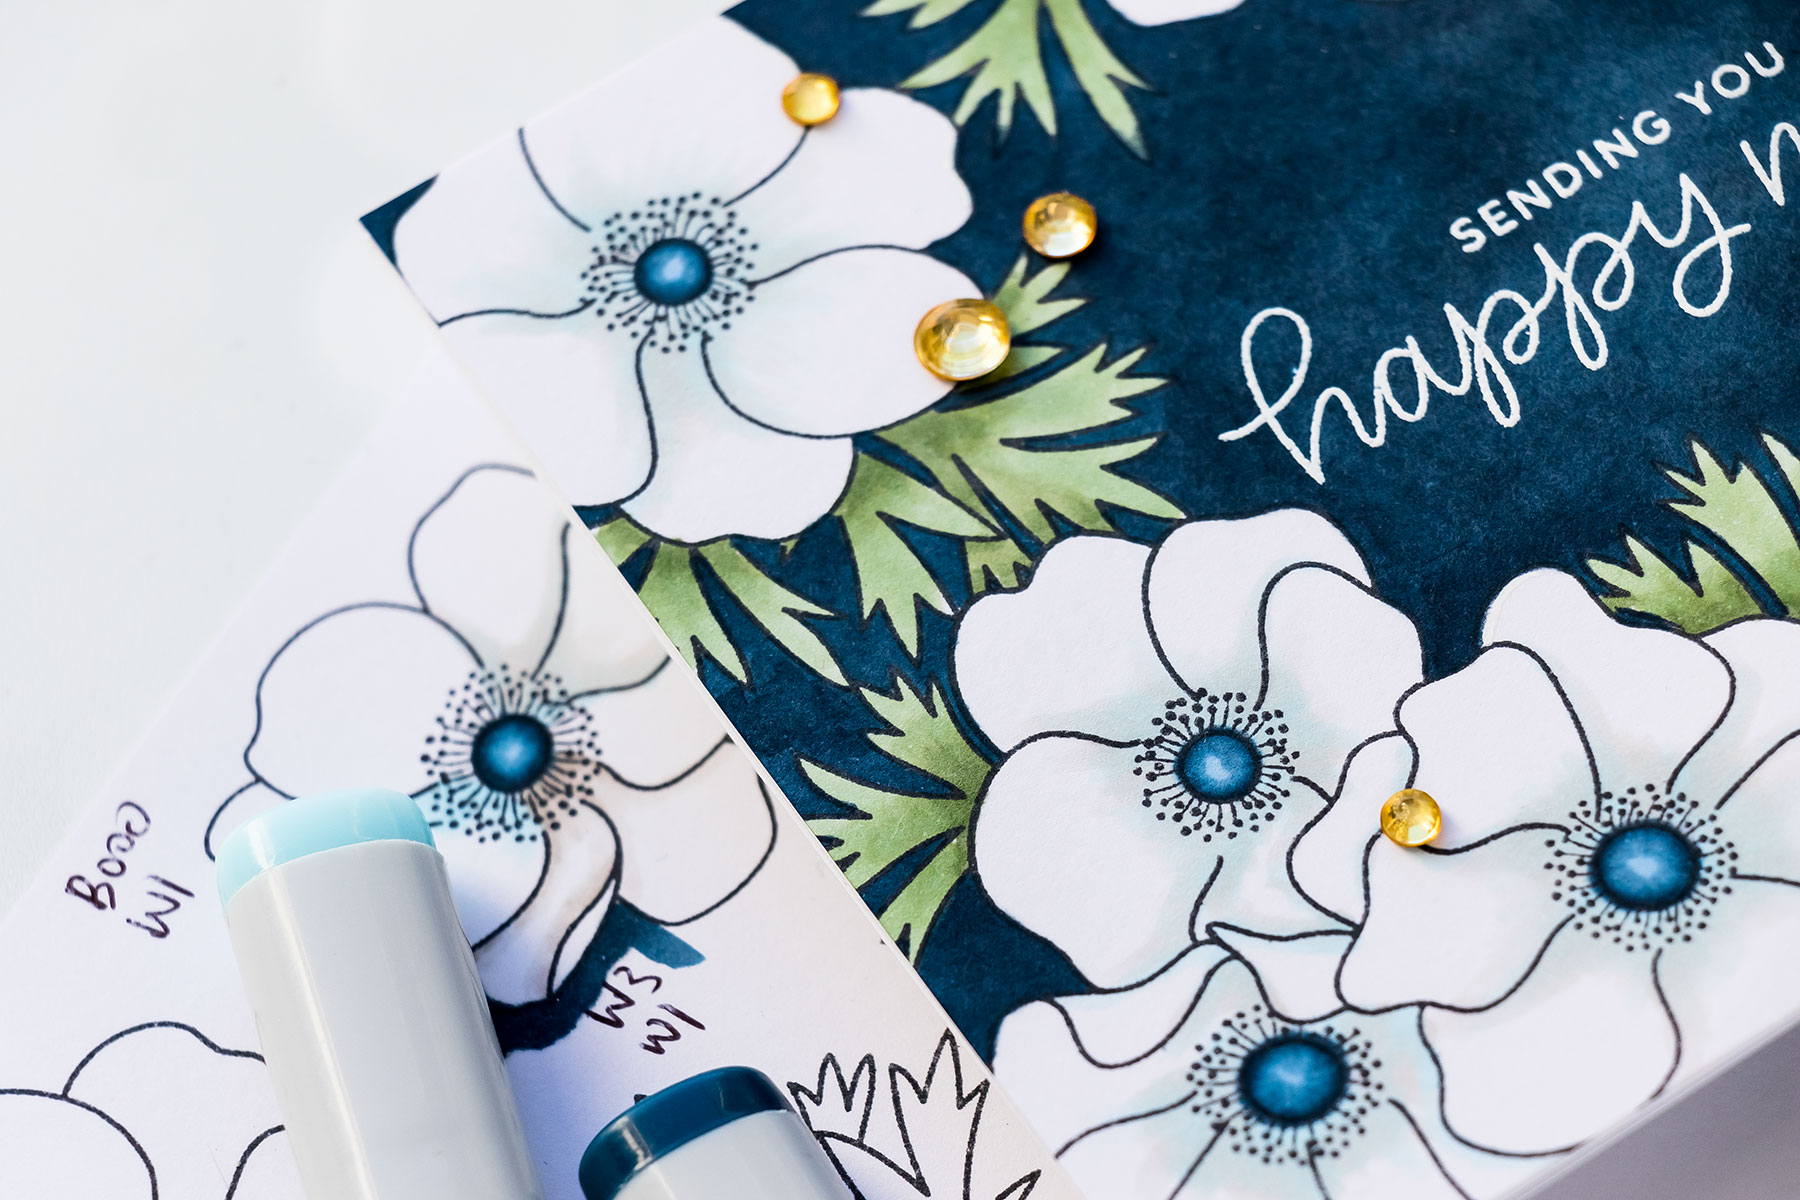
I adhered my background on to an A2 white top folding card base; to dress this card up I used gold confetti and clear jewels. I couldn’t decide which of those embellishments I wanted to use, so I used both by first adhering the confetti piece and topping it with a jewel of the same size.
LAYERED CARD – USING COLORED CARDSTOCK
Not everyone wants to use their Copic markers to color background around the images as that takes a ton of ink and that is also time-consuming. Another way to go about this is to add your die-cut images onto a background made out of colored cardstock.
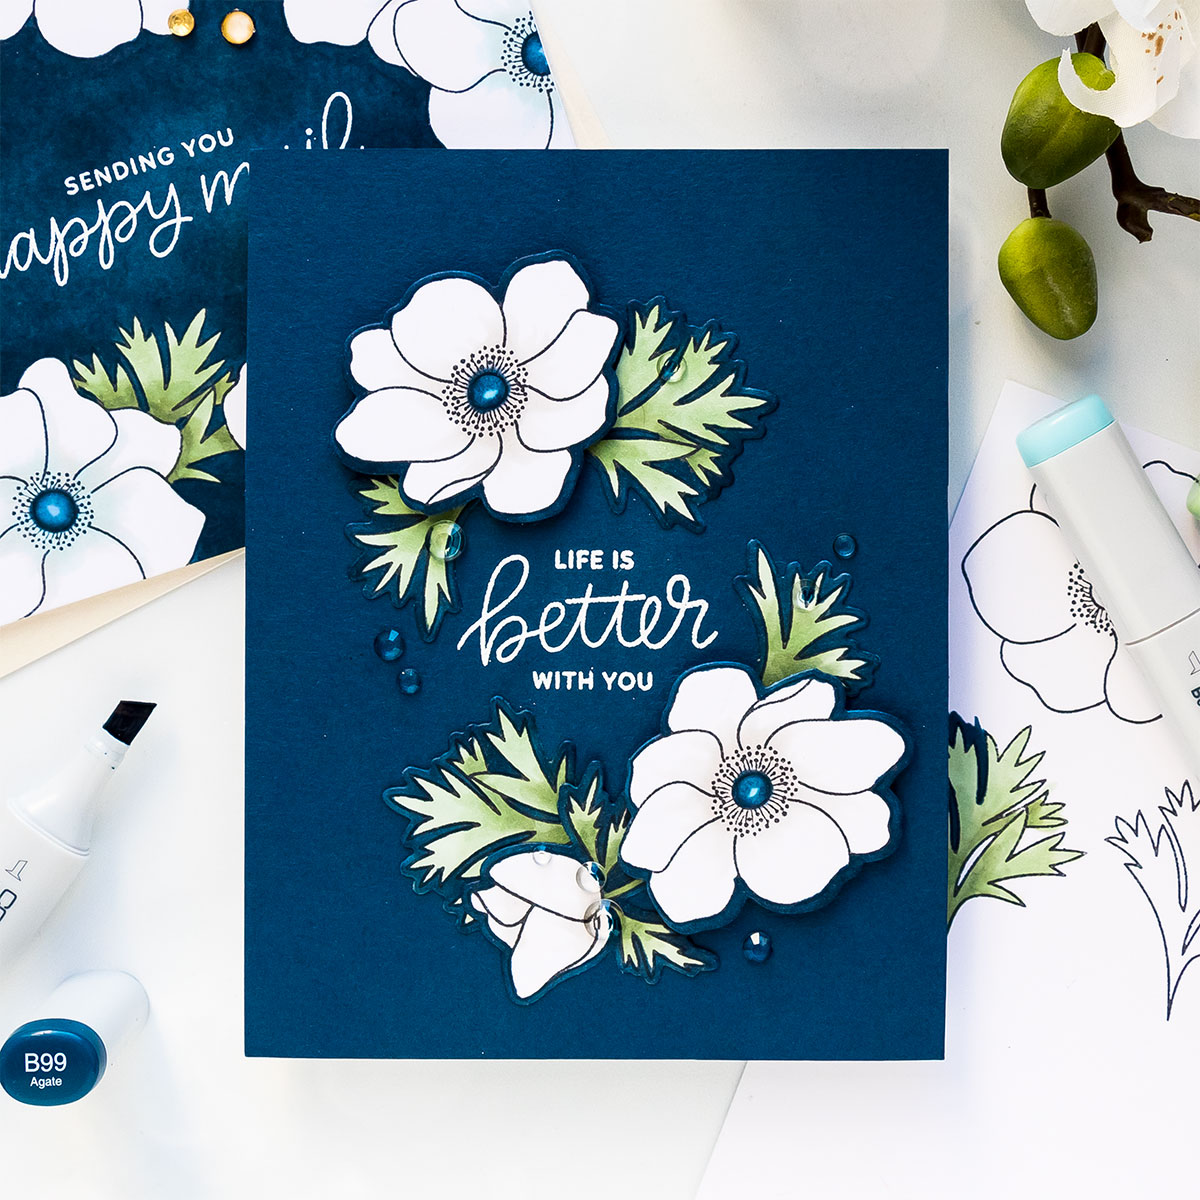
I stamped several images I wanted to use for my 2nd card and once again colored using the same marker colors as before. Using coordinating dies I cut these out in my die cutting machine. This gave me beautiful stamped, colored, and die cuts pieces for my card. This also gave a white outline to each of my die cuts. Having a white outline can be very discarding for this project, so to eliminate it, I used a Copic marker once again and color-matched white outline to my background color.
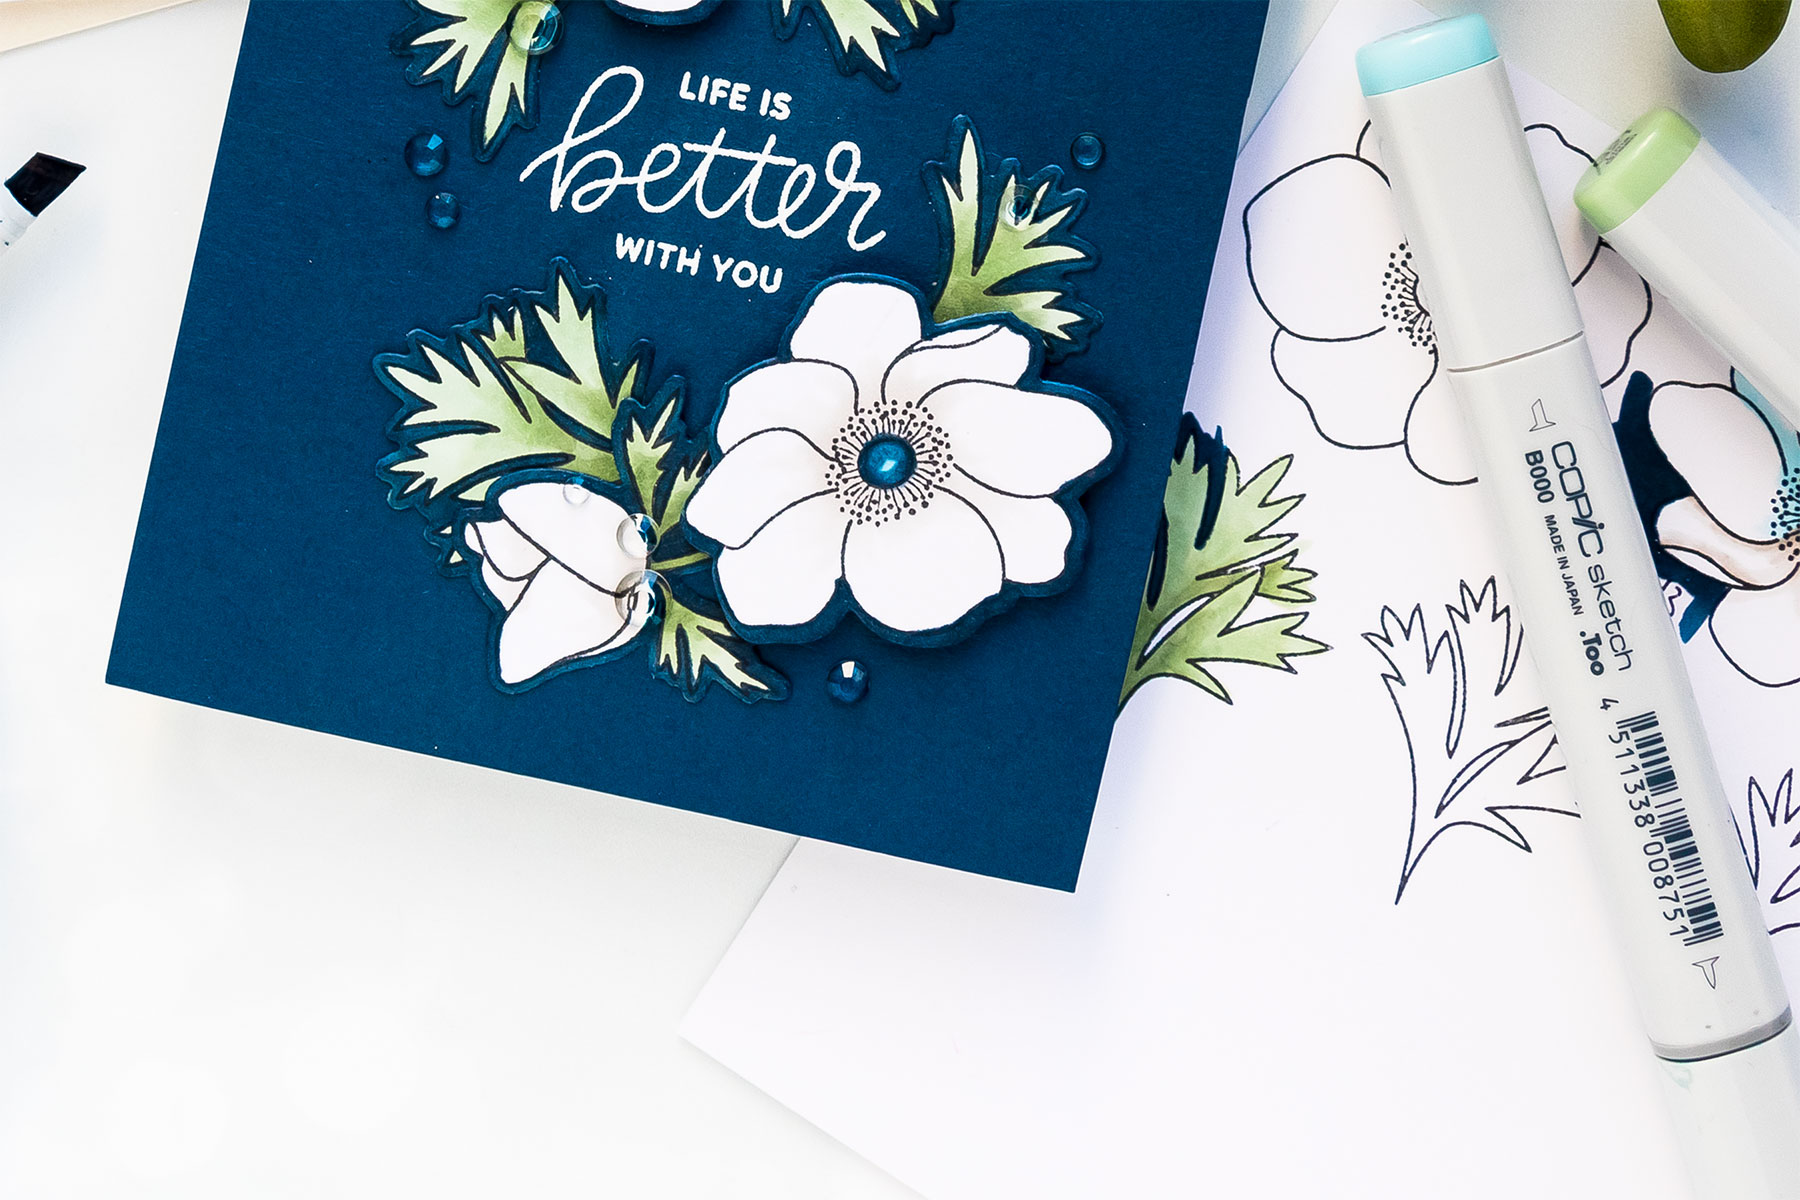
So here instead of coloring the entire background, I’m replacing the marker colored background with colored cardstock and only coloring the white die-cut outlines on my stamped images.
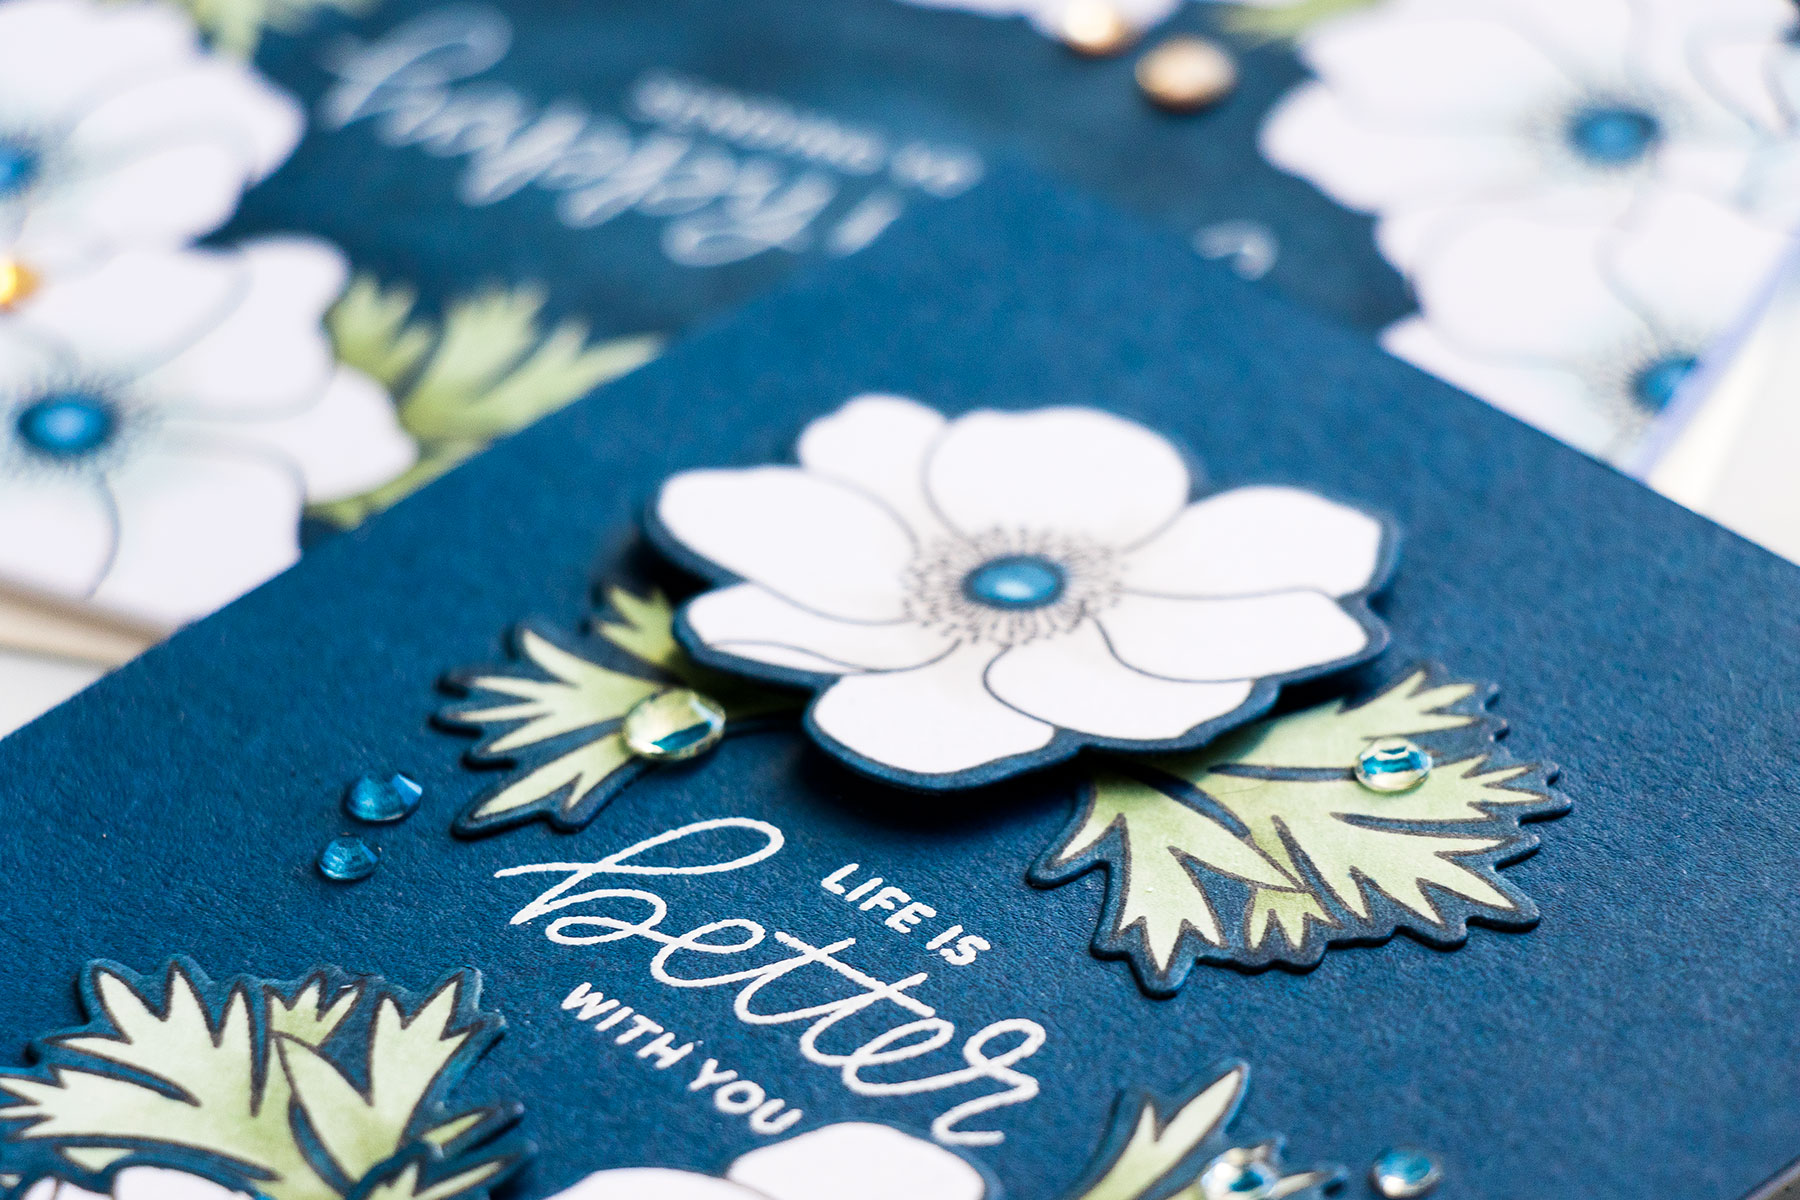
This way your images and the background become one, they look as if they were done on the background directly and don’t have that white border that separates them from the base. This is not a trick that will work for every card design or every image, but this is very fitting for these gorgeous white anemones.
Have fun stamping!
SUPPLIES
I’m listing the products I used below. Click on the link to go directly to the product. Where available I use compensated affiliate links which means if you make a purchase I receive a small commission at no extra cost to you. Thank you so much for your support!
 Pretty Pink Posh Anemones Clear Stamps Shop at: SSS | PPP |
 Pretty Pink Posh Anemones Coordinating Dies Shop at: PPP |
 Pretty Pink Posh Thoughtful Greetings Stamp Set Shop at: SSS | PPP |
 Pretty Pink Posh Happy Mail Clear Stamp Set Shop at: SSS | PPP |
 Pretty Pink Posh Metallic Rose Gold Confetti Shop at: SSS | PPP |
 Pretty Pink Posh Sparkling Clear Jewels Shop at: SSS | PPP |
 Neenah 110 Lb Solar White Cardstock Shop at: SSS | AZ |
 Neenah 80LB Solar White Cardstock Shop at: SSS | AZ |
 Simon Says Stamp Soft Navy Cardstock Shop at: SSS |
 Hero Arts Misti Mini Black Shop at: SSS | SC | HA |
 Mini Misti Stamping Tool Shop at: SSS | SC | HA | AZ |
 Memento Tuxedo Black Ink Pad Shop at: SSS | SC | AZ |
 Versamark Watermark Emboss Ink Pad Shop at: SSS | HA | AZ |
 Judikins Eclipse Art Masking Tape Shop at: SSS | AZ |
 Simon Says Stamp Masking Paper Shop at: SSS |
 Hero Arts White Embossing Powder Shop at: SSS | SC | HA | AZ |
 EK Success Powder Tool Applicator Shop at: SSS | SC | AZ |
 Hero Arts Heat Embossing Gun Shop at: SSS | SC | HA | AZ |
 Copic Sketch Marker B000 Pale Porcelain Shop at: SSS | AZ | BL |
 Copic Sketch Marker B99 Agate Dark Blue Shop at: SSS | AZ | BL |
 Copic Sketch Marker YG63 Pea Green Shop at: SSS | AZ | BL |
 Copic Sketch Marker G21 Lime Green Shop at: SSS | BL |
 Copic Sketch Marker W1 Warm Gray Shop at: SSS | AZ | BL |
 Copic Sketch Marker G94 Grayish Olive Shop at: SSS | AZ | BL |
 Copic Sketch Marker B21 Baby Blue Shop at: SSS | AZ | BL |
 Spellbinders Platinum 6 Die Cutting Machine Shop at: SSS | SC | SB | AZ |
 Tonic Deluxe Adhesive Nuvo Glue Shop at: SSS | SC | AZ | TS |
 Crystal Ninja Crystal Katana Pick Up Tool Shop at: SSS | AZ | BL |

Spectacular florals! Thanks, Yana for the wonderful tips.
Lovely cards. Thanks for the tip about coloring the outside of the die cuts to match the background on certain die cuts.
These are both Really Beautiful!!!
i always like your dark backgrounds
Thanks, Yana, for making me take another look at the anemone set from PPP. I love your work and this video is no different. The cards are stunners!!