


Hello, crafty friends! I’m so excited to bring you a fresh, nautical-inspired project featuring the June 2025 Stitching Die of the Month and the coordinating 3D Embossing Folder from Spellbinders. This project is part of the June-July Club-a-Long that aired earlier this week! If you’ve been following along with the Club-a-Long events, you know how much fun these are – and this one’s full of summer vibes and a cheeky little seagull you’re going to adore!
Like this project? Pin it and save it for later | Curious about my project photography? Click for details.
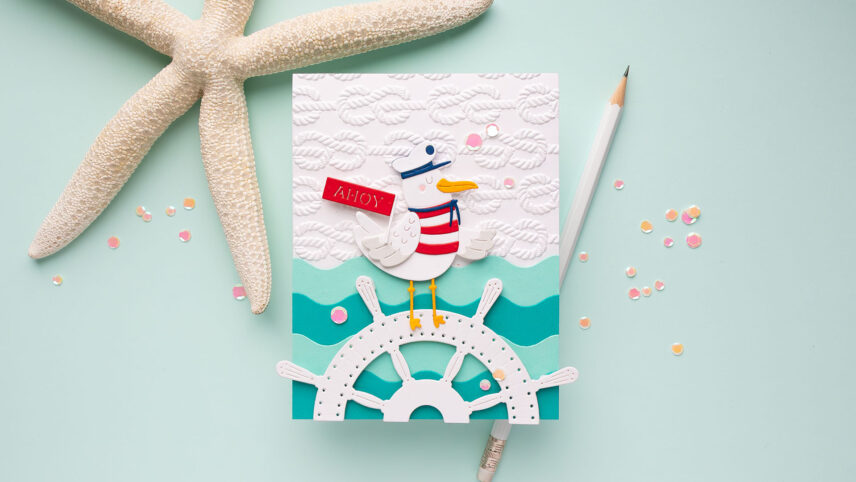
The June stitching die includes wave and steering wheel designs with optional stitch inserts. I love that Spellbinders gives you the choice – stitch for extra detail, or skip it for a cleaner, quicker look. For this project, I opted for no stitching, letting the etched details act as subtle faux-stitching lines.
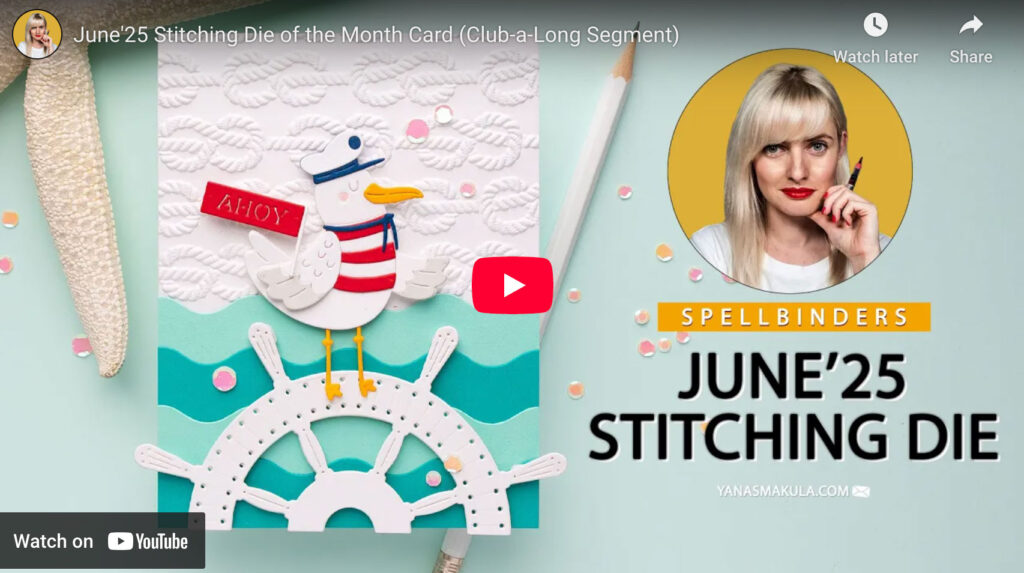
VIDEO TUTORIAL
Watch the video below or on my YouTube channel.
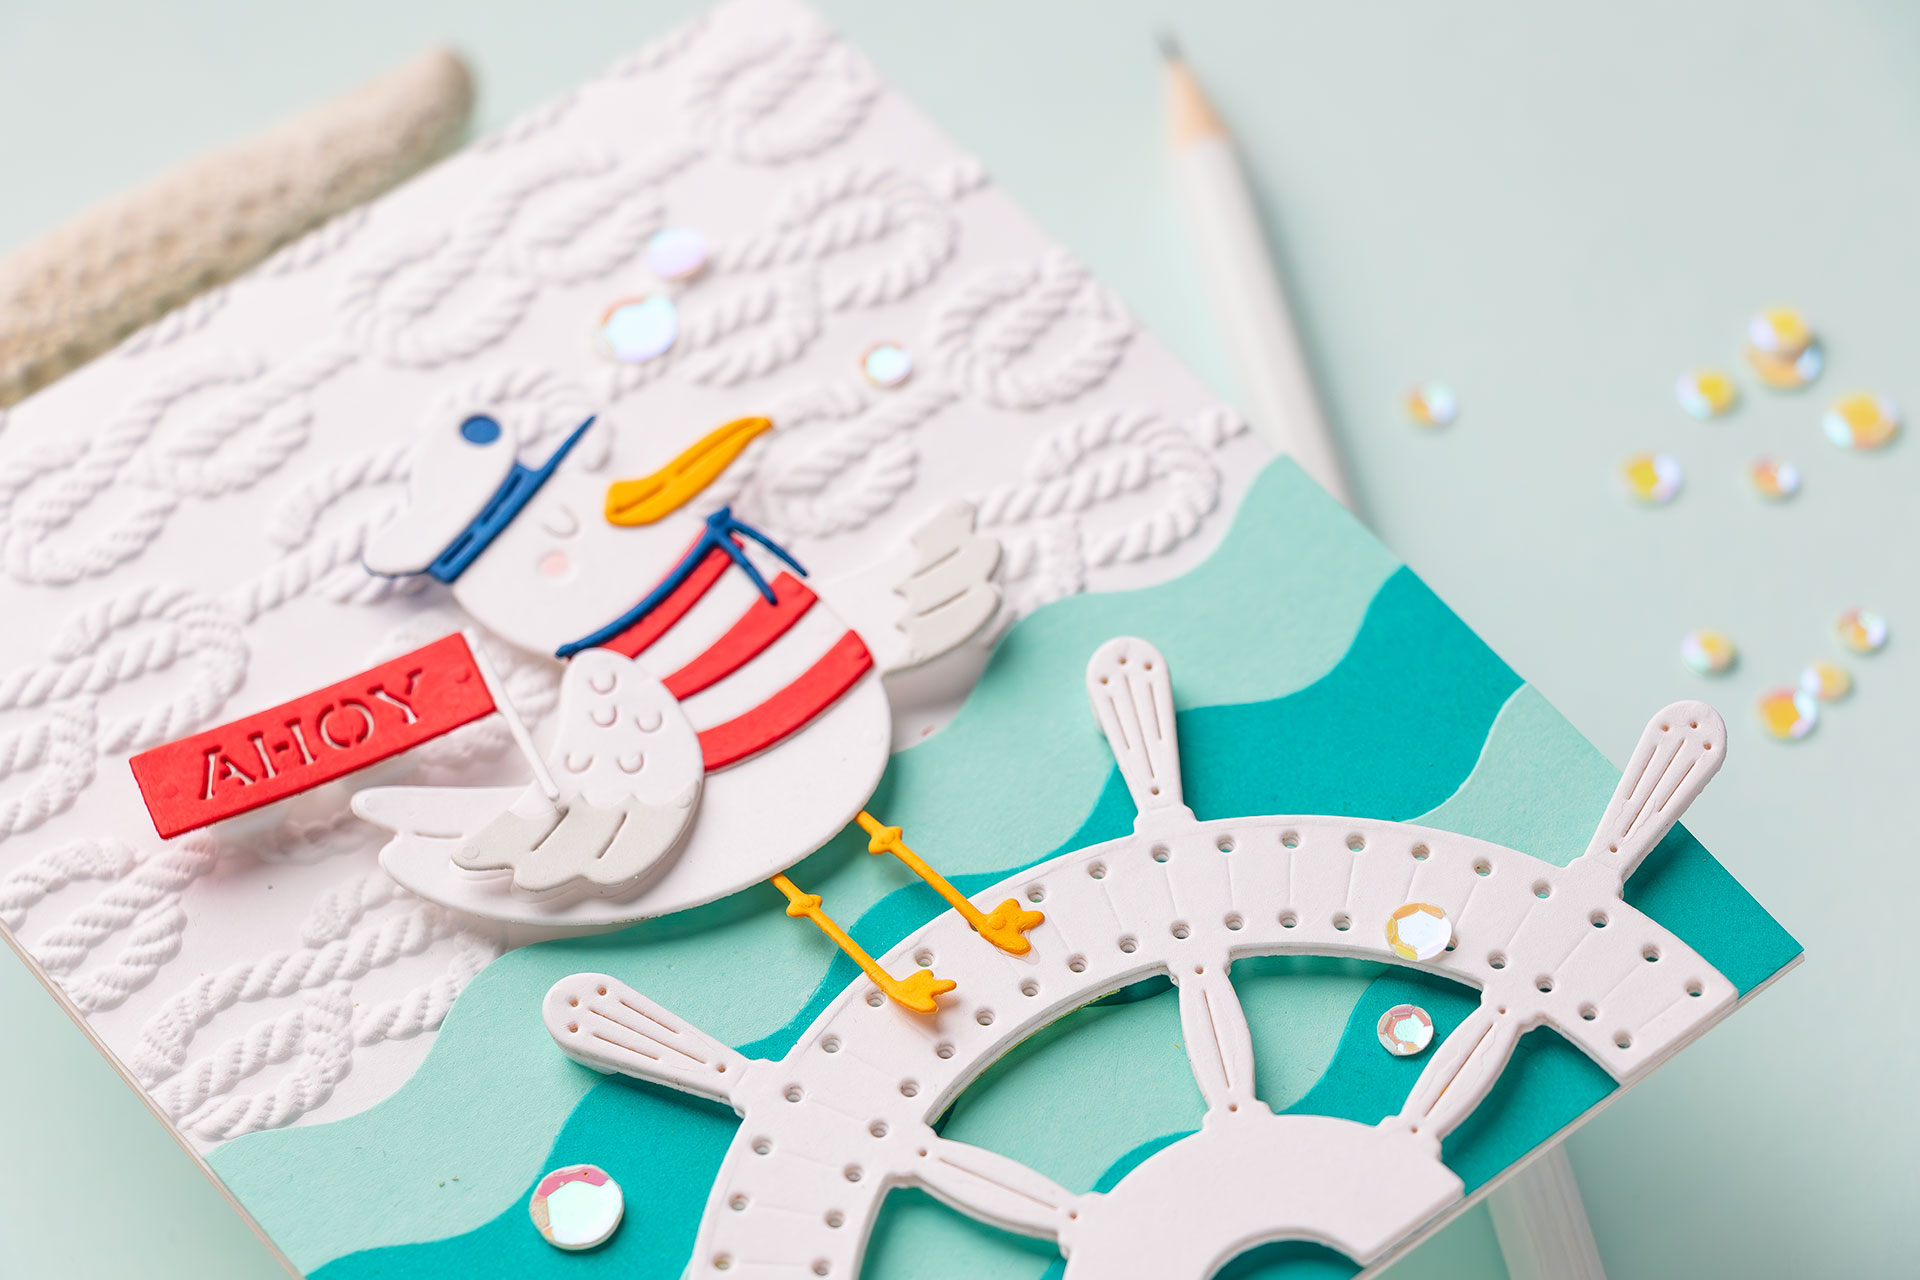
Tip: When working with intricate die cuts, stacking layers gives a nice heft and professional finish. I used 3 layers of cardstock for the wheel—it makes a big difference!
If you’d like to see my current, July 2025, favorite Clubs, you can watch that video here:
The 3D embossing folder for June features a fabulous rope-and-knot pattern – absolutely perfect for nautical cards. I misted my cardstock lightly before running it through my Platinum 6 with the Universal Plate System (don’t forget to use the D adapter!). I trimmed the background to A2 size (4.25 x 5.5”) and used it as the base layer for my scene.
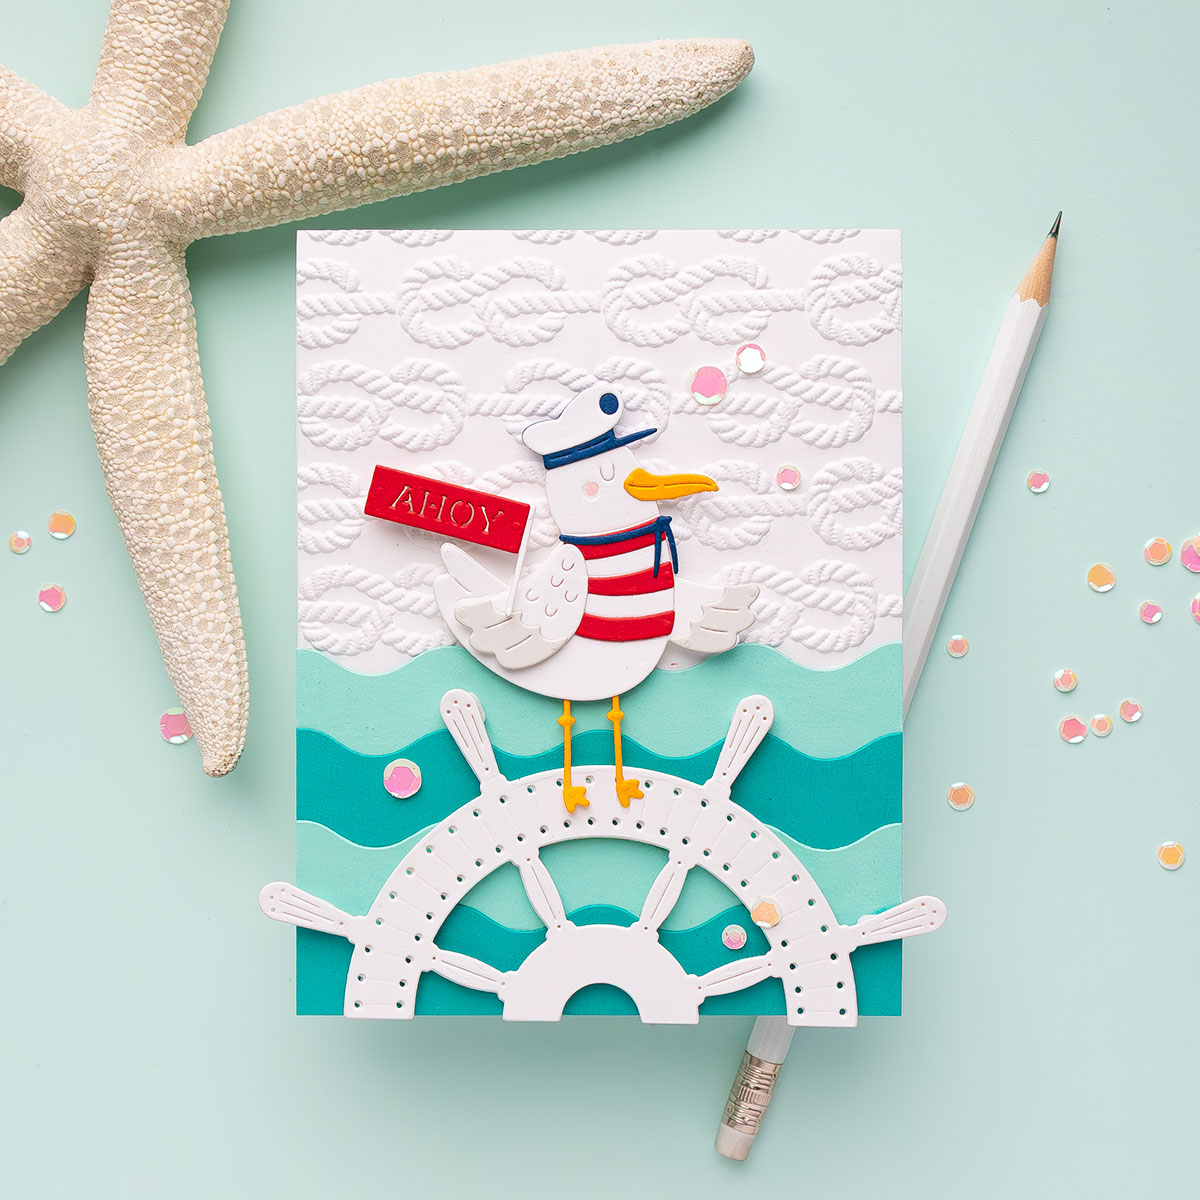
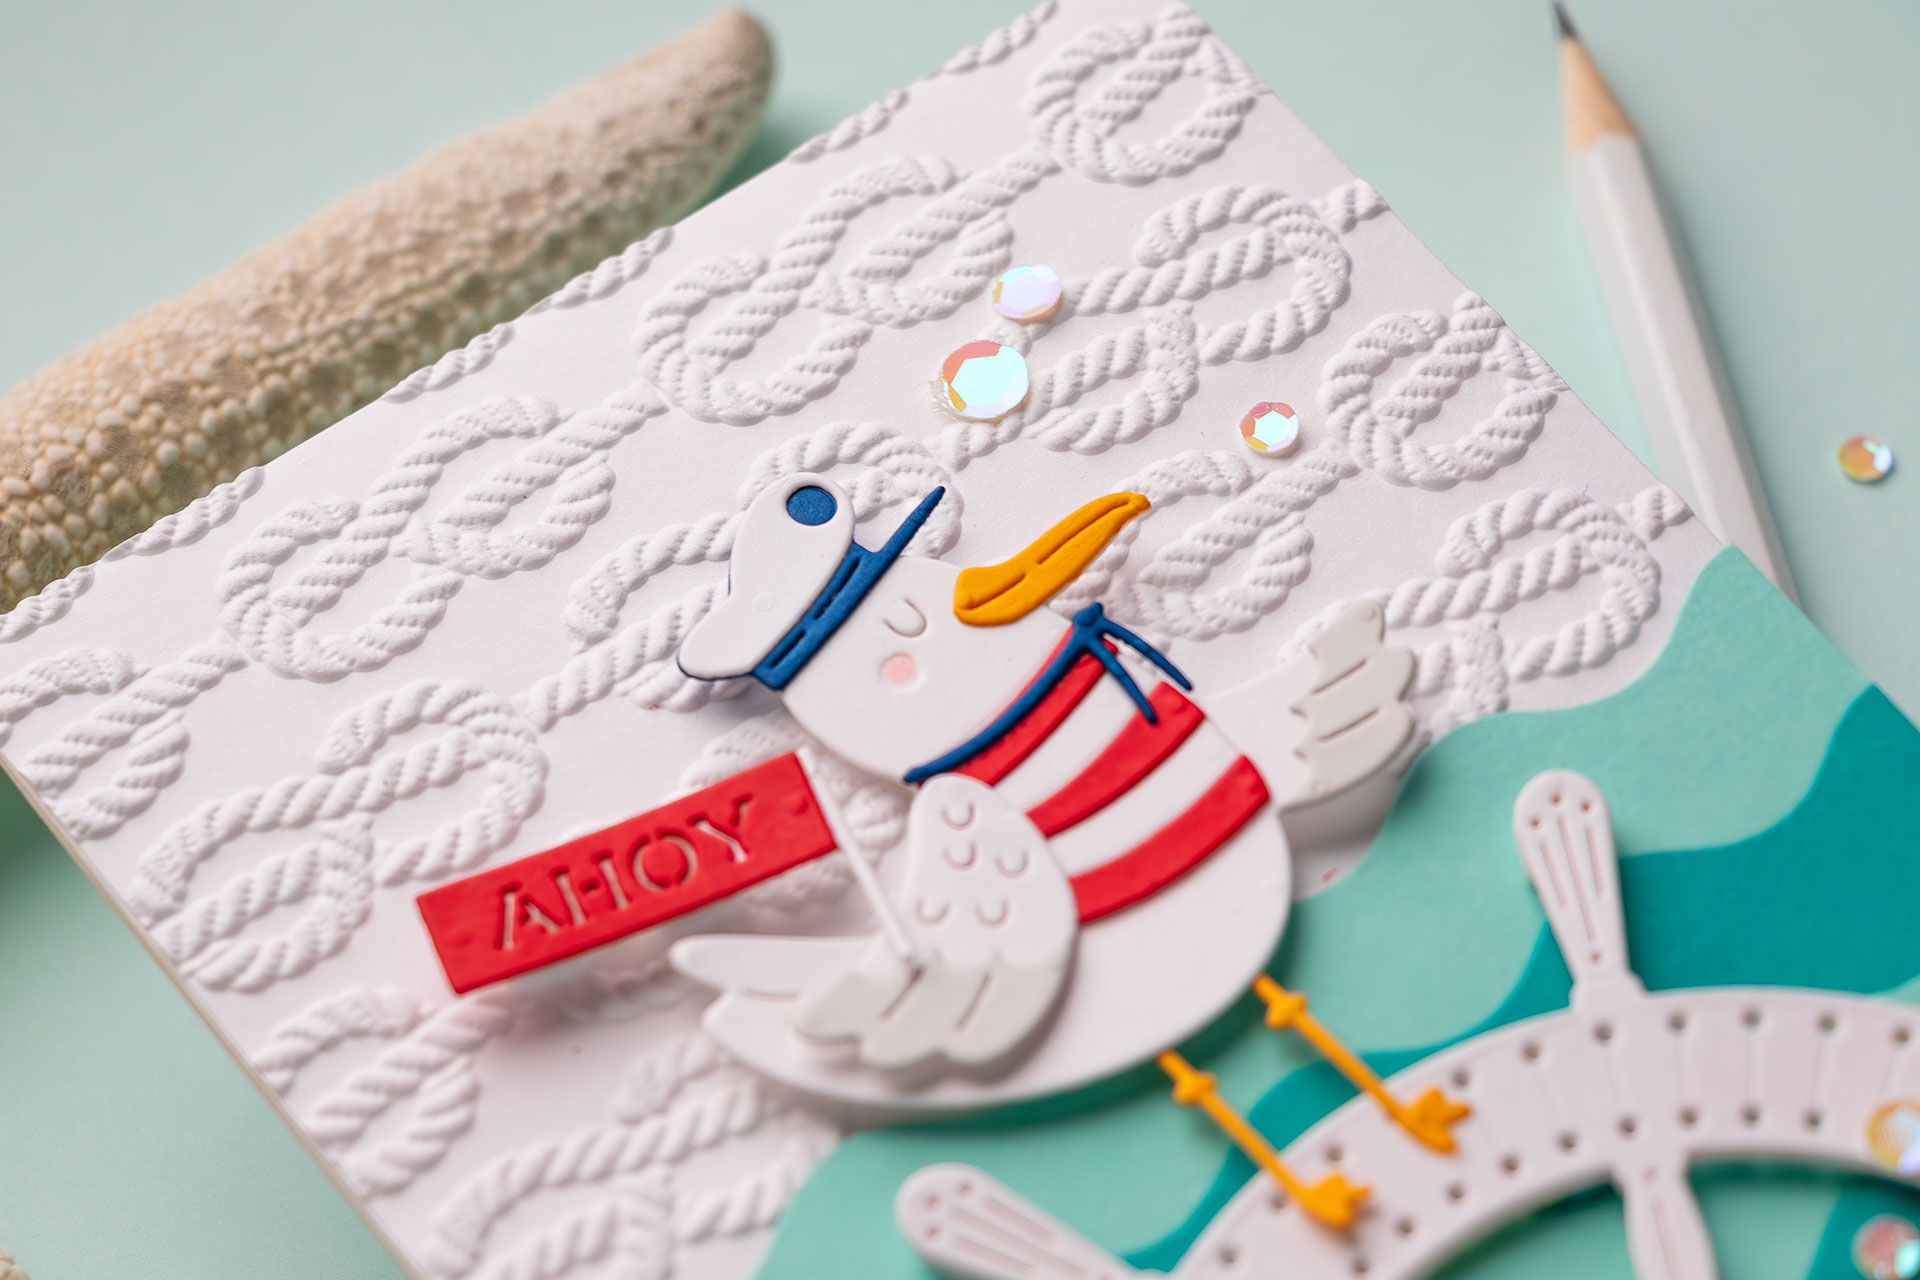
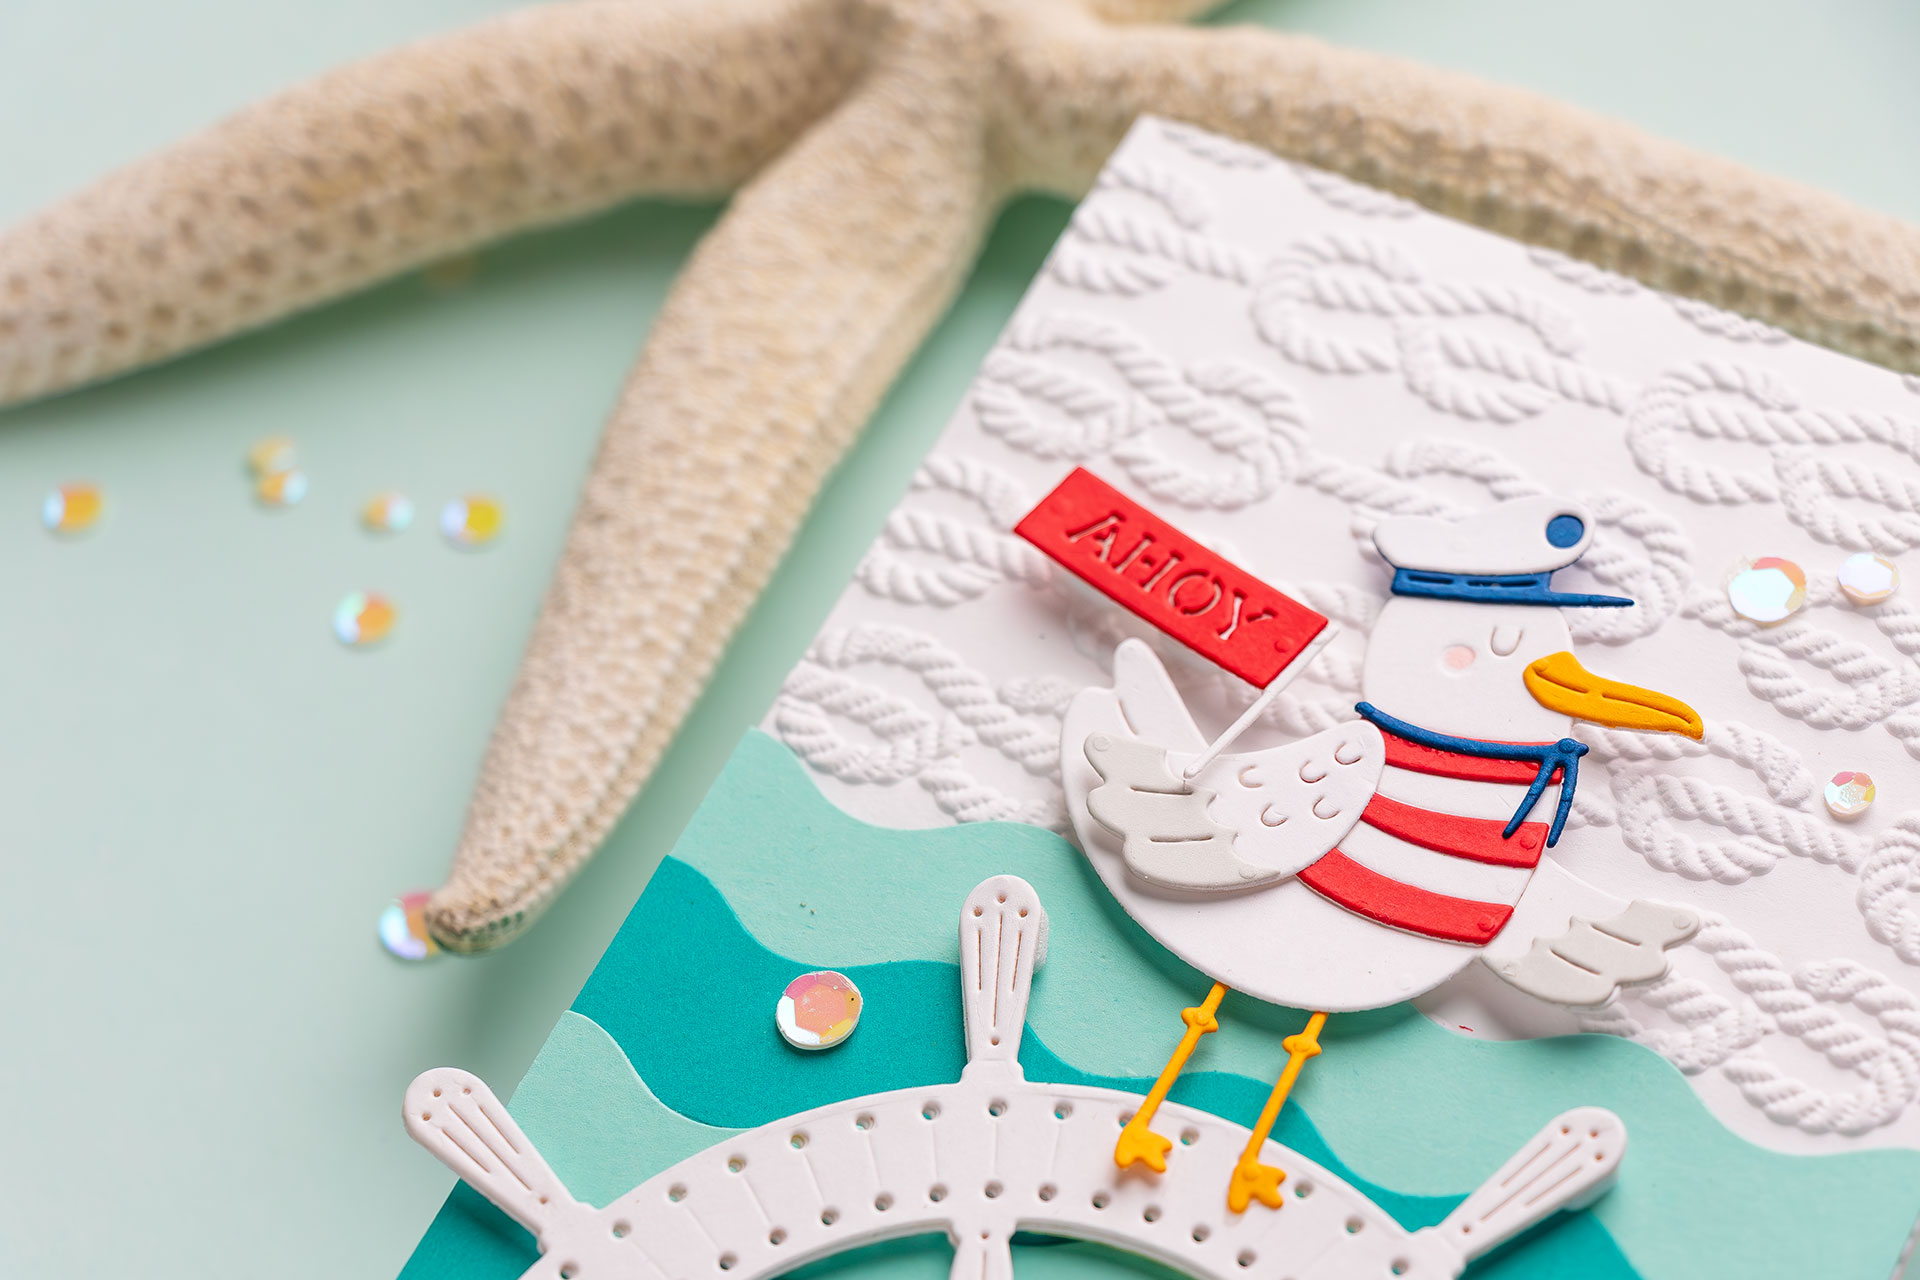
This adorable little guy steals the show! I die-cut the seagull from white and Fog cardstock, added a striped red shirt, and topped him with a little Cosmic Sky sailor’s cap. For extra cuteness, I gave him a tiny blush using Copic R20.
Assembly note: Make sure to layer the t-shirt under the second wing – this keeps everything aligned perfectly.
Here’s how it all came together:
-
Waves were glued flat at the bottom of the embossed background.
-
Steering Wheel was foam-mounted for dimension, slightly overlapping the waves.
-
Seagull sits on top, also foam-mounted with his little legs glued in place.
-
I turned the “Ahoy!” die cut sentiment into a banner for the seagull to hold – it’s the perfect whimsical touch!
-
A few aura sequins add just the right bit of sparkle to finish off the scene.
Everything is mounted to a top-folding A2 card base for a crisp, clean finish.
I absolutely loved playing with the June kits—this card came together quickly thanks to all the layering elements and die details. And the fact that you can stitch or skip makes these kits so versatile! Let me know in the comments- are you team stitch or team no-stitch?
Thanks so much for stopping by today, and happy Club crafting!
SUPPLIES
I’m listing the products I used below. Click on the link to go directly to the product. Where available, I use compensated affiliate links, which means if you make a purchase, I receive a small commission at no extra cost to you. Thank you so much for your support!
 Spellbinders Nautical Knots – 3D Embossing Folder of the Month Shop at: SB USA | SB UK |
 Spellbinders Ahoy, Matey! – Stitching Die of the Month Shop at: SB USA | SB UK |
 Spellbinders A2 White Card Bases – Side Fold – 25 pack Shop at: SB USA |
 Spellbinders Cosmic Sky ColorWheel Cardstock Shop at: PFS | SB USA | SB UK |
 Spellbinders Saffron ColorWheel Cardstock Shop at: PFS | SB USA | SB UK |
 Spellbinders Waterfall ColorWheel Cardstock Shop at: PFS | SB USA | SB UK |
 Spellbinders Teal Topaz ColorWheel Cardstock Shop at: PFS | SB USA | SB UK |
 Spellbinders Poppy ColorWheel Cardstock Shop at: PFS | SB USA | SB UK |
 Spellbinders Classic White ColorWheel Cardstock Shop at: SB USA | SB UK |
 Bearly Art Mini Precision Craft Glue Shop at: SSS | SB USA | AMZ |
 Spellbinders Aura Opalescent Color Essentials Sequins Shop at: SSS | PFS | SB USA | SB UK |
 White Foam Squares Shop at: SSS | PFS | SB USA | SB UK | AMZ |
Really fun card
Thank you! I had so much fun making it — I’m so glad you liked it!
I’m partial to water and summer themes and I love your cards, especially the seagull! He’s full of personality. Have fun with your kitties!
Thank you so much! I’m so glad the seagull made you smile — he really does have a lot of personality, doesn’t he? I love water and summer themes too! And yes, the kitties are keeping me on my toes — and occasionally stealing craft supplies!