


Hello and welcome back for another Yippee For Yana video! In this episode, I will show you how to create a modern one-layer greeting card using a background stamp and an easy masking technique.
Like this project? Pin it and save for later | Curious about my project photography? Click for details.
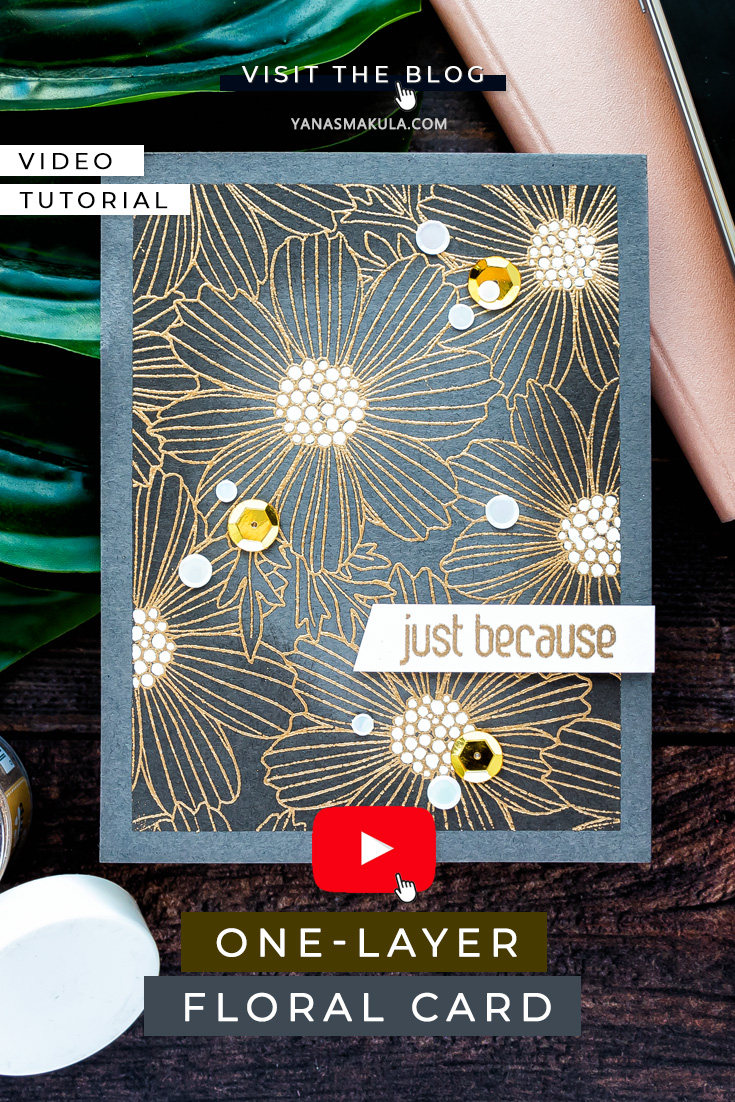
VIDEO TUTORIAL
As always, I filmed a video tutorial showing how to create this project from start to finish. I’m hoping you’ll enjoy it. Watch it below or on my Youtube channel:
Like this video? Please give it a big thumbs up (you can do this on Youtube video page right under the video) and share with a crafty friend! Leave me a comment too, I love hearing from you!
CARDS DETAILS
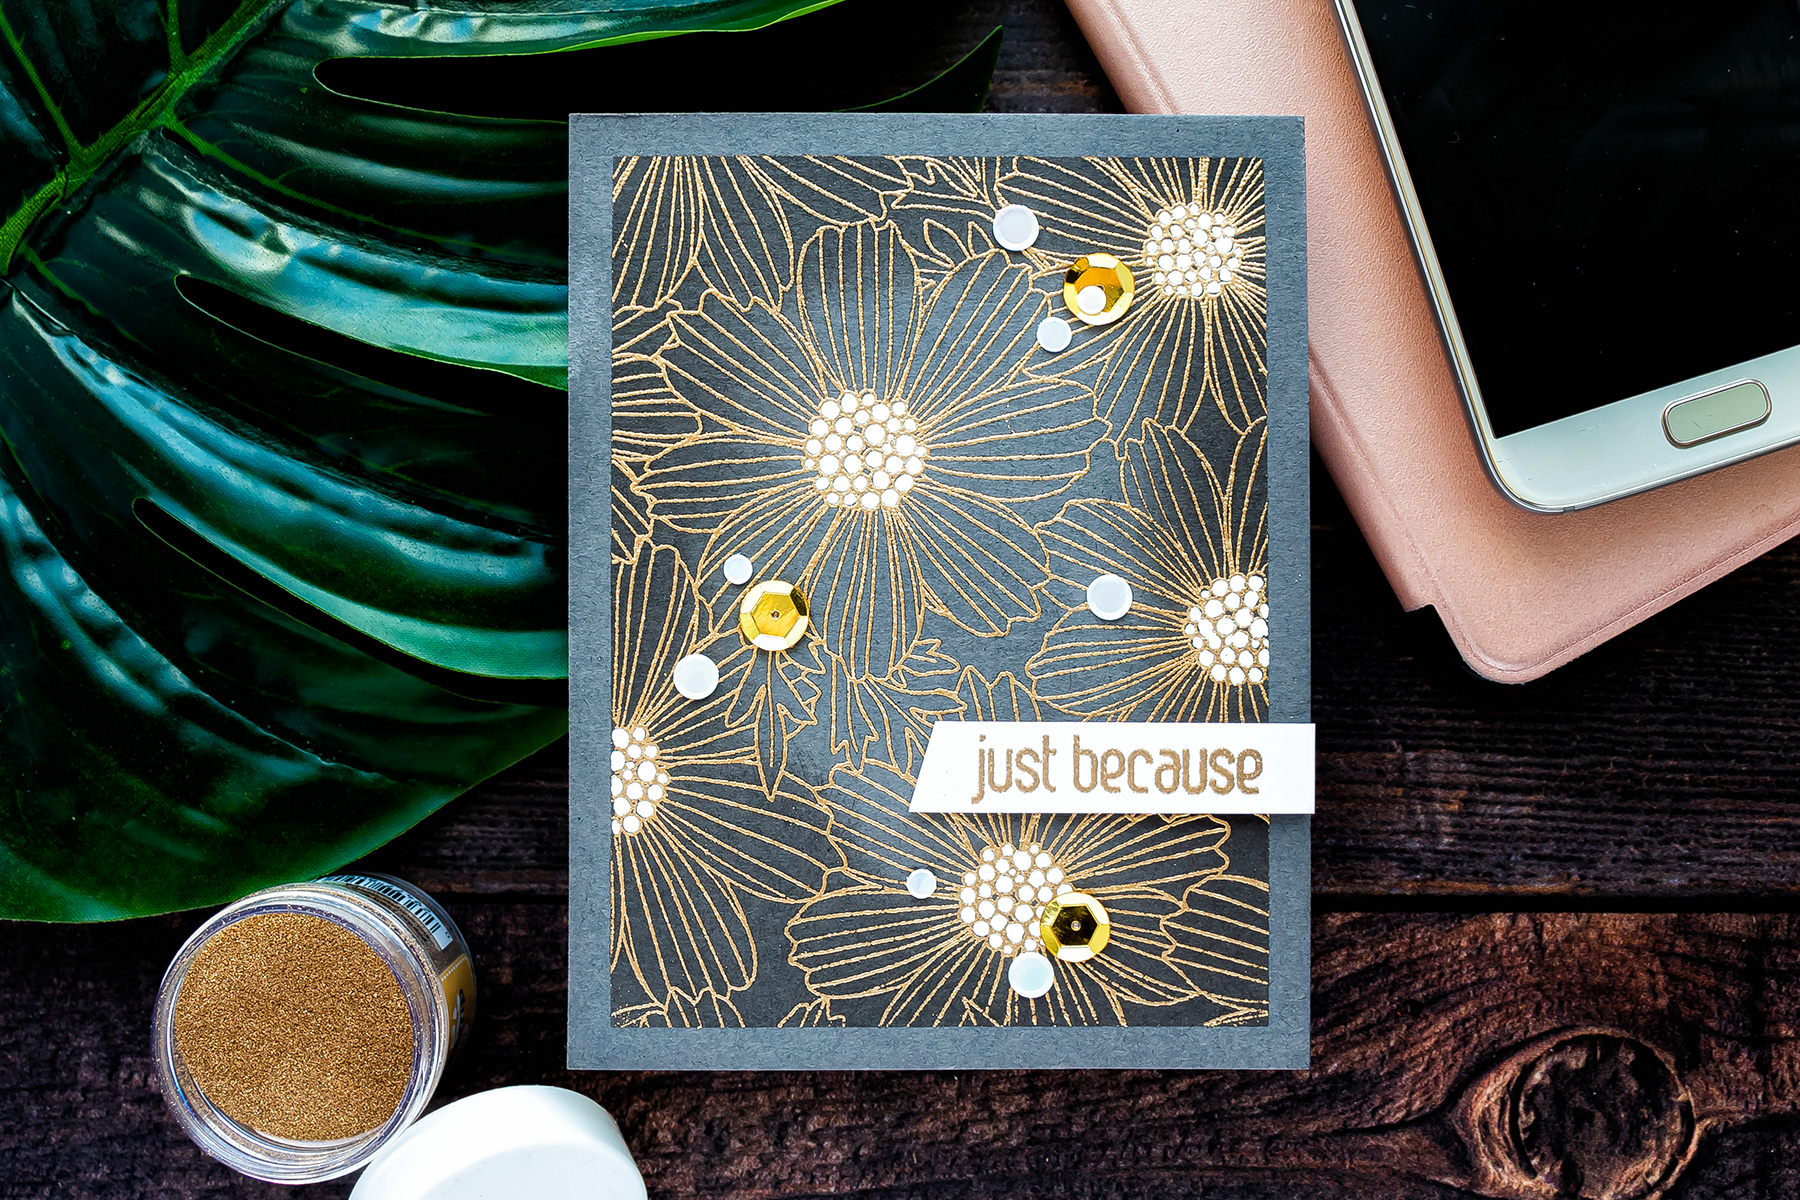
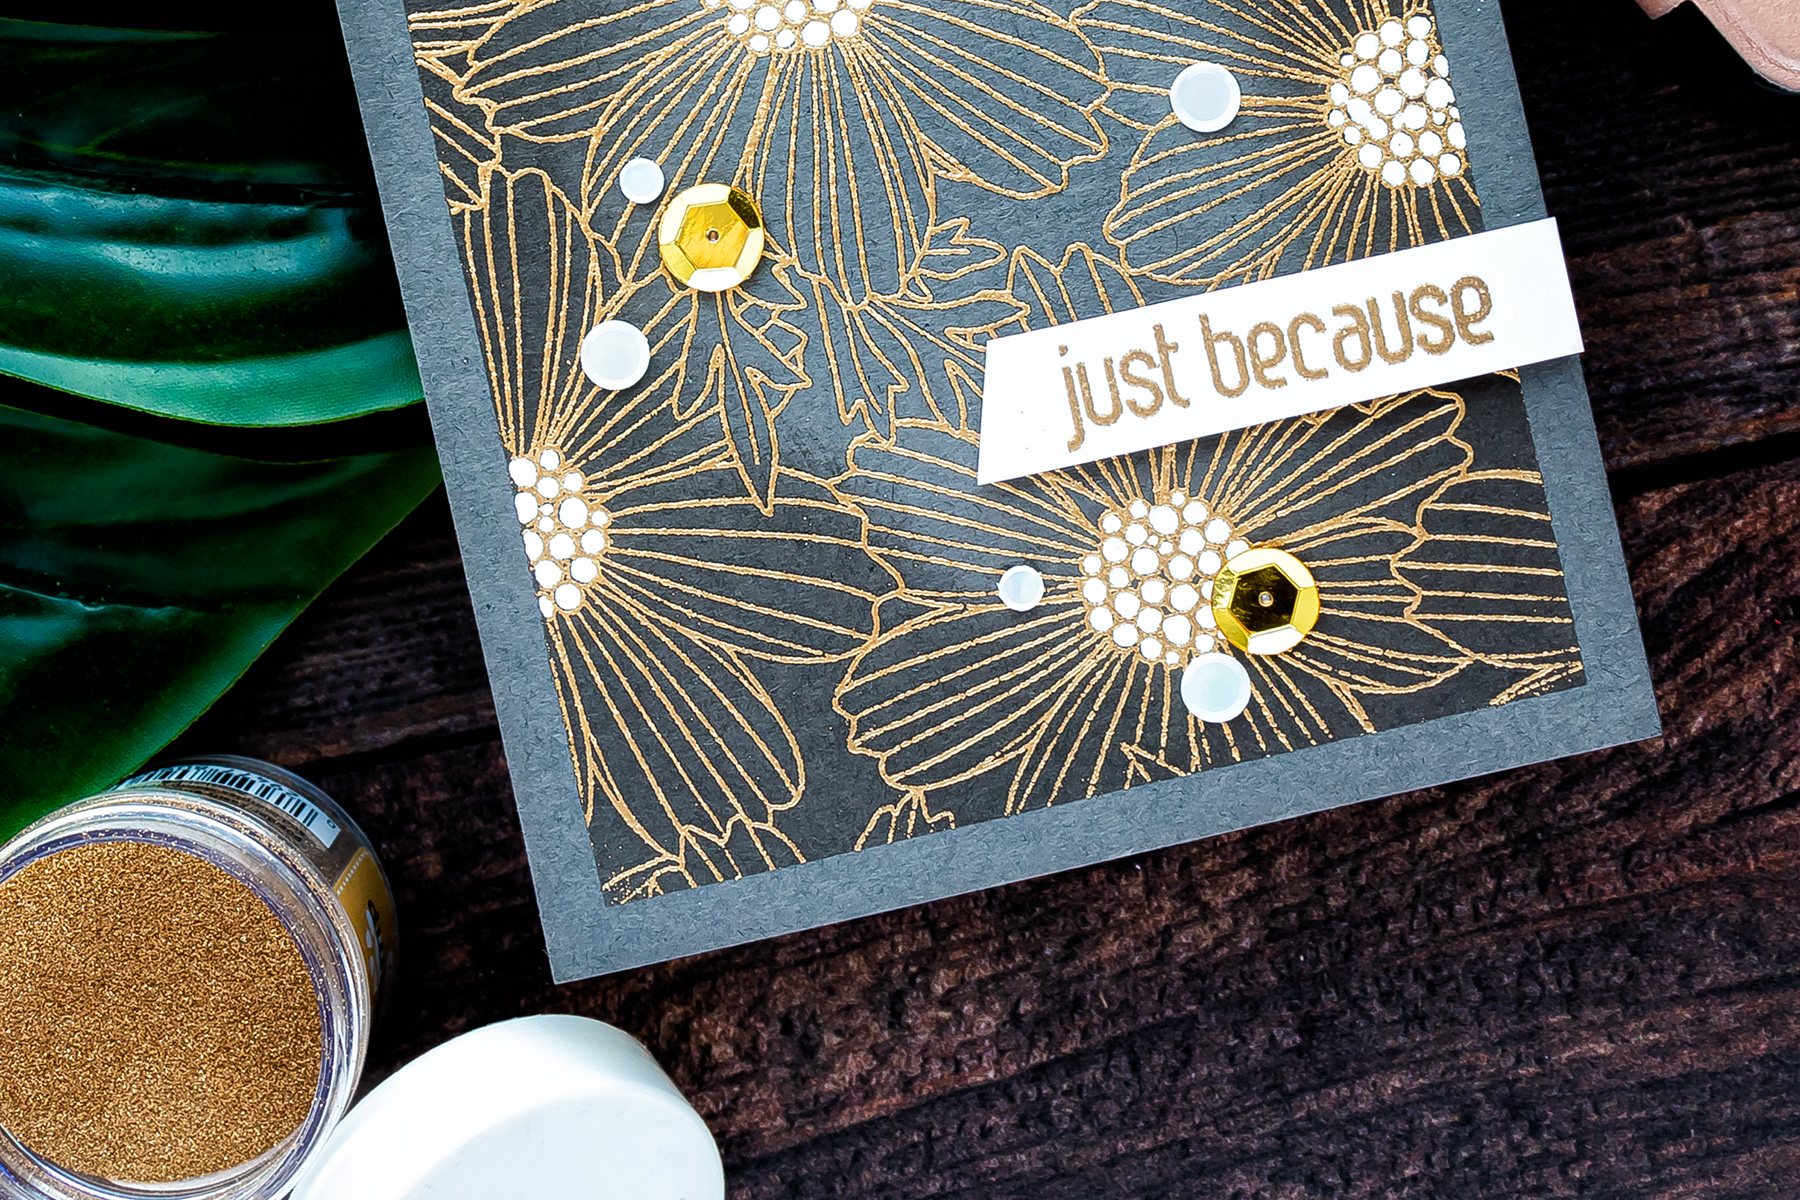
I started with a piece of cardstock, Slate, cut to 4 1/4 x 5 1/2″. Next, I masked 1/4” off on each side using low tack tape and placed it inside my MISTI tool. The tape actually does double duty here – it not only does it mask the edges but also holds the paper in place inside the MISTI. I heat embossed a Cosmos Blooms background, it’s a new 6×6 cling stamp from Simon. It is a beautiful one for coloring, you have nice large flowers, but it’s also a great one to do these simple heat embossed cards. I am all for simple and quick so this background is simply perfect for the idea I have in mind.
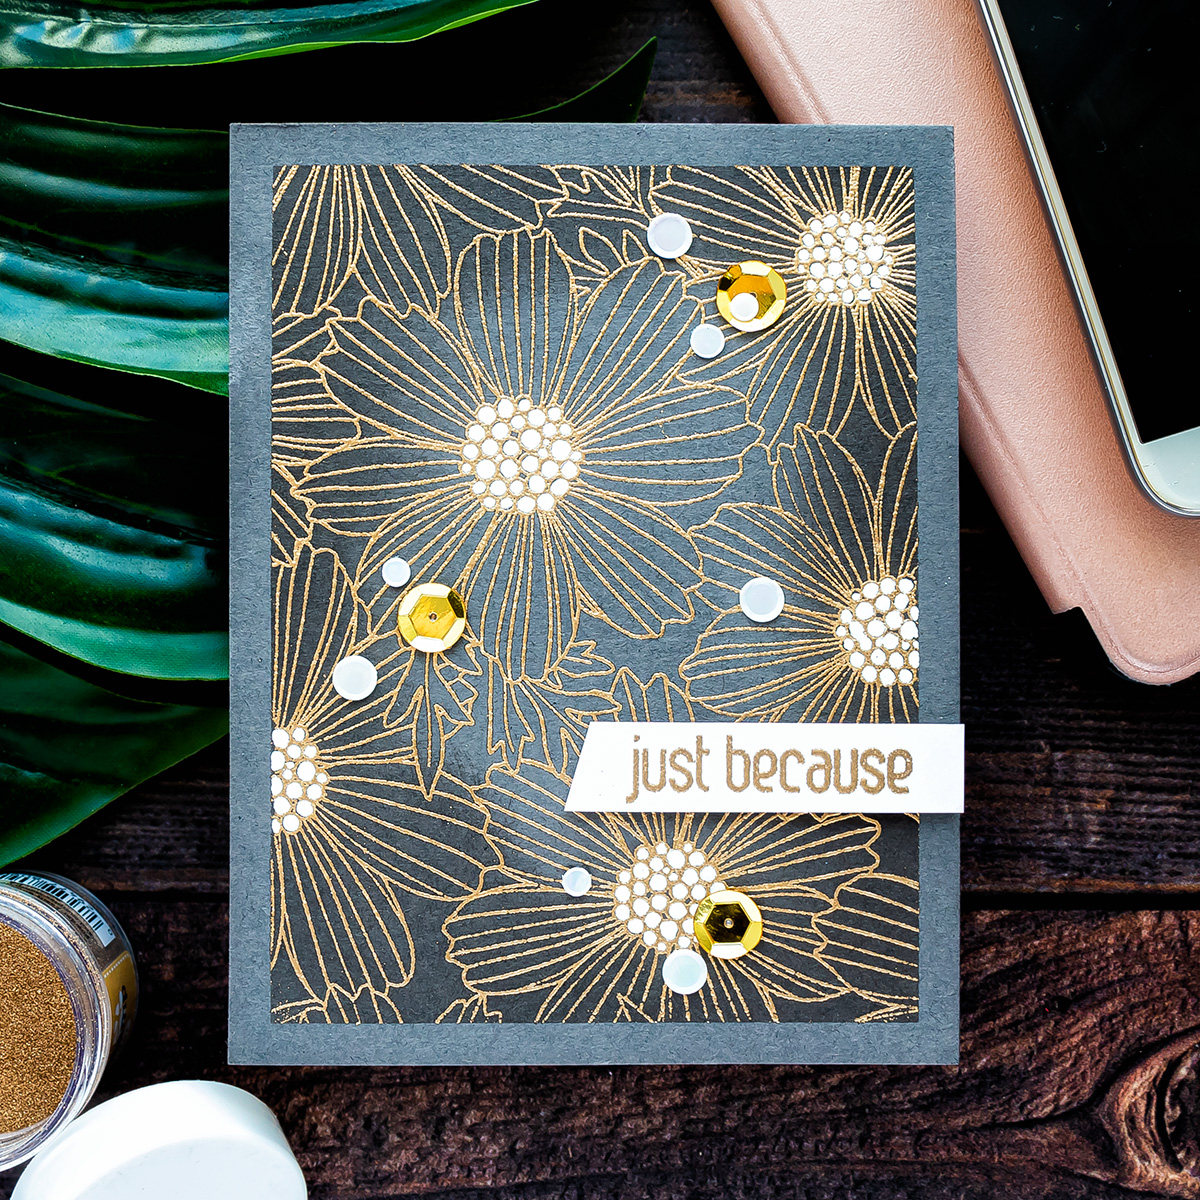
I used Antique Gold embossing powder here. Next, with the masking tape still in place, I ink blended the edges with Sparrow ink. This helped the embossing powder pop even more and it also helped to frame the design. Next, I peeled the tape and adhered this panel onto the A2 white side folding card base.
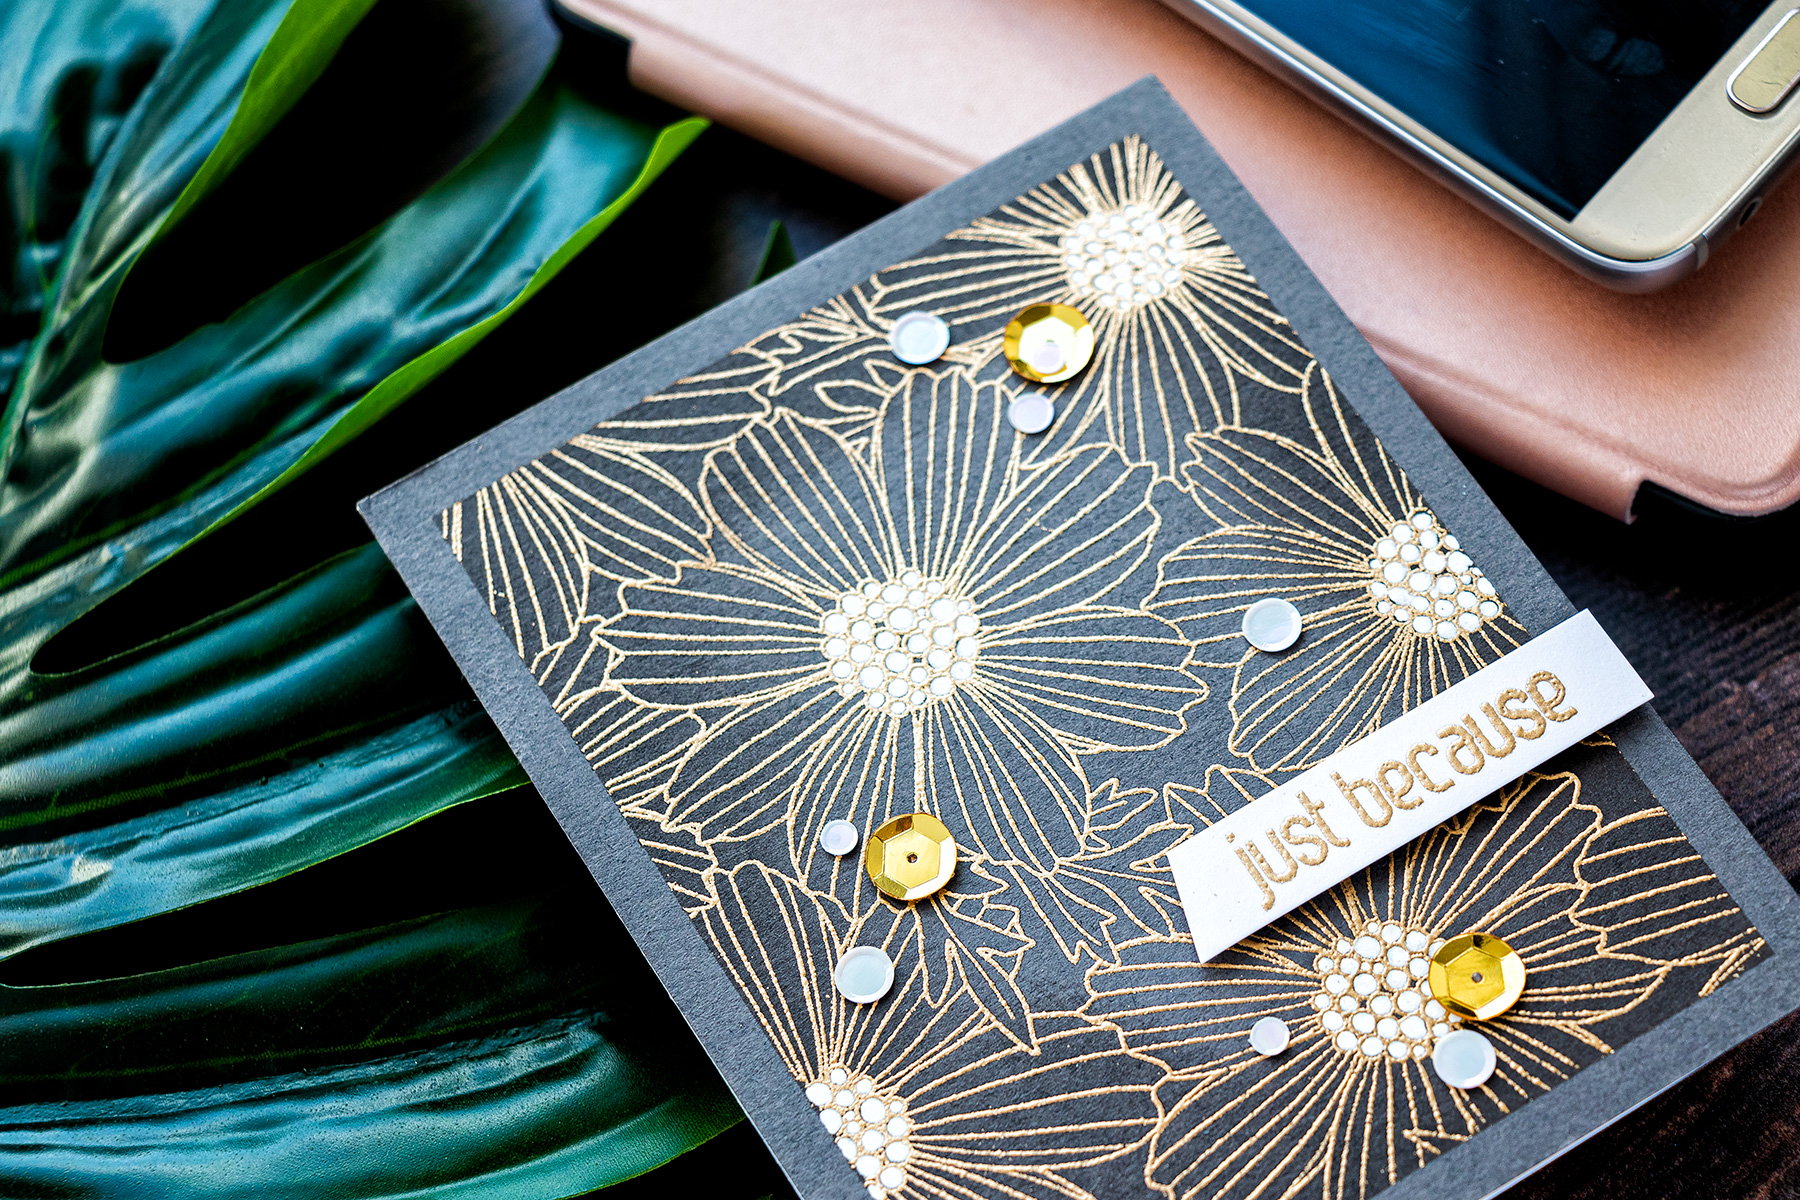
To create a sentiment I heat embossed “Just Because” from Simon’s new Greetings Mix 1 set in same Antique Gold embossing powder, but on white cardstock this time. Finally, I am used a white Sakura pen to color the flower centers white. I debated doing this, I am always afraid to mess up my cards like this, but I figured why not give it a try. I colored one of the flower centers, I liked it and so I colored the rest. I also used sequins to decorate this card – a few from the Raindrops set and a couple from the Gala set.
SUPPLIES
I’m listing the products I used below. Click on the link to go directly to the product. Where available I use compensated affiliate links which means if you make a purchase I receive a small commission at no extra cost to you. Thank you so much for your support!
 Simon Says Clear Stamps Greetings Mix 1 Shop at: SSS |
 Misti Stamping Tool Shop at: SSS |
 Neenah 110 Lb Solar White Cardstock Shop at: SSS |
 Simon Says Stamp Antique Gold Embossing Powder Shop at: SSS |
 Simon Says Stamp Slate Gray Cardstock Shop at: SSS |
 Simon Says Stamp Embossing Ink Pad Shop at: SSS |
 Hero Arts Heat Embossing Gun Shop at: SSS |
 EK Success Powder Tool Applicator Shop at: SSS |
 Scrapbook Adhesives Black Foam Tape Shop at: SSS |
 Tonic Deluxe Adhesive Nuvo Glue Shop at: SSS |
 Crystal Ninja Crystal Katana Pick Up Tool Shop at: SSS |
 Simon Says Stamp Sequins Gala Shop at: SSS |
 Simon Says Cling Stamp Cosmos Bloom Background Shop at: SSS |
 Simon Says Stamp Sequins Raindrops Shop at: SSS |

Oh the coloured centers look so good. LOVE this card, thanks for the inspiration!
Yana, I saw this on your You Tube Channel & over on SSS. IT IS GORGEOUS! SOOO SOPHISTICATED!! TOTALLY LOVE IT!!! ;)<3
Yana – this card is stunning. I would never have thought of doing this, but you can be sure I will now try something like it on my own! Thanks for the inspiration.
Love this card!
I’m just wondering, do you have to heat emboss the design and then blend ink around the border, or can you blend with ink and then heat emboss? It seems the latter would be easier, but perhaps you need to leave a while for the ink to dry. I’m relatively new to heat embossing, so I’m not sure if it’s possible. Feedback would be much appreciated!
Suzy x
This is a beautiful card with lovely heat embossing! 🙂
Simple yet elegant. This would be a great idea for mass producing some cards. Thanks, Yana. Hope you’re well.
I just love how you created this card! It’s gorgeous! 🙂