


Have you ever packed away your Christmas stamps and later thought, “Why did I do that so quickly?”. That’s exactly how this project came to life.
While tidying up my craft room (or attempting to 😅), I came across a holiday floral stamp set that felt far too beautiful to be used only once a year. Instead of saving it for next Christmas, I challenged myself to stretch a holiday stamp into a non-holiday design — and the result was a pair of elegant birthday cards I absolutely love.
Choosing the Right Stamp for Year-Round Card Making
The key to stretching seasonal supplies is design, not theme. Florals, in particular, are incredibly versatile.
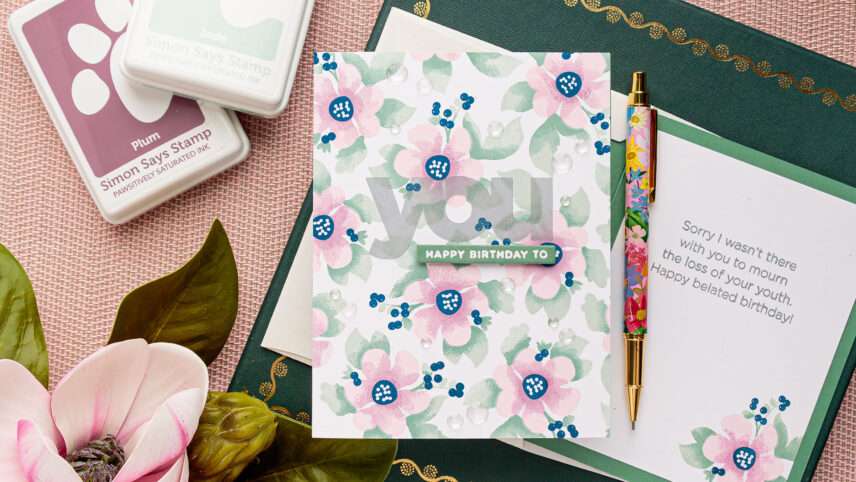
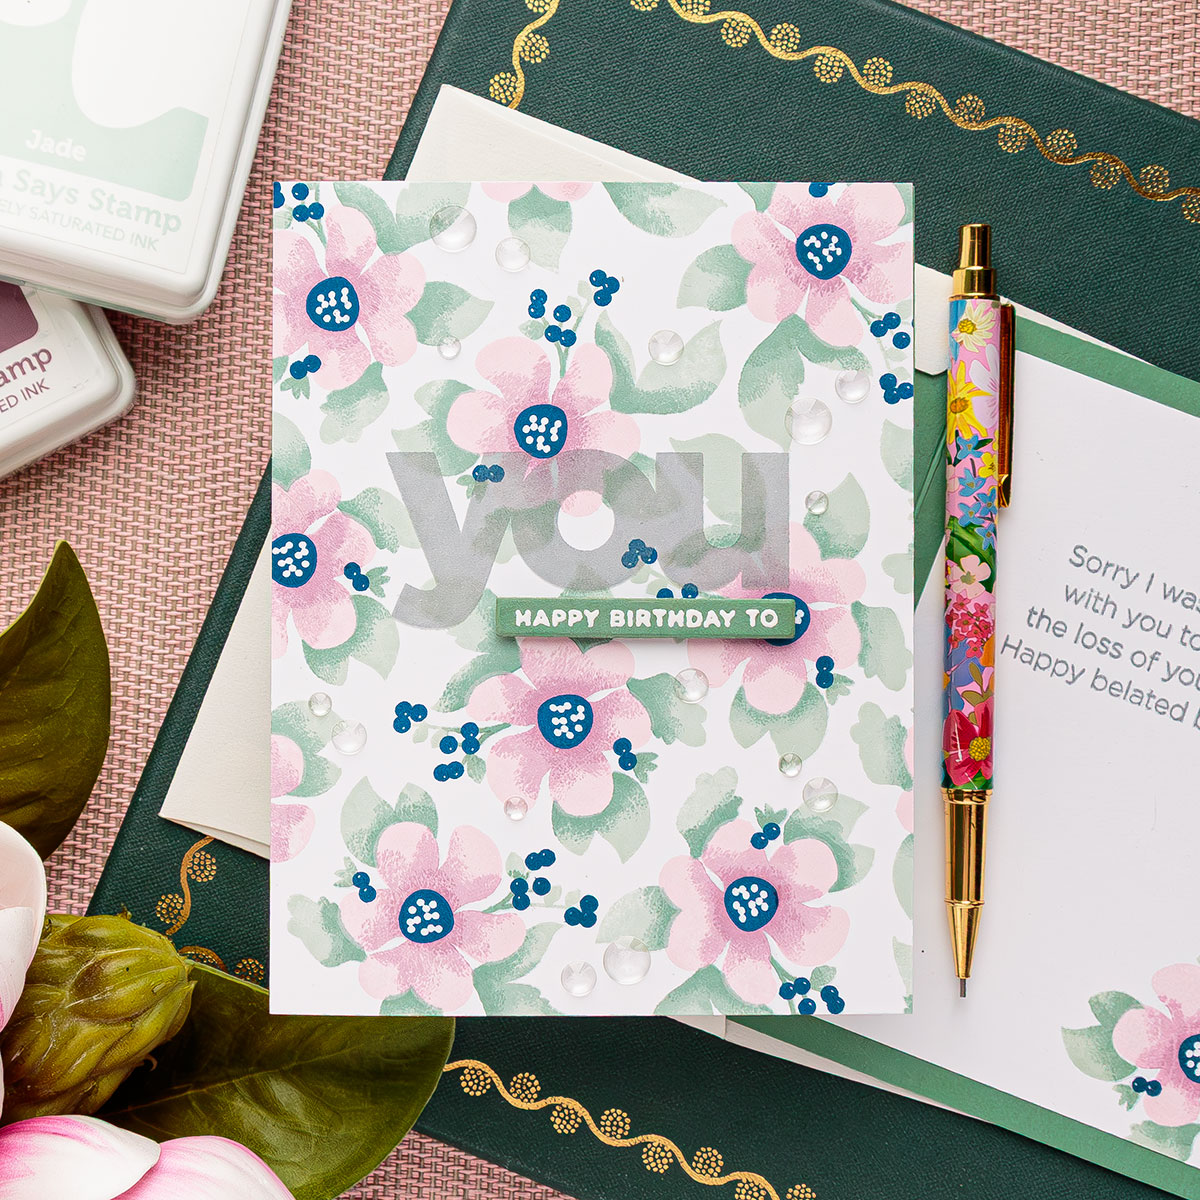
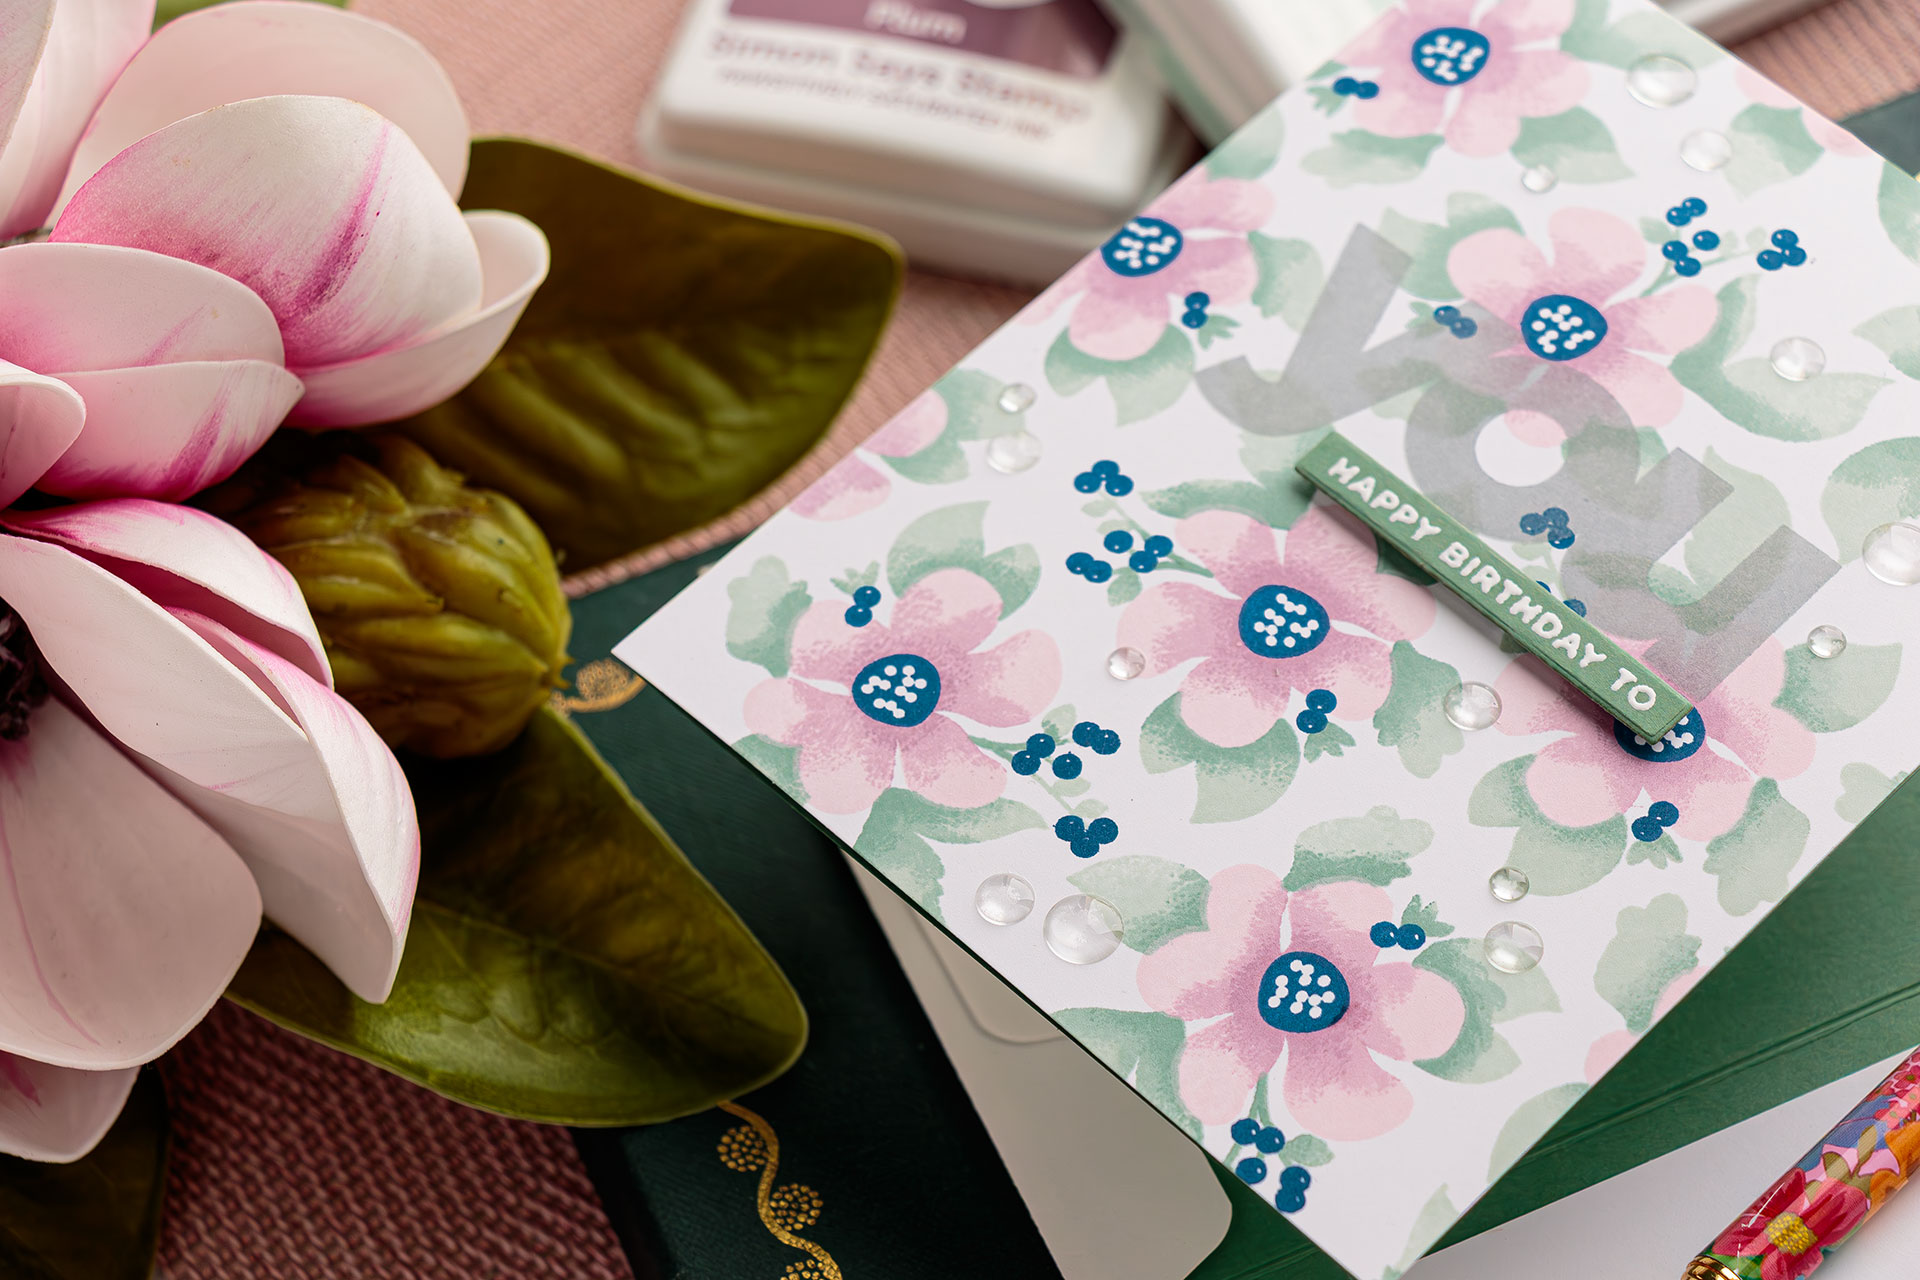
For today’s cards, I used the Warmth and Wonder floral stamp set from Simon Says Stamp. Although it’s often associated with holiday projects, the layered bloom design feels timeless and organic. To me, it resembles an anemone — but really, it can be whatever flower you want it to be.
By changing the color palette, this stamp instantly moves from holiday to everyday.
VIDEO TUTORIAL
Watch the video below or on my YouTube channel.
A Soft, Elegant Color Palette (That’s Not Holiday)
To remove any seasonal feel, I skipped traditional reds and greens and opted for:
-
Muted greens for the leaves
-
Soft pinks for the petals
-
A deep navy blue for the flower centers and berries
This combination feels calm, elegant, and perfect for birthday cards — but it would also work beautifully for thank-you cards, sympathy cards, or just-because greetings.

Background Stamping That Looks Like Patterned Paper
Instead of stamping a single focal image, I created a continuous floral background.
Here’s how:
-
I stamped repeatedly on a 5.5″ × 8.5″ panel of white cardstock
-
I allowed images to run off the edges to create a seamless look
-
Once finished, I trimmed the panel in half to make two A2 card fronts
The result looks like custom patterned paper — but it’s completely handmade. This is one of my favorite ways to maximize both time and supplies.
Tip: A stamping platform (like a MISTI) is essential for this technique, since you’re layering ink and need precise placement.
Adding Depth Without Coloring
All of the dimension on these florals was created at the stamping stage.
Using small blending brushes, I applied darker ink directly onto the stamps before pressing them onto paper. This allowed me to:
-
Add shadows where leaves fold
-
Deepen the color toward the center of the flowers
-
Create a shaded, dimensional look without coloring afterward
It’s simple, relaxing, and incredibly effective.
Bold Sentiments on a Busy Background
Once the backgrounds were complete, it was time for sentiments.
I used a large “YOU” stamp to anchor the design, stamping it directly onto the floral background in soft gray ink. I’ll admit — this part felt a little risky at first! But keeping the color subtle helped the sentiment stand out without overpowering the pattern.
To finish the greeting, I heat-embossed a birthday sentiment in white on sage cardstock and added it as a strip across the card front
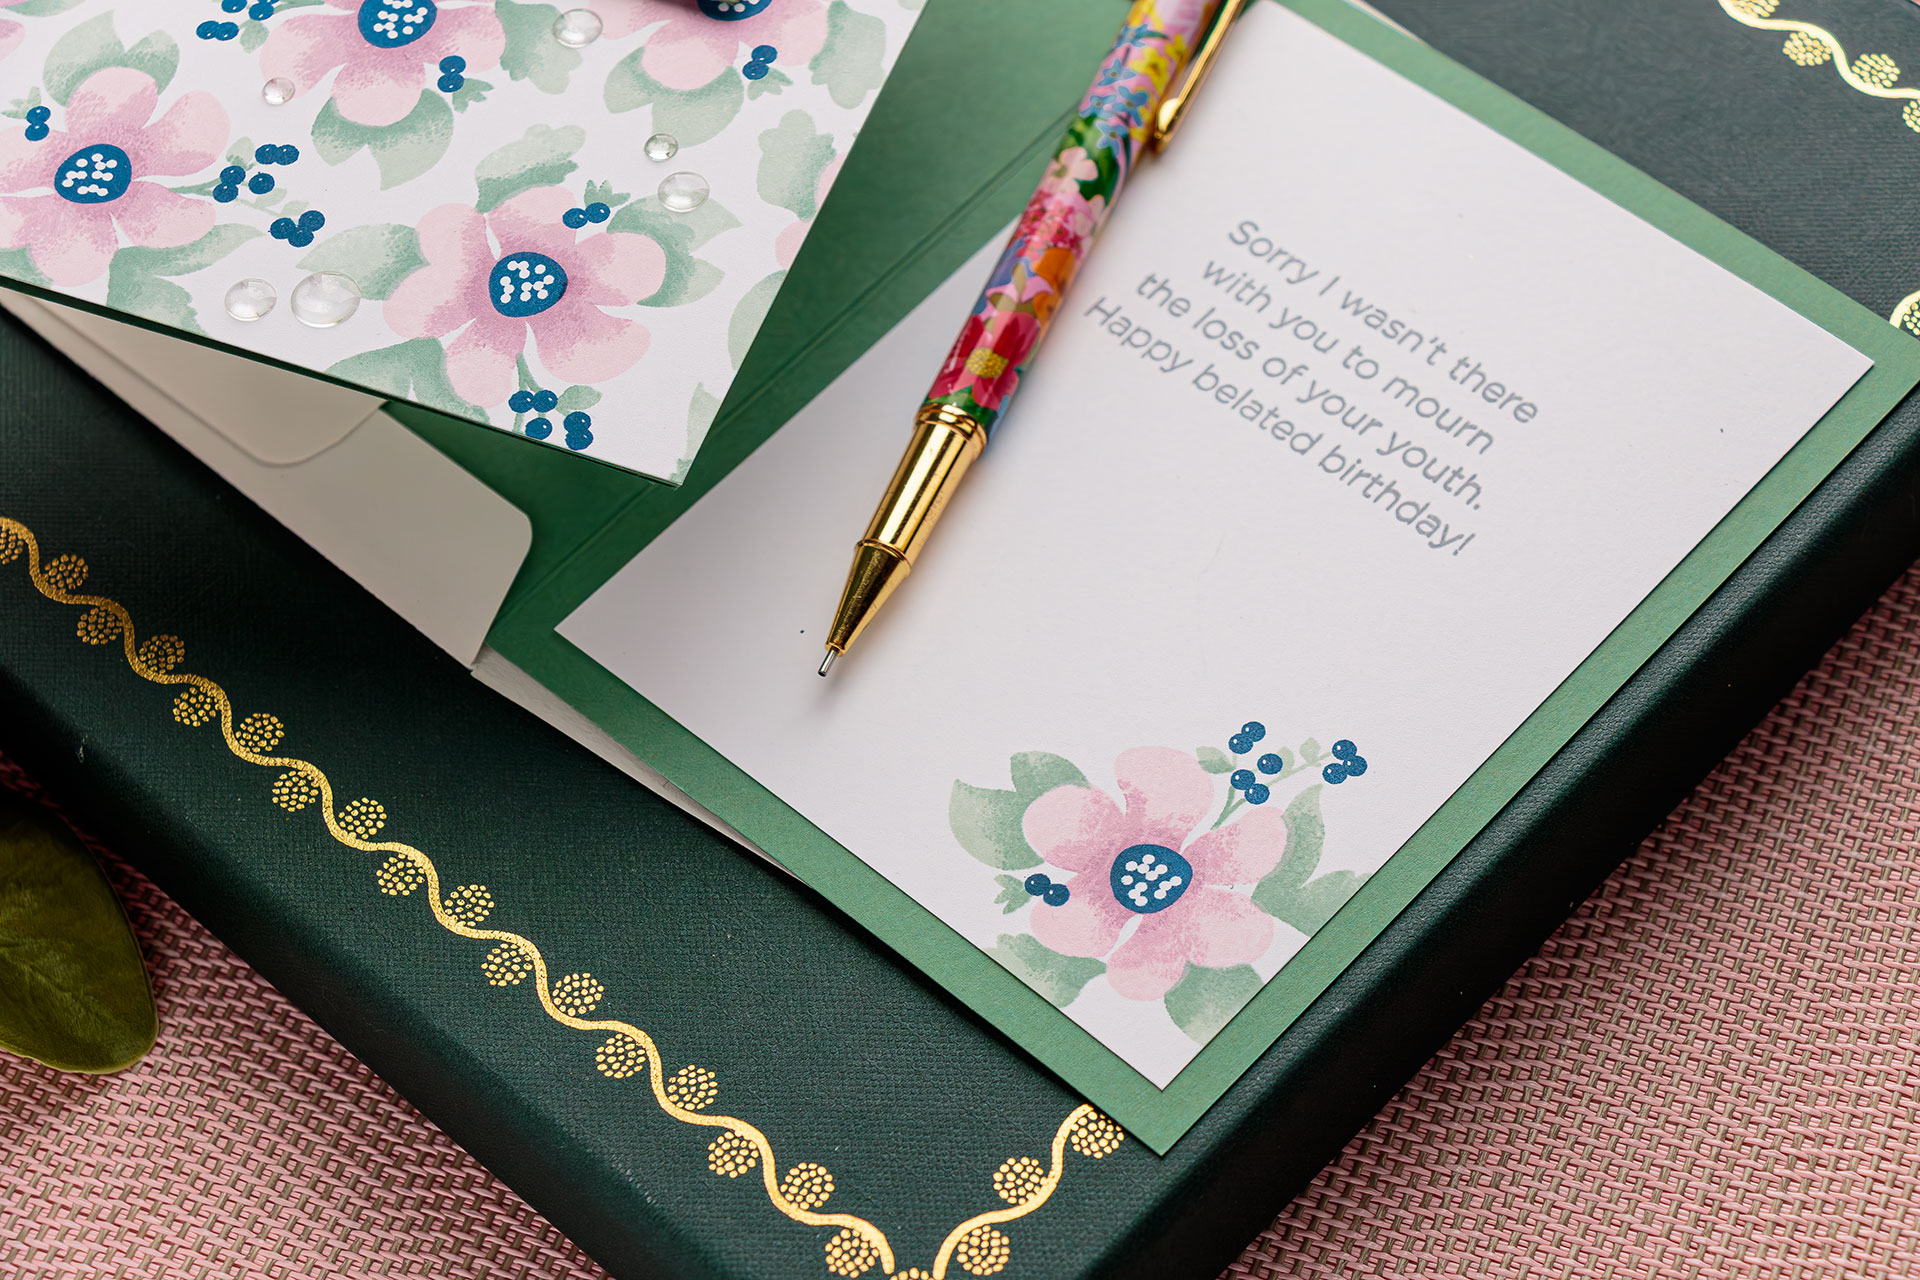
Finishing the Inside of the Cards
I wanted these cards to feel special from start to finish, so I didn’t stop at the front.
Inside each card, I added:
-
A stamped birthday greeting
-
A small floral image to echo the front design
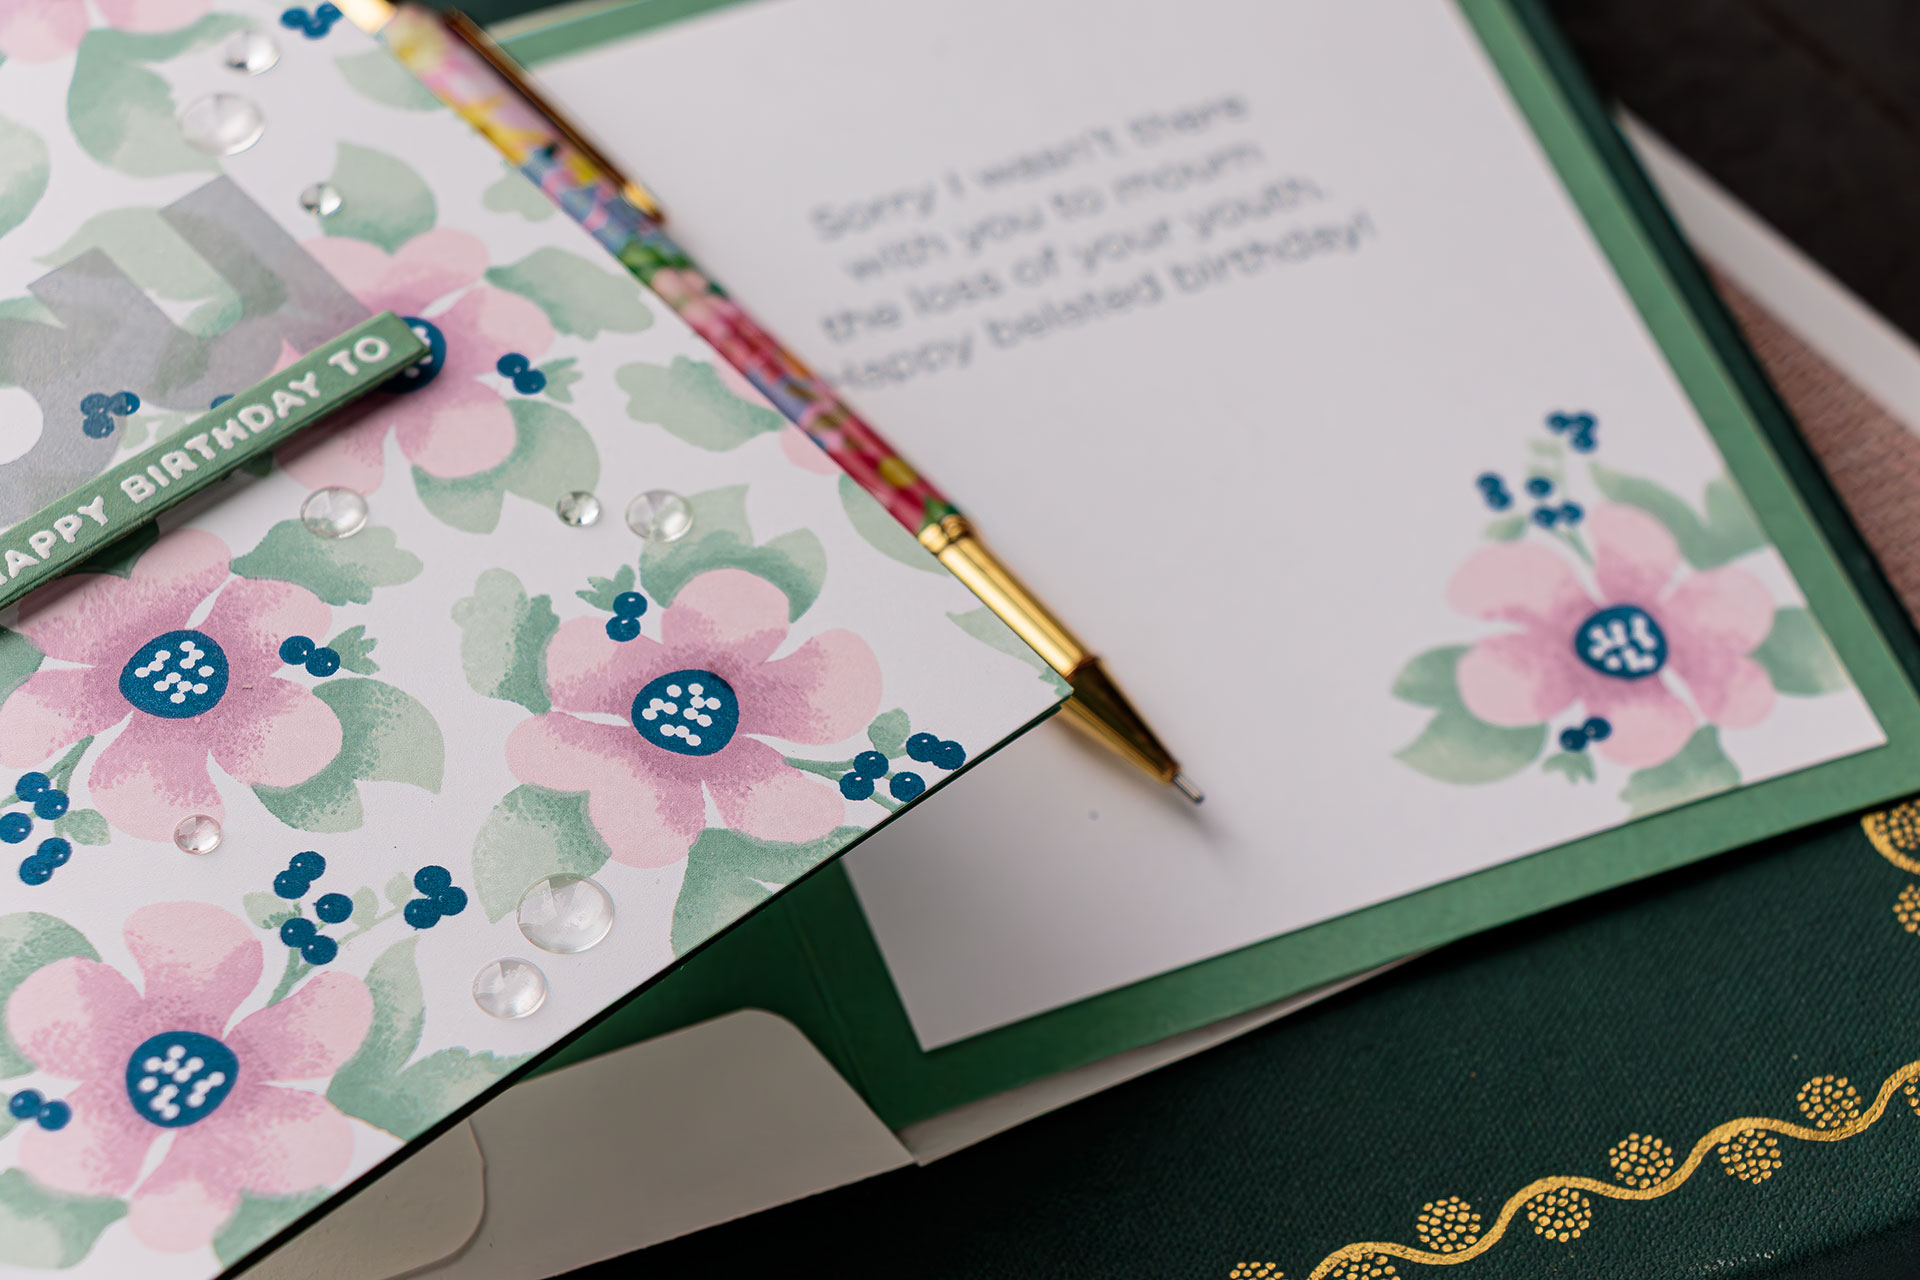
It’s a small detail, but it really pulls everything together.
Final Touches
To keep the focus on the florals, I finished the cards with:
-
Clear enamel dots for subtle shine
-
Sage-colored A2 side-folding card bases to complement the design
Simple, clean, and elegant.
Don’t Pack Away Your Holiday Stamps Too Soon
This project is a great reminder that holiday stamps don’t have an expiration date. With a different color palette, a new layout, or a fresh technique, many seasonal designs can become everyday favorites.
If you’re looking to build your birthday card stash — or simply want to get more mileage out of the supplies you already own — I highly recommend giving this idea a try.
Thanks so much for stopping by and crafting along with me. 💛
I’ll see you again soon.
SUPPLIES
I’m listing the products I used below. Click on the link to go directly to the product. Where available, I use compensated affiliate links, which means if you make a purchase, I receive a small commission at no extra cost to you. Thank you so much for your support!
 Simon Says Stamps and Dies Warmth and Wonder Shop at: SSS |
 Simon Says Clear Stamps Warmth and Wonder Shop at: SSS |
 CZ Design Clear Stamps Inside Greetings Birthday Shop at: SSS |
 CZ Design Clear Stamps You Shop at: SSS |
 MISTI Stamping Tool Shop at: SSS |
 Simon Says Stamp Cardstock 100lb Sage Shop at: SSS |
 Hammermill White 100 Lb Smooth Premium Color Copy Pack 25 Sheets Shop at: SSS |
 Simon Says Stamp Pawsitively Saturated Ink Pad Earl Shop at: SSS |
 Simon Says Stamp Pawsitively Saturated Ink Pad Night Shop at: SSS |
 Simon Says Stamp Embossing Ink Pad Shop at: SSS |
 Altenew Crystal Clear Enamel Dots Shop at: SSS |
 Simon Says Stamp Sage A2 Side Fold Scored Cards 100# 10 Pack Shop at: SSS |
 Simon Says Stamp White Detail Embossing Powder Shop at: SSS |
 Simon Says Stamp Pawsitively Saturated Ink Trio 31 and Re-Inkers Shop at: SSS |
 Simon Says Stamp Pawsitively Saturated Ink Trio 34 and Re-Inkers Shop at: SSS |
 Simon Says Stamp Detail Round Blending Brushes Shop at: SSS |
 Wagner Precision Heat Tool Shop at: SSS |
 Simon Says Stamp 2 Dot Runner Refills Adhesive Shop at: SSS |
 Simon Says Stamp Brush Powder Tool Shop at: SSS |
 Simon Says Stamp 3D Foam Strips Shop at: SSS |
This is absolutely gorgeous
awww, thank you so much! I am so glad you like it!