

Hello, crafters. Welcome back for another Yippee For Yana video! In this video, I have simple tips for you to set the scene / create that scenic background for your cards with no specialty tools. I am a fan of using colored cardstock for my cards, I love how colored cardstock instantly adds that pop of color, and I love how bright and vivid it is. Of course, you can always use specialty tools to create the backgrounds, like background stamps, dies or even stencils, but I wanted to go back to basics today and show you how you can use just plain paper, and a little bit of tweaking to create fabulous scenic backgrounds for your cards.
Like this project? Pin it and save for later | Curious about my project photography? Click for details.
VIDEO TUTORIAL
Watch the video below or on my Youtube channel.
CARDS DETAILS
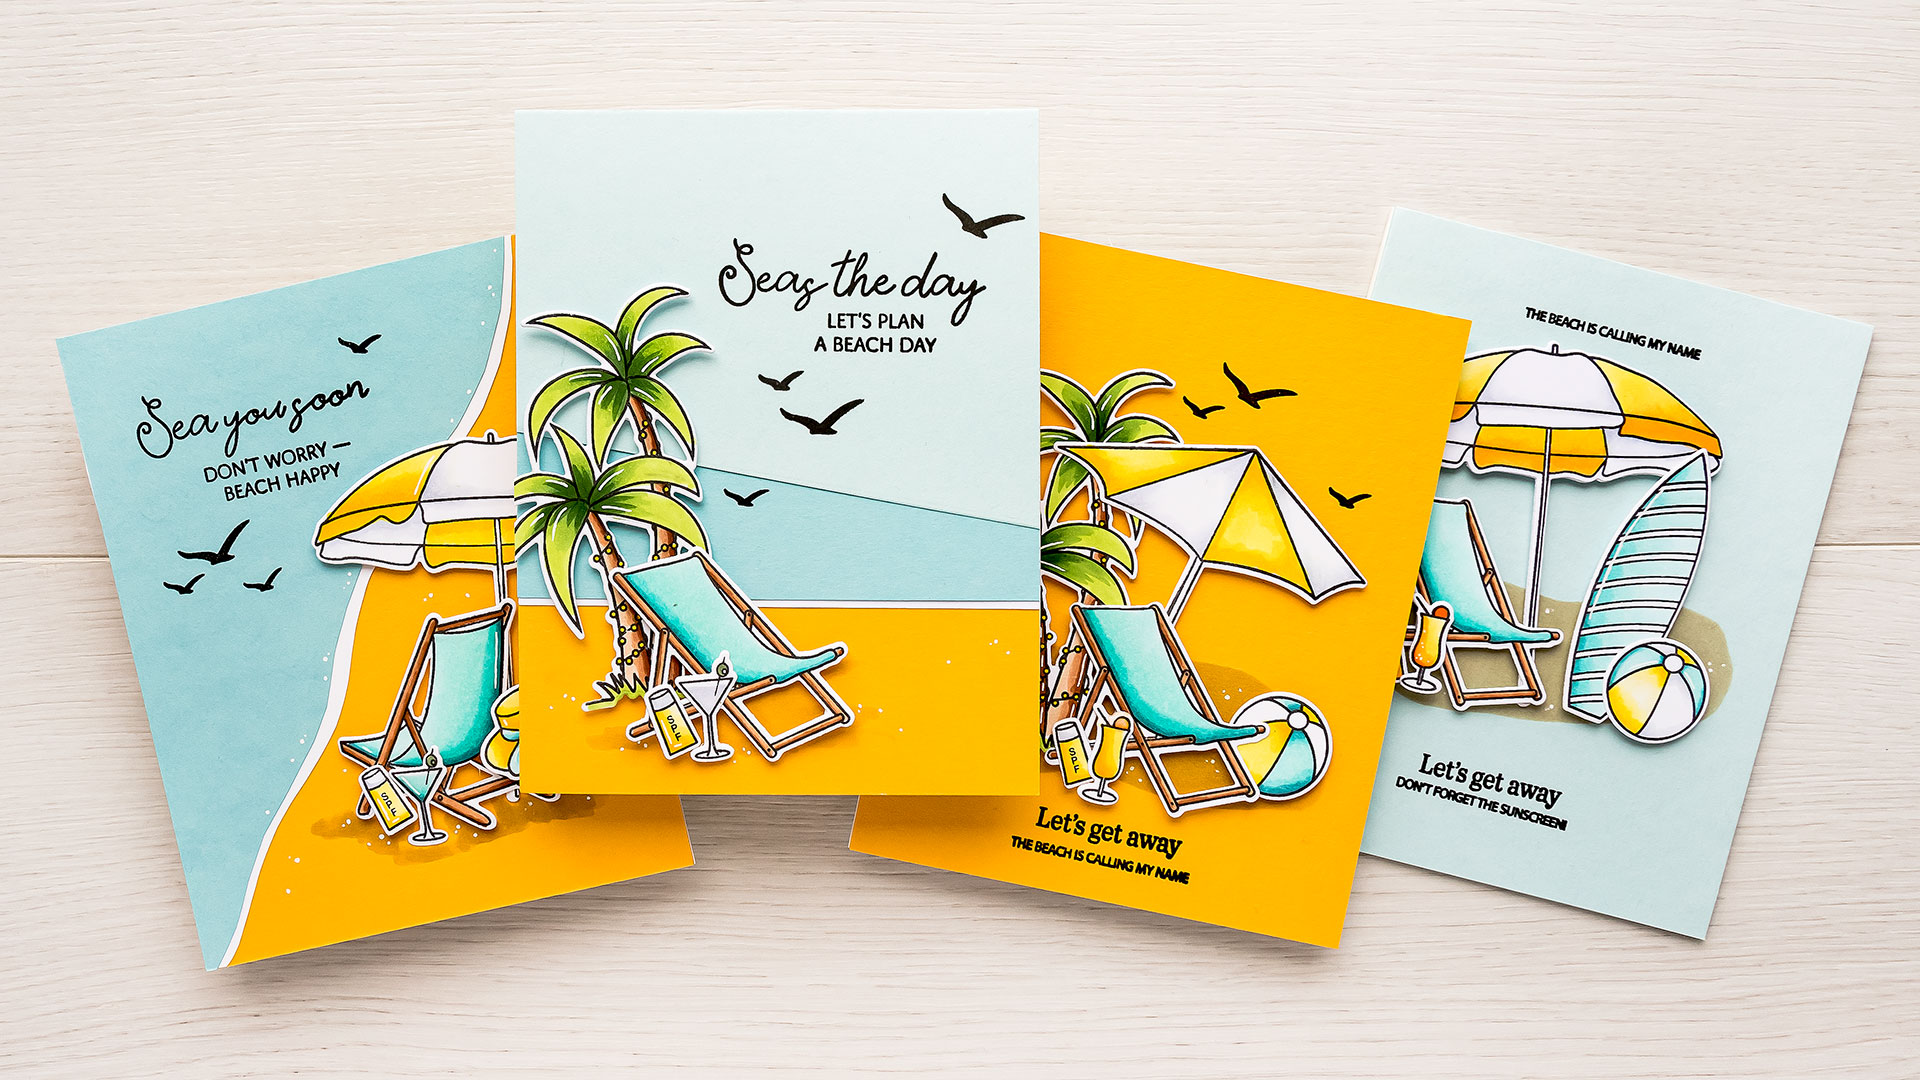
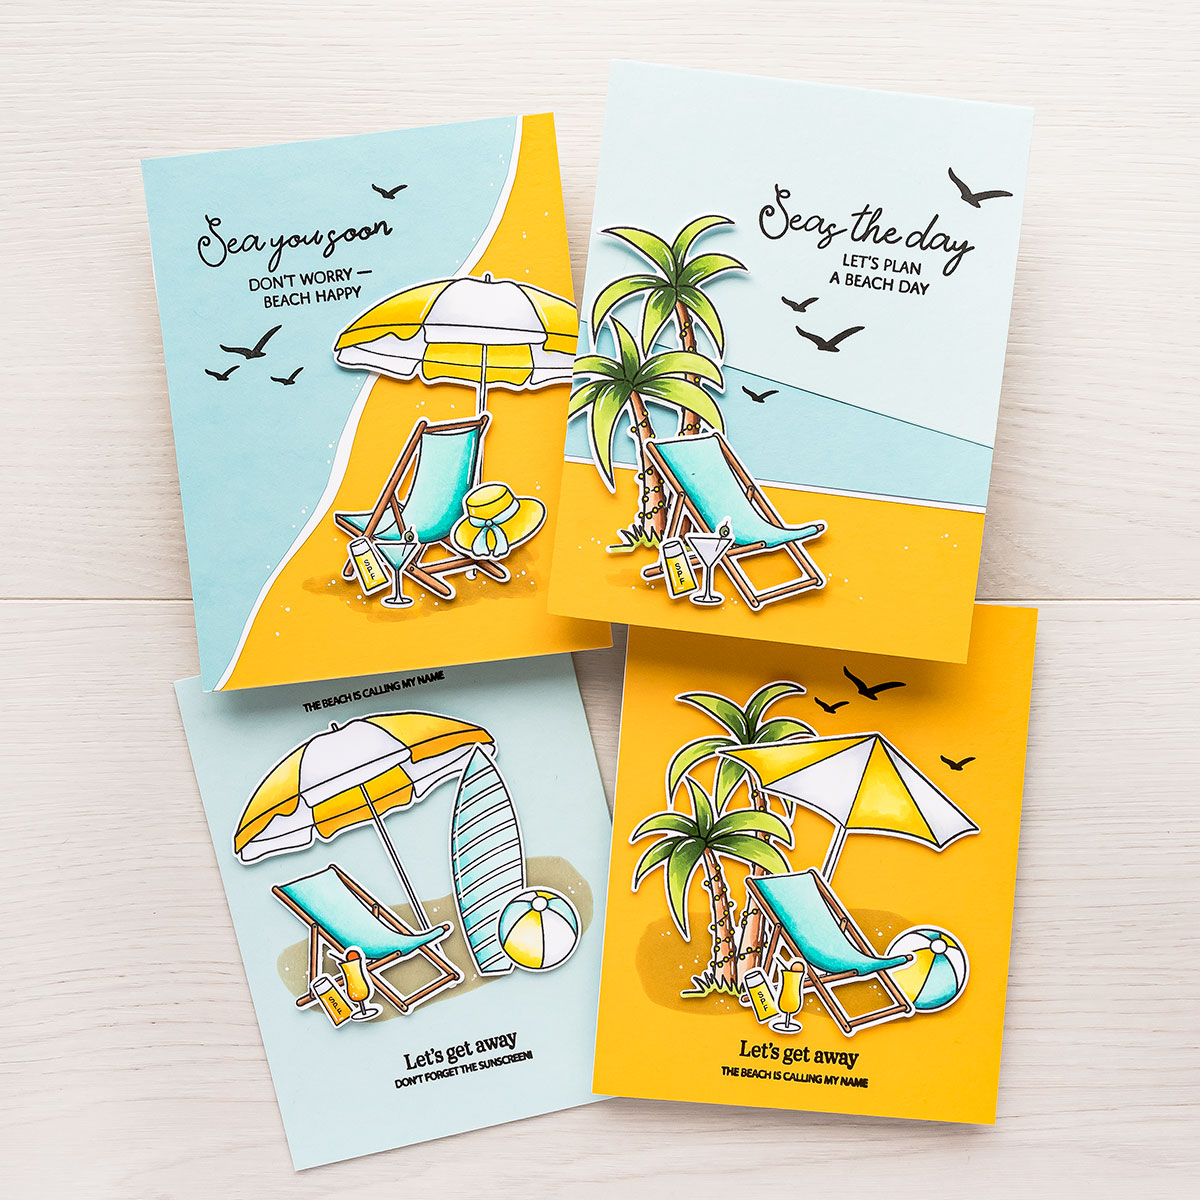
I’m making summer beach cards as an example, but this technique can be adapted to other occasion cards, all you need to do, is switch up the colors of cardstock.
I’m using 3 stamp sets from Simon for my cards to do all of my stamping: Let’s Get Away, Seas and Greetings, and Warm Christmas Wishes.

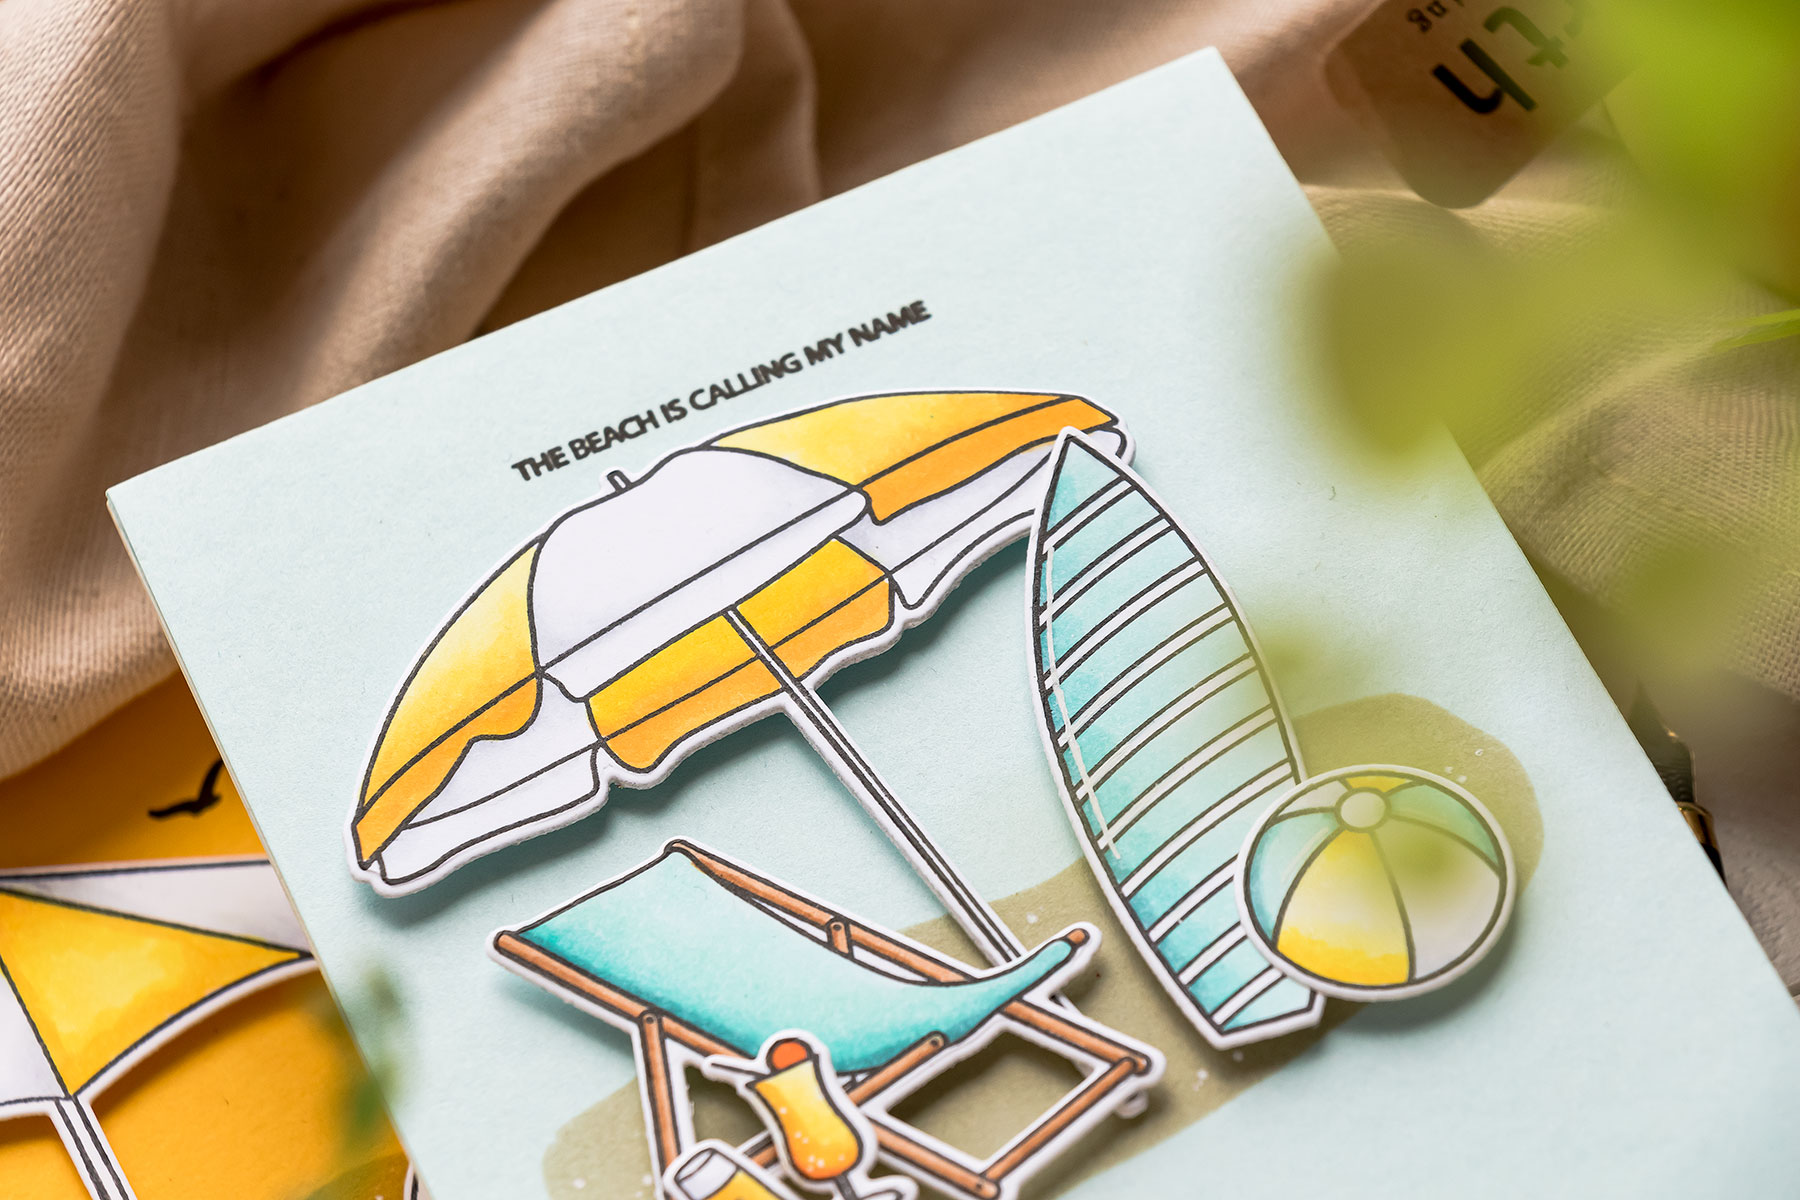
The color scheme I picked is yellow and teal. I used the same color markers to color all of the images: E31, E33, E37, BG11, BG13, BG18, C3, C1, Y19, Y08, Y13, Y11, YG03, YG17, YG67.
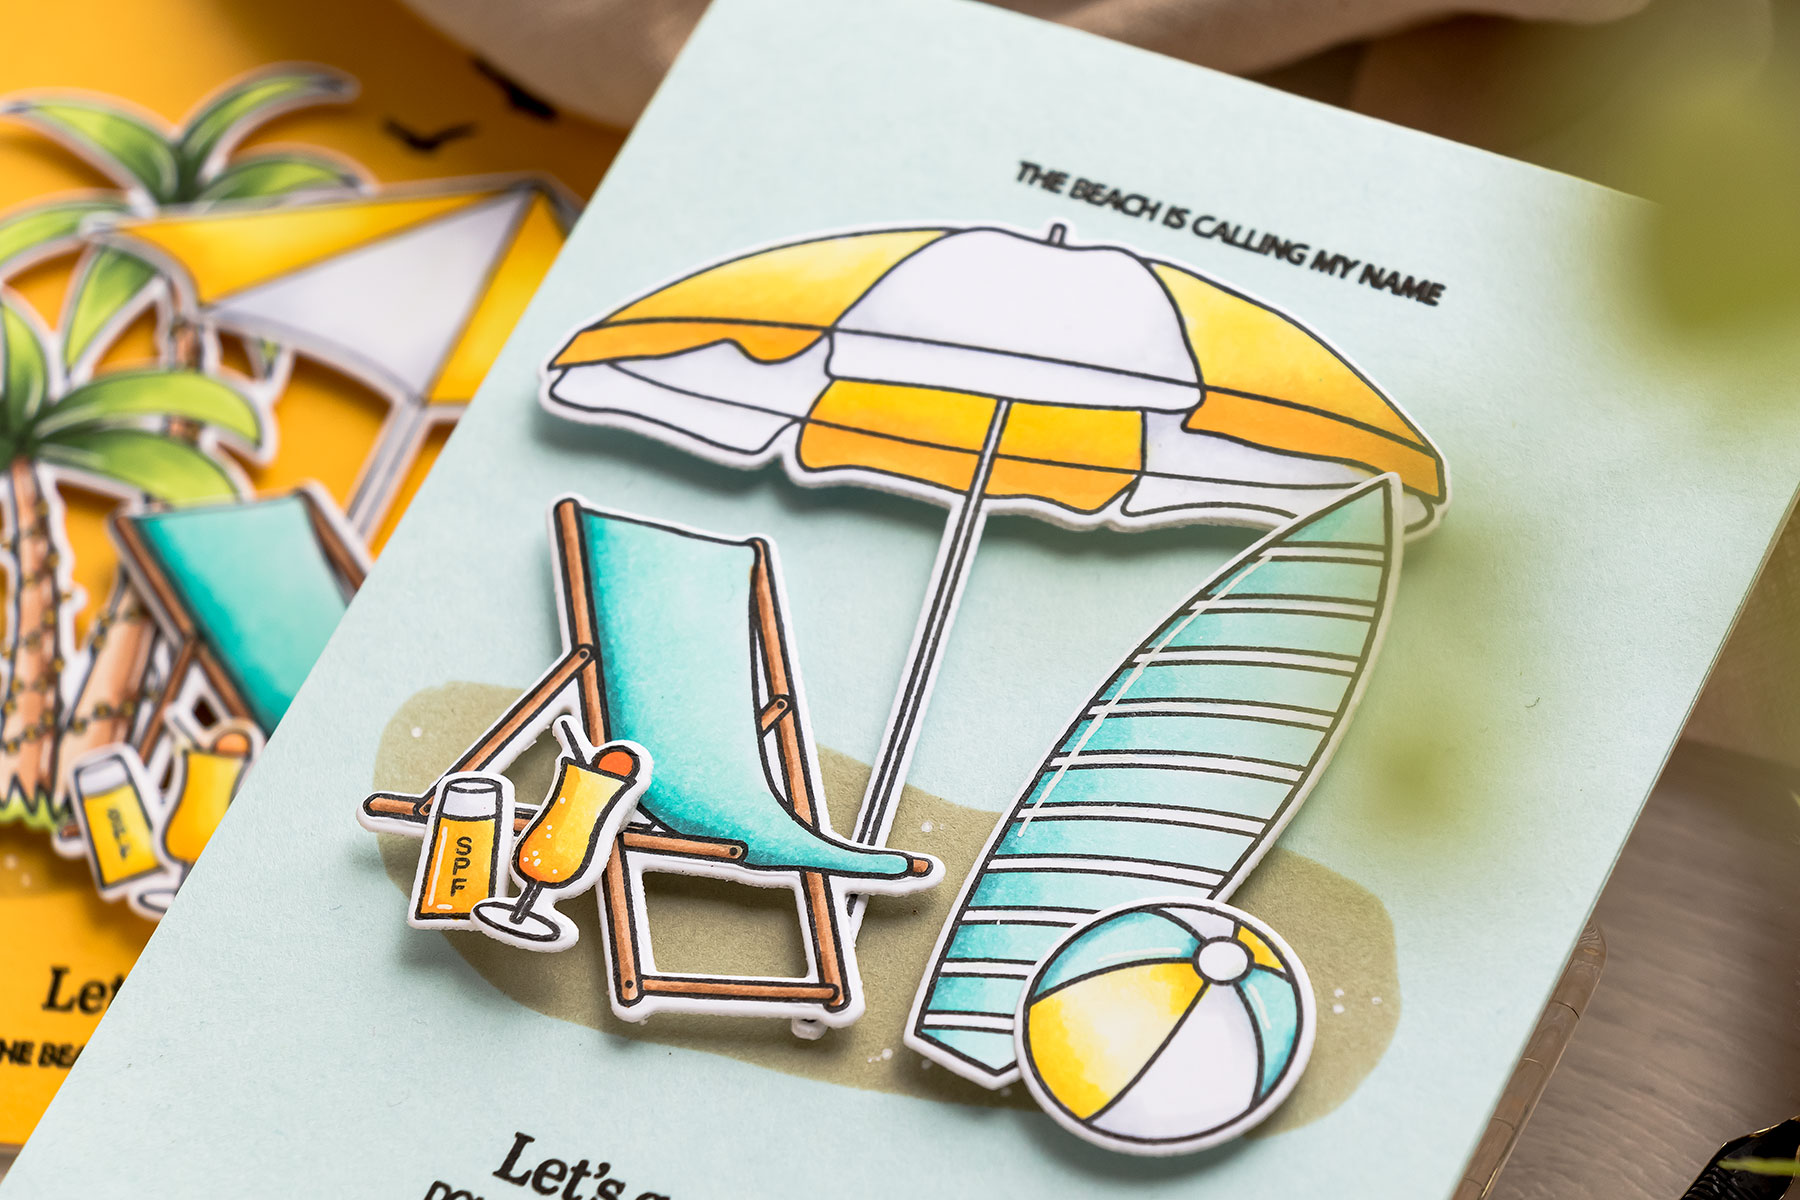
I used a solid color cardstock for the first 2 samples and to ground my scenes, I created a DIY stencil to ink blend a blob shape to mimic ground/shadow. I looked through my stencils and I didn’t have a shape that worked for me, so I made one instead. I used scrap paper and drew a blob using a pencil. Anyone can do this, you don’t need any skills for this, just draw a simple blob shape. It doesn’t have to be perfect, it doesn’t have to be symmetrical, it just has to fit on an A2 card.
Next, use scissors or a craft knife and cut the inner part out. Better to use a craft knife as you can start in the center and simply free-hand it, Again doesn’t have to be perfect, doesn’t even have to follow the pencil line exactly, you can go outside the line, you are just making a simple imperfect blob. And there we have it.
Next, treat this as a stencil, and position it on your background, you can take it to the light to see if the placement works for you and just tape it in place with low-tack tape. Grab your ink blending tool and ink and blend the ground or the shadow on your paper. I used the color Latte from Simon and a large ink blending brush to add the ground to my piece.
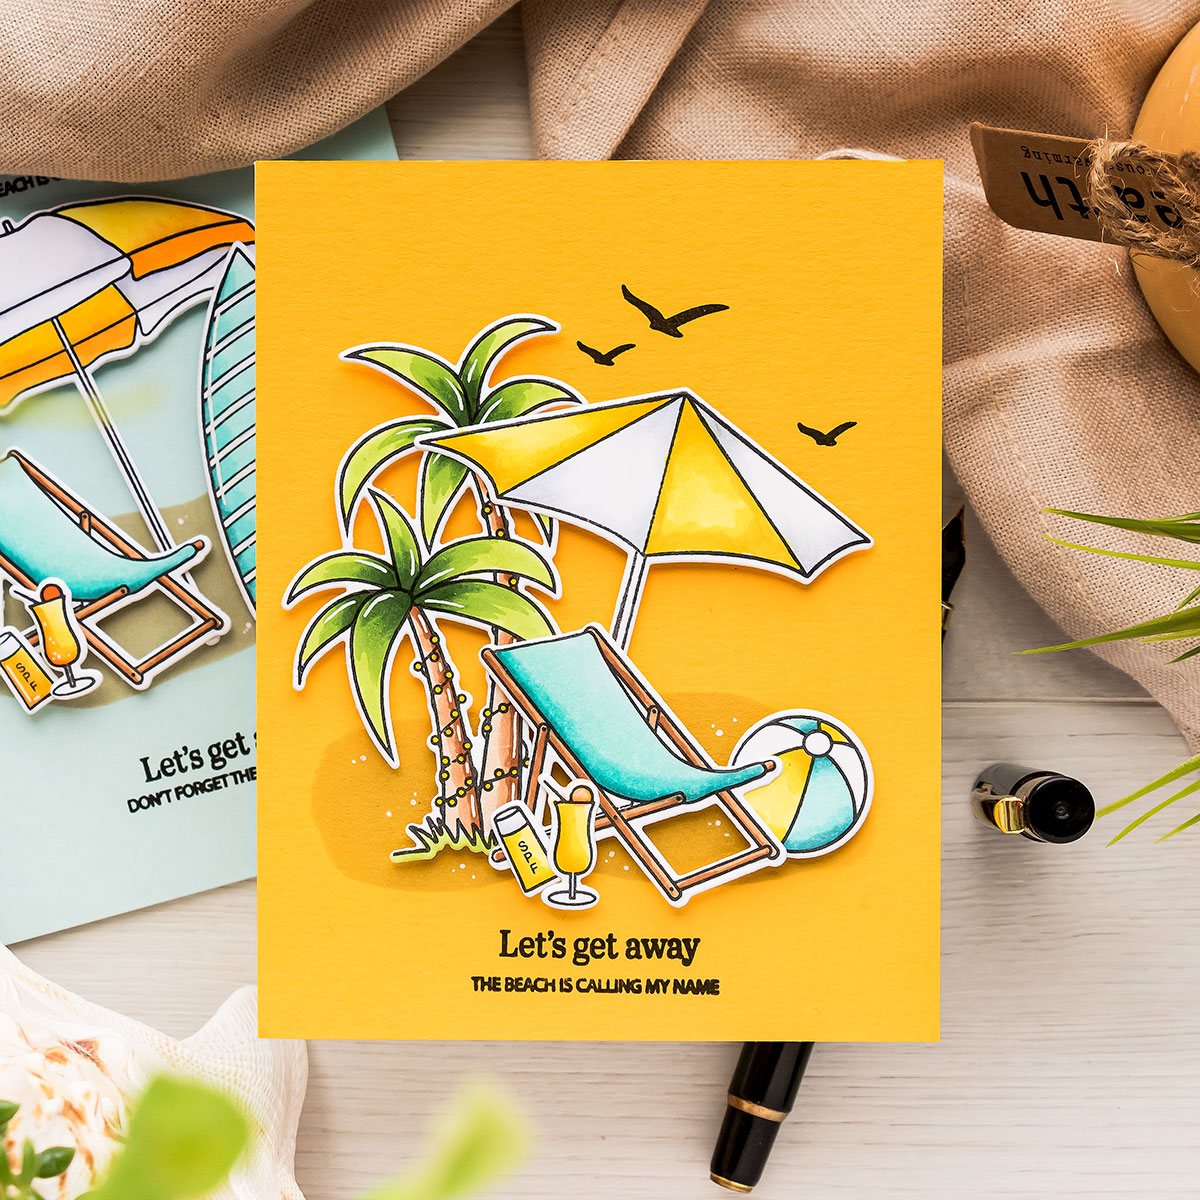
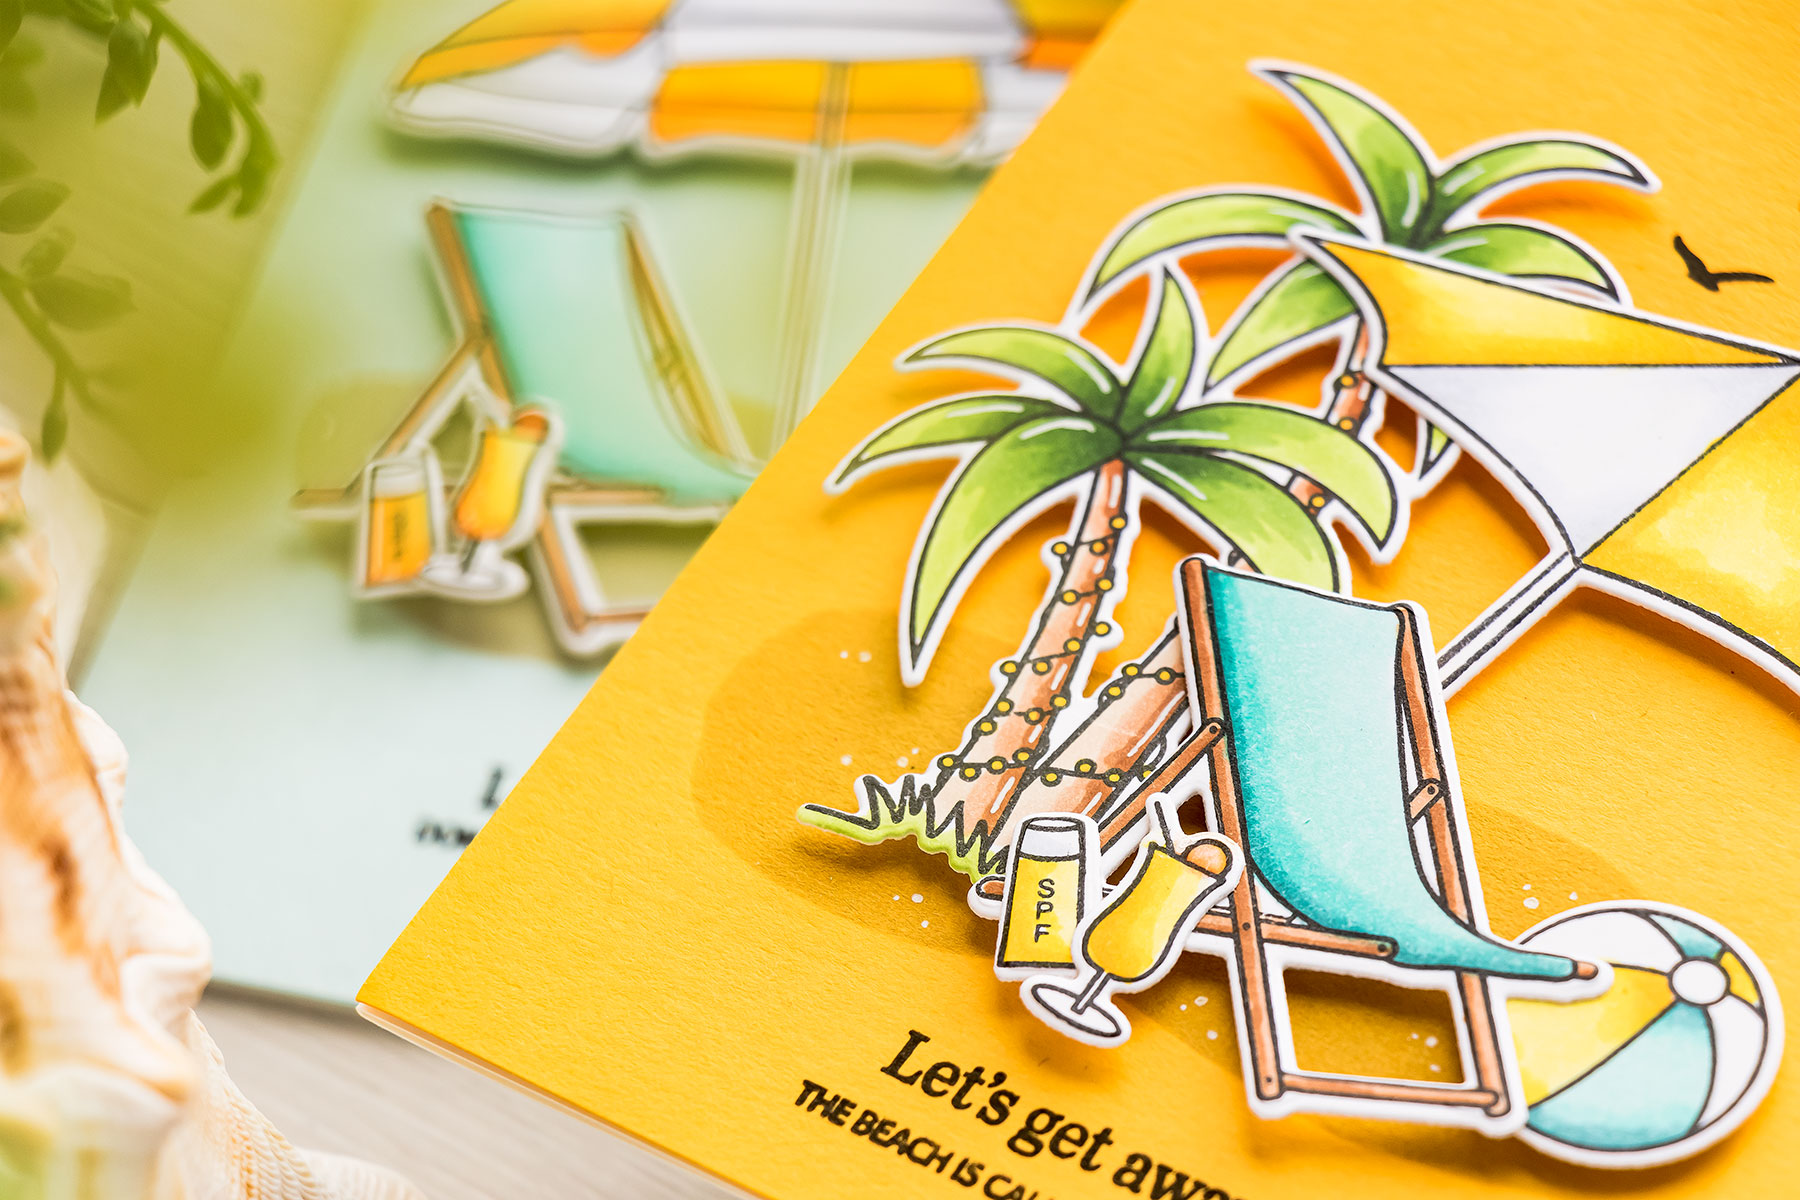
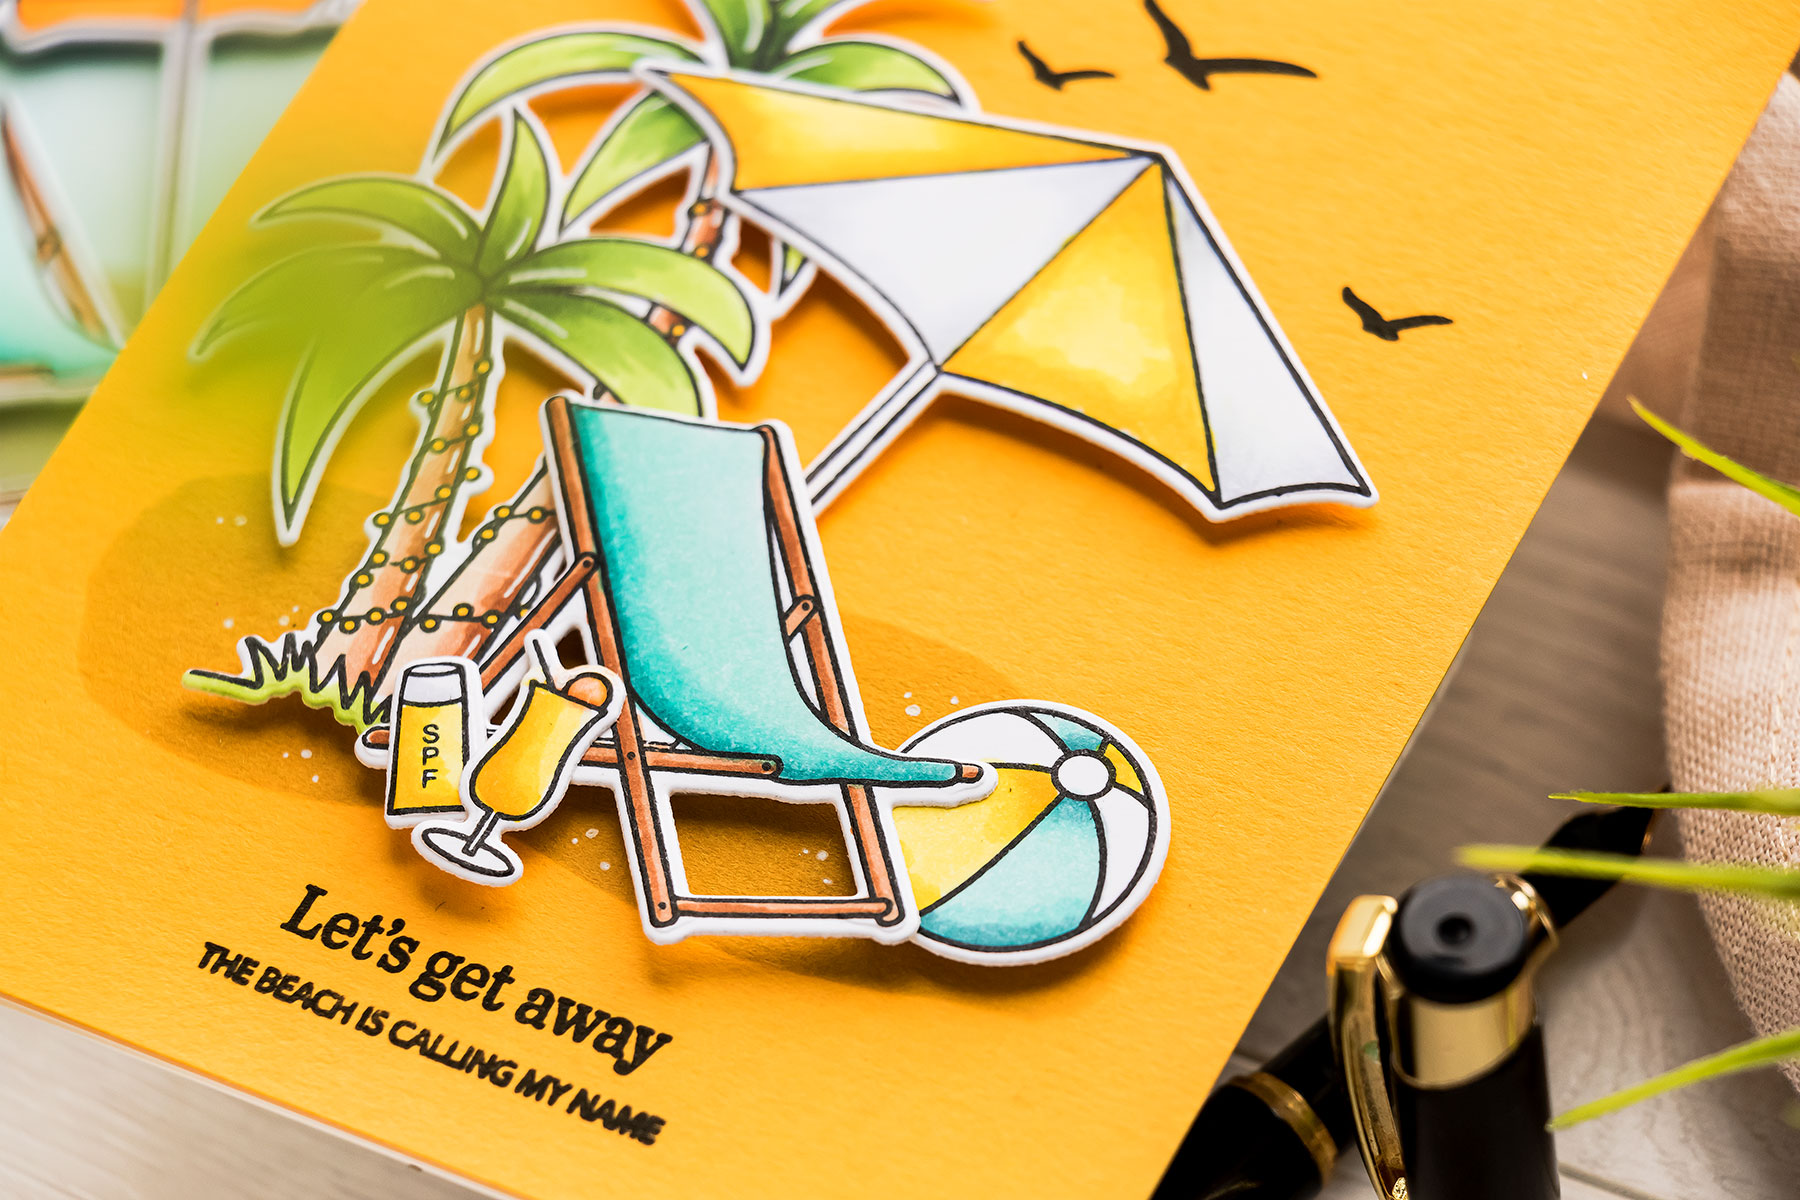
I foam mounted my scene over the ink blending and it fit right in! I also used a white pen and I used it a lot when making these cards – I added white dots onto the ground to help mimic the look of sand. You can also spot some dots on the drink – the dots look a bit like little air bubbles in there.
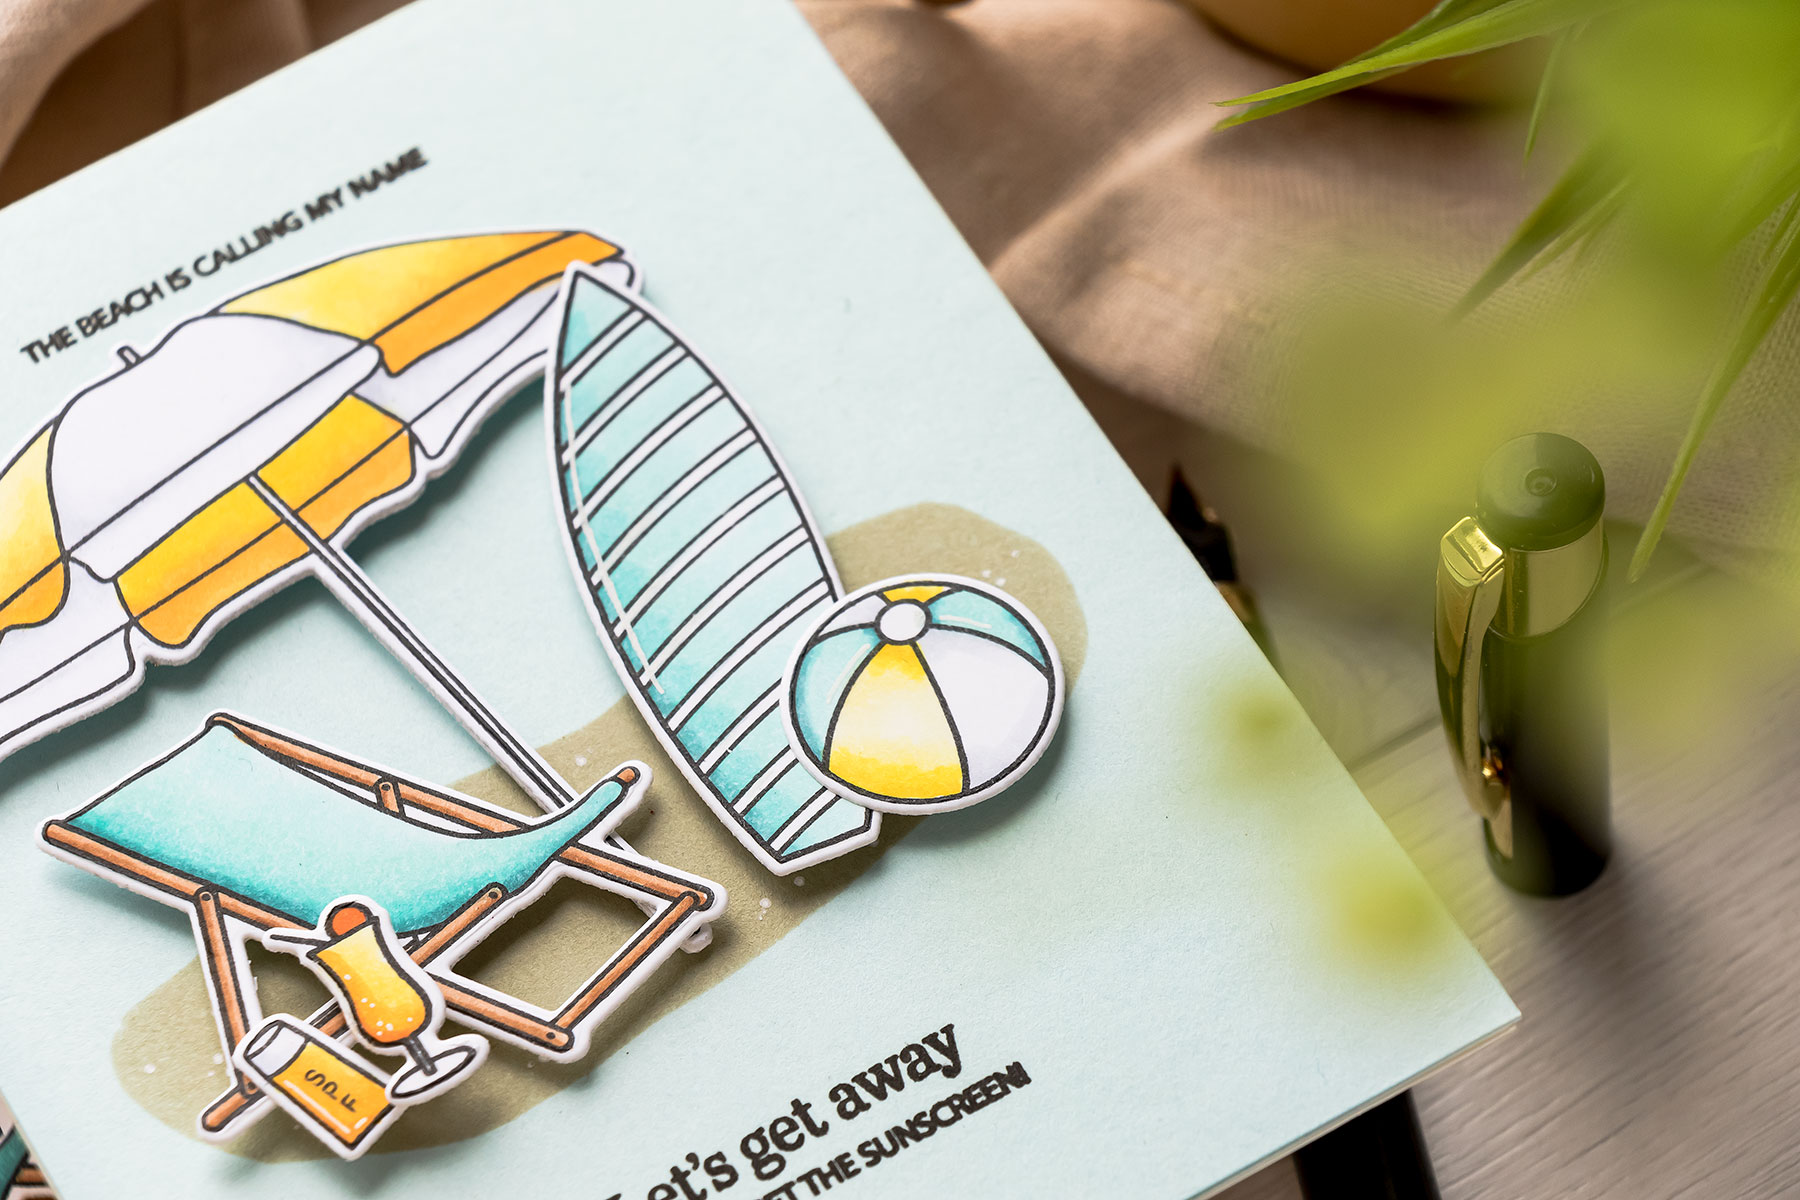
We can also combine several colors of cardstock to create backgrounds. Below, I used colored cardstock to create a color-blocked landscape. I have yellow sand in the foreground, next, there’s a narrow area that signifies the ocean with a skinny white stripe in front of it, that looks like sea foam, and finally, a large light blue panel at the top that looks like the sky.
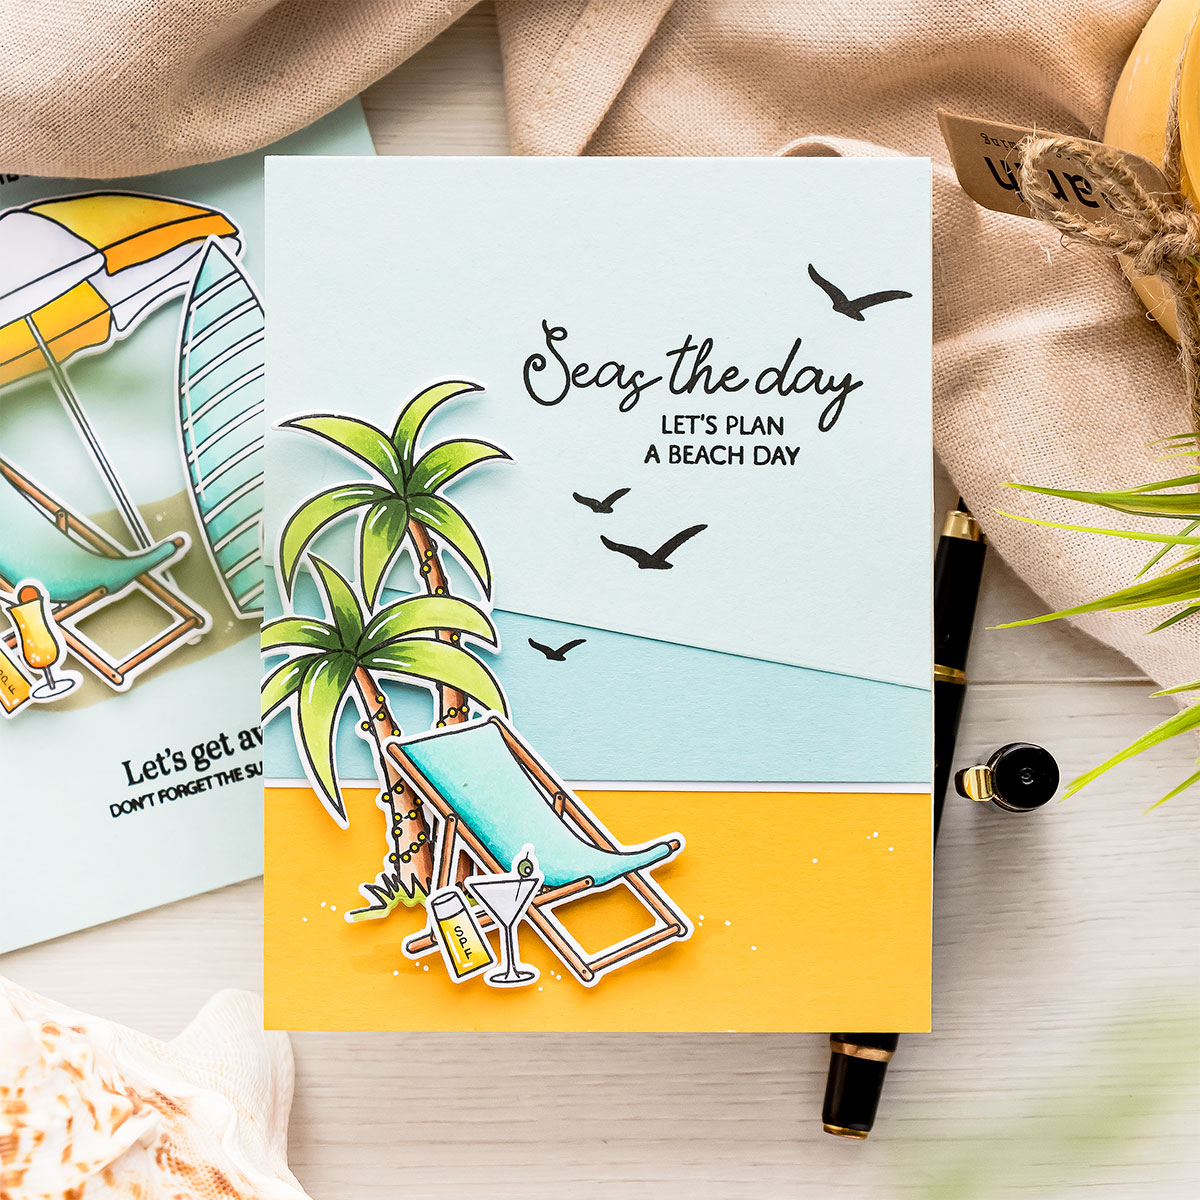
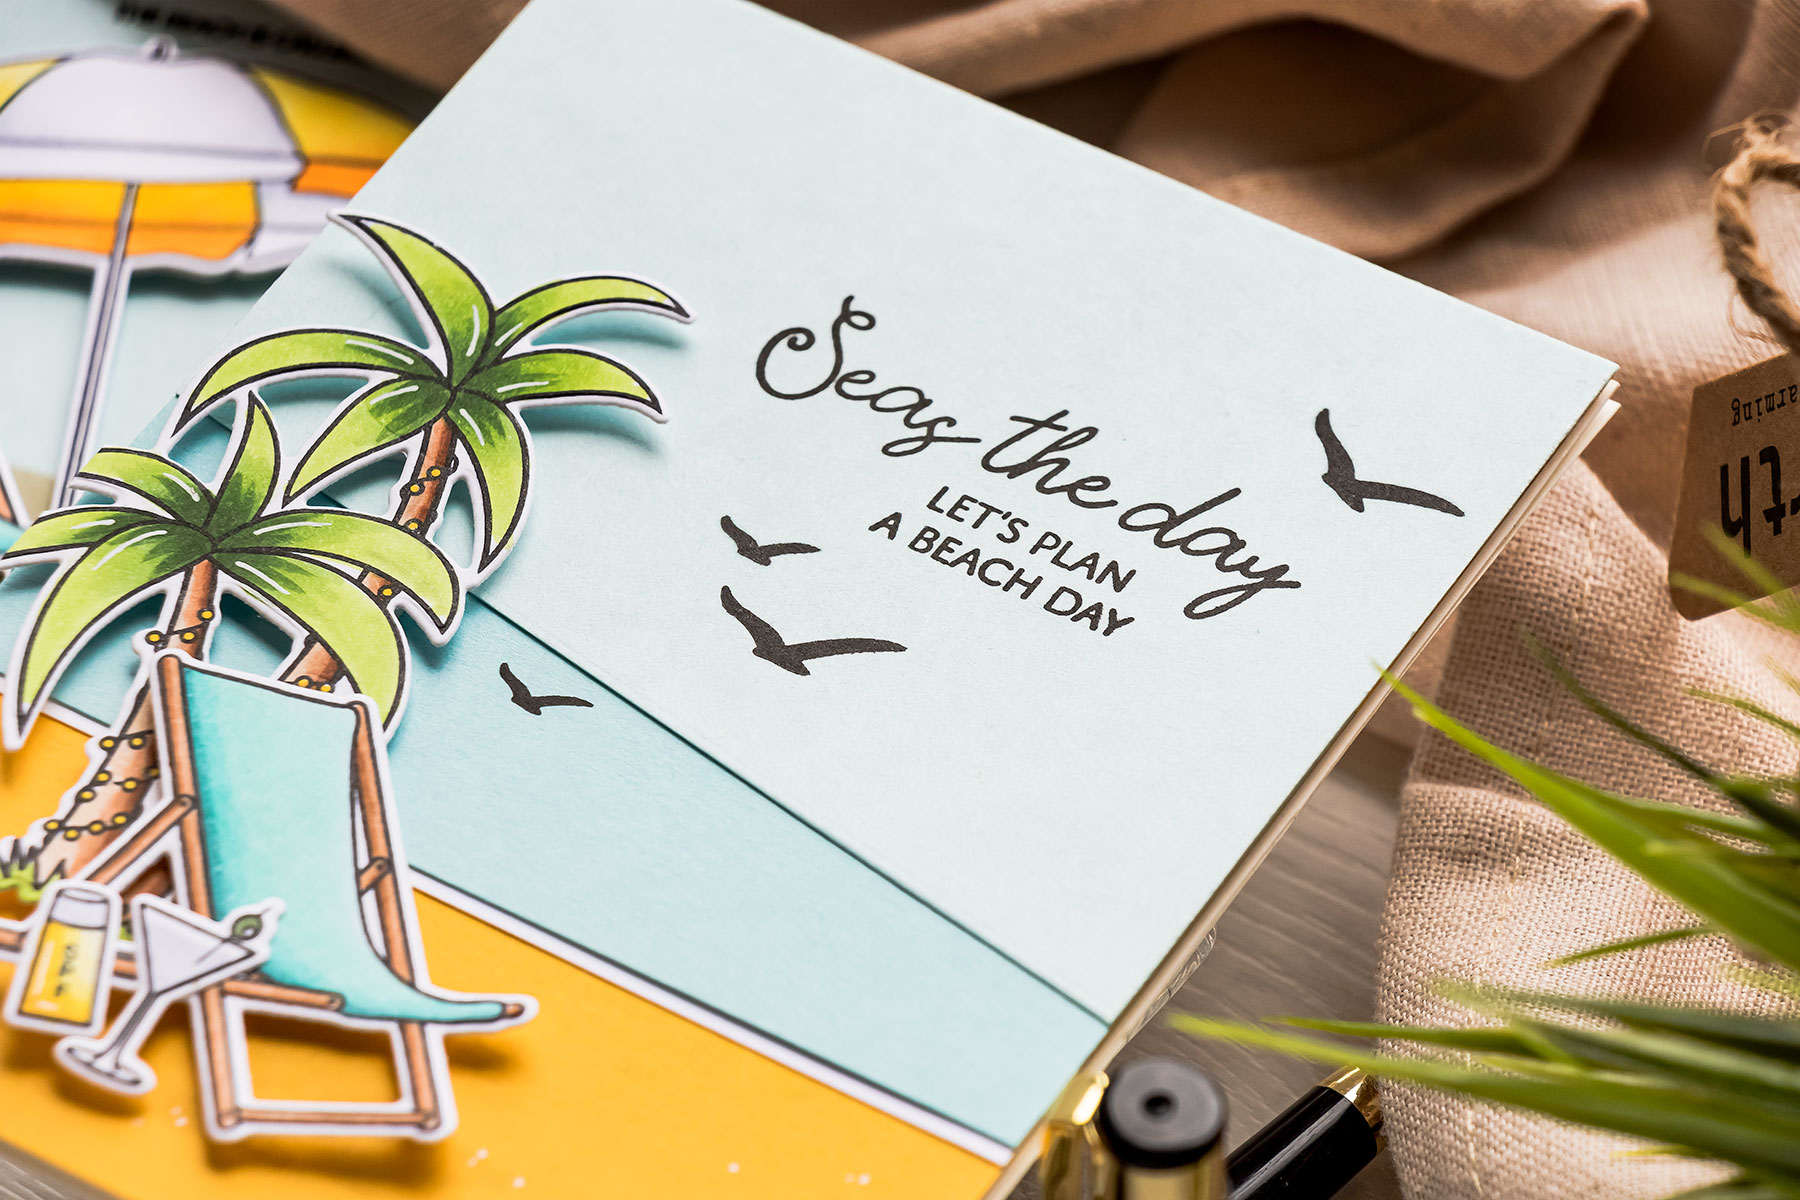
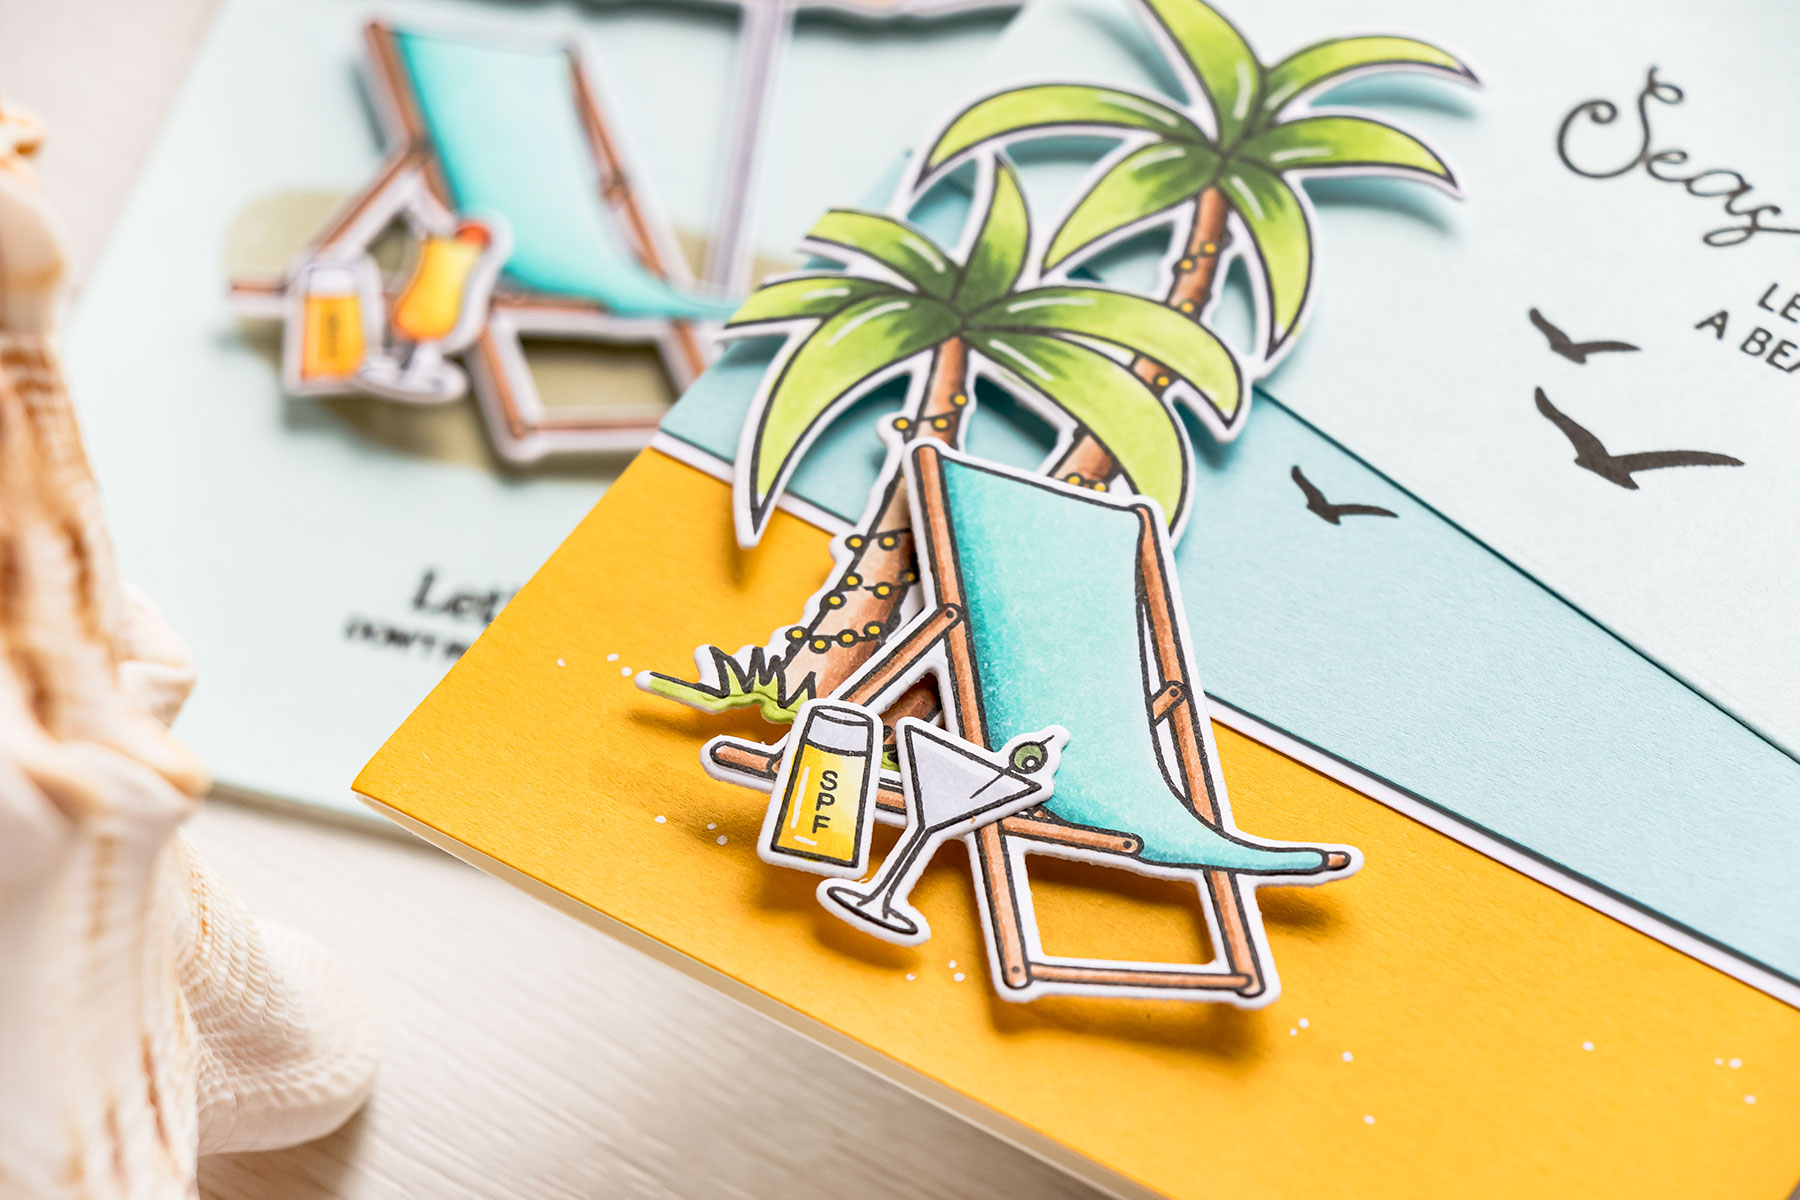
No specialty dies were used to make this background, all I did was cut my paper and an angle using a paper trimmer. I then glued everything onto the background, the yellow panel, and build my scene on top. I didn’t do any ink blending here as I didn’t need it, I already had my ground to hold my scene. But I used a C1 Copic marker, which is a cool gray color, and added some shadow under the beach chair.
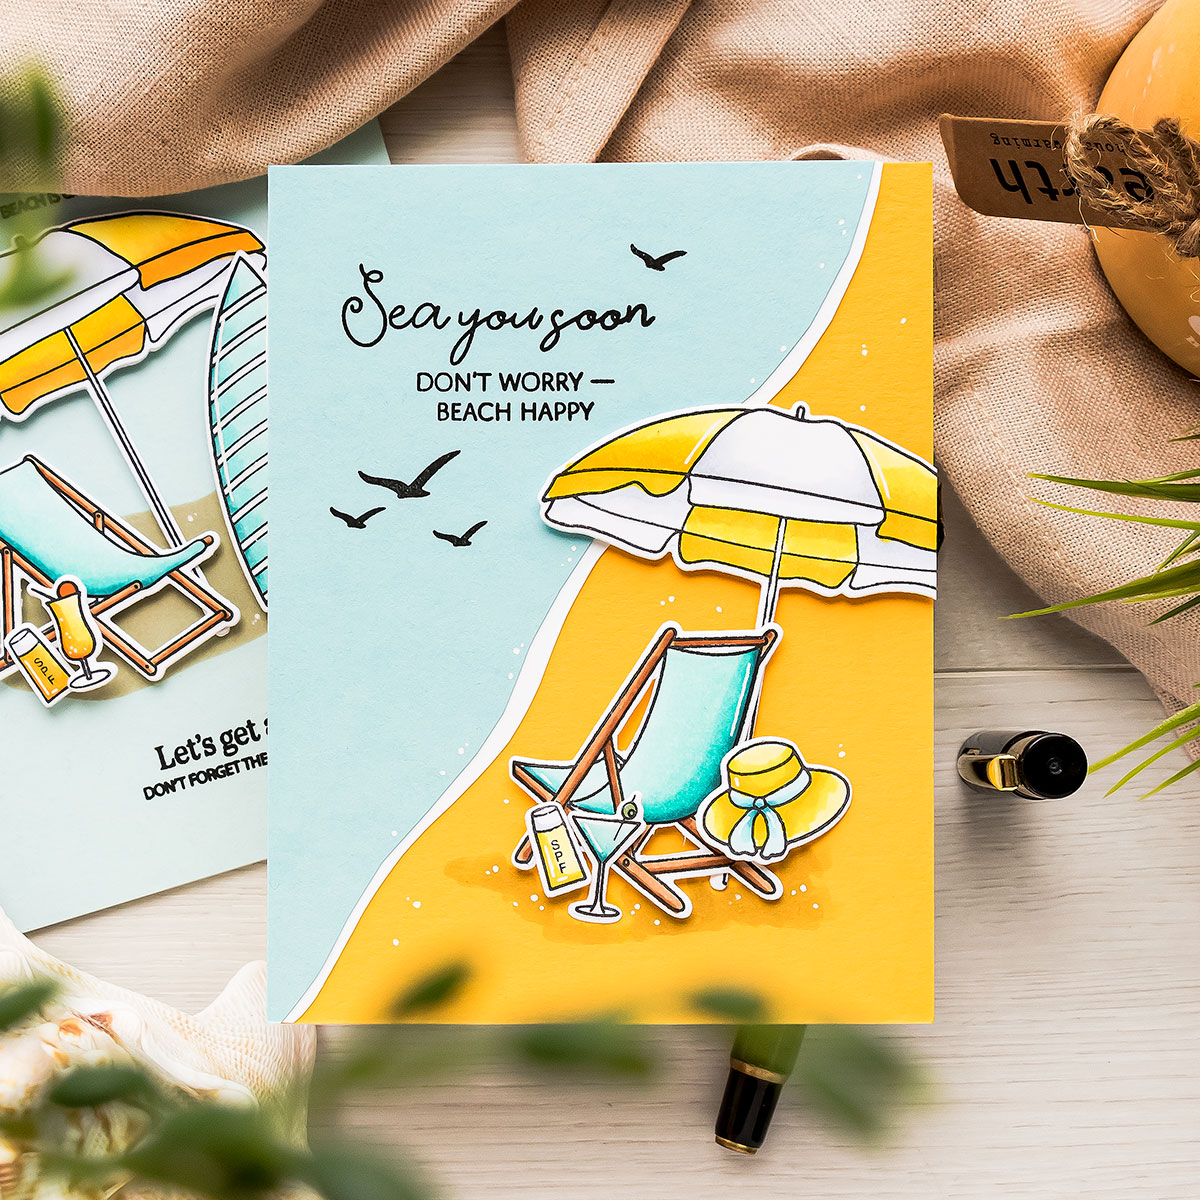
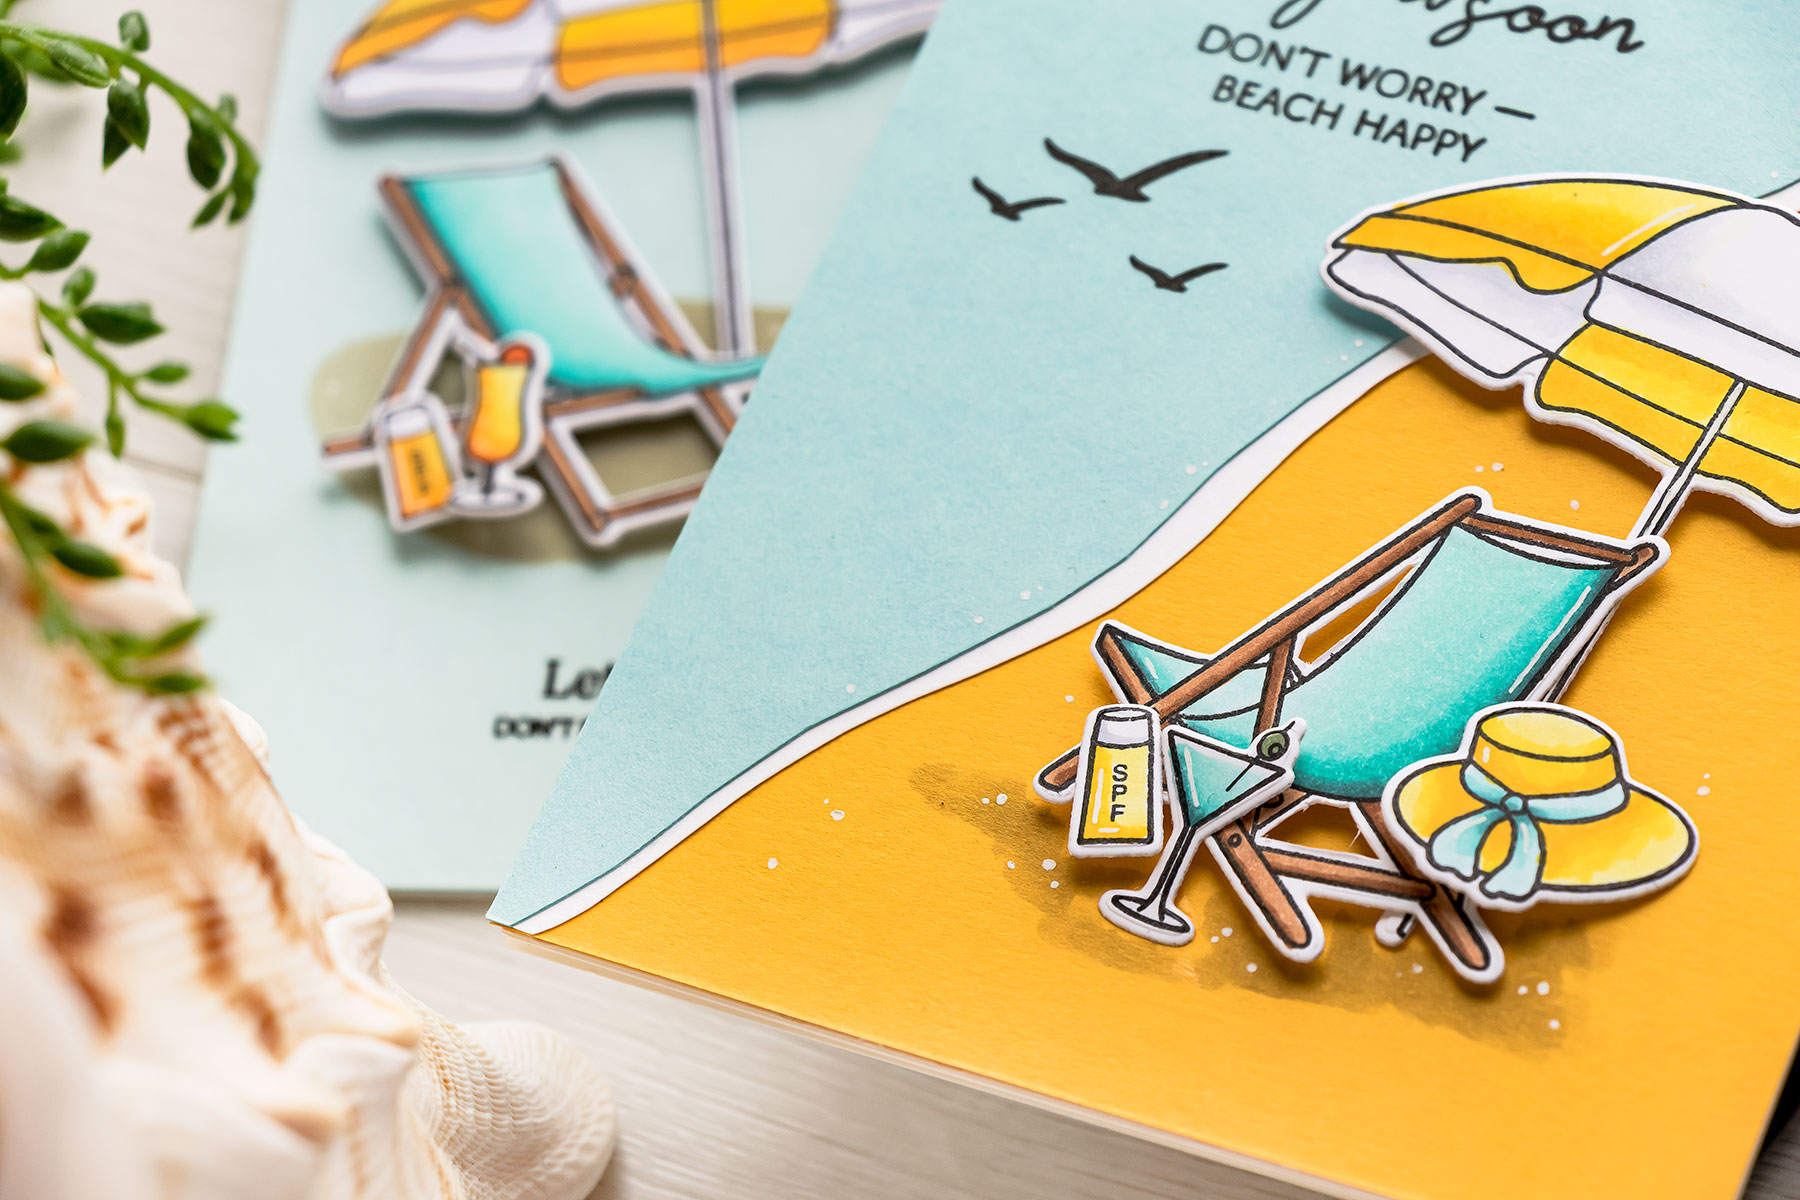

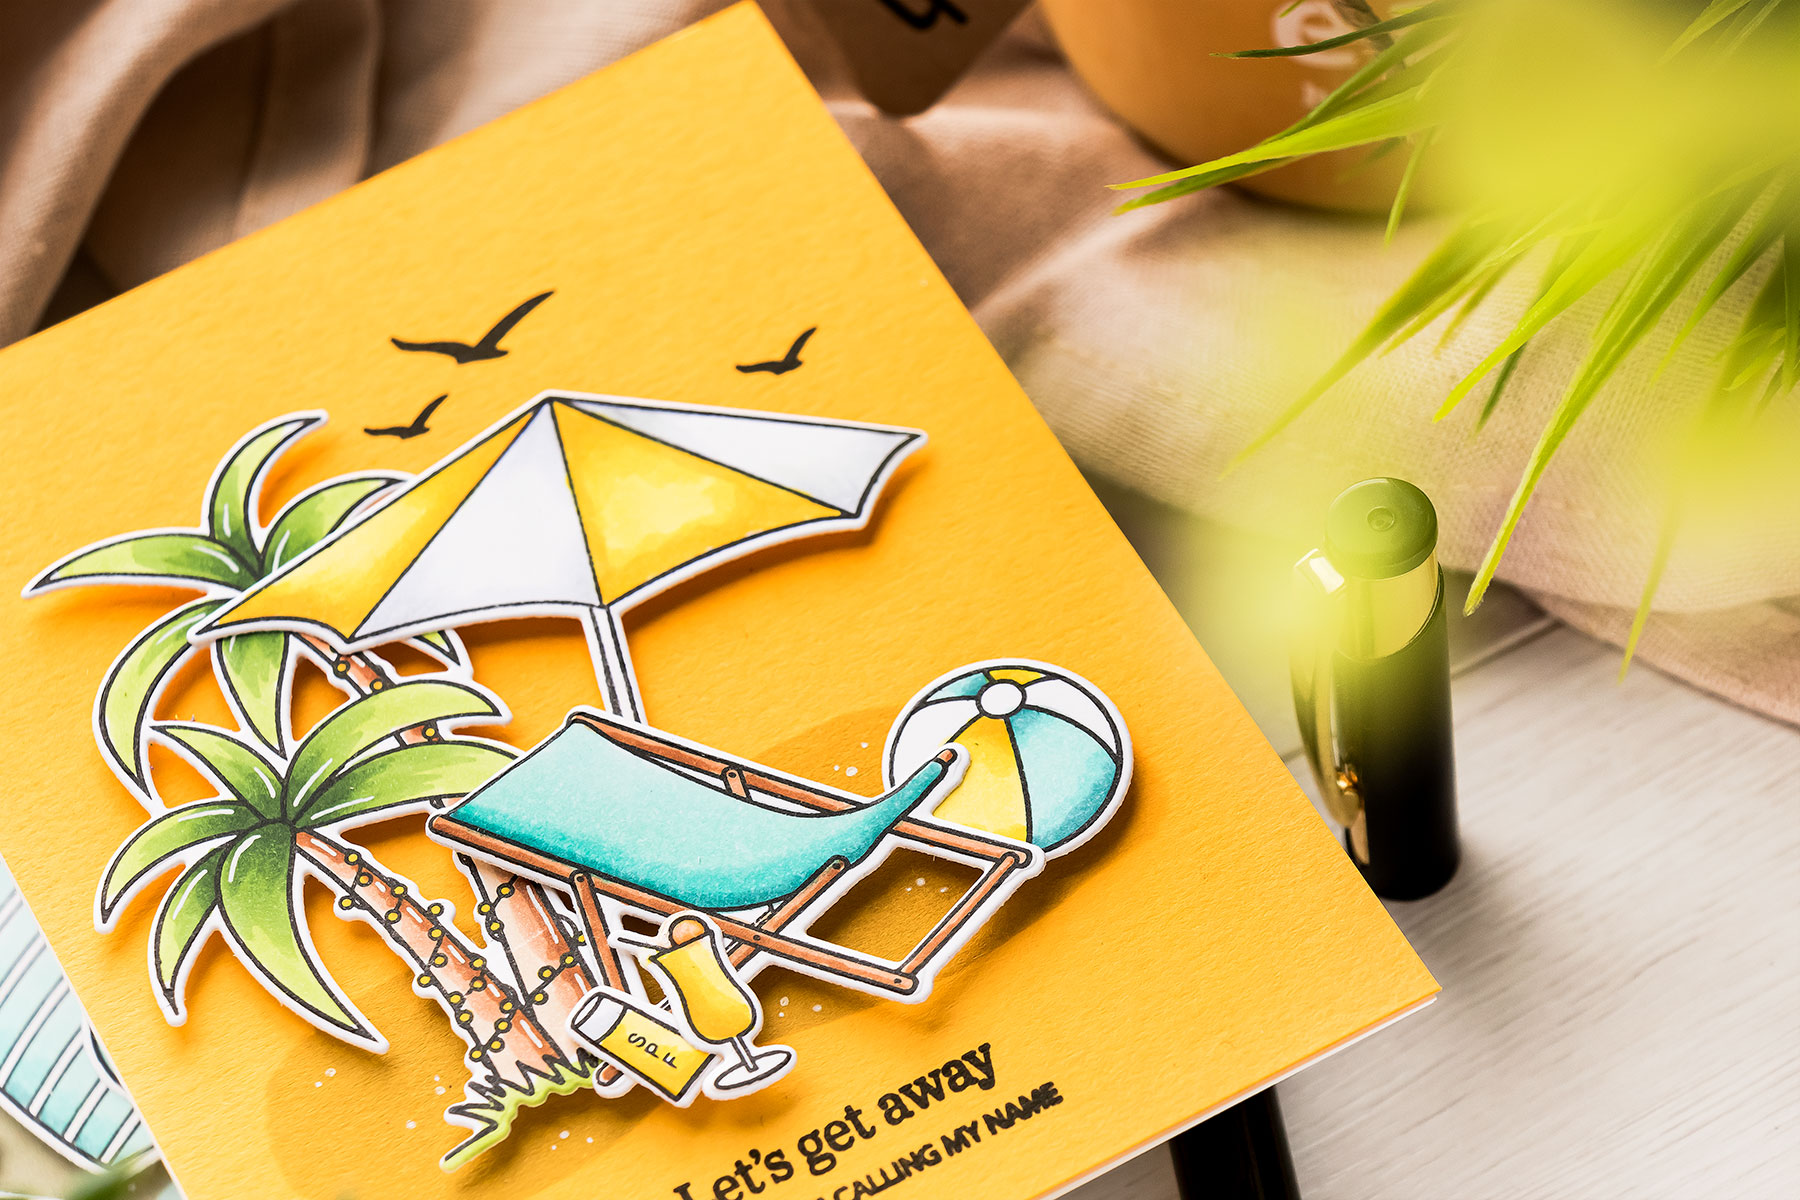
So we used a paper trimmer to make straight or diagonal paper cuts for this card, for my next example (above) I free-hand cut the paper to create an organic-looking shoreline. I used scissors and just free-hand the diagonal cut. I wanted it wavy. Next, I use a sheet of white paper, and I tried and mimic the same shape so that I have a bit of that sea foam on my card.
So you can use your colored cardstock to create unique backgrounds for your cards without any other specialty tools. I hope you’ve found this video useful and I hope you are going to dive into your colored cardstock stash!
Have fun crafting!
SUPPLIES
I’m listing the products I used below. Click on the link to go directly to the product. Where available I use compensated affiliate links which means if you make a purchase I receive a small commission at no extra cost to you. Thank you so much for your support!
 Simon Says Stamp Let’s Get Away Wafer Dies Shop at: SSS |
 Simon Says Stamps and Dies Let’s Get Away Shop at: SSS |
 Simon Says Clear Stamps Let’s Get Away Shop at: SSS |
 Simon Says Clear Stamps Seas and Greetings Shop at: SSS |
 Simon Says Stamps and Dies Seas and Greetings Shop at: SSS |
 Simon Says Stamp Seas and Greetings Dies Shop at: SSS |
 Simon Says Clear Stamps Warm Christmas Wishes Shop at: SSS |
 Spellbinders Platinum 6 Die Cutting Machine Shop at: SSS |
 Simon Says Stamp Mega Thick White Cardstock 130LB Shop at: SSS |
 Simon Says Stamp Sunshine Cardstock Shop at: SSS |
 Simon Says Stamp Sea Glass Cardstock Shop at: SSS |
 Simon Says Stamp Surf Blue Cardstock Shop at: SSS |
 Simon Says Stamp Blending Brush Set Large Shop at: SSS |
 Simon Says Stamp Pawsitively Saturated Ink Pad Latte Shop at: SSS |
 Hero Arts Ink Pad Intense Black Ink Shop at: SSS |
 Mini MISTI Stamping Tool Shop at: SSS |
 Tsukineko Versafine Onyx Black Ink Shop at: SSS |
 Spellbinders Best Ever Craft Tape Shop at: SSS |
 Copic Sketch Marker Y13 Lemon Yellow Shop at: SSS |
 Copic Sketch Marker Y08 Acid Yellow Shop at: SSS |
 Copic Sketch Marker Y19 Napoli Yellow Shop at: SSS |
 Copic Sketch Marker YG03 Yellow Green Shop at: SSS |
 Copic Sketch Marker YG17 Grass Green Shop at: SSS |
 Copic Sketch Marker YG67 Moss Shop at: SSS |
 Copic Sketch Marker BG11 Moon White Shop at: SSS |
 Copic Sketch Marker BG13 Mint Green Shop at: SSS |
 Copic Sketch Marker BG18 Teal Blue Shop at: SSS |
 Copic Sketch Marker C1 Cool Gray Shop at: SSS |
 Copic Sketch Marker C3 Cool Gray Grey Shop at: SSS |
 Copic Sketch Marker E31 Brick Beige Shop at: SSS |
 Copic Sketch Marker E33 Sand Shop at: SSS |
 Copic Sketch Marker E37 Sepia Shop at: SSS |
 Tonic Spring-cut Fine Tip Detail Scissors Shop at: SSS |
 Bearly Art Mini Precision Craft Glue Shop at: SSS |
 White Foam Squares Shop at: SSS |
 Sakura Classic White Gelly Roll Pens Set of 3 Shop at: SSS |
I really enjoy using many colors of paper, solid or pattern, for my cards. Your cards are so pretty and very inspiring. Thank you. Be safe.
Such wonderful techniques and great cards!h
These are so fun … and you have such an amazing eye for colour. I hope you are staying safe and well
WOW!…these stamp and die sets are fabulous fun, but your inventive, ingenious backgrounds make them stand out and ‘shine’…such versatile scenes!☺ Your creativity always astounds and inspires me. You have made me re-think my background cardstock in a whole new way!♥ (Praying for you and your country.)
These are fabulous beachy scenes in super happy colours!
“grounding” images really makes a difference and your ideas are FANTASTIC! thank you!!