


Hello, friends! Today I am excited to join Simon Says Stamp for their Rainbows release blog hop. I have 3 cards to share featuring the new 3D embossing folders and a simple white pigment ink technique.
Like this project? Pin it and save for later | Curious about my project photography? Click for details.
VIDEO TUTORIAL
Watch the video below or on my Youtube channel.
Like this video? Please give it a big thumbs up (you can do this on Youtube video page right under the video) and share it with a crafty friend! Leave me a comment too, I love hearing from you!
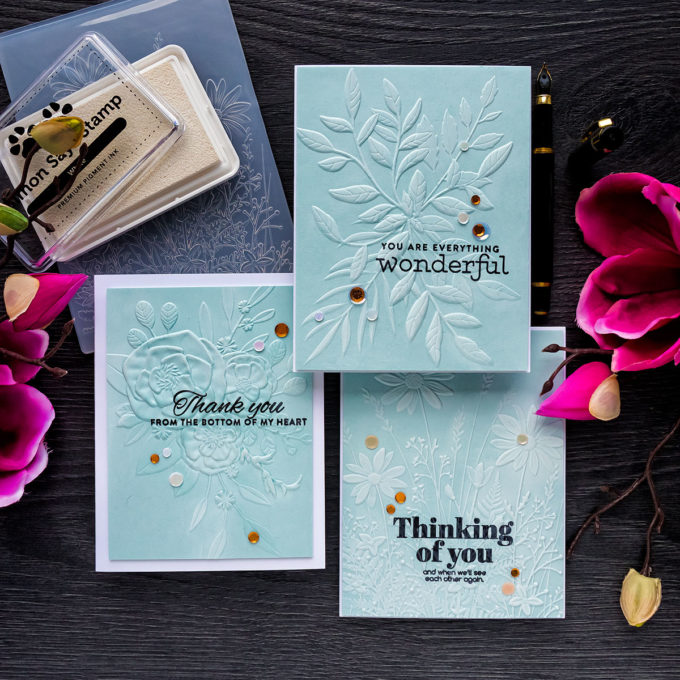
CARDS DETAILS
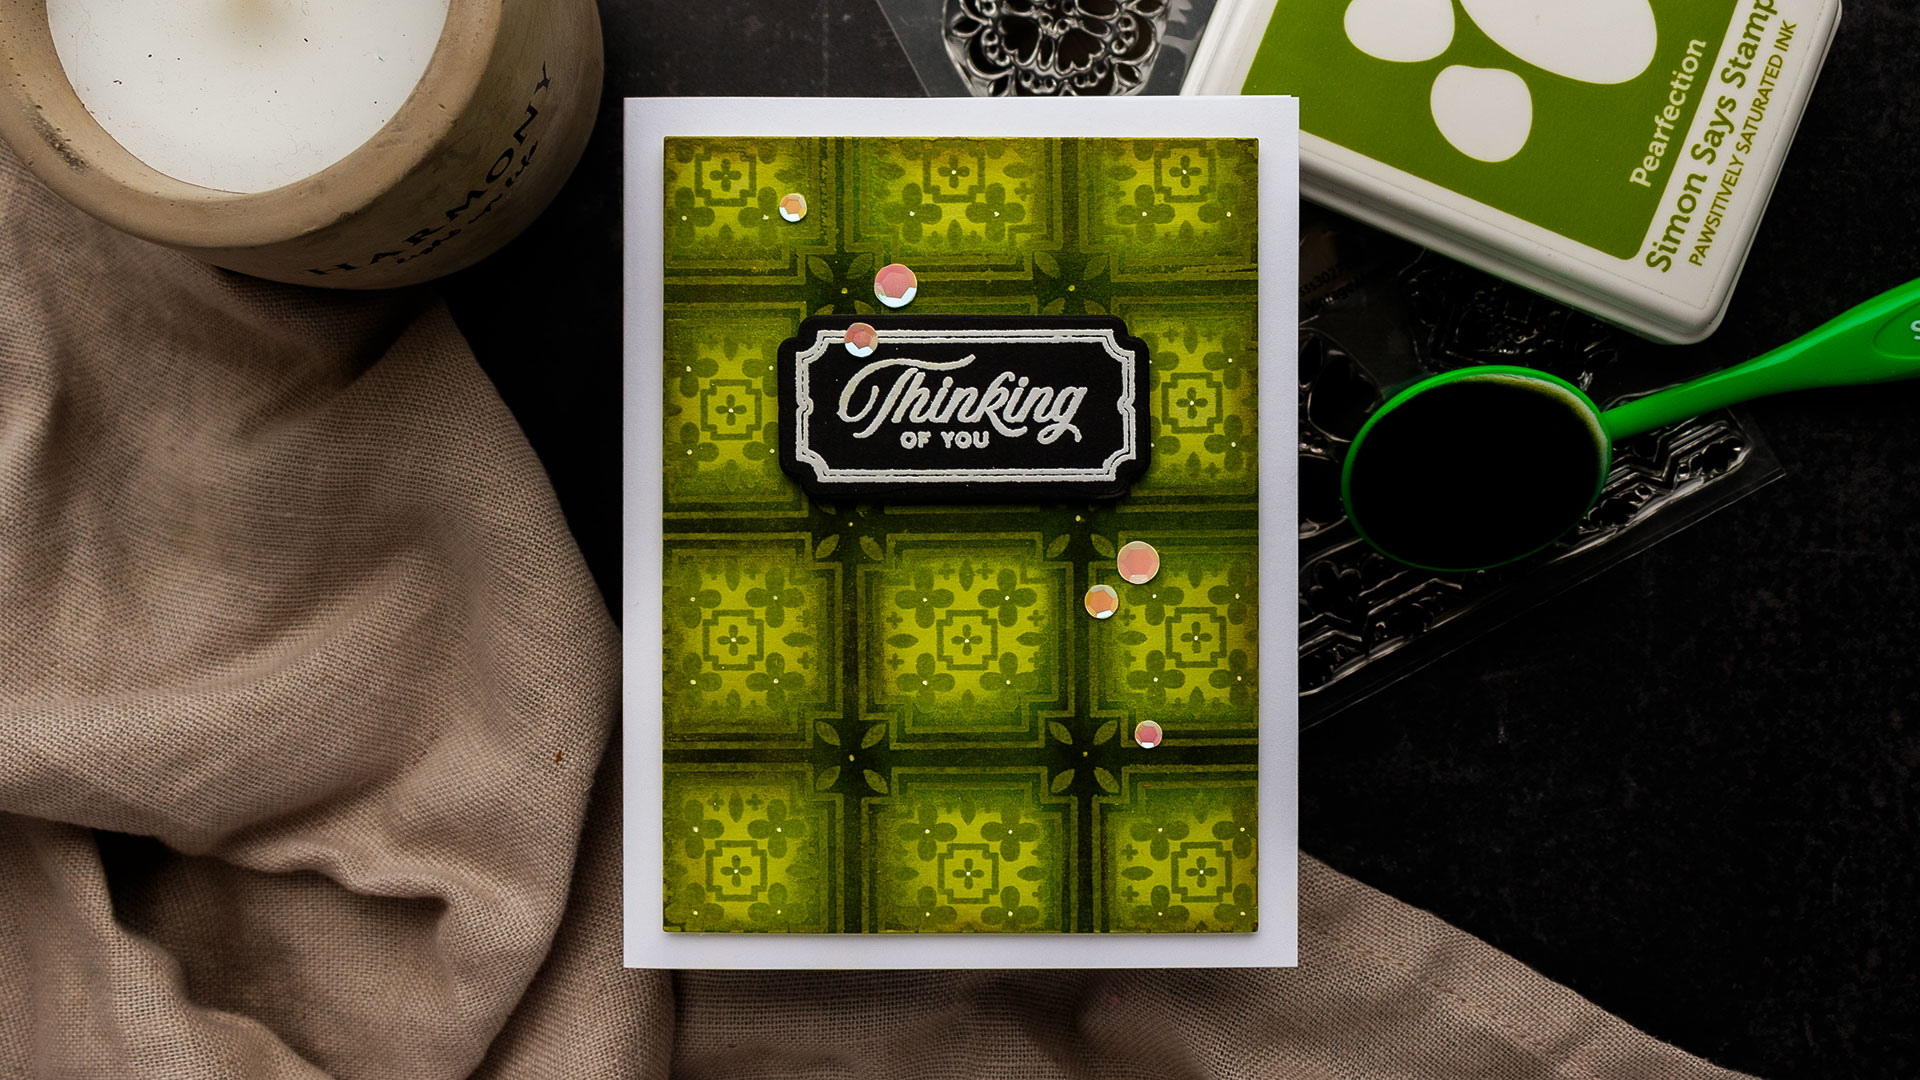
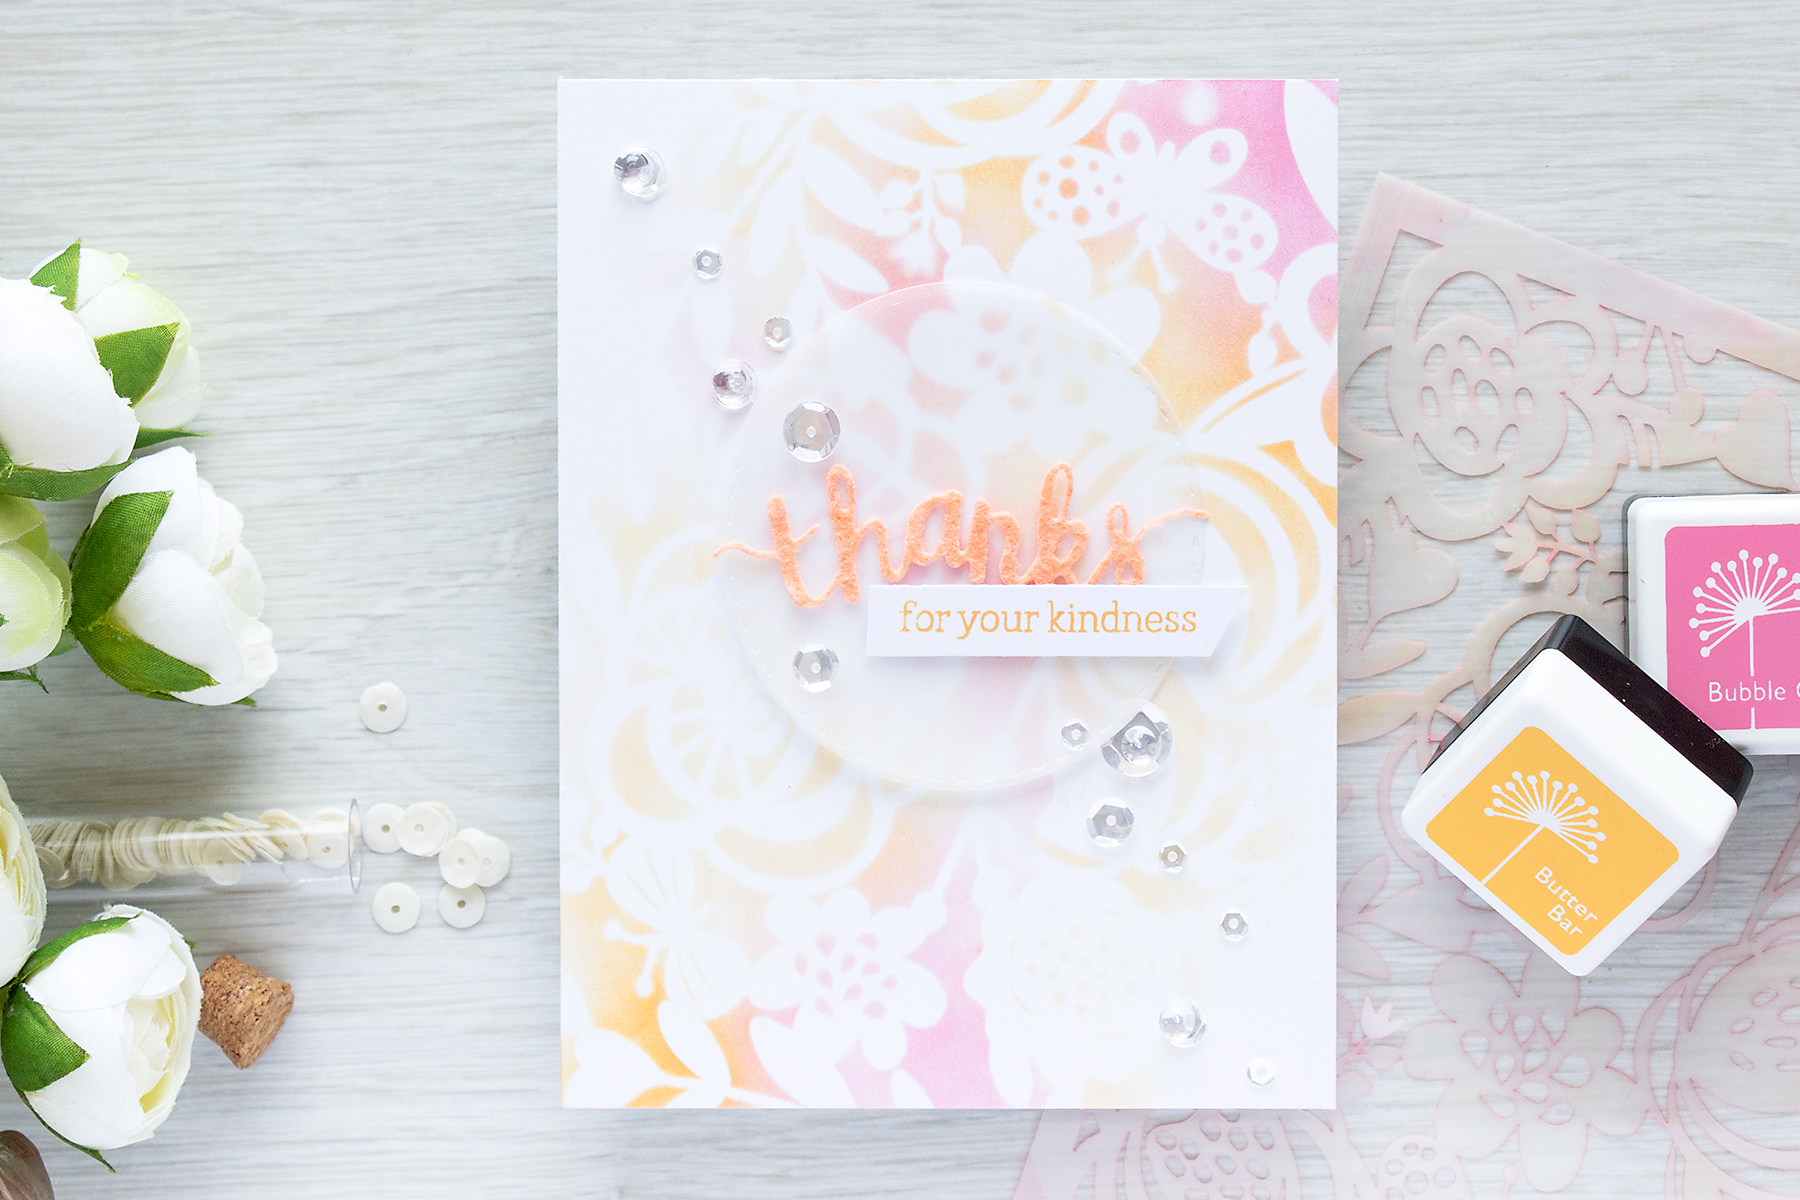
I started working on my cards by stamping the sentiments on Simon’s Sea Glass cardstock. I stamped them in Versafine Onyx Black ink using a MISTI. The sentiments come from various sets – Greetings Mix 2, Spring Bouquets, and Greetings Mix 1.
Here’s a closer look at these cards:

featuring the Leaf Bundle Embossing Folder
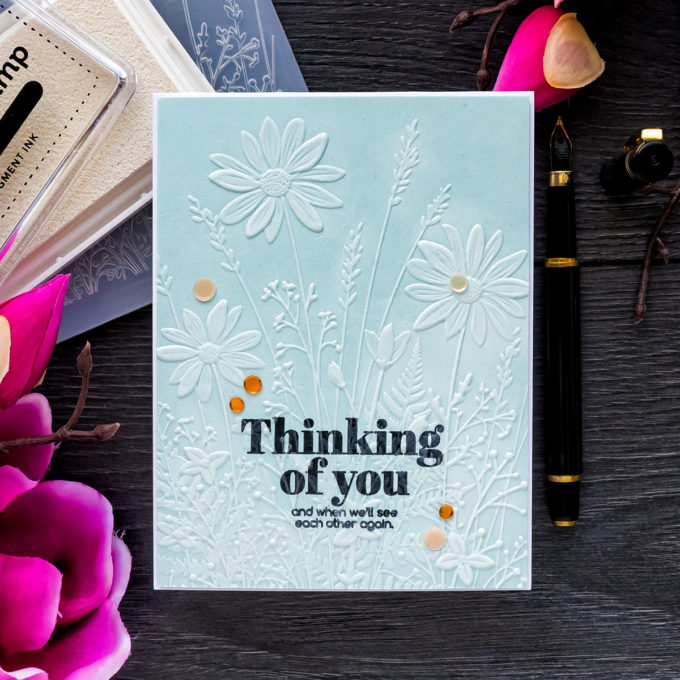
featuring the Wildflower Field Embossing Folder
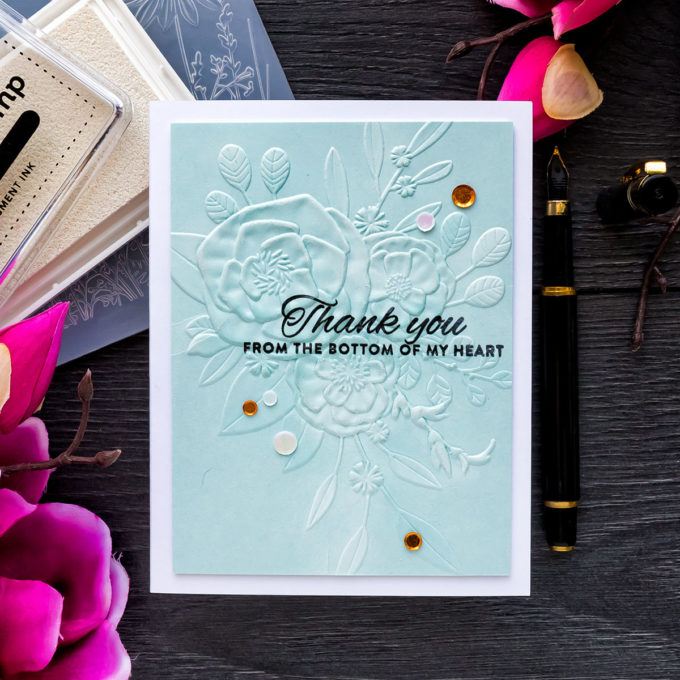
featuring the Roseville Bouquet embossing folder
Next, I embossed each panel using new 3D embossing folders – Roseville Bouquet, Wildflower Field, and Leaf Bundle (there’s also a 4th embossing folder, Vine Canopy, I used it for slightly different cards HERE). Next, I covered the stamped part with clear embossing powder and heat set. The stamping was still wet (I used pigment ink and it takes longer to dry), so I was able to emboss it.
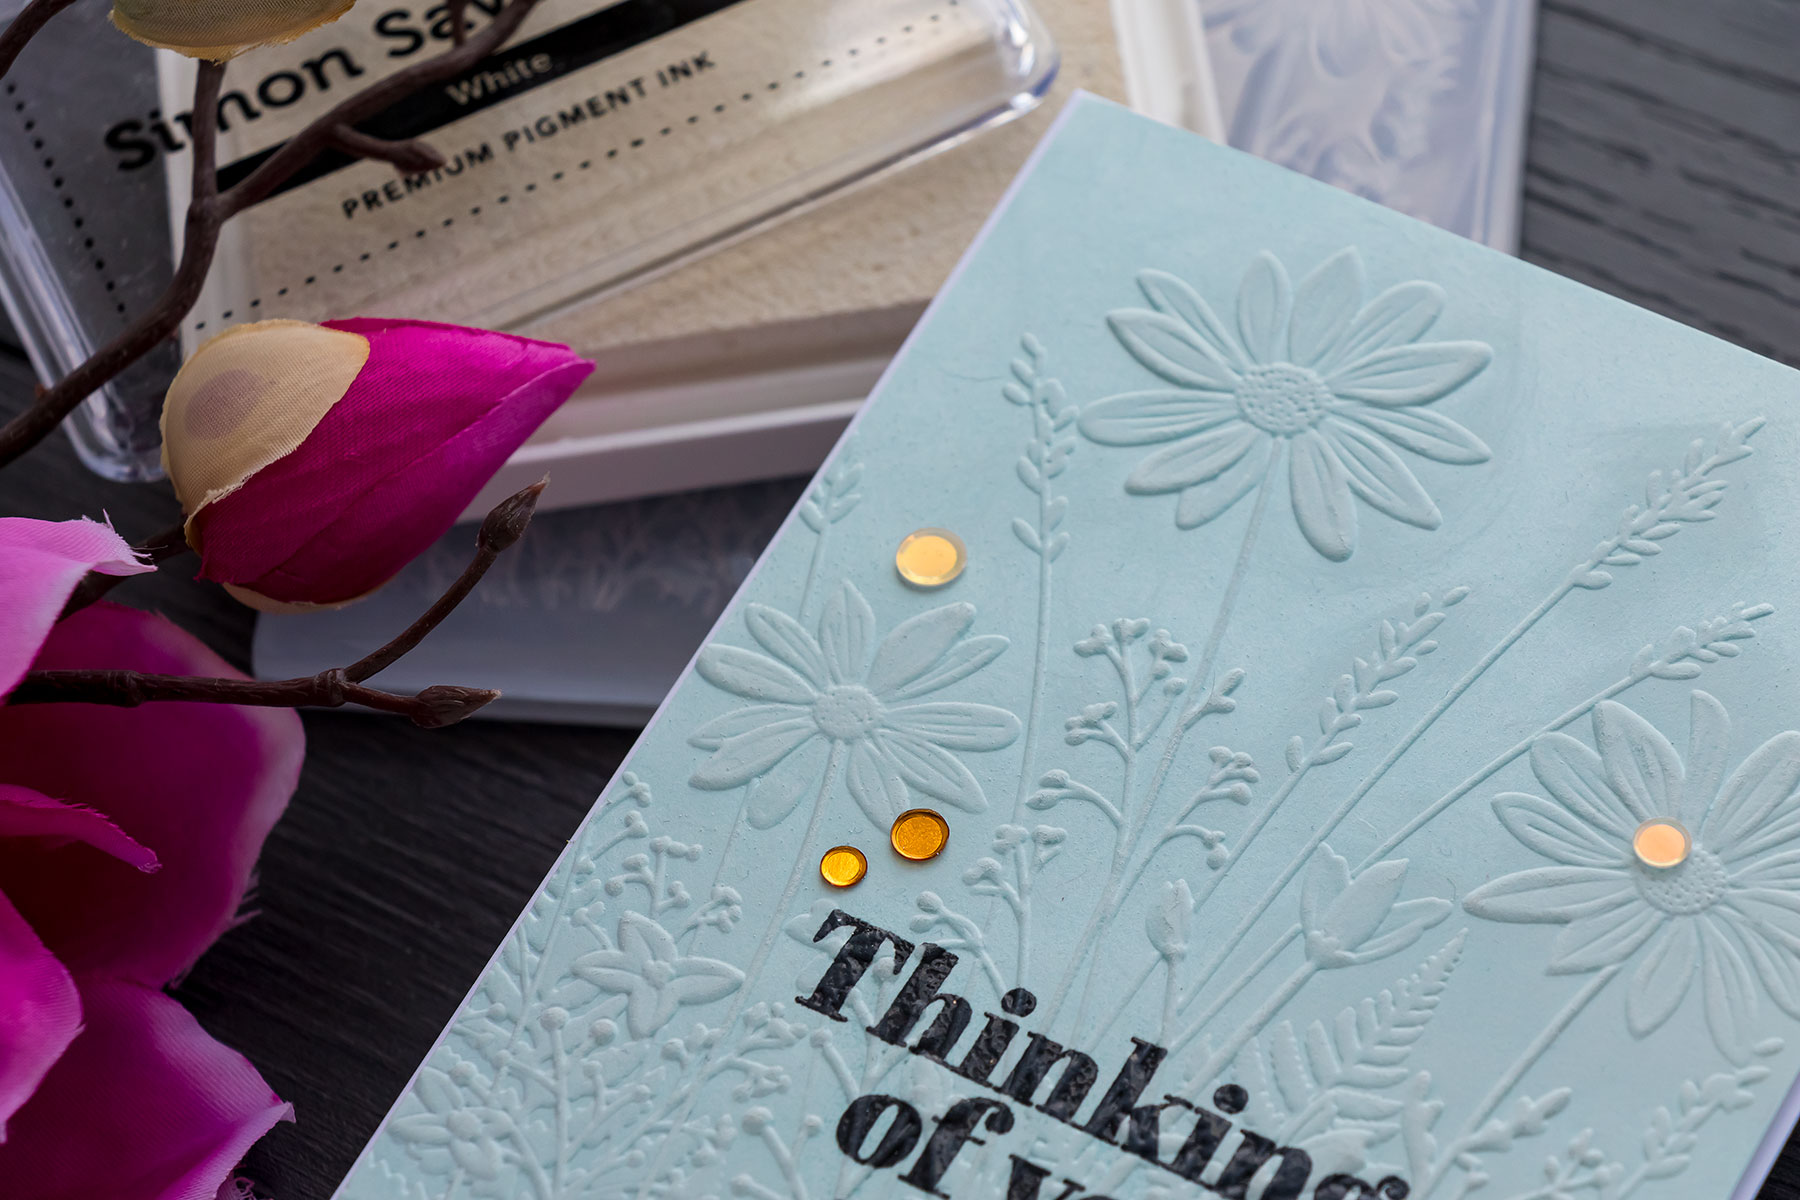
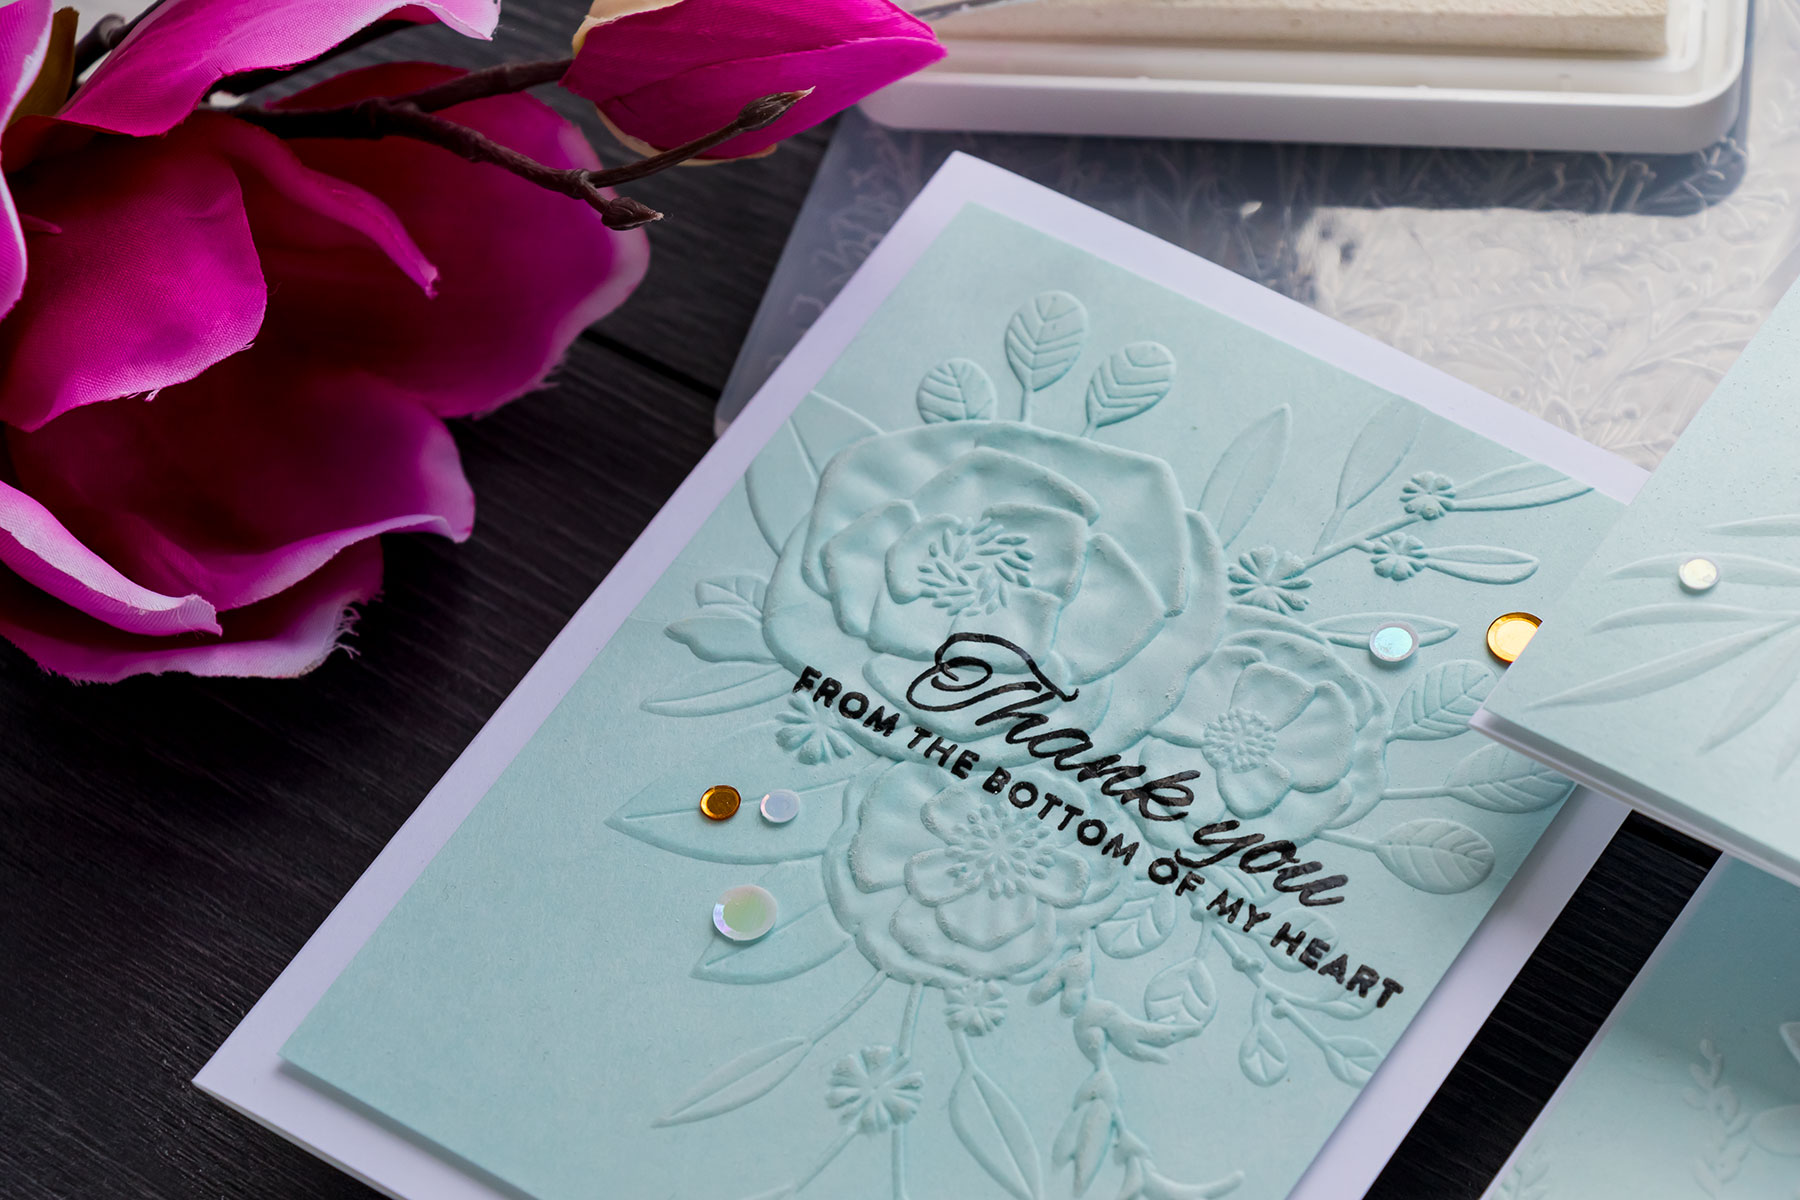
I trimmed the panels down slightly and foam mounted onto A2 white card bases. Next, to help the designs pop I gently rubber watermark ink over the raised areas (this gives a slightly darker color to the embossing), and white pigment ink (this lightens the embossing). Finally, I added some sequins from my stash.
BLOG HOP
If you arrived from Suzy Plantamura, the next stop on this hop is Kathy Racoosin. You can also start over on the Simon Says Stamp blog.
GIVEAWAY AND PROMO!
Use code ENVIES to get a pack of Holographic envelopes for FREE (with purchase). This promotion will expire 6/6 at 11:59 pm EDT.04
Simon is giving away a $25 coupon to every stop on the hop from the blog comment section. Winners will be posted on the Simon Says Stamp blog on Wednesday, the 9th of June.
SUPPLIES
I’m listing the products I used below. Click on the link to go directly to the product. Where available I use compensated affiliate links which means if you make a purchase I receive a small commission at no extra cost to you. Thank you so much for your support!
 Simon Says Stamp Embossing Folder Roseville Bouquet Shop at: SSS |
 Simon Says Stamp Embossing Folder Leaf Bundle Shop at: SSS |
 Simon Says Stamp Embossing Folder Wildflower Field Shop at: SSS |
 Simon Says Clear Stamps Spring Bouquets Shop at: SSS |
 Simon Says Clear Stamps Greetings Mix 1 Shop at: SSS |
 Simon Says Clear Stamps Greetings Mix 2 Shop at: SSS |
 Tsukineko VersaFine Onyx Black Ink Shop at: SSS |
 Neenah 110 Lb Solar White Cardstock Shop at: SSS |
 Simon Says Stamp Sea Glass Cardstock Shop at: SSS |
 Spellbinders Platinum Die Cutting Machine Shop at: SSS |
 Jewel Picker Pick Up Tool Shop at: SSS |
 Simon Says Stamp Clear Fine Detail Embossing Powder Shop at: SSS |
 Simon Says Stamp White Pigment Ink Pad Shop at: SSS |
 Hero Arts Clear Embossing & Watermark Ink Shop at: SSS |
 EK Success Powder Tool Applicator Shop at: SSS |
 Hero Arts Heat Embossing Gun Shop at: SSS |
 Bearly Art Mini Precision Craft Glue Shop at: SSS |
 Tonic Studios 8.5 Inch Paper Trimmer Shop at: SSS |
What great cards!
So beautiful, Yana!
This card has inspired me to use the numerous embossing folders in my stash!
Sooo pretty!
Love all these ideas from this release! The cards are wonderful. Thank you for the inspiration!!!
You chose a beautiful color for these cards. I love the subtle touches of white pigment over the embossing!
Beautiful cards!
These are stunning
I love these embossing folders
Thanks for sharing the tip about rubbing the Versamark ink over the raised areas. The darker areas and white ink really added dimension to your cad.
So elegant and so clever! I never would have thought to use an embossing folder while the ink was still wet.
Beautiful cards! Thanks for the inspiration!
These are so beautiful – you’ve really shown off the new embossing folders!
These cards are so soft and beautiful…I am out of sympathy cards and these will make exceptional Sympathy cards…thanks so much for sharing your talent and for reminding me that simplicity can be extraordinary!!!
I do think embossing folders are one of my absolute favorite ways to add dimension! These are stunning and so so elegant!
Gorgeous cards, love the stamping before you embossed the panels!
Beautiful cards with these lovely embossed designs! Love the addition of the white ink to highlight the cards! I look forward to checking out the video!
Very nice cards. They have a calming effect.
Subtle and elegant cards that look like they’d be perfect for a wedding or engagement. Very pretty!
Love these Embossing folders!
These cards are so pretty!! I’ll definitely be trying this technique.
Hi, Did she ink the embossing folder? I am having trouble understanding? Thank you.
I love those embossing folders. versatile.
Love, love, love your cards!! I think I may be slightly obsessed with SSS 3D embossing folders. As always, thank you for sharing your creativity!
I love the elegant sophisticated look of your cards!
Love these! I’m in love with these folders, for sure and you really made them shine – thanks!
Beautiful use of the embossing folders.
thanks for sharing
txmlhl(at)yahoo(dot)com
Just simply gorgeous!
Such an elegant idea for a simple card. I love that sea glass cardstock!! Thank you for suggesting this unique technique.
I am surprised that the sentiment looks so beautiful after embossing. You have given me courage to try this!
Your cards are so beautiful and you are so inspiring! Thank you, these embossing folders are on my shopping list!
I enjoyed the process video and the cards are lovely. Thanks for sharing and inspiring.
I like that color of cardstock. Great project shares.
Beautiful cards! Love the color of the paper you used for the embossing…so creative.
Thanks for sharing.
Your cards are absolutely stunning. Love the look you created. I will definitely have to try this.
Beautiful cards using the embossing folders.
Love your techniques – beautiful cards!
I love the subtle color over the dry embossed background. It looks very elegant!
Love these embossing tips.
Great tips on making the embossed image stand out more. I’m definitely going to try this. I love how you did 3 similar, yet unique cards using the same technique!
I loved this technique, Yana. I learned a lot today watching your video. The light cardstock with these beautiful 3D embossing folders have so many possibilities. They are fairly easy to make once you figure out your machine and gather your products. Thanks for sharing.
These are stunning in their simplicity!
Beautiful cards. I love all the dimension created with these embossing folders.
All of your cards are gorgeous! I just love the look of these new 3D embossing folders! 🙂
Clean and classy, gorgeous cards. Great tip for highlighting the embossed areas.
Yana, your cards are always so beautiful! Thanks for showing us how to stamp the sentiment on before embossing…such a great idea. I really love the look of the white ink on the raised areas… it adds so much to the card! I think these would make beautiful wedding cards, too!
Thanks for inspiration and tips.
Absolutely gorgeous! I love those embossing folders and the fun technique. Thanks for the inspiration.
so pretty – love this technique!
These are so elegant but easy to achieve! Love your beautiful cards.
wow, amazing, I love your design!