


Hello, crafters! In this blog post & video, you’ll learn how to use your dye ink pads to create beautiful abstract backgrounds in a matter of minutes! This really is one of the easiest ways to make a colorful background for a handmade card without much effort or specialty supplies.
Like this project? Pin it and save for later | Curious about my project photography? Click for details.
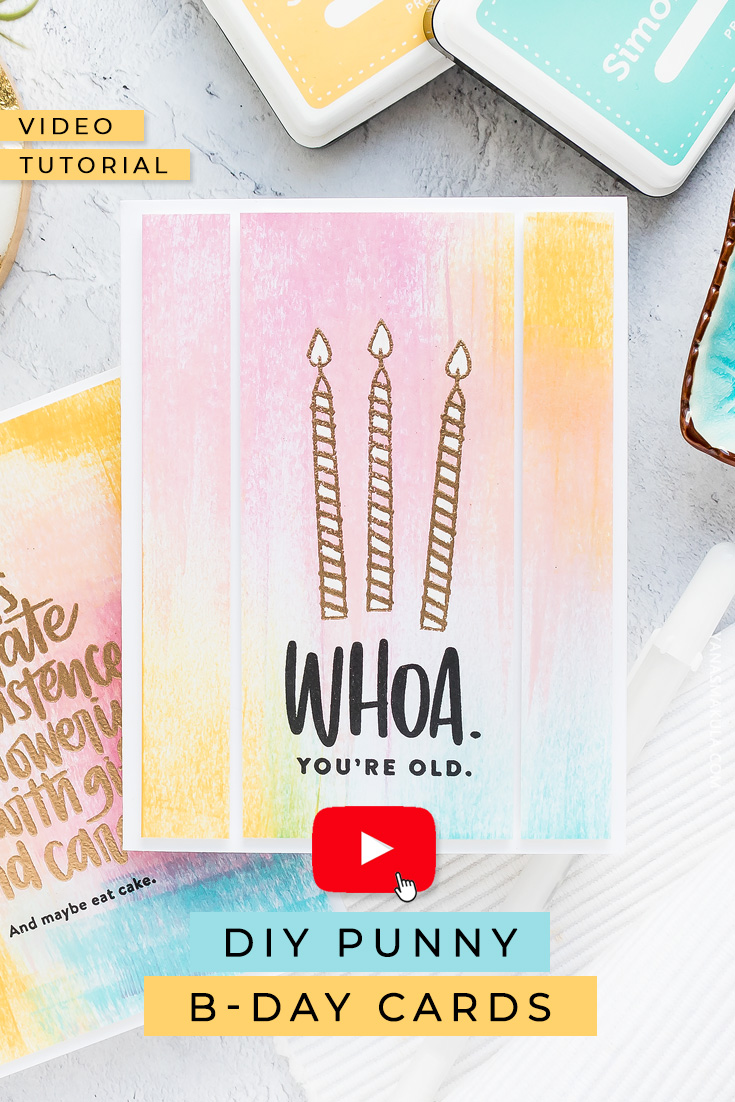
VIDEO TUTORIAL
As always, I filmed a video tutorial showing how to create this project from start to finish. I’m hoping you’ll enjoy it. Watch it below or on my Youtube channel.
Like this video? Please give it a big thumbs up (you can do this on Youtube video page right under the video) and share with a crafty friend! Leave me a comment too, I love hearing from you!
CARD DETAILS
You can use your full size or mini ink pads, it doesn’t really matter, what matters is that you pick the colors of ink that go well together and when applied over each other won’t produce mud or brown colors.
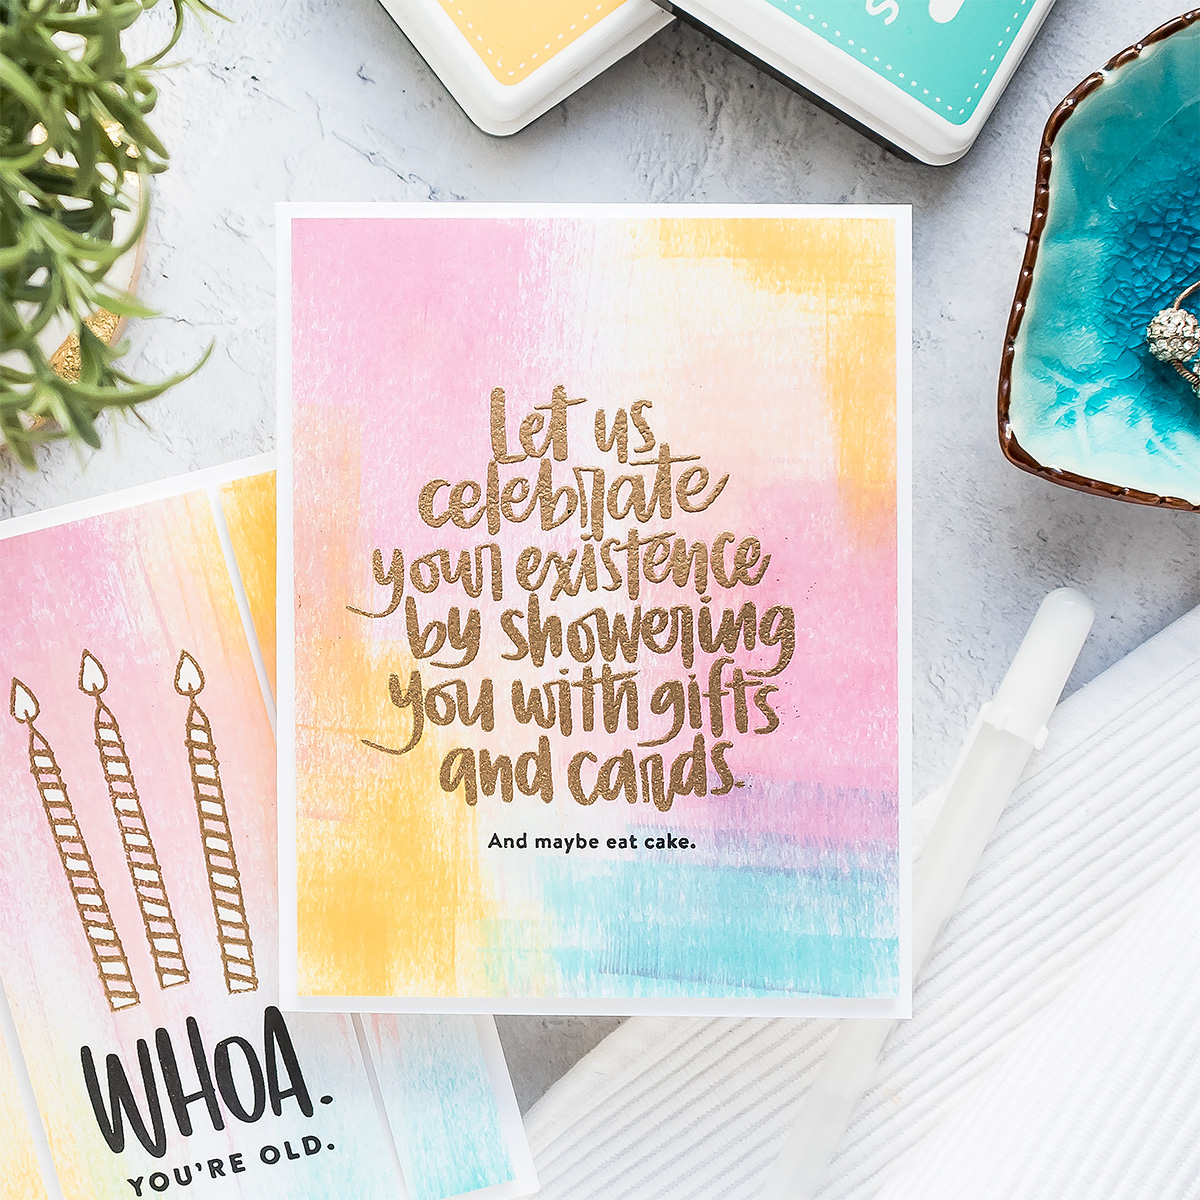
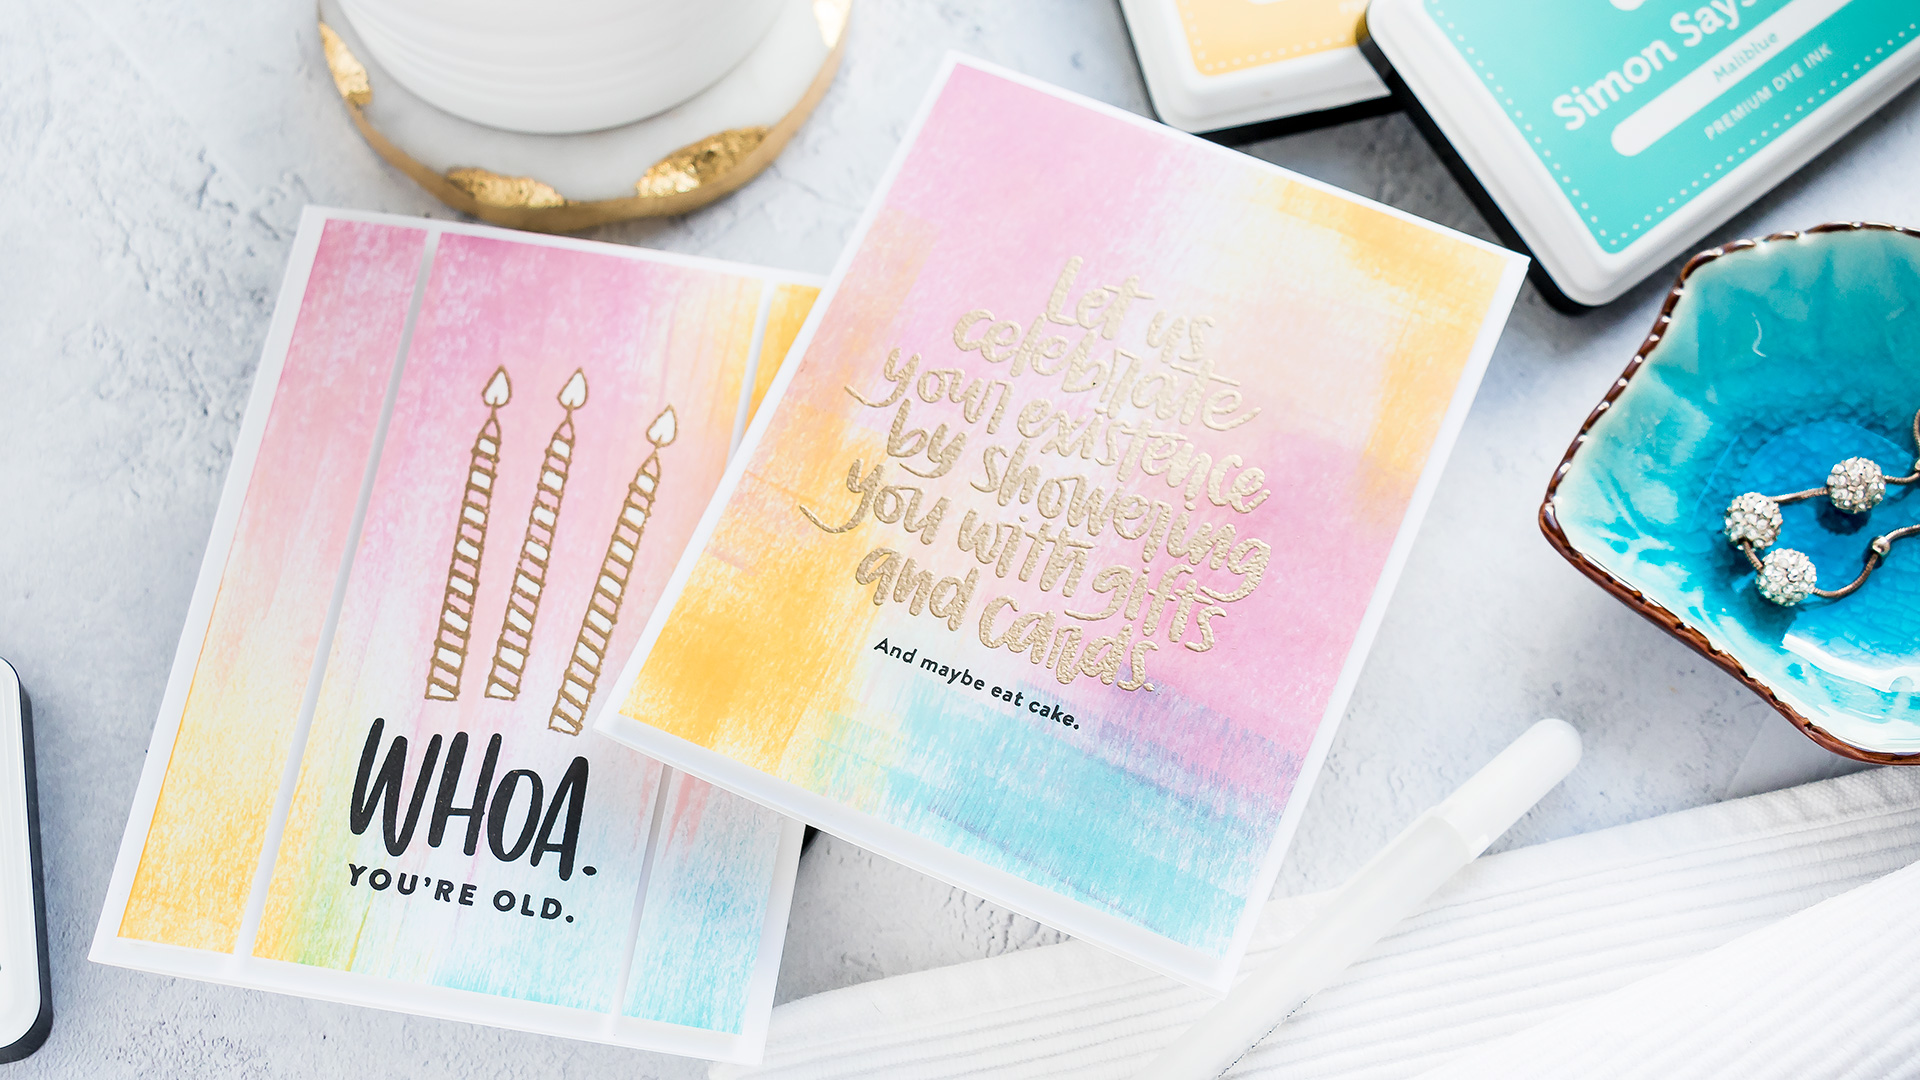
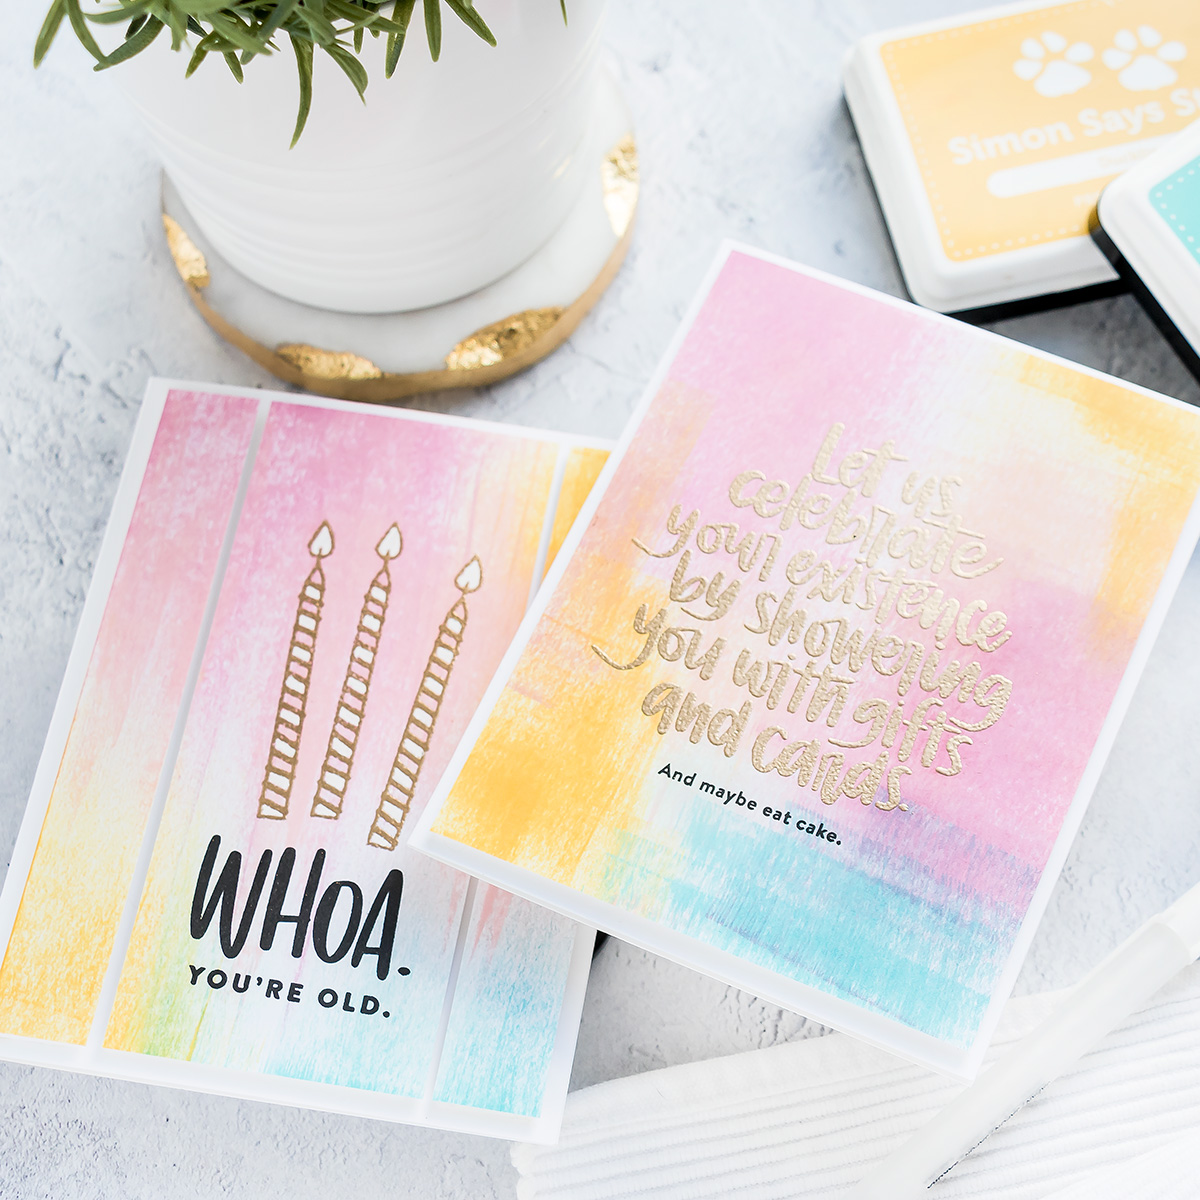
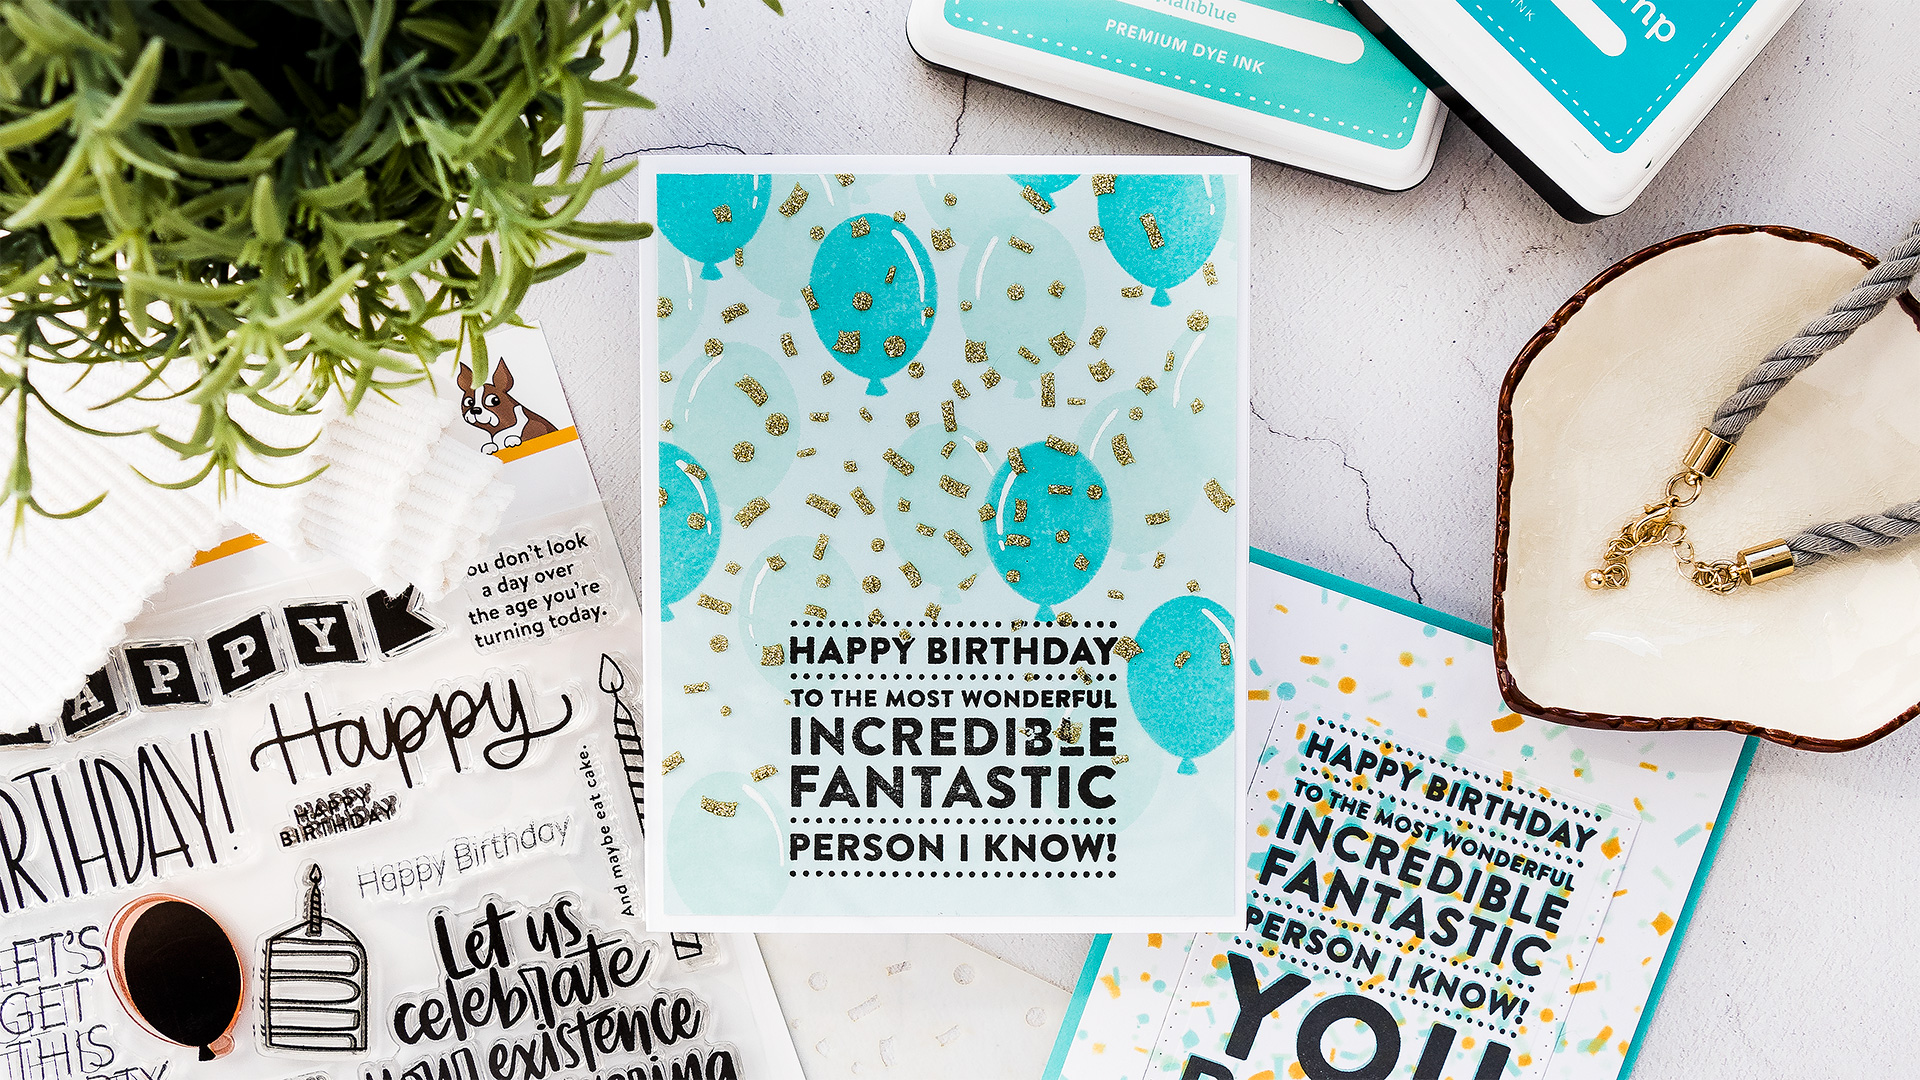
I’ve started with a dark pink ink pad first and all I did here was simply rub it over my background. I didn’t touch the entire ink pad to the surface of the paper, rather I held the ink pad at a slight angle and touched only the edge of the pad and dragged it to have some of the ink from the ink pad transfer to the paper to create an abstract looking background.
The key here is using colors of ink that go well together. I used 2 shades of pink, two shades of yellow and also two shades of blue ink for this background. Yellow, pink and blue work well together. When you blend yellow and pink you have orange, when you blend yellow and blue you have green and when you blend pink and blue you have purple. No matter how you blend these colors or layer them, you will always have pretty result in the end.
I used inks by Simon Says Stamp, but similar formula inks from other companies will work just as well for this. Think dye or hybrid inks from Hero Arts, Wplus9, Jane Davenport inks from Spellbinders, Lawn Fawn inks and others, too. The ink colors, in case you are curious, are Audrey Blue, Maliblue, Duckling, Sunshine, Hollyhock and Rosie Cheeks.
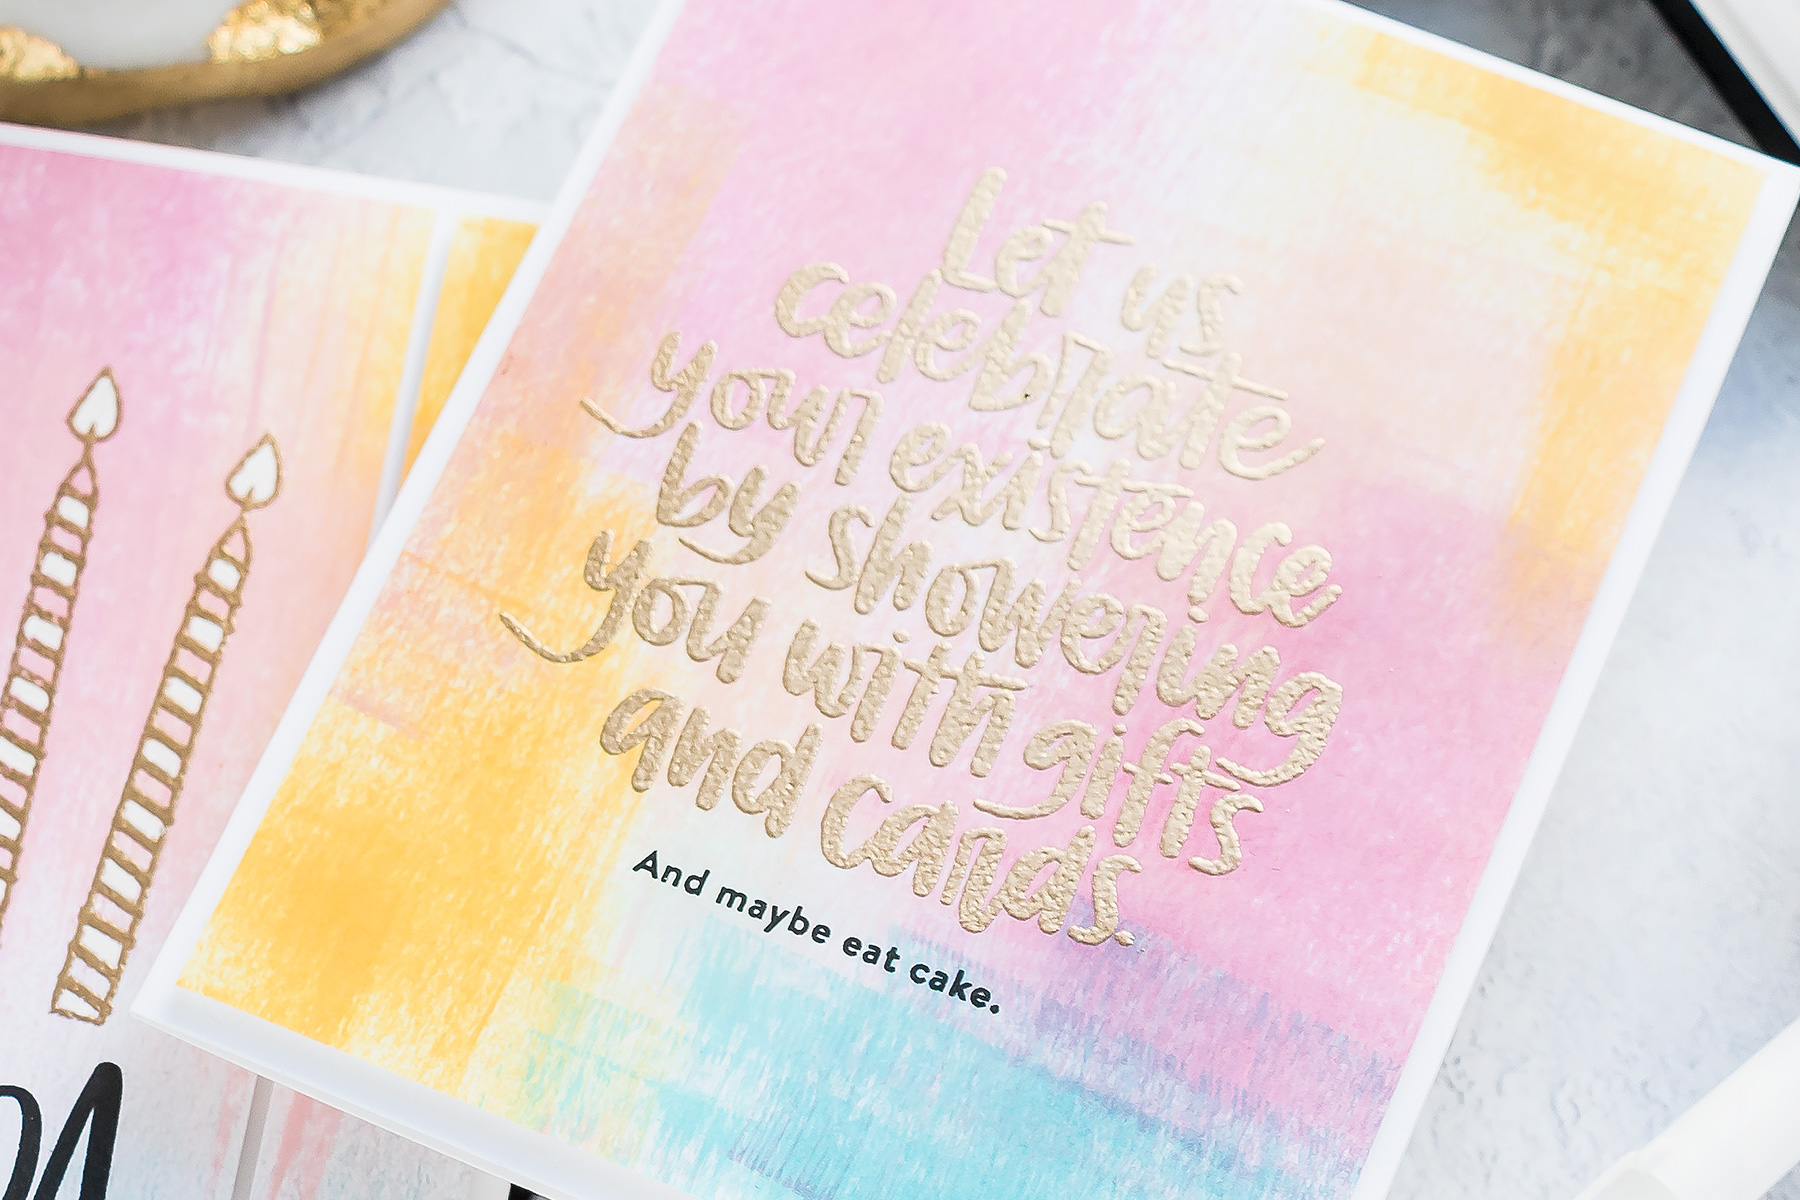
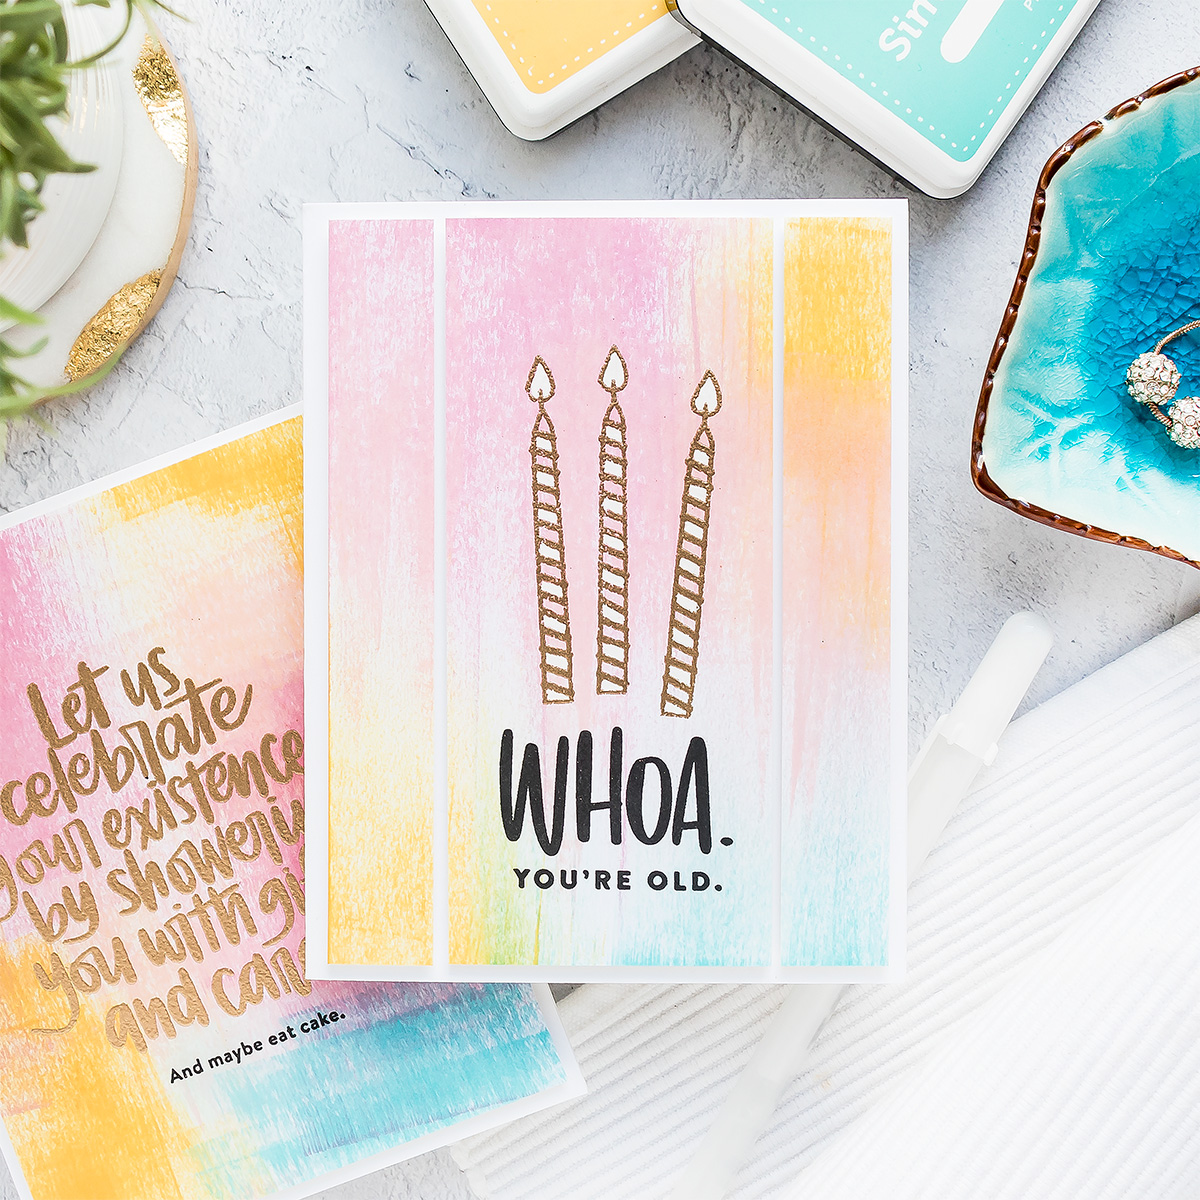
I wanted to make very simple yet colorful Birthday cards to replenish my birthday cards stash so I decided I’d stamp and heat emboss some fun and quirky messages on these backgrounds using a new Big Birthday Greeting stamp set from Simon.
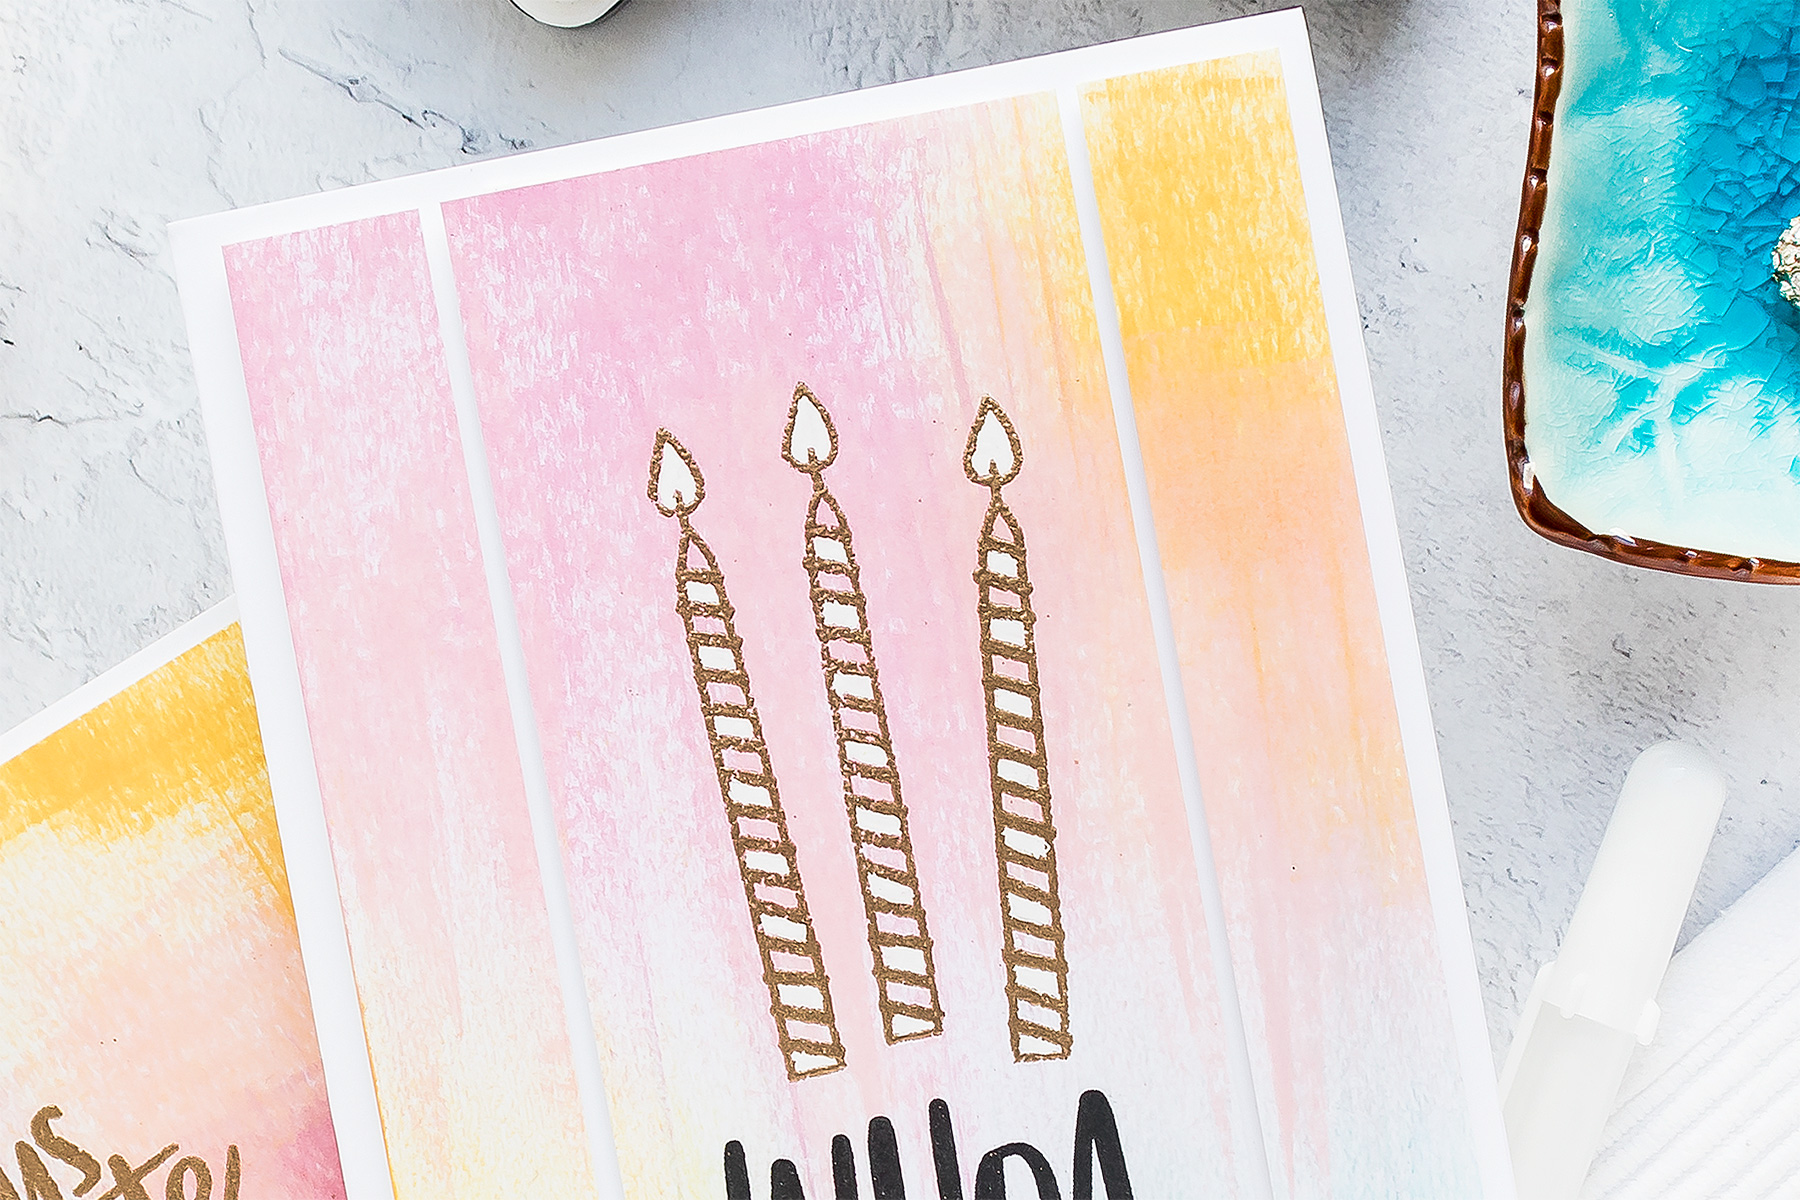
I stamped some messages/images in black ink and heat embossed others in Antique Gold embossing powder. To turn these into cards I trimmed backgrounds and foam mounted them on to A2 white card bases. The one with the candles was also colored using a white pen – I added some simple coloring to the candle images, I also cut this background apart into 3 pieces and foam mounted each of the pieces onto the card base.
SUPPLIES
Where available I use compensated affiliate links which means if you make a purchase I receive a small commission at no extra cost to you. Thank you so much for your support!
 Simon Says Clear Stamps Big Birthday Greetings Shop at: SSS |
 Simon Says Stamps and Dies Big Birthday Greetings Shop at: SSS |
 Simon Says Stamp Hollyhock Ink Pad Shop at: SSS |
 Simon Says Stamp Rosie Cheeks Dye Ink Pad Shop at: SSS |
 Simon Says Stamp Duckling Ink Pad Shop at: SSS |
 Simon Says Stamp Sunshine Ink Pad Shop at: SSS |
 Simon Says Stamp Maliblue Ink Pad Shop at: SSS |
 Simon Says Stamp Audrey Blue Dye Ink Pad Shop at: SSS |
 Simon Says Stamp Antique Gold Embossing Powder Shop at: SSS |
 Neenah 110 Lb Solar White Cardstock Shop at: SSS |
 Tsukineko VersaFine Onyx Black Ink Shop at: SSS |
 Hero Arts Heat Embossing Gun Shop at: SSS |
 Neenah 80LB Solar White Cardstock Shop at: SSS |
 EK Success Powder Tool Applicator Shop at: SSS |
 Mini Misti Stamping Tool Shop at: SSS |
 White Fun Foam 12 Pack 9 x 12 Shop at: SSS |
 Sakura Classic White Gelly Roll Pens Set of 3 Shop at: SSS |
SAVE ME/PIN ME TO PINTEREST
Like this card idea? Be sure to save it to one of your Pinterest boards for future reference!
I love these beautiful backgrounds!!
I absolutely L♥VE these cards Yana, you inspire me every.single.time!
Great idea for a simple background. I’m assuming the ink pads don’t get contaminated with another color? I especially like the 2nd card and how you cut the panel into thirds. Looks so cool and a little something different that punches up the card. Thanks, Yana!
Great use of ink for these backgrounds! I can’t wait to try that technique!
I really enjoyed watching your video tutorial on how to make these easy & different backgrounds Yana. Thanks for that. I particularly like the way you cut the background into three sections.
Great background idea!
Lovely technique, Yana, & beautiful cards! Thanks for sharing!
Love these color choices! Thanks for the tips & beautiful card examples!
I really liked the card you did with the semi abstract background. Thank you for sharing your techniques with us!
This looks like such a fun technique! Your birthday cards turned out so cute, simple yet so colorful!